

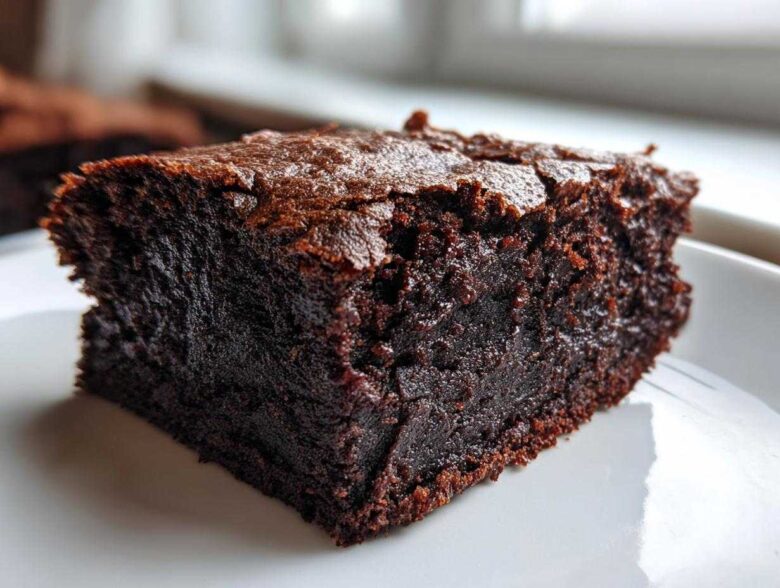
Look, I get it. You want that chocolate fix, especially after a killer workout, but every time you try to bake a brownie with protein powder, you end up with something that tastes like dry, dusty chalk, right? Ugh, I’ve been there more times than I care to admit! I spent months tweaking every recipe under the sun, trying to boost the protein without sacrificing that amazing, gooey, fudgy texture we all crave. Well, guess what? I finally cracked the code. These **Protein Brownie** recipes are the real deal—rich, satisfying, and definitely not dry. Trust me, after years of baking trial and error, I found the magic blend to give you a truly delicious, high-protein dessert that tastes like a classic treat!
Why This Fudgy Protein Brownie Recipe Works (Expert Tips)
The biggest headache when making any **protein brownie** is fighting the dryness. Protein powder, no matter how good it is, loves to suck up moisture like a sponge, turning your masterpiece into a sad, crumbly brick. That’s why our approach focuses heavily on moisture management! That little bit of applesauce? It’s not just for sweetness; it’s acting as a wet binder, keeping things tender.
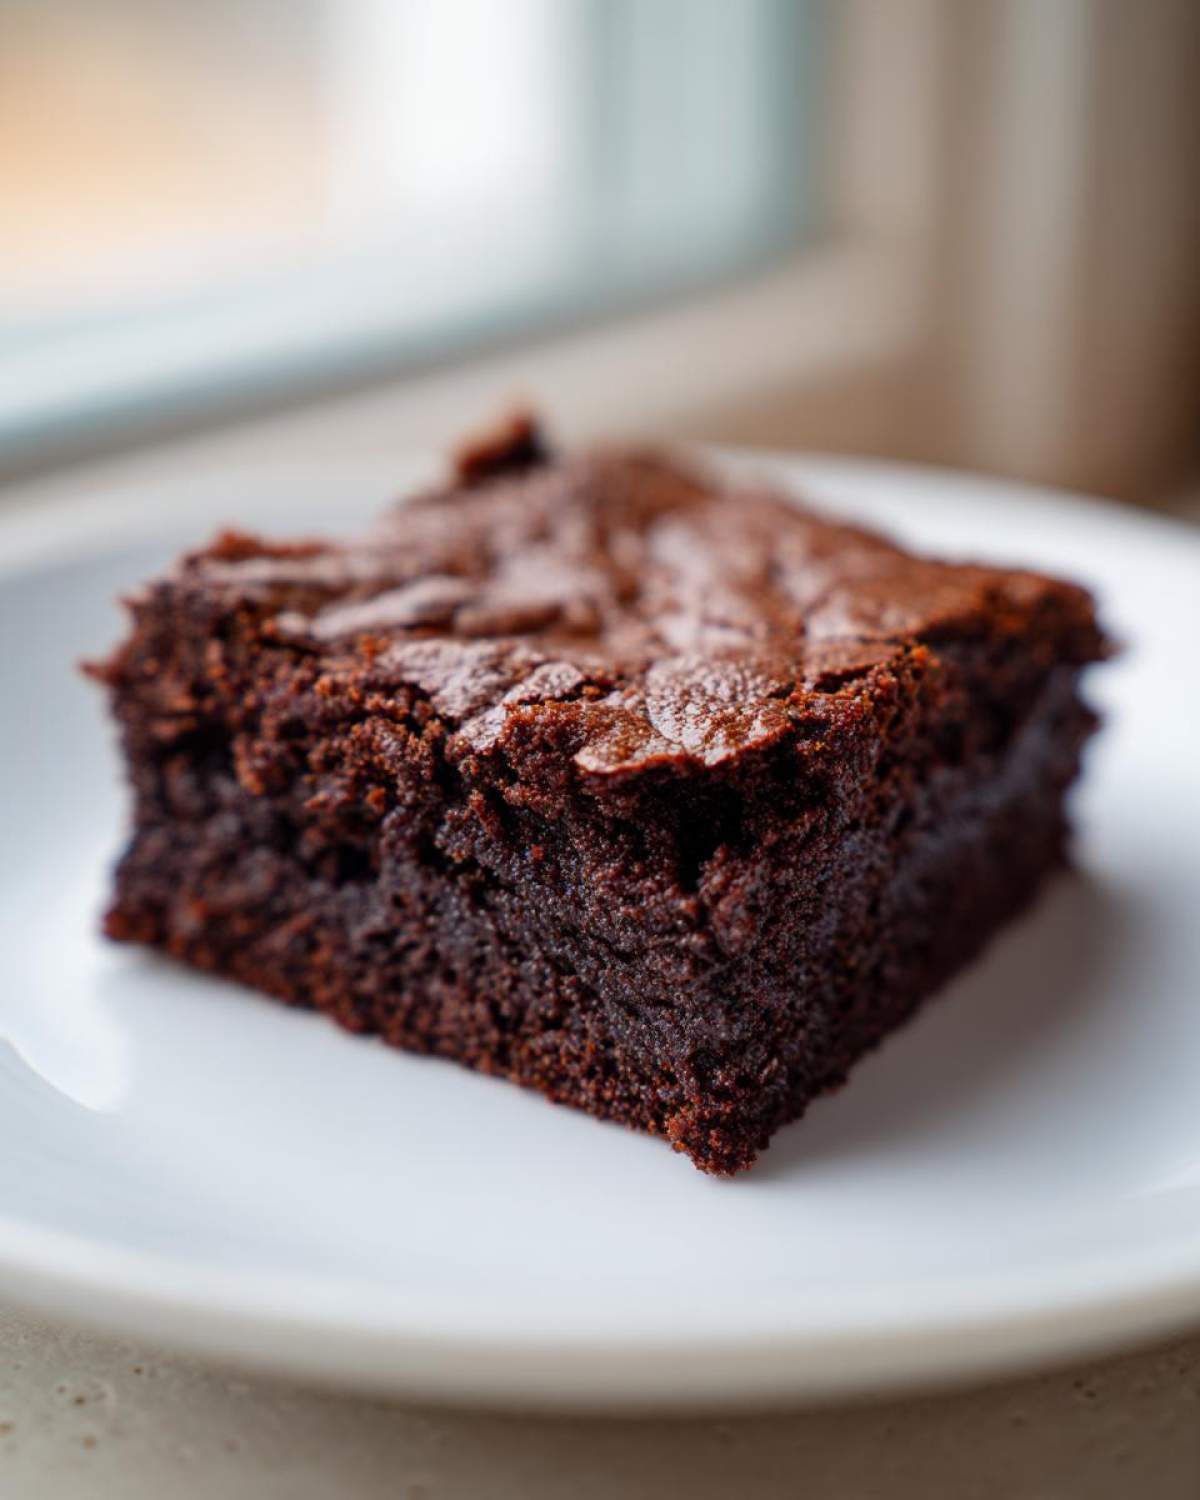
When you’re chasing those perfect **fudgy protein treats**, the type of powder truly matters. Remember what I said about my grandmother and her stubborn rules? Well, I have rules for protein too! I stress the importance of using a blend, like whey/casein. Casein absorbs liquid much slower than pure whey, keeping the batter richer for longer. My pro tip for beating the dryness? Make sure whatever fat you use—whether it’s coconut oil or butter—is fully melted, but don’t let it get hot. Whisking slightly cooled melted fat into smooth wet ingredients helps everything emulsify beautifully before it even hits the dry stuff.
Choosing the Right Protein Powder for Your Protein Brownie
If you only have pure whey protein on hand, you can use it, but you MUST compensate. Whey dries out faster during the bake. That’s why I always steer folks toward that whey and casein mix. Casein just gives the final brownie that dense, creamy mouthfeel we’re after. It’s the secret weapon for staying closer to a traditional brownie texture rather than a protein bar texture. I wrote a whole breakdown on all the best ways to handle different powders over at my baking with protein powder guide, so definitely check that out if you want to dive deeper!
Gathering Ingredients for Your Protein Brownie
Okay, let’s get this show on the road! Having all your components ready is half the battle here—this is a super fast recipe, so no time to run excuses to the pantry once you start mixing. You’ll need about half a cup of rich, unsweetened cocoa powder to give these the deep, dark chocolate color we want. Then grab your protein powder, exactly 1/2 cup of it, plus 1/2 cup of oat flour or almond flour. Don’t forget the baking powder and salt to balance the flavor.
For the wet stuff, we’re using 1/2 cup of unsweetened applesauce, 1/2 cup of pure maple syrup (or the sweetener equivalent if you go low-sugar), 1/4 cup of melted coconut oil or butter, two large eggs, and a splash of vanilla extract. Oh, and if you’re feeling decadent—and you absolutely should be—toss in 1/2 cup of dark chocolate chips right at the end. They melt just enough to make gooey pockets!
Ingredient Substitutions for Healthy Brownie Recipes
I know not everyone stocks the same pantry, so let’s talk swaps for these **healthy brownie recipes**. If you don’t have oat flour, almond flour works like a charm and keeps things nice and moist; either one is a great choice! The real big swap comes with the sweetener. If you’re cutting down on sugar, you can definitely use a granulated zero-calorie sweetener equivalent to 1/2 cup of sugar.
Just a heads up, if you make that sweetener swap, the batter might look a bit stiff compared to the maple syrup version. If that happens, my notes suggest you just mix in an extra tablespoon or two of water or milk until it looks like thick brownie batter again. Easy peasy! It’s all about tuning the recipe to what works for your goals.
Step-by-Step Instructions to Make the Perfect Protein Brownie
Alright, now for the fun part! Putting it all together is lightning fast, which is why this is one of my go-to **post workout dessert ideas**. Preheat that oven to 350°F (175°C) right away. I learned the hard way that you absolutely must prep your 8×8 inch pan first—line it with parchment paper and really make sure you leave an overhang on two sides. Seriously, don’t skip this; you’ll thank me later when you lift the whole thing out in one perfect piece!
Baking and Setting Up Your Protein Brownie
First stop is the dry team. Get your cocoa powder, your protein powder, your flour, baking powder, and salt into a big bowl and whisk it all together really well. We want those dry ingredients totally integrated. Then, over in a separate bowl, whisk your wet team: the applesauce, maple syrup, melted oil/butter, eggs, and vanilla. Once they look smooth and happy, slowly pour that wet mix right into the dry stuff. Remember what I said about Grandma? We don’t beat things into submission here!
Achieving Fudgy Texture in Your Protein Brownie
This is the most crucial moment for fudginess! Stir everything gently until you just barely see the dry streaks disappear. I mean it—stop mixing the second it looks combined. Overmixing develops gluten and that’s how you get a cakey texture instead of the dense, **fudgy protein treats** we adore. If you’re adding chocolate chips, fold those in last, super gently. Spread that thick batter into your prepared pan. Bake it for about 20 to 25 minutes. You’re looking for the toothpick test to show moist crumbs clinging to it, not wet batter, and the edges should look set.
Now, the hardest part: cooling! You absolutely cannot rush this part if you want ultimate fudginess. Let those brownies cool completely in the pan on a wire rack before you try to lift them out. Seriously, give them at least an hour. This setting time is what transforms the texture from slightly soft to perfectly dense. You can find more general tips for my favorite baked recipes over on the blog if you’re curious!
Tips for Success When Baking Protein Brownie
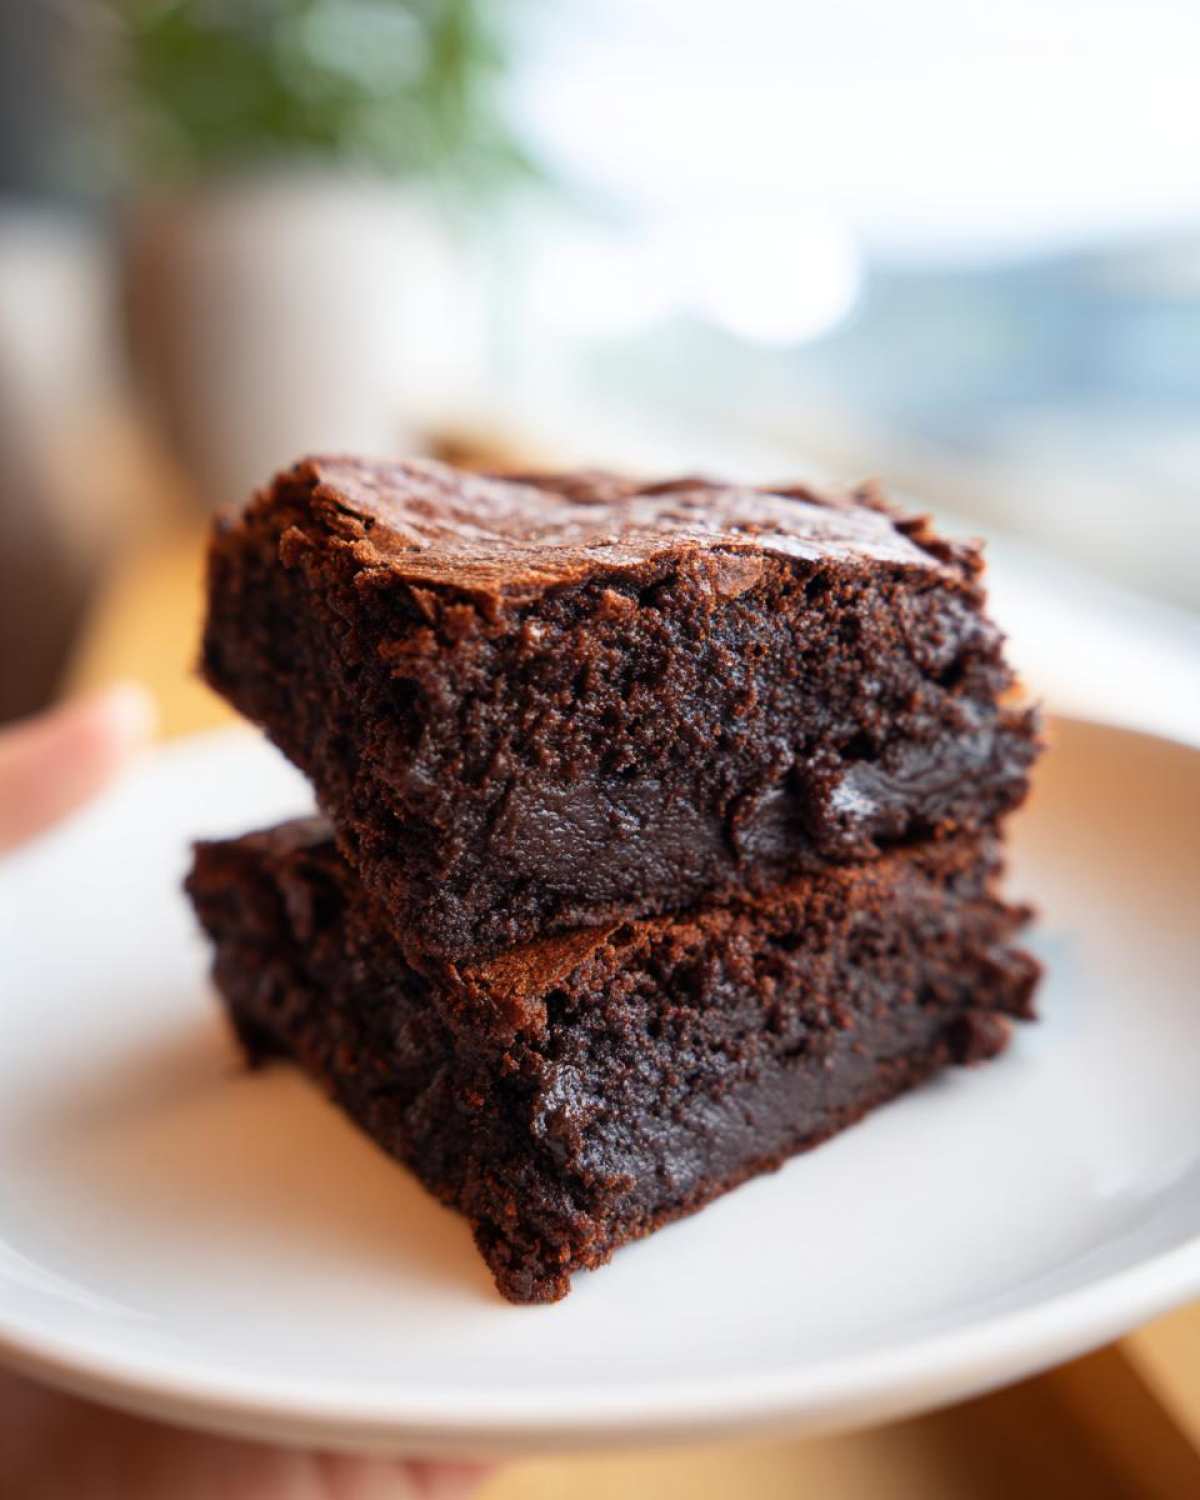
Look, these **protein brownie** recipes are tough to mess up, but a few little tricks can take them from great to jaw-droppingly excellent. The biggest rookie mistake I see is trying to bake them in a nine-inch pan instead of the recommended 8×8. If you use a bigger pan, the batter spreads too thin, and they turn into dry little hockey pucks because the bake time shrinks too much! Always stick to the right size pan, or be prepared to cut the time down significantly.
Also, patience is key when cutting them. Don’t grab your knife the second they come out of the oven. If you try to slice them hot, they’ll just stick to the knife and come apart. Wait until they are totally cool—and I mean *totally*—then use the parchment overhang to lift the whole slab out. Then, grab a sharp, long knife, wipe it clean between cuts, and press straight down. This ensures you get those beautiful, cleanly cut squares for your **protein powder baking hacks** stash. Check out my favorite protein powder baking hacks for more pro advice!
Serving Suggestions for Your High Protein Dessert Recipes
Now you’ve got these amazing **high protein dessert recipes** ready, you can enjoy them just as they are—they’re seriously great naked! But if you want to elevate them just a bit more, I have a couple of ideas. Because they are so rich, a little something cool on the side is fantastic. Try serving one warm square with a big dollop of plain Greek yogurt mixed with a tiny dash of vanilla. That combo just cranks up the protein even higher!
Or, for a fresh contrast, a handful of bright, slightly tart raspberries or strawberries cuts through the deep chocolate perfectly. It makes it feel like a decadent treat, not just a post-gym essential. My recent post on whipping up some high-protein sides, like my cottage cheese mixes, might give you some extra inspiration for healthy pairings!
Storage and Making Ahead Fitness Snacks
One massive win for this recipe is that they are fantastic for meal prepping! Because they are dense and naturally fudgy, these **Protein Brownies** hold up really well, unlike those delicate, dry cakes. If you plan to eat them within three or four days—which you probably will—just store them in an airtight container at cool room temperature. I usually stack them with a piece of parchment paper between the layers so they don’t stick together.
If you need them to last longer, go ahead and pop them in the fridge. They firm up even more in there, which some folks actually prefer! For long-term **make ahead fitness snacks**, freezing is your best friend. Wrap each square tightly in plastic wrap first, then toss them all into a heavy-duty freezer bag. They keep perfectly for about two months. When you need one, just pull it out in the morning and let it thaw on the counter for an hour. It’s like getting a fresh brownie months later! For more ideas on prepping snacks ahead of time, check out my guide to no-bake protein bars.
Frequently Asked Questions About Making a Protein Brownie
I always get asked the same few questions when people try to transition their favorite chocolate recipes into something packed with protein. It can feel like a total science experiment, but once you know the tricks, it’s easy! Don’t worry if you only have certain items; we can usually troubleshoot. These are honestly some of the **best tasting protein bars alternative** you can possibly make at home, so let’s get those lingering doubts cleared up!
Can I use only whey protein in this Protein Brownie?
You totally can, but I have to warn you: your texture will change. If you use 100% whey, your brownies are going to be noticeably drier and perhaps a little more cakey than fudgy. Whey just absorbs moisture faster than casein does during the bake. If that’s all you have, try adding an extra tablespoon of applesauce or a tiny splash of milk to compensate, but know that the recipe is *best* with a blend that includes casein for that deep fudge factor.
Are these Guilt Free Chocolate Brownies suitable for post-workout?
Absolutely! That’s one of the biggest reasons I developed them! With 12 grams of protein per square, these are perfect for getting some quality recovery fuel in without wrecking your daily macros. They satisfy that craving for something truly comforting while still being counted as a solid part of your fitness plan. If you’re already tracking things, you might also want to check out some of my low carb protein snacks ideas for other times of the day!
What about going lower carb? If you’re aiming for a true **low carb protein snack** version, you can definitely use zero-calorie sweetener, but remember, you’ll need to adjust the liquid content slightly, as I mentioned earlier. That careful balance keeps these **guilt free chocolate brownies** tasting rich and comforting every single time.
Nutritional Estimate for One Protein Brownie
Now, let’s talk numbers! I know a lot of us are trying to balance that sweet tooth with our fitness goals, and honestly, that’s why I love these **Protein Brownies** so much. They fit right into the plan when made correctly. Based on the ingredients listed in the recipe, here’s the approximate breakdown for one square (assuming 9 servings): you’re looking at about 180 calories.
The protein count is fantastic—we hit about 12 grams per brownie, which is huge for a dessert! You’ll also be getting around 18 grams of carbohydrates and 8 grams of fat. As for sugar, it clocks in around 12 grams, mostly coming from the maple syrup, so keep that in mind if you’re swapping sweeteners. Remember, these are just estimates, folks!
Since we are baking and swapping out sugars or using different brands of protein powder, the final macros can shift a little. If you use almond flour instead of oat flour, or if you opt for a zero-calorie sweetener instead of maple syrup, your exact sugar and carb counts will change. Always treat these numbers as a fantastic starting point for your **post workout dessert ideas**!
Share Your Protein Brownie Creations
I’m so excited for you to get these **Protein Brownies** into your oven! Honestly, seeing your results is the best part of sharing these family-tested (and heavily revised for protein!) recipes. Once you’ve pulled them out, let them cool completely—I cannot stress that enough for the best texture—then grab a fork and dig in!
Seriously, I want to know what you think! Did you stick to the maple syrup or try the zero-calorie swap? Were you able to find a casein blend that gave you that perfect fudge factor? Head down below and leave me a rating using the stars. A five-star review means you achieved peak fudginess, and a lower score tells me exactly where we might need to tweak things next time for future **high protein dessert recipes**!
If you took a picture of your perfect squares, snap it and tag me on social media! I love sharing your creations on my stories. Don’t hesitate to reach out through my contact page if you have any questions at all once you start baking. Happy fudging!
PrintFudgy Protein Brownies
A recipe for rich, fudgy brownies made with protein powder to increase protein content.
- Prep Time: 10 min
- Cook Time: 25 min
- Total Time: 35 min
- Yield: 9 servings
- Category: Dessert
- Method: Baking
- Cuisine: American
- Diet: Vegetarian
Ingredients
- 1/2 cup unsweetened cocoa powder
- 1/2 cup vanilla or chocolate protein powder (whey/casein blend recommended)
- 1/2 cup oat flour or almond flour
- 1 teaspoon baking powder
- 1/2 teaspoon salt
- 1/2 cup unsweetened applesauce
- 1/2 cup pure maple syrup or zero-calorie sweetener equivalent
- 1/4 cup melted coconut oil or butter
- 2 large eggs
- 1 teaspoon vanilla extract
- 1/2 cup dark chocolate chips (optional)
Instructions
- Preheat your oven to 350°F (175°C). Line an 8×8 inch baking pan with parchment paper, leaving an overhang for easy removal.
- In a large bowl, whisk together the dry ingredients: cocoa powder, protein powder, oat flour, baking powder, and salt.
- In a separate medium bowl, mix the wet ingredients: applesauce, maple syrup, melted coconut oil, eggs, and vanilla extract until smooth.
- Pour the wet mixture into the dry mixture. Stir gently until just combined. Do not overmix.
- Fold in the chocolate chips, if using.
- Spread the batter evenly into the prepared baking pan.
- Bake for 20 to 25 minutes. The edges should look set, and a toothpick inserted near the center should come out with moist crumbs attached, not wet batter.
- Let the brownies cool completely in the pan on a wire rack before lifting them out using the parchment overhang and cutting them into squares. Cooling helps achieve a fudgier texture.
Notes
- For a fudgier texture, use casein protein or a whey/casein blend. Pure whey protein can sometimes result in a slightly drier texture.
- If you prefer a lower sugar option, substitute the maple syrup with a granulated zero-calorie sweetener equivalent to 1/2 cup sugar, adding 1-2 tablespoons of extra liquid (like milk or water) if the batter seems too stiff.
- For gluten-free results, confirm your protein powder is certified gluten-free and use almond or oat flour.
Nutrition
- Serving Size: 1 brownie
- Calories: 180
- Sugar: 12
- Sodium: 150
- Fat: 8
- Saturated Fat: 4
- Unsaturated Fat: 4
- Trans Fat: 0
- Carbohydrates: 18
- Fiber: 3
- Protein: 12
- Cholesterol: 45