

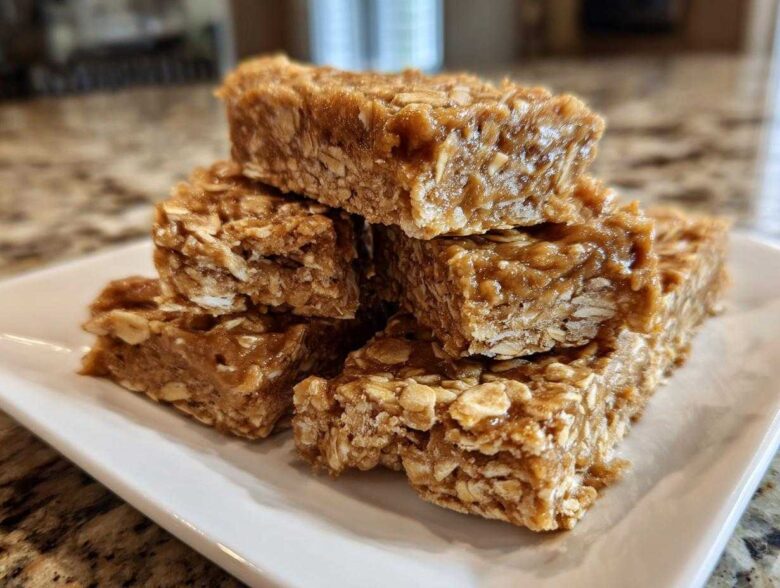
Listen, I get it. You’re busy, you’ve just finished a monstrous workout, or maybe you just stared down an afternoon meeting that requires sheer willpower, and you need fuel *now*. Not later. Now! That’s why I finally perfected what I truly believe are the ultimate easy, no-bake peanut butter protein bars. Forget those chalky, chemically-tasting store-bought things; these stick to your ribs and taste like a nostalgic treat. I was so tired of juggling complicated steps just to get some decent **protein bars** in my snack drawer, so I boiled this recipe down to the essentials. Trust me, if you can stir, you can make these.
Why You Need These Easy No-Bake Protein Bars
Why have I stopped buying those expensive things? Because this recipe delivers everything you actually want in a snack without any fuss! These **protein bars** are a total game-changer for my meal prep routine. You honestly can’t beat how fast they come together.
Here is the simple breakdown of why these are going to be your new go-to:
- Prep time flies by in under 15 minutes. No oven needed, so say goodbye to heating up the kitchen!
- They are packed with protein—seriously satisfying fuel for right after a tough session.
- We only use simple, whole ingredients. You know exactly what you are putting into your body.
If you love quick, satisfying snacks, you definitely need to check out how I make my no-bake energy bites too; these bars are just the bigger, more portable version!
Gathering Ingredients for Your Homemade Protein Bars
Okay, time for the fun part: gathering our simple parts! The beauty of these **homemade protein bars** is that they rely on pantry staples you probably already have on hand, meaning we can whip these up faster than running to the store.
If you want to see another way I use oats in a ridiculously easy morning meal, check out my recipe for apple pie overnight oats! But for now, let’s look at what makes these bars stick together perfectly.
Specific Ingredient Notes and Substitutions for Protein Bars
I’ve learned the hard way that the quality of your ingredients really matters here, especially since we aren’t baking them! For the peanut butter, you absolutely must use natural stuff—the kind that separates and you have to stir. If you use the super-processed kind? Your bars will be way too oily and won’t set up right.
When it comes to your protein powder, I usually grab vanilla whey, but if you’re plant-based, that’s totally fine! Just know that plant proteins can sometimes soak up more liquid, so you might need that extra tablespoon of milk I mention later. If you’re trying to reduce sugar, swap the honey for brown rice syrup for a similar binding power, though you might lose a tiny bit of that deep flavor.
And remember, we need those rolled oats! They give us the essential structure and add those lovely chewy bits that make these **chewy protein bars recipe** so satisfying. Don’t sub quick oats unless you truly want a super soft bar, okay?
Step-by-Step Instructions for No Bake Protein Bars
Alright, let’s get mixing! This is where the magic happens for these fantastic **no bake protein bars**. Seriously, if you can microwave something for 30 seconds, you are already halfway done. The first step is crucial for easy cleanup later, so don’t skip lining that pan with parchment, making sure you have edges sticking out like little handles.
We start by mixing all the dry stuff—oats, protein powder, and those little chia seeds—in your biggest bowl. Now, for the sticky binder: microwave your peanut butter and honey together just until they look smooth and glossy and you can stir them without fighting it. Pour that warm, gooey mix right over your dry ingredients. Stir it all up until it looks like thick, coarse sand. This is where you need my visual cue…
Mixing the Dough for Perfect Chewy Protein Bars
When I say stir until uniform, I mean it needs to look like one sticky mass, not crumbly or dusty anymore. If it’s too dry—and this happens if your protein powder is super absorbent—don’t panic! You just add that almond milk one tablespoon at a time. I mean it, one tablespoon! You want it to be thick enough that when you pinch a bit between your fingers, it actually sticks together and holds its shape. That’s the key for **chewy protein bars recipe** that don’t fall apart when you try to eat them post-workout.
Chilling and Cutting Your Protein Bars Recipe Quick
Once it’s packed down tightly into that prepared pan—and really press it down hard so they don’t crumble later—cover it up and get it into the fridge. Patience is key here! You need at least a full hour for these **protein bars** to firm up properly. If you try to cut it early, you’ll just end up with a sticky mess you need a fork for. Which, admittedly, tastes amazing, but isn’t great for grabbing on the go!
When they are rock solid, use those parchment paper handles to lift the whole block out onto a cutting board. Pro tip for the cleanest slices in your **protein bar recipes quick**: run a large knife under really hot water for a few seconds, wipe it dry, and then slice. Wipe and reheat the knife between every single cut. It keeps those peanut butter fats from sticking and results in perfect squares!
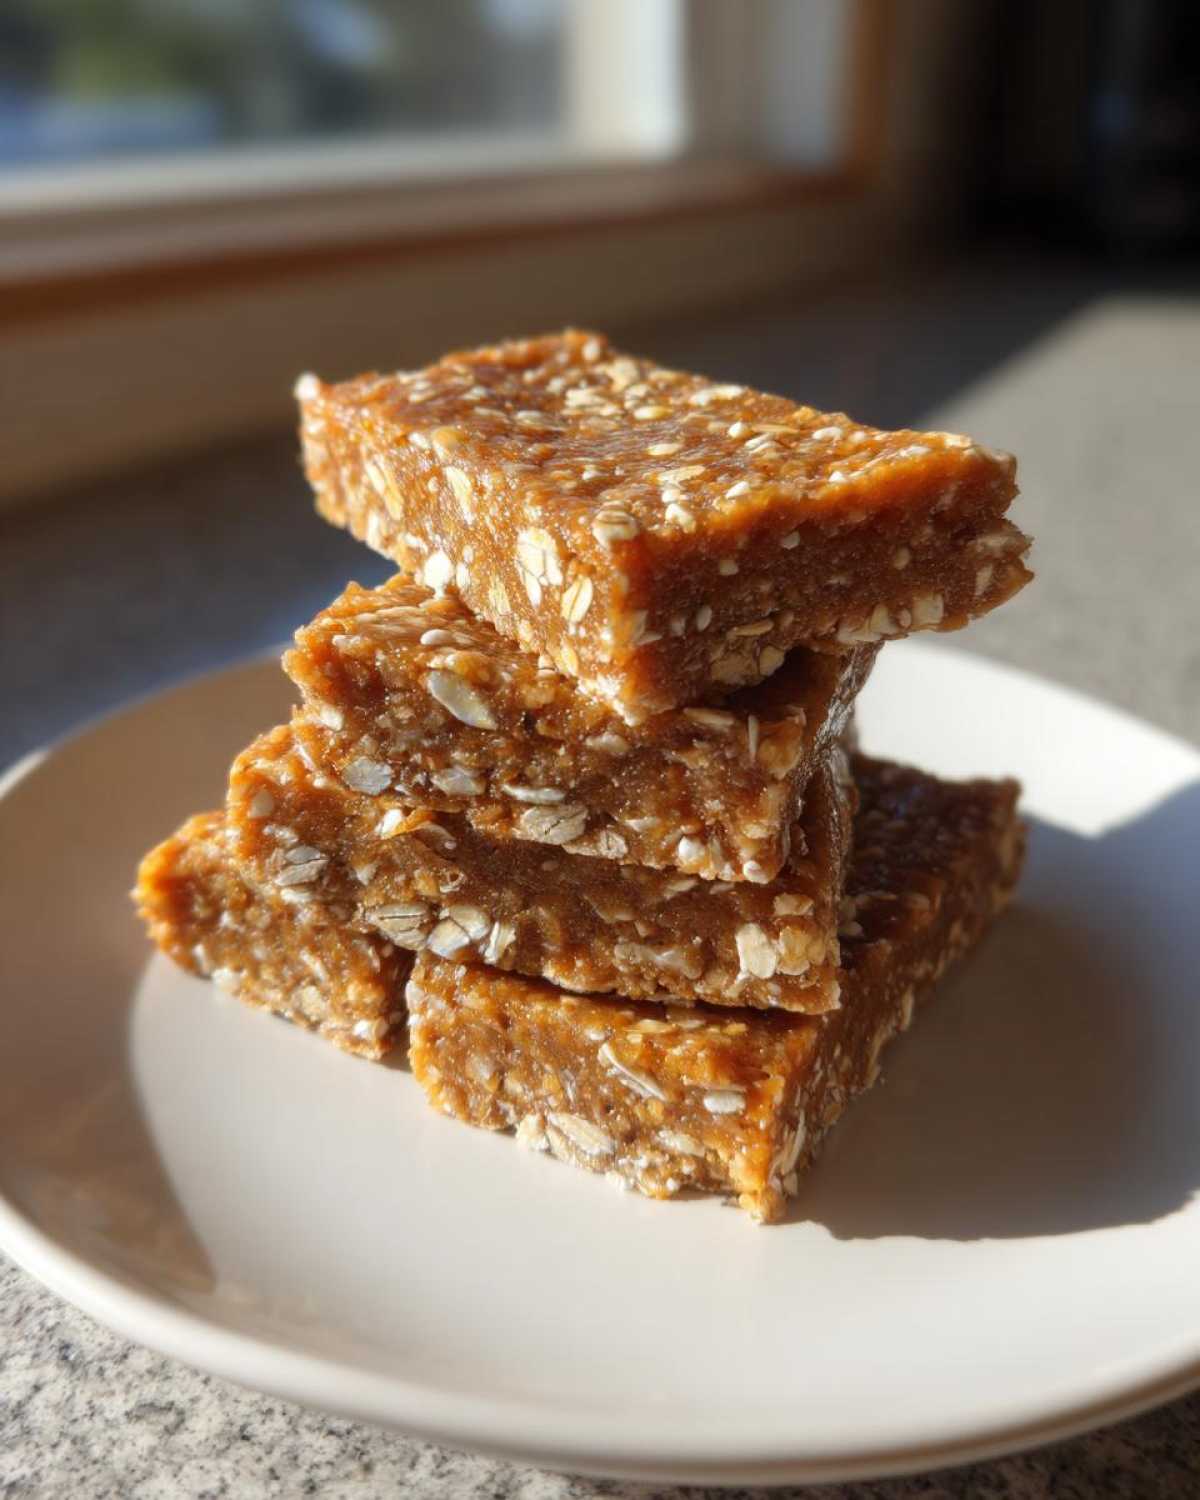
If you want to check out my favorite cold snack that uses a similar binding trick, don’t skip my recipe for a no-bake peanut butter pie. It’s the same science, just in a different format!
Tips for Success When Making Peanut Butter Protein Bars
Now that you know how to mix these, let’s talk about making sure your **peanut butter protein bars** achieve that perfect chew and flavor balance every single time. The biggest headache people have is getting the consistency just right, so let me save you some dough-covered frustration!
If you find your bars come out way too sweet after you’ve set them—and this is a personal thing, I know some people love sweet snacks—remember you can dial back that honey or maple syrup right down to three tablespoons. It’ll still bind fine, just keep in mind that liquids affect setting, so you might need an extra sprinkle of milk if you decrease the syrup too much. My favorite customization? I sometimes melt a little dark chocolate and drizzle it right over the top before chilling for that extra wow factor. It makes them feel way more decadent.
Also, don’t forget to check out those energy bites again; sometimes a bite-sized snack is exactly what you need if you’re worried about overdoing it with a full bar. My energy bites recipe uses a similar structure but molds differently for a quick grab!
Making Healthy Protein Bars for Meal Prep
What good is an amazing recipe if you can’t eat it for three days straight? That’s the beauty of these! Since these are **no bake protein bars**, they are absolutely perfect for preparing ahead of time. I usually make a double batch on Sunday—seriously, it takes hardly any extra time—and that gets me set for almost the entire week.
You store them in an airtight container right in the fridge. They will stay perfectly chewy and delicious for about a week. If you know you won’t get through them that fast, they freeze like a dream! Just separate the layers with wax paper so they don’t stick together once frozen. They last easily a couple of months in the freezer, and honestly, they are kind of great slightly frozen, too!
I often pack these as my grab-and-go **protein bars for meal prep**, whether it’s my morning commute or something quick before heading to the gym. If you like having your meals planned out ahead of time, you should absolutely check out how I handle my cold sesame noodle meal prep sometime, because efficiency is everything!
Variations on These Easy Protein Bars Recipe
You know I love keeping things simple, but let’s be real, we can’t eat the exact same flavor every single day! That’s why I want to show you how easy it is to tweak these **easy protein bars recipe** to suit whatever craving hits you. The base structure is so solid that you can throw almost anything in there and it works!
If peanut butter just isn’t cutting it one day, a quick 1:1 swap works wonders. Try using almond butter or even sunflower seed butter if you need to keep it nut-free for school lunches. Almond butter gives a slightly lighter, almost smoother flavor, which I really enjoy sometimes.
Want chocolate? Now this is my favorite hack! Just pull out about 1/4 cup of your dry mix (oats, powder, seeds) before you add the wet stuff. Replace that 1/4 cup with unsweetened cocoa powder. Stir it in with the dry ingredients, and boom—you’ve got rich chocolate **protein bars**! You can even toss in a handful of mini chocolate chips right before you press the dough into the pan. Easy peasy flavor bomb!
Answering Common Questions About Protein Bars
I know when you try a new recipe, especially one you want to rely on for **high protein snacks**, you’re going to have questions. I’ve spent ages tweaking this formula, so I’m happy to share exactly what I’ve learned over time about these **homemade protein bars**! If you’re looking for baked goods that fit dietary needs, always check out my gluten free blueberry muffins recipe for inspiration.
Can I make these low sugar protein bars?
That’s a smart question, especially if you’re watching your sugar intake! As I mentioned when talking about swaps, reducing the honey to three tablespoons definitely cuts down on the sugar content significantly, and they still bind well enough. You could try using a liquid stevia blend, but be warned—zero-calorie sweeteners don’t provide the same structure as sugar or honey. You might need to play around with adding a touch more protein powder or a few extra chia seeds to compensate and get that sturdy texture you want in **low sugar protein bars**.
Are these the best homemade protein bars for post workout snacks?
You bet they are! Based on how I measure things out, you are getting about 15 grams of protein per bar, which is fantastic fuel for recovery. The oats give you those nice, slow-releasing carbs to replenish energy stores, and the peanut butter offers healthy fats to keep you full. They are perfectly balanced for a quality **post workout snack**.
How do I ensure my protein bars that taste good and are not chalky?
Ah, the dreaded chalk factor. That usually comes down to two things: the protein powder quality and the liquid ratio. Cheap protein powders just don’t dissolve nicely into these softer textures. If your powder is a bit on the dry side, you *must* remember to add that almond milk one tablespoon at a time until it just comes together. A little extra binding liquid defeats the chalkiness instantly, making sure we get those delicious **protein bars that taste good**!
Estimated Nutritional Information for These Protein Bars
Okay, I always include a little disclaimer here because ingredient brands vary so much, but this is what you can generally expect from one of these delicious **high protein snacks**. Remember, these numbers are based on using standard whey protein and honey—if you swap things out, the values will shift a bit!
For one serving (one bar):
- Calories: About 200
- Protein: 15 grams! That’s fantastic.
- Fat: 11 grams
- Sugar: Just 8 grams
It’s a solid, dependable number for grabbing one of these **homemade protein bars** when you’re rushing out the door. If you want to check out other balanced recipes, my chickpea salad is surprisingly similar in macro balance!
Share Your Experience Making These Protein Bars
Okay, now that you’ve got your first batch of these amazing, easy **protein bars** cooling in the fridge, I desperately want to hear what you think! This recipe only gets better when we all share what works for us. Please, don’t just leave quietly with your delicious snack!
The very first thing I need you to do is come back here and give the recipe a rating. How many shiny stars are you handing out? Be honest! A little rating system is super helpful for everyone else looking for the **best homemade protein bars**.
Second, tell me about your fun! Did you add cocoa powder? Did you use cashew butter instead of peanut butter? Drop all those flavor modifications down in the comments below. I love seeing how you all put your own spin on these!
And finally, if you snap a picture of your perfectly chewy, no-bake creations—maybe them stacked on your desk ready for the week of meal prep—please share it on social media! Tag me so I can share the love. If you have any final questions or need support, my contact page is always open, or you can send a note via my contact form!
PrintEasy No-Bake Peanut Butter Protein Bars
Make these simple, chewy peanut butter protein bars without baking. They require minimal ingredients and are ready quickly for a high-protein snack.
- Prep Time: 15 min
- Cook Time: 0 min
- Total Time: 1 hour 15 min
- Yield: 12 servings
- Category: Snack
- Method: No-Bake
- Cuisine: American
- Diet: Vegetarian
Ingredients
- 1 cup rolled oats
- 1/2 cup natural peanut butter
- 1/2 cup whey or plant-based protein powder (vanilla or unflavored)
- 1/4 cup honey or maple syrup
- 2 tablespoons chia seeds
- 1/4 cup unsweetened almond milk (or milk of choice)
- 1 teaspoon vanilla extract
Instructions
- Line an 8×8 inch baking pan with parchment paper, leaving an overhang on the sides for easy removal.
- In a large bowl, combine the rolled oats, protein powder, and chia seeds. Mix well.
- In a separate, microwave-safe bowl, combine the peanut butter and honey (or maple syrup). Microwave for 30 seconds until softened and easily stirrable.
- Pour the melted peanut butter mixture into the dry ingredients. Add the vanilla extract.
- Stir everything together until a thick, uniform dough forms. If the mixture is too dry, add almond milk one tablespoon at a time until it comes together.
- Press the dough evenly into the prepared pan. Use the back of a spatula or your hands to pack it down firmly.
- Cover the pan and refrigerate for at least 1 hour, or until the bars are firm enough to cut.
- Lift the bars out using the parchment paper overhang. Cut into 10 to 12 equal bars.
- Store the bars in an airtight container in the refrigerator for up to one week.
Notes
- For a chocolate swirl, melt 1/4 cup of dark chocolate chips and drizzle over the pressed mixture before chilling.
- If you prefer a less sweet bar, reduce the honey or maple syrup to 3 tablespoons.
- Use quick oats instead of rolled oats for a slightly softer texture.
Nutrition
- Serving Size: 1 bar
- Calories: 200
- Sugar: 8
- Sodium: 150
- Fat: 11
- Saturated Fat: 2
- Unsaturated Fat: 9
- Trans Fat: 0
- Carbohydrates: 18
- Fiber: 3
- Protein: 15
- Cholesterol: 0