

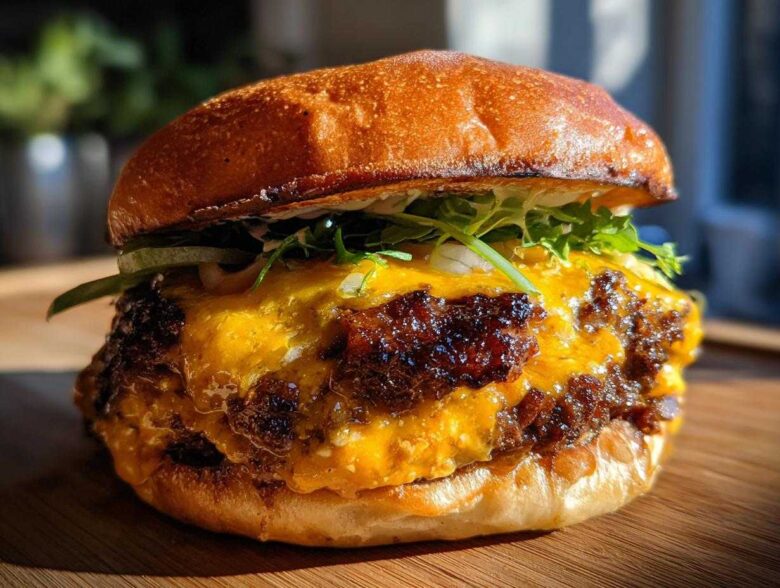
Forget those sad, pale patties you’ve been making! Getting that perfect, dark, crispy crust on a burger—the kind that drips flavor down your arm—used to feel like a secret only diner cooks knew. Well, I spent years messing up batch after batch until I finally cracked the code! Trust me, making a restaurant-quality **Smash Burger** right here in your kitchen is unbelievably easy once you know the exact technique. We share all the secrets we learned over at our kitchen philosophy. This guide is going to show you how to maximize that amazing, flavorful crust while keeping that center unbelievably juicy. It’s the definitive method, perfected through endless backyard testing!
Why This Is the Best Homemade Smash Burger Recipe
I stand by this! This isn’t just another recipe floating around; this is the absolute **Best homemade smash burger recipe** I’ve ever developed. You get the texture and flavor of a high-end burger joint without the fuss. Seriously, you won’t believe these came out of your own skillet. We share more great cooking tips over on the main blog. We are talking about achieving true **Restaurant quality burger at home** in under 20 minutes!
- It’s lightning fast—we’re talking 10 minutes cook time!
- Guaranteed peak juiciness thanks to the right fat blend.
- The crust development is non-negotiable; it’s the star of the show.
Achieving Maillard Reaction on Burgers for Maximum Flavor
That deep brown, crispy edge? That’s the Maillard reaction happening, and it’s where all the amazing savory flavor comes from. If you don’t get that crust, you just have a hot ground beef patty, not a smash burger! We guarantee that reaction because we use extremely high heat and make sure the meat has absolute, direct contact with the hot surface. It’s all about building that complex flavor profile quickly with the right technique, which is the core of **Achieving Maillard reaction on burgers**.
Essential Tools for the Perfect Smash Burger
Forget trying to do this in a standard non-stick frying pan. To get that incredible crust, you need serious heat retention, so a cast iron skillet or a flat-top griddle is a must-have. I swear by my cast iron; it just holds the temperature steady. Talking about the **Must have smash burger tools**, the spatula is what separates the pros from the amateurs! You’ll need something sturdy, wide, and most importantly, preferably metal with a sharp edge.
Anything flimsy won’t cut it when you’re trying to scrape that beautiful crust off the bottom. Do yourself a favor and check out some dedicated tools; I found a favorite wide metal spatula after seeing other chefs use them—look around for heavy-duty ones, as finding the right tool makes all the difference in **Where to buy smash burger spatula** that won’t bend on you mid-smash! We’ve got some great tips on keeping things hot over on our guide to Easy backyard griddle cooking.
Choosing the Right Spatula for Your Smash Burger
I can’t stress this enough: you need a wide, flat, metal spatula. You are essentially scraping every caramelized bit off the hot surface, and a thin rubber spatula will just fold over and let that delicious crust break apart. You should aim for a tool that’s at least 4 inches wide so you can get completely underneath the patty in one swift motion. A slightly angled or beveled edge helps you get that initial scoop without tearing up the developing Maillard layer. That sharp edge is crucial for lifting the entire crust intact!
The Perfect Ground Beef Mixture for Smashing
Okay, let’s talk beef because this is where most people go wrong. You absolutely must use 80/20 ground chuck—that means 80% lean meat and 20% glorious, flavor-packed fat. This ratio is the cornerstone of the **Perfect ground beef mixture for smashing**. If you go leaner, say 90/10, the meat will dry out before you even get a good crust, and you’ll end up with a sad, crumbly puck.
The 20% fat does two things: It’s what renders out to help create that crispy Maillard crust when it hits the hot griddle, and it keeps the inside of your thin patty incredibly moist. Don’t try to substitute this part; it’s essential for that **Juicy smashed patty recipe** feel. Just grab the 80/20 blend, leave it loose, and you are halfway to success!
Step-by-Step Instructions for Your Smash Burger
Now that we have the perfect meat and the right equipment, it’s time to cook! This entire process moves incredibly fast once the heat is up. You aren’t cooking burgers; you are searing them. I always like to have my buns ready and that special sauce mixed up before I even touch the meat. This is the method that perfectly replicates that authentic **Diner style burger technique**, so follow these steps closely, and don’t walk away once the meat hits the pan!
First, you’re going to mix up that amazing sauce you prepared and get all your beef in loose little balls—about 2 ounces each. Don’t pack them! Get your cast iron skillet so hot that it’s just starting to smoke slightly—medium-high heat is critical here. Add a tablespoon of neutral oil, something like canola, just to help the transfer. If you’re looking to kick up the flavor even more sometime, you might want to check out our Cowboy Butter dipping sauce, but for this classic, we stick to the standard mix for now.
Place two of those loose beef balls onto the screaming hot surface, making sure they have space between them. Immediately, and this is key, lay a square of parchment paper right over one of the meat piles. Next, we smash!
Tips for Smashing Ground Beef Thin
This is the moment of truth! Grab your heavy, flat metal spatula or press, and use firm, even pressure to smash that ball down through the parchment paper. You need conviction here! Press hard for about 10 seconds to ensure the meat makes full, flat contact with the heat. The parchment keeps the meat from sticking to your press, making the next step cleaner. Once you lift the paper, immediately season the raw top side you just exposed with salt and pepper—seasoning *after* the smash locks in the flavor right where you want it. This is how you master **Tips for smashing ground beef thin** without losing all your fat!
While you are smashing your first set, take a minute to prep your buns. I always toast the inside cut side of the potato buns directly on the griddle surface—sometimes I even rub a tiny bit of butter on them first. That warm, toasty bun is the perfect bed for our crispy creation.
How to Make Crispy Crust Burger by Scraping and Flipping
Let those patties cook completely undisturbed for about 90 seconds, maybe two minutes. You will start to smell that deep, nutty aroma—that’s your crust forming! You’ll know it’s ready when you can see the edges looking dark brown. Now comes the fun part for **How to Make Crispy Crust Burger by Scraping and Flipping**: take that wide, sharp spatula and slide it underneath with one swift, confident scrape. You want to lift the entire crust intact! Flip it over, and immediately lay a slice of American cheese on top.
Cook the flipped side for only 30 to 60 seconds until that cheese is perfectly gooey and melted. Repeat the process with the remaining meat balls. Once the cheese is melted, assemble everything: sauce on both bun halves, then stack your two cheesy patties on the bottom, top it with the bun lid, and get ready to eat! This quick cooking time is what seals in all the juices.
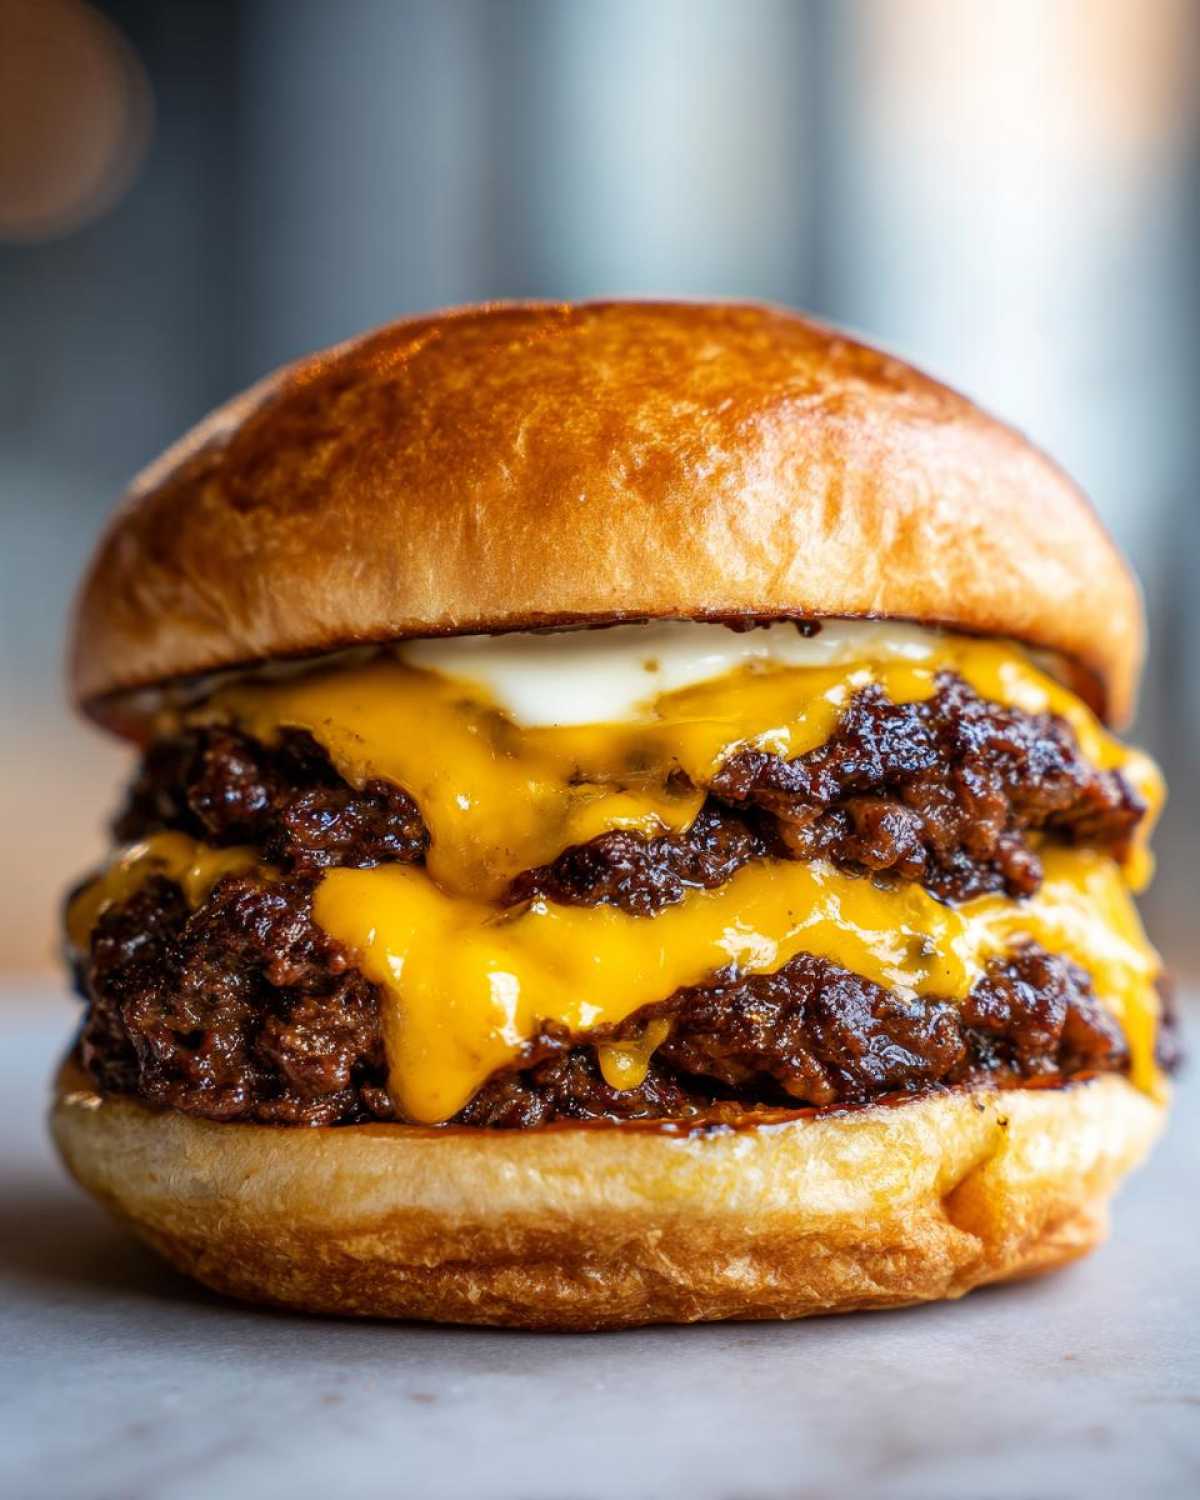
Simple Smash Burger Sauce Recipe and Cheese Melt Ideas
You can’t have a truly amazing diner-style burger without the right sauce! Don’t skip mixing this up while the grill is heating—it’s incredibly easy and so much better than anything store-bought. This quick base for our **Simple smash burger sauce recipe** just blends together mayonnaise, ketchup, mustard, a little pickle relish, and just a splash of vinegar for tang. It’s simple, but it absolutely ties everything together. If you ever want to level up your sauce game with something creamier, you should check out this creamy garlic aioli recipe sometime, but for smashing, keep it classic!
Now for the cheese! When we talk about **Smash burger cheese melt ideas**, you know American cheese is the GOAT because of how perfectly it melts and drapes over those crispy edges. That said, if you want something a little sharper that still melts well, Provolone is a fantastic second choice. Just lay that slice on the moment you flip the patty; you need that direct heat to get that perfect, messy, cheesy blanket over the crust!
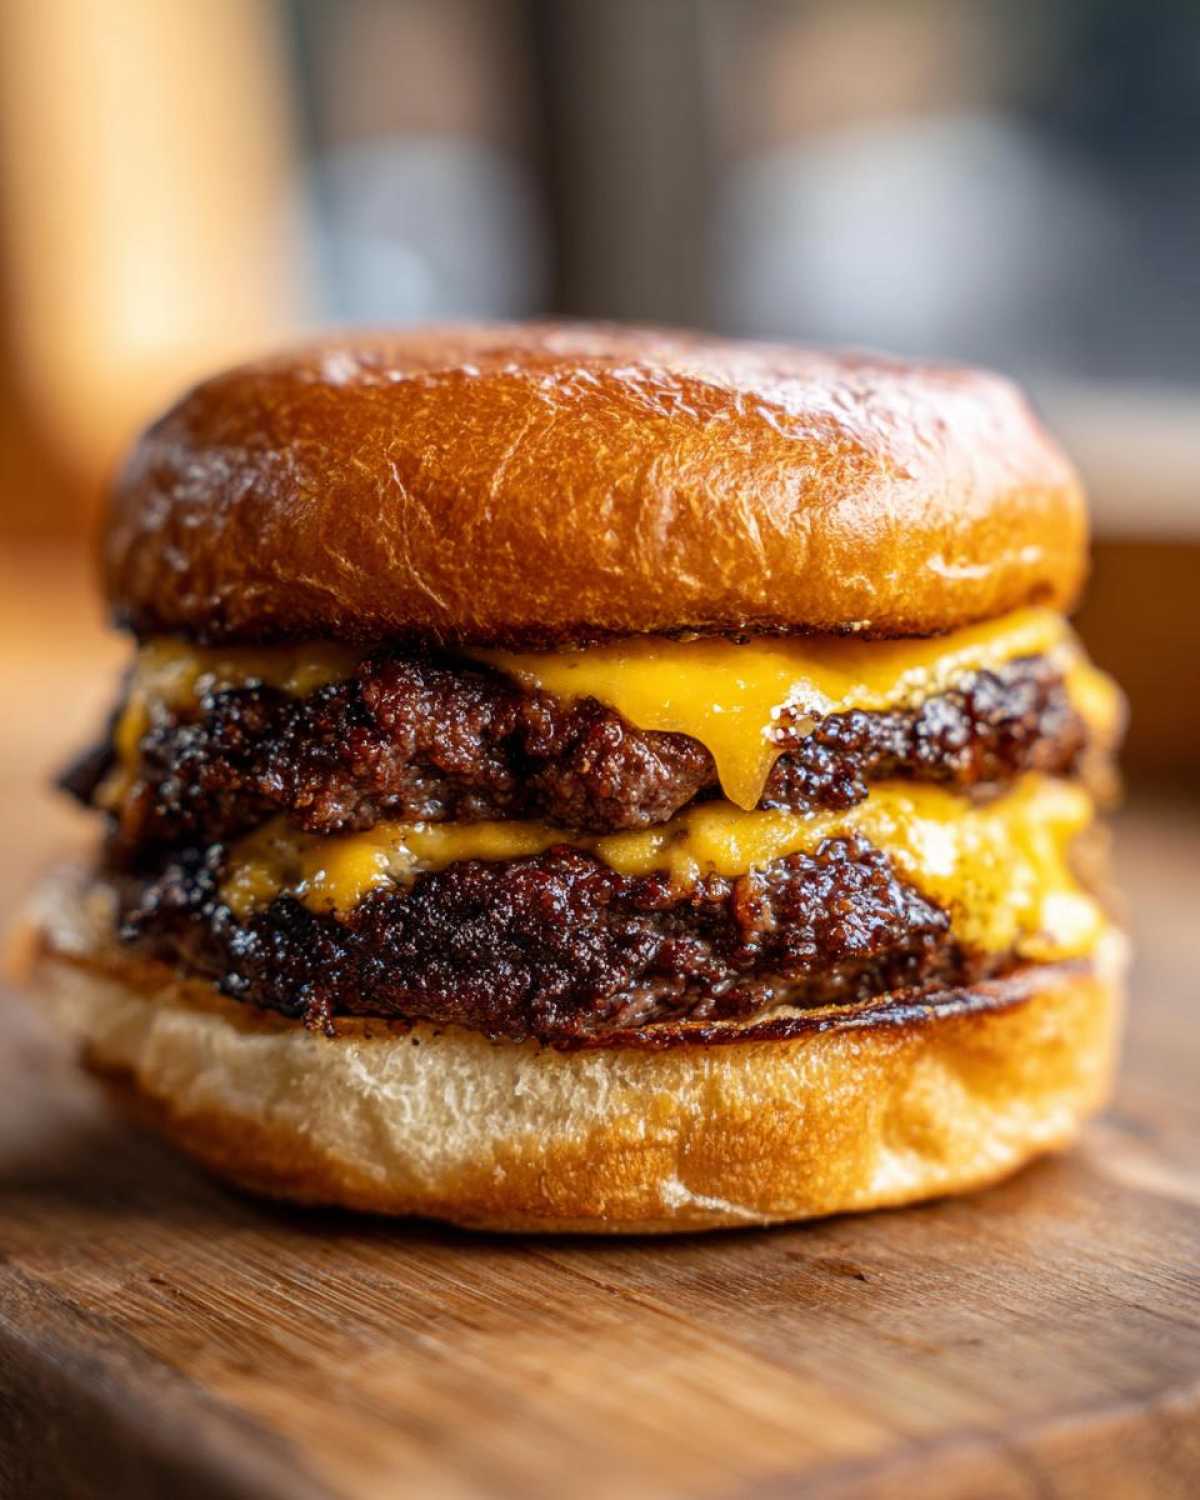
Assembly and Serving Suggestions for Your Smash Burger
We are at the finish line! Now comes the final construction of your **Classic American cheeseburger recipe**. Remember, the sauce goes on both the toasted top and bottom bun halves—don’t skimp! Then, gently place your two cheesy, crusty patties right on the bottom half. Stack them high; that’s part of the fun!
To keep that crisp texture from getting soggy too fast, I always add my cold elements *after* the hot meat. A few thinly sliced dill pickle chips are non-negotiable for that zing! If you like onions, finely dice them, sprinkle them on top of the cheese before that final flip, or add them raw after assembly. If you want to try some other amazing hand-held meals, check out our Sloppy Joes recipe, but for these burgers, simple is king. Serve immediately with super thin fries!
Storage and Reheating Instructions for Smash Burger Leftovers
Look, let’s be honest: the best way to eat these is right off the griddle. Seriously, if you can manage it, eat all four servings immediately! That crispy crust we worked so hard to achieve doesn’t love sitting around. But hey, sometimes life happens, and you have a leftover patty or two sitting in the fridge. This is a real problem when dealing with the perfect crust, because the microwave will just steam it into sad, soft oblivion.
For short-term storage—say, overnight—wrap the fully cooled patties tightly in foil or plastic wrap, or stash them in an airtight container. When it comes time to reheat, forget the microwave entirely! You want to zap that Maillard reaction back to life, and that means dry heat. My favorite trick is using the oven or, even better, the air fryer. If you’re using the air fryer, set it to about 350°F and give those patties just 3 to 5 minutes. If you’re using the oven, lay them on a baking sheet and heat at 350°F until warmed through. If you’re interested in exploring other ways to use hot air cooking, I have some fantastic results with my air fryer chicken recipes!
If you only have a toaster oven, that works too! Just make sure they aren’t stacked. Reheating on a dry skillet over medium heat for a minute per side can also bring back a decent crisp factor, but you have to watch them closely so they don’t burn beneath the heat. The goal here is always maximum crisp restoration, and that requires dry heat transfer!
Frequently Asked Questions About Making a Smash Burger
I know you have questions because I sure did when I started learning this technique! People always ask me about substitutions or what happens if they mess up the smash itself. I’ve tried to cover the biggest stumbling blocks right here so you can feel confident hitting that hot griddle. If you need to check our general policies, you can always browse our Disclaimers page too.
Can I use leaner ground beef for my Smash Burger?
Oh, please don’t! I know leaner beef seems like the healthier choice, but honestly, you sacrifice everything that makes a great smash burger. If you use anything leaner than 80/20, you absolutely will not get a proper crust because the fat won’t render out fast enough to aid the browning process. Plus, without that 20% fat making up the difference, your patty will cook through before it browns, leaving you with a dry, hockey puck of beef instead of a **Juicy smashed patty recipe**.
What is the secret to keeping the burger juicy inside?
It’s a two-part secret, really! First, it’s that high heat. You need the surface of the skillet to be searing hot so that when the patty hits it, the crust forms almost instantly—that’s the Maillard reaction doing its job, which seals in the amazing beef juices. Second, and we mentioned this earlier, it’s using that 80/20 blend. The fat melts and creates a little barrier while protecting the interior meat from drying out. High heat + high fat equals juicy perfection every single time.
How thin should I press the patty for a true Smash Burger?
The goal is thin, but not *paper* thin! We are aiming for about a quarter of an inch thick when you finish your press. That gives you maximum surface area for the crust, but those 2-ounce balls still retain enough beef mass to stay juicy inside after they cook. If you press them down until they are barely there, they cook too fast, and by the time the cheese melts, you’ve overcooked the meat. Remember, you are using force, but only for about 10 seconds, then you let it cook untouched!
Nutritional Estimates for This Juicy Smashed Patty Recipe
Look, I love that you are focusing on nutrition! That’s responsible cooking, and I totally get wanting to know what’s going into your body. I’ve done my homework and based on standard calculations for 80/20 ground beef, American cheese, potato buns, and the sauce proportions we used, there’s certainly a range for what these come out to.
I want to be super clear about this, though: the exact numbers really depend on the specific brand of cheese you choose and exactly how much oil you use in the pan, not to mention the thickness of your bun. For complete transparency, I always recommend checking the labels on the specific products you bring home. You can find more about how we approach recipe data management over on our Privacy Policy page.
Think of the estimates we ran as a general guide only. What matters most is that you’re using quality ingredients and mastering the technique to get that amazing flavor! Enjoy these burgers—they are worth every single crumb of that crust!
PrintDefinitive Smash Burger Recipe
Follow these steps to create a diner-style smash burger with a maximum crust and a juicy interior.
- Prep Time: 10 min
- Cook Time: 10 min
- Total Time: 20 min
- Yield: 4 servings
- Category: Dinner
- Method: Griddling
- Cuisine: American
- Diet: Low Fat
Ingredients
- 1 pound ground beef (80/20 blend recommended)
- 4 slices American cheese
- 4 potato buns
- Salt and black pepper to taste
- 1 tablespoon neutral oil (like canola or vegetable)
- For Sauce: 1/2 cup mayonnaise
- For Sauce: 2 tablespoons ketchup
- For Sauce: 1 tablespoon yellow mustard
- For Sauce: 1 teaspoon pickle relish
- For Sauce: 1/2 teaspoon white vinegar
Instructions
- Prepare the sauce by mixing mayonnaise, ketchup, mustard, relish, and vinegar in a small bowl. Set aside.
- Divide the ground beef into 8 equal, loose balls (about 2 ounces each). Do not pack them down.
- Heat a cast iron skillet or flat-top griddle over medium-high heat until very hot. Add the oil.
- Place two beef balls onto the hot surface, leaving space between them.
- Immediately place a piece of parchment paper over one beef ball. Use a heavy, flat-bottomed metal spatula or a burger press to firmly press the ball down into a thin patty (about 1/4 inch thick). Press hard for about 10 seconds to ensure full contact with the heat. Remove the parchment paper.
- Season the exposed top surface generously with salt and pepper.
- Cook undisturbed for 90 seconds to 2 minutes until a deep brown crust forms on the bottom.
- Scrape under the patty firmly with your spatula to lift the crust intact. Flip the patty.
- Immediately place one slice of cheese on top of each patty.
- Place the top half of a bun on the griddle to toast lightly.
- Cook the flipped patty for 30 to 60 seconds more until the cheese is melted and the patty is cooked through.
- Assemble the burger: Spread sauce on both halves of the toasted bun. Place two cheesy patties on the bottom bun. Top with the other bun half. Repeat for the second burger.
Notes
- Use an 80/20 fat ratio for the best flavor and moisture retention when smashing.
- The key to the crust is high heat and pressing firmly immediately after placing the meat on the surface.
- Use a sturdy, wide metal spatula with a sharp edge for effective scraping and flipping.
- For extra flavor, lightly butter the inside of the buns before toasting them on the griddle.
Nutrition
- Serving Size: 2 patties with bun and sauce
- Calories: 550
- Sugar: 10
- Sodium: 850
- Fat: 35
- Saturated Fat: 14
- Unsaturated Fat: 21
- Trans Fat: 1
- Carbohydrates: 30
- Fiber: 2
- Protein: 32
- Cholesterol: 110