

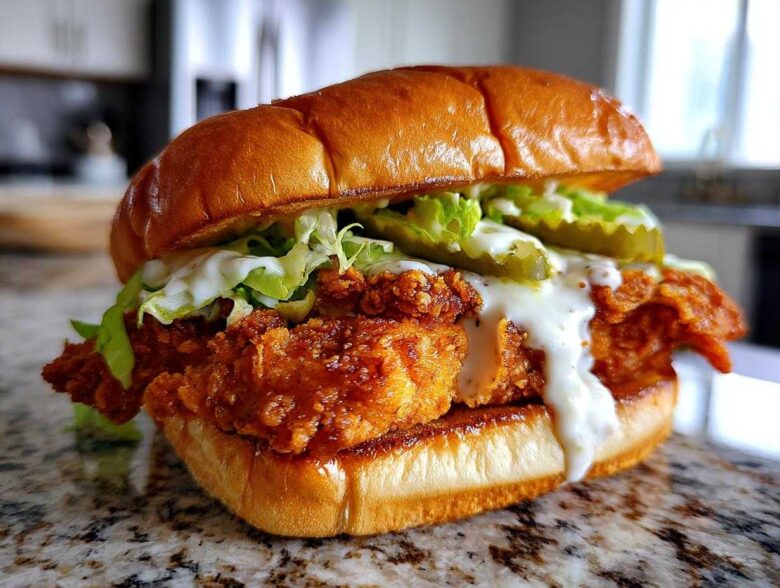
Oh my gosh, have you ever left a diner swearing you could make that amazing fried chicken sandwich at home, but every attempt just ends up soggy? I’ve been down that road so many times! Well, I finally cracked the code for that incredible crunch against that juicy interior. Forget the sad, flat sandwiches—we are going for true restaurant style here.
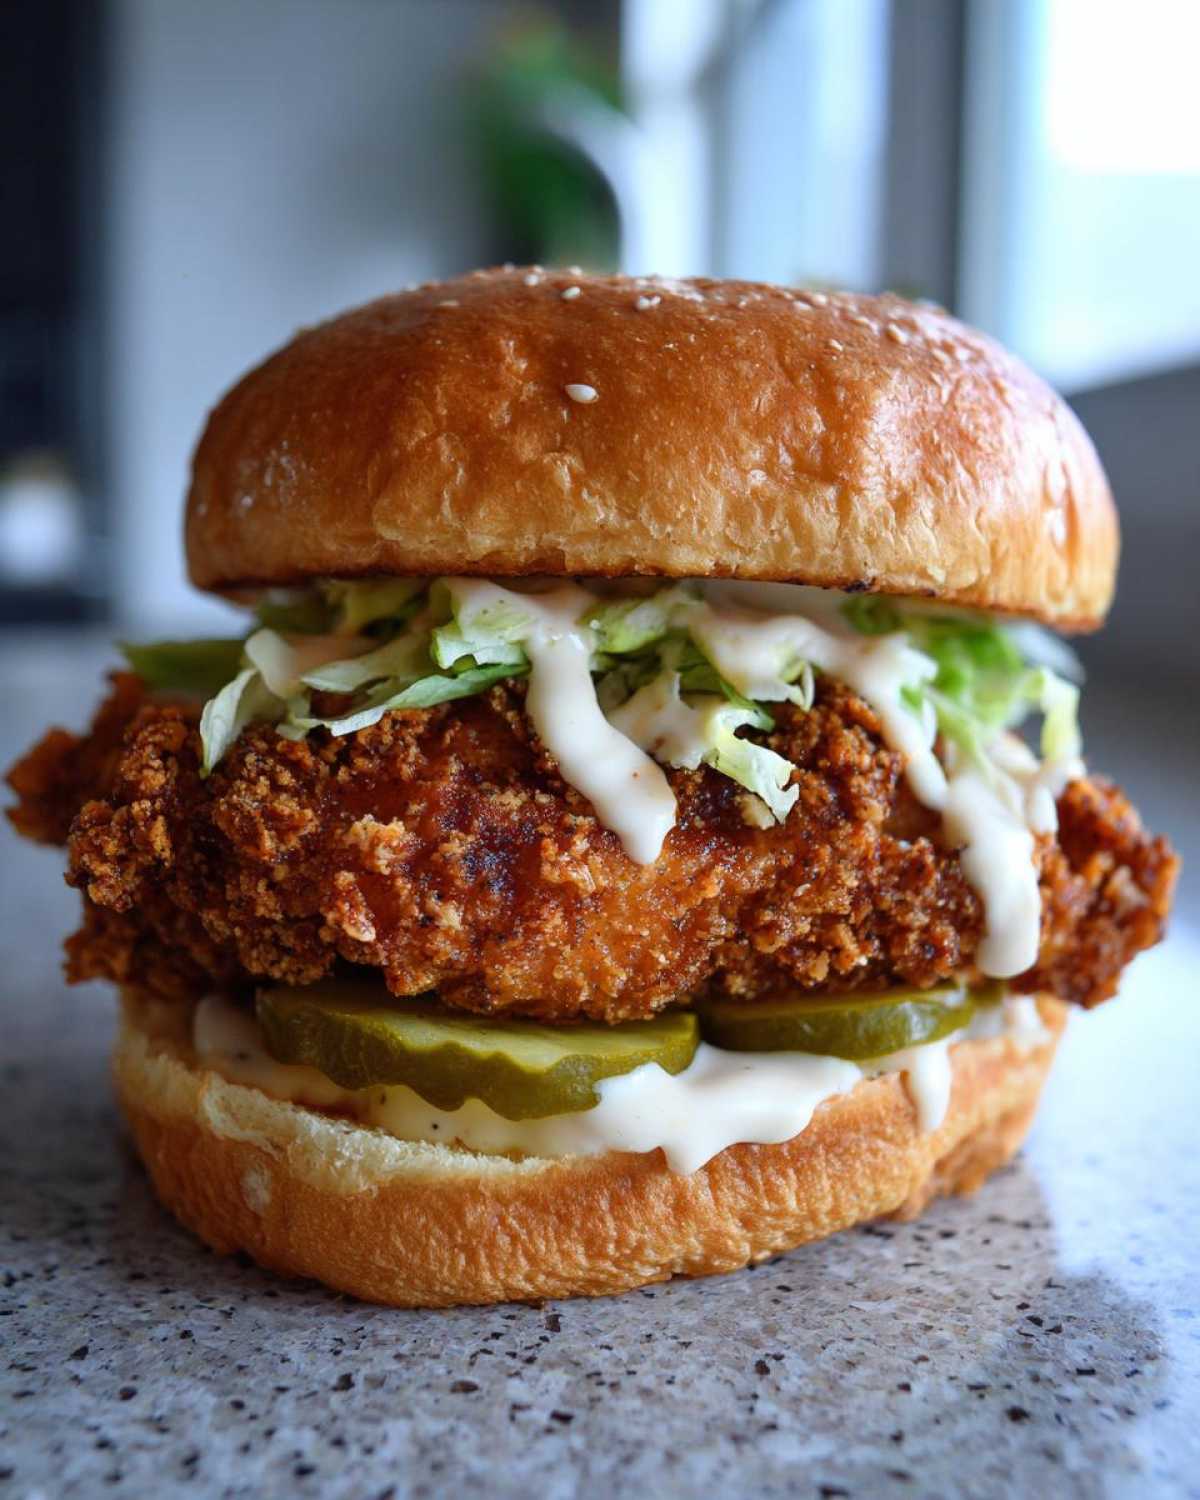
The absolute game-changer for my homemade Crispy Chicken Sandwich with Garlic Sauce isn’t just the breading; it’s the sauce. Seriously, you won’t believe how easy it is to whip up a dreamy, garlicky aioli that tastes better than anything you get on takeout. After testing what felt like a million spice blends, I found the perfect balance. Trust me, once you try this version, you’ll be making it every weekend for your ultimate chicken sandwich project.
Before we jump into the frying, if you’re looking for an extra flavor punch underneath the crunch, check out my tips on how to get super flavorful meat with my article on the best chicken marinade recipe for juicy flavor. But honestly, even without a long marinade, these instructions are solid!
Why This Crispy Chicken Sandwich with Garlic Sauce is the Ultimate Recipe
So, why should you drop everything and make my Crispy Chicken Sandwich with Garlic Sauce right now? Because it ticks every single box! We’re talking about achieving that perfect balance that restaurants usually keep secret.
- The texture is outrageously crunchy, far beyond your average sandwich.
- The homemade garlic sauce is creamy, sharp, and makes the whole thing taste gourmet.
- It delivers that satisfying, diner style chicken sandwich experience without leaving your kitchen.
Achieving the Perfect Crunchy Fried Chicken Sandwich Texture
The secret to making this a truly crunchy fried chicken sandwich lies right in the breading station. We use a double-duty setup. First, the seasoned flour grabs onto the chicken breast tightly. Then, we press that floured piece hard into the Panko breadcrumbs.
Panko is key because those flakes fry up lighter and stay crispier than standard breadcrumbs. This combination locks in the juices while creating that shatteringly crisp exterior you’re dreaming about. It’s all about getting real coverage!
Gathering Ingredients for Your Crispy Chicken Sandwich with Garlic Sauce
Okay, friend, getting ready to make the ultimate Crispy Chicken Sandwich with Garlic Sauce starts right here, with making sure you have every single precise little thing you need. Don’t cheat on the panko, or you might as well just put cold chicken on a bun!
I always lay everything out on the counter first—it makes things so much easier when the frying part gets going fast. We need the stars of the show: the chicken, the three stages of breading, and of course, the magic sauce ingredients. Organizing this part prevents last-minute panic!
Ingredients for the Homemade Garlic Sauce for Chicken
This sauce is what takes this from being a regular sandwich to the absolute king of sandwiches. It’s so vibrant and garlicky, it just screams gourmet. If you like big flavor, this simple mixture is the secret weapon that elevates every bite of your Crispy Chicken Sandwich with Garlic Sauce.
You’ll need:
- Half a cup of mayonnaise—use the good stuff!
- Two cloves of garlic, minced super, super fine.
- One tablespoon of bright lemon juice.
- One teaspoon of Dijon mustard for a little kick.
- Just a pinch of salt and pepper to bring it all home.
If you want to skip making it later, you can totally whip this up ahead of time. Seriously, check out my guide for a 5-minute creamy garlic aioli recipe if you need more sauce magic!
Components for the Perfectly Fried Chicken Coating
This section is all about getting that golden, unbelievable crunch. Remember, you want your chicken breast fillets to be pounded down evenly—about half an inch thick is perfect—so they cook through at the same time the crust gets beautiful.
- Two boneless, skinless chicken breasts, split horizontally and pounded flat.
- For the flour dredge: a cup of all-purpose flour, salt, pepper, paprika, garlic powder, and cayenne pepper. That cayenne gives the coating a lovely background warmth, trust me.
- Two large eggs whisked with a quarter cup of milk for the binder.
- One full cup of Panko breadcrumbs—these are non-negotiable for superior crispiness!
- Plenty of vegetable oil for frying, or if you are air frying, just some cooking spray.
Step-by-Step Instructions for the Ultimate Chicken Sandwich Recipe
Alright, this is where the magic happens! Follow these steps exactly, and you’ll nail that restaurant-quality texture every single time you make your Crispy Chicken Sandwich with Garlic Sauce. Timing is everything here, so have your dishes lined up before you even pick up that first chicken breast.
Preparing the Chicken and Setting Up the Breading Station
First things first: you need those chicken halves pounded flat. Lay them between plastic wrap or parchment paper and use a meat mallet or even a heavy pan to get them all to that perfect half-inch thickness. This ensures they cook evenly and quickly!
Next, set up your three-stage dredging operation. It needs to be in this exact order so you get that amazing adhesion:
- Dish One: The seasoned flour mixture (salt, pepper, paprika, powders).
- Dish Two: The egg wash (eggs and milk whisked together).
- Dish Three: The Panko breadcrumbs—make sure they’re spread out nicely so you can really press the chicken in there.
Dredge that chicken rigorously! Flour first, gently tapping off the excess—we don’t want clumps. Then dip it quickly into the egg wash, making sure it’s saturated, and finish by firmly pressing it into the Panko. You want every single surface covered; that coverage is what guarantees a truly crispy texture.
Mixing the Creamy Garlic Sauce Chicken Sandwich Topping
While your chicken is getting its nice coating, we assemble the star sauce for your Creamy Garlic Sauce Chicken Sandwich. In a small bowl, just combine the mayo, the finely minced garlic, the lemon juice, and that little dab of Dijon mustard. Give it a good stir.
Here’s my pro tip: Taste it! Seriously, don’t skip this. If your garlic is super potent, you might want less; if you like it tangier, add a tiny squeeze more lemon. A little pinch of salt and pepper to season, and set it aside. It’s ready to soak into that toasted bun!
Cooking Methods: Achieving the Best Crispy Chicken Sandwich
For the best results, we’re frying! Heat up about an inch of vegetable oil in a deep skillet until it hits 350 degrees Fahrenheit. You *have* to use a thermometer here, or you risk either burnt crusts or raw centers. Carefully lower your breaded chicken into the hot oil—don’t overcrowd the pan, or the temperature will drop right away!
Fry until it’s deeply golden brown, about three to four minutes on each side. Once they come out, place them straight onto a wire rack, not paper towels, so air can circulate underneath and keep that crust perfectly crisp. The internal temp must hit 165 degrees Fahrenheit, of course.
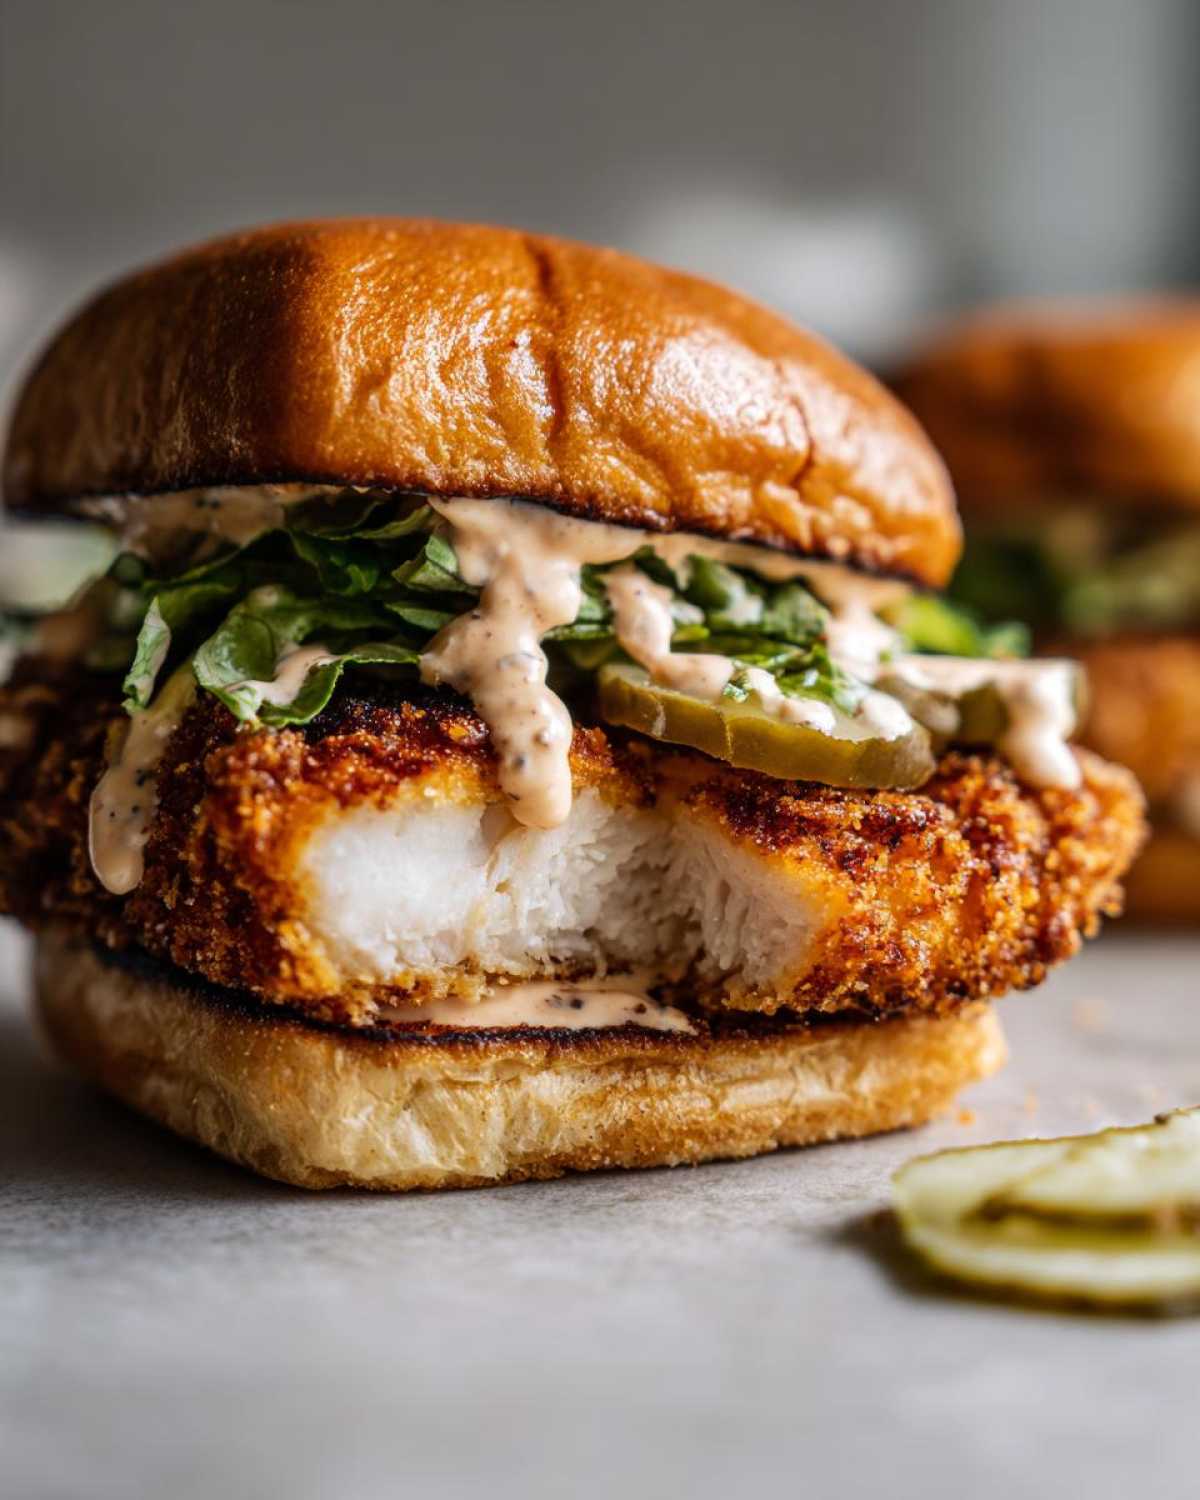
Now, if you’re looking for a lighter method, you can absolutely use the air fryer. You’ll spray those breaded beauties really well with oil and cook them at 380 degrees Fahrenheit for about 12 to 15 minutes, flipping halfway through. It won’t be quite the same as deep frying, but it’s a fantastic way to make an Air Fryer Crispy Chicken Sandwich!
Tips for Success with Your Crispy Chicken Sandwich with Garlic Sauce
Honestly, making the perfect Crispy Chicken Sandwich with Garlic Sauce is less about luck and more about managing temperature and time. Anyone can coat chicken, but keeping that coating perfect while the inside gets juicy? That takes strategy!
My absolute number one trick, which I mentioned briefly, is chilling the breaded chicken. Once you’ve managed to dredge those pieces perfectly—flour, egg, Panko—don’t fry them immediately! Pop them onto a rack over a plate and stick them in the fridge for about 15 minutes. This short chill time lets the egg wash set up and basically glues the Panko onto the chicken so it won’t flake off in the hot oil.
Secondly, you need consistency with your oil temperature. If it’s too low, the chicken soaks up oil and gets greasy—the opposite of crispy! If it’s smoking hot, the crust burns before the center cooks. Stick firmly to that 350 degrees Fahrenheit mark. If you’re wondering what to dip those leftover crispy edges into that aren’t going on the sandwich, try my recipe for Cowboy Butter Dipping Sauce Recipe—it’s incredible!
Finally, don’t crowd the pan! I know it’s tempting when you’re hungry, but if you stack those pieces in, the temperature instantly drops, and you end up steaming your coating instead of frying it to perfection. Cook in batches to guarantee that crunchy finish on your Crispy Chicken Sandwich with Garlic Sauce.
Ingredient Notes and Substitutions for This Recipe
Okay, let’s talk specifics, because even though this recipe is pretty straightforward, a few ingredient choices make a huge difference between good and totally *amazing*. We’ve got the main players here: the chicken, the breading, and that fantastic creamy garlic sauce. Changing just one thing can throw off the whole texture we worked so hard to achieve!
If you’re looking to lighten things up a touch while keeping that creamy consistency for your sandwich topping, you can definitely swap out some of that mayonnaise for plain Greek yogurt. You might need a tiny splash more lemon juice to keep the tang up, but it works wonderfully in a pinch!
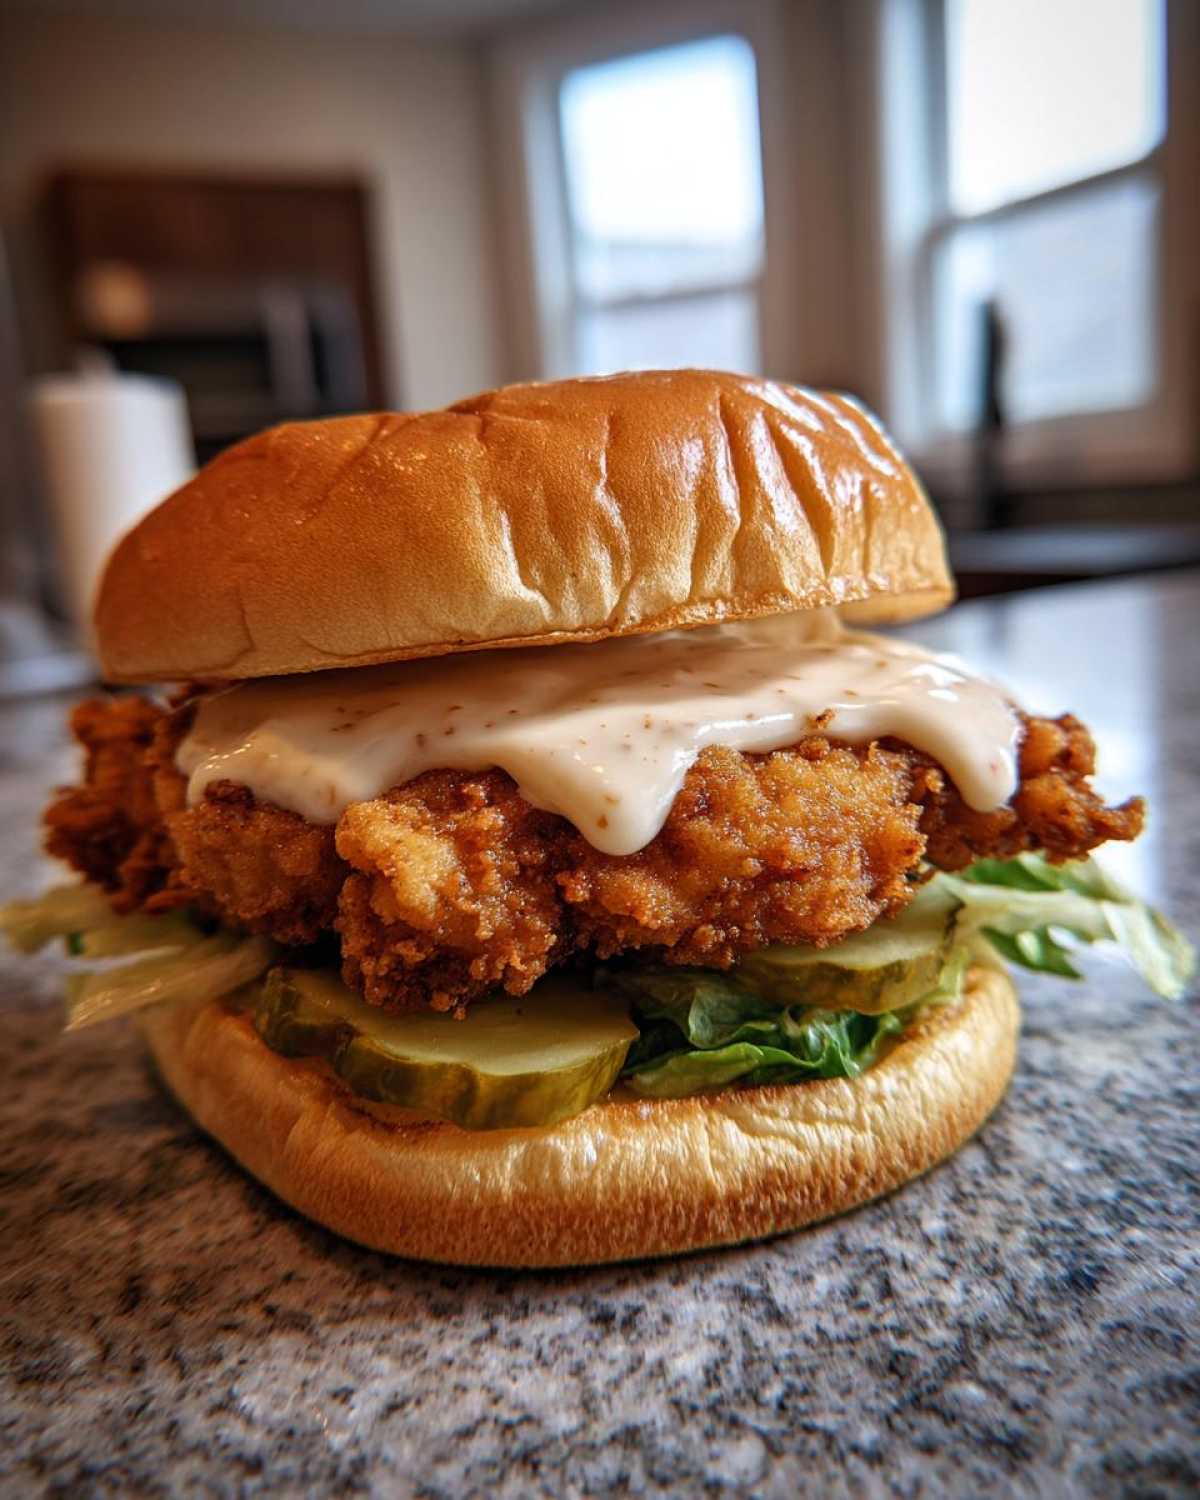
But if there’s one ingredient I’m fiercely protective of, it’s the Panko breadcrumbs. You just cannot beat them! Regular breadcrumbs soak up oil like crazy and give you a dense, slightly cardboard-y crust. Panko, on the other hand, those light, airy flakes fry up instantly, creating that famous, shattery crunch that makes a restaurant-style sandwich worth crossing the street for.
Another thing people often ask about is the pickles. If you are making these on a weekend and want to add an extra layer of bright crunch, try whipping up some quick refrigerator pickles! They bring such a necessary acidic cut to all that rich fried flavor. My guide on refrigerator pickles recipe easy crispy shows you how to make some fantastic ones overnight!
Finally, when it comes to the chicken itself, feel free to swap out the breasts for boneless chicken thighs. Thighs have a little more fat, so they stay incredibly juicy, though you might need to add a minute or two to your cooking time since they are often a bit thicker than pounded breasts. Either way, you’re getting a top-tier crunchy chicken experience!
Serving Suggestions for Your Savory Chicken Sandwich Ideas
You’ve done the hard work! That sandwich is crispy, it’s dripping with garlic sauce, and it looks incredible. Now, you need something on the side that complements all that richness without weighing the whole meal down. I never let a great sandwich stand alone; it needs a little buddy on the plate.
Since the chicken itself is bold and savory, I usually lean toward things that are cool, crunchy, or nicely salted. Honestly, you can’t go wrong with crispy fries. But if you want to keep things slightly lighter, I have a couple of go-to pairings that make this meal feel like a perfect Sunday project.
First up: Coleslaw! But not the gloopy, heavy kind. You want a bright, vinegar-based slaw. It cuts right through the fat from the frying and the richness of the sauce. Toss shredded cabbage and carrots with apple cider vinegar, a touch of sugar, celery seed, and maybe a drizzle of olive oil. It gives you that essential crisp bite that contrasts beautifully with the soft bun.
If you are leaning into the total indulgence factor, we’re talking about hand-cut, salty french fries. Don’t even bother with the frozen stuff if you’ve fried your chicken! Slice up some potatoes, soak them in cold water, dry them meticulously, and give them a quick double-fry until they are incredibly crisp. Seriously, the salty hit alongside the garlicky chicken is just heaven.
Finally, if you need a green component, keep it super simple. A small side salad made of crisp romaine, slivered red onion, and maybe some shaved cucumber, tossed with a very light vinaigrette. It seems minor, but that fresh, cold component makes the whole meal feel balanced and less heavy. Enjoy every bite!
Storage and Reheating Instructions for Leftover Crispy Chicken Sandwich with Garlic Sauce
I rarely have leftovers of my Crispy Chicken Sandwich with Garlic Sauce because they vanish instantly, but when I do, you absolutely cannot just wrap up the whole thing and stick it in the fridge. You’ll wake up to a soggy, sad mess—and we worked too hard for that crunch!
The absolute key here is separation, separation, separation. Remember how we focused so hard on that perfectly fried coating? Don’t let moisture from the lettuce, pickles, or sauce ruin that achievement!
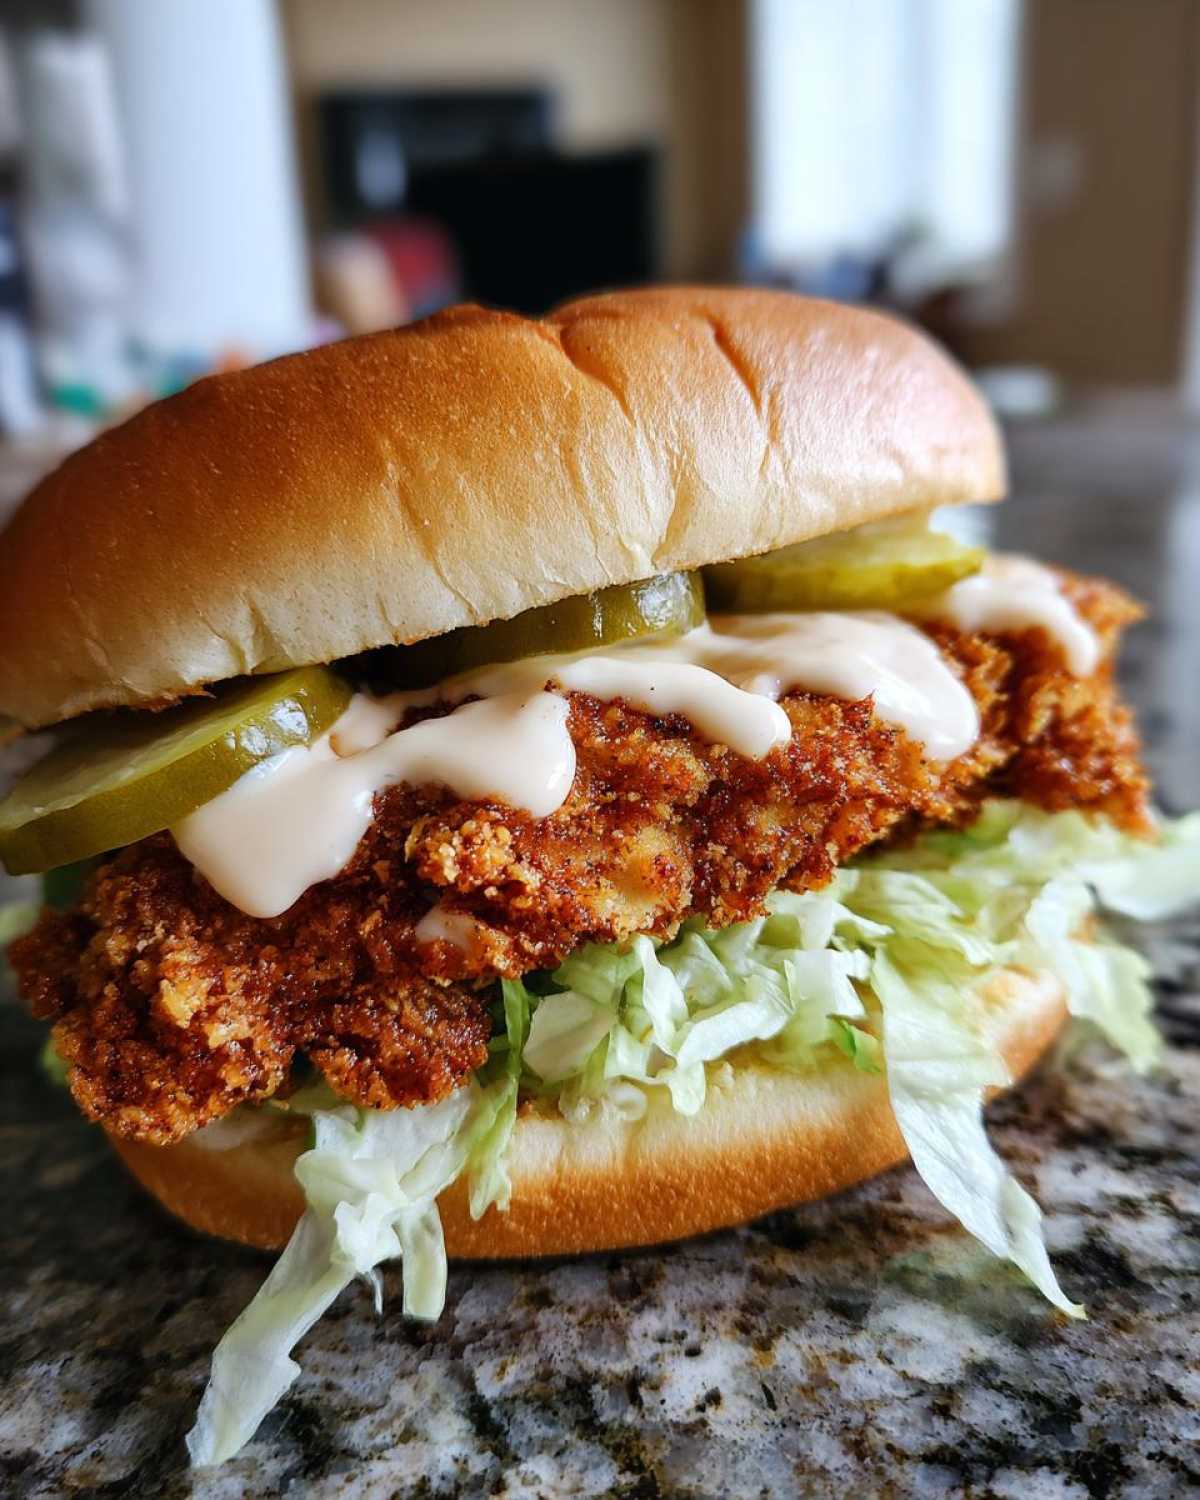
Here is my foolproof plan for storing components so you can have an almost-as-good-as-fresh Crispy Chicken Sandwich with Garlic Sauce later:
- The Chicken: Once completely cooled (this is important—steam creates sogginess!), store the crispy chicken breasts in a single layer inside an airtight container lined with a paper towel. The paper towel will wick away any residual moisture.
- The Buns: Keep the toasted buns separate in a dry bag or container. Don’t try to store them in the fridge; they get tough.
- The Sauce: The make ahead garlic sauce is the easiest part! You can store that creamy mixture in a sealed container for up to four days. Honestly, keeping that ready to go makes making the sandwich next time so fast! If you want more sauce tips, check out my notes on make ahead garlic sauce.
When you’re ready to eat the next day, you have to re-crisp that chicken! Don’t use the microwave—that’s the enemy of crispiness. The best way to reheat leftover crispy chicken for your sandwich is in an oven or toaster oven set to about 375 degrees Fahrenheit for about 8 to 10 minutes. You want it hot all the way through and audibly crunchy again. Then, assemble everything fresh with new lettuce and extra sauce, and you’re back in business!
Frequently Asked Questions About Making the Best Crispy Chicken Sandwich Recipe
It’s totally normal to have questions when you’re aiming for that top-tier result! I get a bunch of emails asking for small tweaks to this recipe, especially when people are trying to fit it into a busy weeknight schedule. Here are answers to the most common things folks ask when trying to create the Best Crispy Chicken Sandwich Recipe.
Don’t stress if your first attempt isn’t perfect; learning little tricks takes time. We all want that restaurant quality crunch without the hassle, right?
Can I bake this?
Yes, you absolutely can bake this recipe if you want to skip deep frying! We have to adjust expectations slightly, though. No baked version will ever achieve the same, deep, shatteringly crisp texture that hot oil gives you, but we can get close enough! To bake, make sure you set up a wire rack over a baking sheet—this lets air circulate underneath, which is crucial for crispness.
Pop those breaded cutlets into a 400-degree oven. They usually take about 20 to 25 minutes, and you must flip them halfway through to get them golden on both sides. If you’re looking for a purely oven-based option, check out my guide on a similar dish: baked ranch chicken easy crispy recipe for inspiration!
What type of bun works best for this sandwich?
This is an essential question for any Diner Style Chicken Sandwich! You need a bun that can handle the juicy chicken and all that garlicky sauce without dissolving immediately. My personal favorite is a soft, slightly sturdy potato roll—they have just enough structural integrity but still yield gently when you bite into them.
Brioche buns are super popular, too, and they bring a nice sweetness that pairs wonderfully with the savory chicken and tart pickles. Whatever you choose, make sure you toast the insides! A quick 30 seconds in a dry pan or under the broiler is non-negotiable to create a moisture barrier against the sauce.
How long does the Garlic Sauce for Chicken last in the fridge?
The beauty of the homemade garlic sauce—or aioli, depending on what you call it—is that it keeps really well! Because it’s mayo-based and we use lemon juice, it holds up nicely. If you store it properly sealed in the fridge, it stays fresh and delicious for up to five days. This makes it perfect for prepping on a Sunday for your next weekday lunch.
Can I use chicken thighs instead of breasts for this recipe?
Oh, I love using thighs for a Juicy Chicken Breast Sandwich alternative! Chicken thighs are inherently richer and more forgiving, meaning they stay moist even if you accidentally leave them frying for an extra minute. The main difference is the shape and thickness. Chicken thighs are often more irregular. If you use them, make sure you trim any excess fat!
Because thighs are generally a bit denser than breasts, you might need to add a couple of extra minutes to your cook time to ensure they hit that 165-degree internal temperature all the way through. It’s worth the extra minute or two for that unbeatable, tender texture!
Understanding the Nutrition of This Crispy Chicken Sandwich with Garlic Sauce
Okay, let’s be real for a second. When you’re diving into a glorious, restaurant-style Crispy Chicken Sandwich with Garlic Sauce, you aren’t really thinking about calories, right? I know I wasn’t when I was testing these recipes! But since you put in the incredible effort to make this incredible sandwich from scratch—using fresh ingredients and controlling your oil—it’s neat to know what you’re consuming.
The numbers below are just estimates, okay? They’re based on using the exact ingredients listed, deep frying in vegetable oil, and using a standard potato roll for assembly. Your choice of bun or how much sauce you generously slather on will change these totals!
Here’s a ballpark look at what you’re getting with one serving of this phenomenal sandwich:
- Serving Size: 1 sandwich
- Calories: 550 (It’s a meal, folks!)
- Fat: 30g (A good amount coming from that frying oil and the mayo in the sauce!)
- Saturated Fat: 5g
- Carbohydrates: 40g
- Protein: 35g (That chicken breast really delivers!)
- Sugar: 6g (Mostly natural sugars in the bun and spices)
- Sodium: 750mg (This is where you watch out—be mindful of your salt in the dredge!)
See? Thirty-five grams of protein! That helps balance out the indulgence. It’s definitely a weekend treat, but because we are using clean ingredients—real chicken and homemade sauce versus whatever mysterious stuff goes into fast food—I feel way better about eating a homemade Crispy Chicken Sandwich with Garlic Sauce!
PrintCrispy Chicken Sandwich with Garlic Sauce

Follow these steps to make a restaurant-style crispy chicken sandwich featuring a juicy chicken breast and a homemade creamy garlic sauce.
- Prep Time: 20 min
- Cook Time: 15 min
- Total Time: 35 min
- Yield: 4 servings
- Category: Main Course
- Method: Frying
- Cuisine: American
- Diet: Low Fat
Ingredients
- 2 boneless, skinless chicken breasts, halved horizontally
- 1 cup all-purpose flour
- 1 teaspoon salt
- 1 teaspoon black pepper
- 1 teaspoon paprika
- 1/2 teaspoon garlic powder
- 1/2 teaspoon cayenne pepper
- 2 large eggs
- 1/4 cup milk
- 1 cup panko breadcrumbs
- Vegetable oil, for frying (or cooking spray for air fryer)
- 4 sandwich buns
- 4 leaves crisp lettuce
- Pickle slices, for serving
- For Garlic Sauce: 1/2 cup mayonnaise
- 2 cloves garlic, minced
- 1 tablespoon lemon juice
- 1 teaspoon Dijon mustard
- Pinch of salt and pepper
Instructions
- Prepare the chicken: Pound the chicken halves to an even 1/2-inch thickness.
- Set up the breading station: In one shallow dish, mix the flour, salt, pepper, paprika, garlic powder, and cayenne pepper. In a second dish, whisk the eggs and milk together. In a third dish, place the panko breadcrumbs.
- Dredge each chicken piece first in the flour mixture, shaking off excess. Dip it into the egg mixture, letting excess drip off. Finally, press firmly into the panko breadcrumbs to coat completely.
- Make the garlic sauce: In a small bowl, combine the mayonnaise, minced garlic, lemon juice, Dijon mustard, salt, and pepper. Mix well and set aside.
- Cook the chicken: Heat about 1 inch of vegetable oil in a heavy-bottomed skillet to 350 degrees Fahrenheit (175 degrees Celsius). Carefully place the breaded chicken in the hot oil, ensuring not to overcrowd the pan. Fry for 3 to 4 minutes per side until golden brown and cooked through (internal temperature of 165 degrees Fahrenheit). Remove and drain on a wire rack. (For air fryer: Spray chicken with oil and cook at 380 degrees Fahrenheit for 12-15 minutes, flipping halfway.)
- Toast the buns lightly in a dry pan or under the broiler.
- Assemble the sandwich: Spread a generous amount of garlic sauce on both halves of each bun. Place a piece of crispy chicken on the bottom bun. Top with lettuce and pickles. Place the top bun on the sandwich.
Notes
- For extra crispiness, you can chill the breaded chicken in the refrigerator for 15 minutes before frying.
- You can make the garlic sauce up to two days ahead of time and store it covered in the refrigerator.
- If baking, place chicken on a wire rack set over a baking sheet and bake at 400 degrees Fahrenheit for 20-25 minutes, flipping once.
Nutrition
- Serving Size: 1 sandwich
- Calories: 550
- Sugar: 6
- Sodium: 750
- Fat: 30
- Saturated Fat: 5
- Unsaturated Fat: 25
- Trans Fat: 0
- Carbohydrates: 40
- Fiber: 2
- Protein: 35
- Cholesterol: 110