

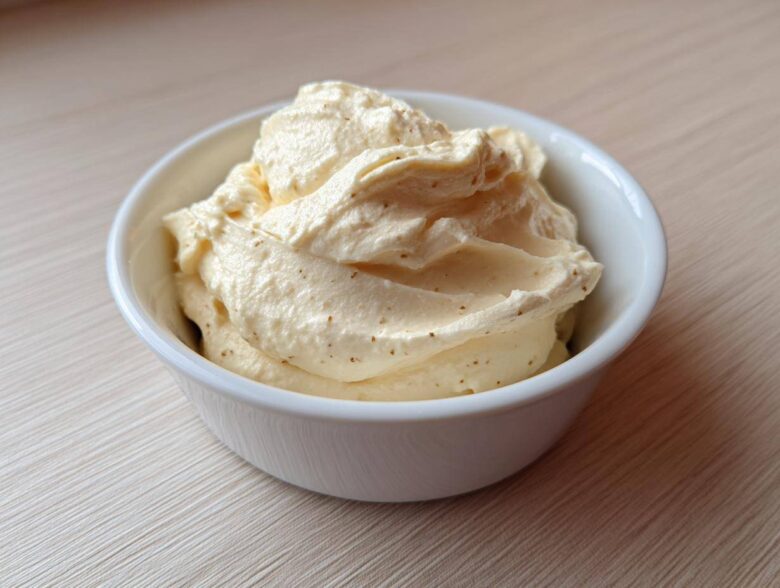
Are you tired of those sad, watery little squeeze bottles of ‘garlic sauce’ that taste more like vinegar than actual garlic? I swear, I used to buy jarred stuff religiously until I realized how much flavor I was missing out on. That’s why I spent three whole weeks testing different combos of garlic and fat until I nailed this method. Friends, I’m so excited to share my Ultimate 5-Minute Creamy Garlic Aioli recipe. It’s unbelievably rich, intensely flavorful, and honestly, it takes less time than making a pot of coffee. You’re going to want to slather this on everything, I promise. Check out my story over at our chef profiles to see how obsessed I’ve become since cracking this code!
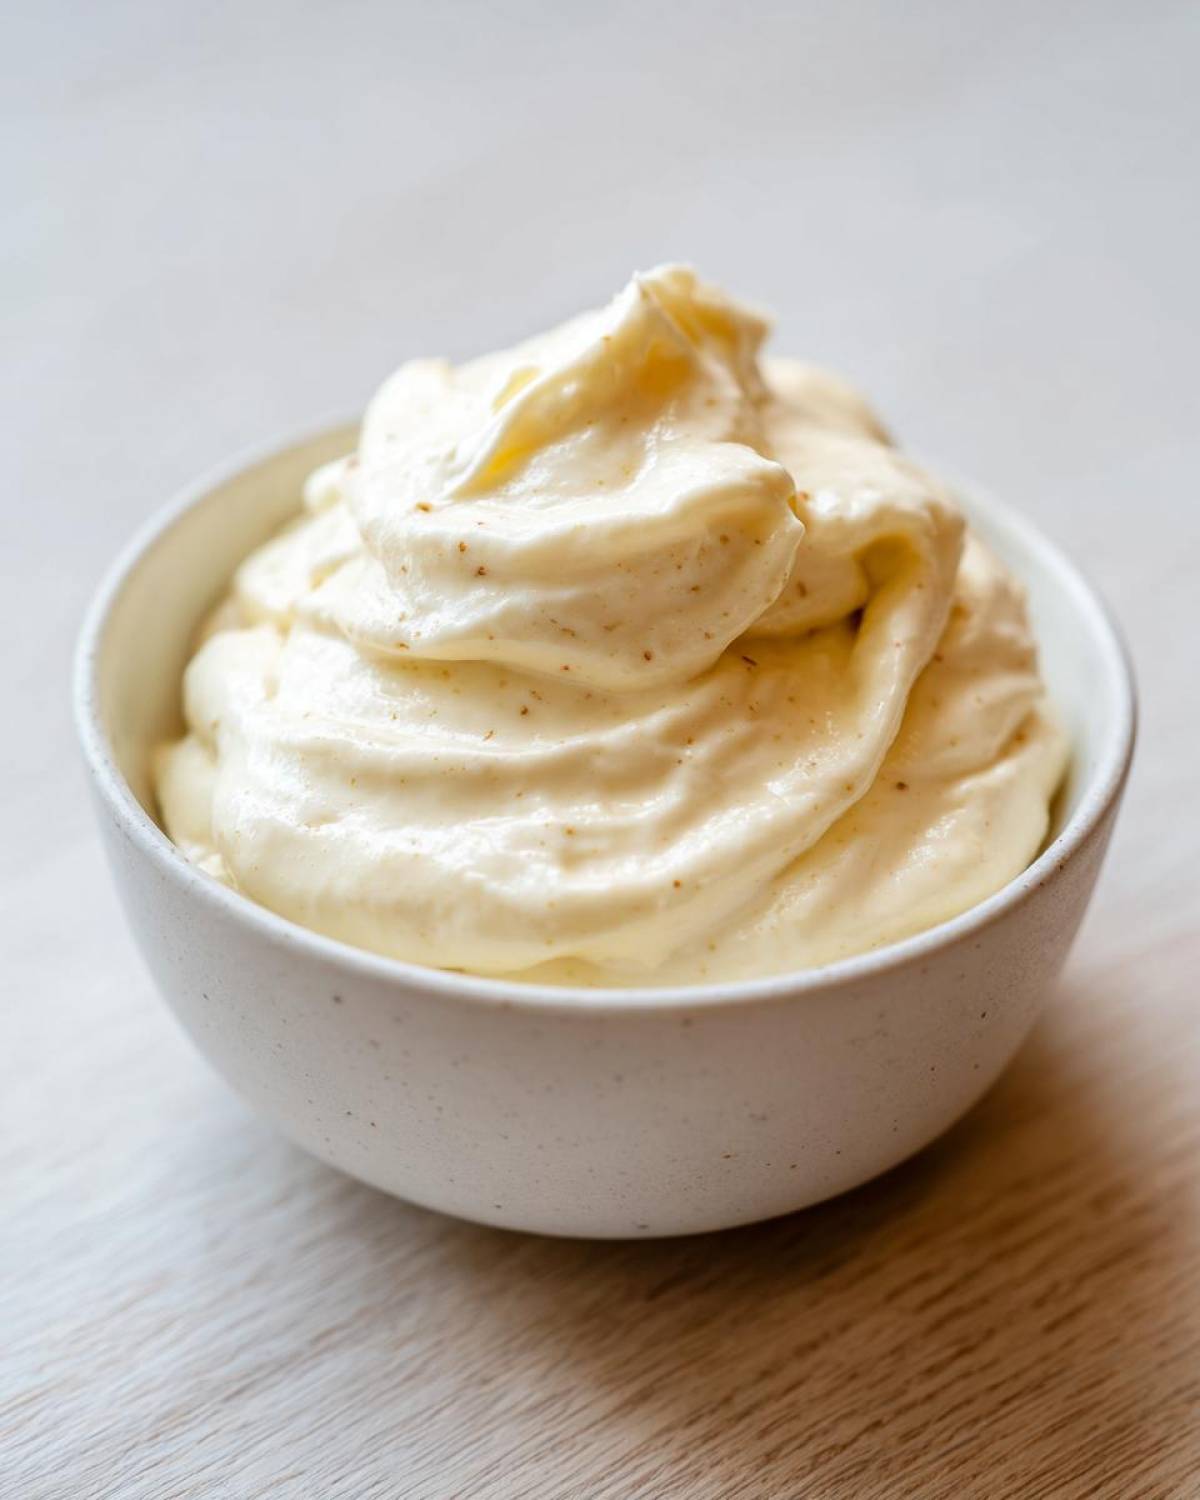
Why This 5-Minute Creamy Garlic Aioli Recipe Works So Well
What makes this garlic aioli so much better than everything else you’ve tried? It boils down to speed, texture, and keeping things super honest in the ingredient department. Honestly, who has time to slowly drizzle oil into an egg yolk for thirty minutes? Not me!
- It delivers incredible, silky texture faster than you can say “emulsion.”
- The garlic flavor is punchy and bright, not dull or cooked-tasting.
- It’s the definition of a five-minute condiment—truly instant gratification.
Achieving Perfect Creamy Condiment Texture
See, the real, traditional aioli involves tediously whipping oil into egg yolks until they magically form a thick sauce. It’s delicious, but messy and time-consuming. We skip all that drama! By starting with great quality mayonnaise, we already have a stabilized emulsion, so we just need to flavor it. That’s why this result is so reliable and instantly creamy—no worries about breaking.
The Secret to Intense Fresh Garlic Sauce Flavor
You can’t fake freshness here, folks. If you want a real kick, you have to use fresh garlic, and you have to attack it right before mixing. I always press mine or mince it until it’s practically pulp. When you mince garlic, you break the cell walls, releasing those potent sulfur compounds that give you that signature bite. This little bit of effort is what elevates this from just a mayo mix to a powerhouse Fresh Garlic Sauce.
Gathering Ingredients for Your Ultimate Flavor Sauce
When you are moving this fast, you need everything ready to go! Don’t mess around with sub-par ingredients here; they are the whole show for this garlic aioli. Remember, cheap mayo just won’t give you the rich base we need for that perfect texture.
- 1 cup good quality mayonnaise (This is crucial!)
- 3 large cloves fresh garlic, minced very finely or pressed hard
- 1 tablespoon fresh lemon juice (Always fresh, trust me on this one)
- 1/2 teaspoon Dijon mustard
- 1/4 teaspoon salt, or to taste
- 1/8 teaspoon black pepper
Ingredient Notes and Simple Homemade Sauce Substitutions
I’ve noticed that using a creamy, full-fat mayo makes a huge difference. If you use a light mayo, your sauce might end up a little thinner, so adjust using a touch less water later if you do. If you don’t have fresh lemon juice? A quarter teaspoon of white wine vinegar will work in a pinch, but fresh is always king for that bright finish in your Simple Homemade Sauce. Don’t skip the Dijon; it helps carry the garlic flavor beautifully!
How to Prepare Your Five Minute Condiment garlic aioli
Okay, this is the fun part where we defy time itself! Remember, the prep time here is seriously five minutes, which means get your bowl and whisk ready before you even peel that first clove. If you need help tracking my methods or want to chat about recipes, feel free to shoot me a line over at our contact page!
- First up, in a small bowl, combine your minced garlic, the fresh squeeze of lemon juice, the tiny bit of Dijon mustard, and your salt and pepper. Give that a quick stir.
- Now, dump in the whole cup of mayonnaise. Don’t be shy!
- Whisk everything together like you mean it. You want to whisk until it is totally smooth and looks like the creamiest dip you’ve ever seen. That’s it! Your garlic aioli prep is practically done!
- Take a quick taste test. Does it need a little more zing from the lemon? A pinch more salt? Fix it right now—this is your sauce!
Now, here is the one step that breaks the five-minute *active* prep rule, but it’s pure magic for flavor infusion.
Infusing Flavor: A Quick Tip for aioli
If you have got an extra 60 seconds before that initial whisking starts, here is my secret weapon for maximum punch. Take the minced garlic and put it directly into the bowl with just the lemon juice and mustard. Let that sit untouched for about five minutes. This short soak allows the sharpness from the garlic to meld perfectly with the acid. When you finally add the mayo and whisk it up, the flavor is deeper and more pungent, honestly making it taste like it simmered all day.
The Essential Chilling Step for the Best Aioli for Fries
Listen closely: Even though the active prep is lightning fast, you absolutely must taste-test that sauce before you chill it. But after tasting, cover that bowl tightly! This beautiful Best Aioli for Fries needs a dedicated time-out in the fridge. Why? Because the raw garlic flavor is intense right after mixing. Chilling it for at least 15 minutes (longer is even better!) lets all those strong flavors mellow out and marry with the creamy base. If you serve it straight from the whisk, it might taste too harsh.
Tips for Success When Making Restaurant Style Aioli
We’ve already established that this garlic aioli is fast, but fast doesn’t mean sloppy! I want you to achieve that perfect, thick, gourmet texture every single time, like you’re pulling it from a secret batch at your favorite burger joint. Here are a few little rules I put in place for myself to guarantee perfection.
First, temperature matters for the mayonnaise. Keep your jar of mayo in the fridge until the last second. If the mayo is too warm when you start, it can lead to a slightly looser sauce, even with the minimal mixing we are doing. We want that cold shock!
Second, regarding the garlic—resist the urge to use garlic powder if you are aiming for that authentic taste. Powder just doesn’t provide the sharp, bright edge that fresh garlic gives. If you are sensitive to raw garlic heat, remember my tip about letting it soak in the lemon juice first; that really calms the fire down beautifully.
Also, think about consistency when you serve it. If you’re planning to use this as a drizzle, like over roasted potatoes or fish, you might want to thin it just a hair right before serving. Even though we don’t want it watery, a little drizzle consistency is nicer than a thick dollop. I usually whisk in a teaspoon of very cold water right before putting it on the table if I’m serving it warm-weather food. Pop over to my main blog for more sauce deep dives!
Storing Your Homemade Aioli Recipe Leftovers
Now these days, I almost never have any Homemade Aioli Recipe leftovers because my family devours it before the first day is even over, but occasionally, I manage to squirrel away a tiny bit in the back of the fridge. Since we aren’t cooking this sauce and it relies heavily on that fresh, raw garlic, storage is really important!
You absolutely must keep this sealed tightly. I found the absolute best way is transferring any leftover garlic aioli into a small glass jar—like one of those little jam jars—and making sure the lid screws on tight. Don’t just cover the bowl with plastic wrap unless you press the wrap directly down onto the surface of the sauce to limit air exposure. Air is the enemy!
The good news is that this sauce keeps really well in the refrigerator for up to a full week. That means you can make a big batch on Sunday and still have amazing sauce for dipping those zucchini fries on Friday! Just keep it cold; it should always be served nice and chilled.
Now, about reheating? Don’t even dream about it! This is a cold, creamy condiment. Put it near heat, and you’ll just end up with separated garlic oil, which is not pretty or tasty. If you want to serve it slightly less cold so the flavors open up, just take the jar out about ten minutes before you plan to use it. That small temperature adjustment makes a huge difference in how much you taste that garlic and lemon.
Serving Suggestions for Your Versatile Sauce Spreads
This is where things get REALLY fun, because you finally have in your arsenal an garlic aioli that is so stable and flavorful, it seriously works on absolutely everything. Forget keeping three or four different jarred dips around. This one creamy condiment can take you from weeknight dinner to weekend BBQ with zero effort.
The obvious first choice, right? Fries! But don’t just stop at regular potato fries. If you’ve seen my recipe for air fryer zucchini fries, you have to dredge those bad boys through this sauce. The coolness and tang of the aioli just cuts right through the crispy outside. It’s amazing!
Beyond dipping, I use this as a thick schmear on sandwiches. Think about swapping out plain mayo on your next turkey club or veggie burger—it instantly elevates it to gourmet status. It even works wonders as a binder when you’re making chicken salad, giving it that little bit of zing that supermarket versions never have.
Pairing the Lemon Garlic Dip with Seafood
Because we added that lovely fresh lemon juice in the base mix, this is naturally a fantastic Lemon Garlic Dip for anything that swims! My absolute favorite thing to make when I have a batch of this aioli ready is baked cod or shrimp. Seriously, toss your shrimp with a little salt and pepper, bake them until they are just pink, and then pull them out and stir them gently right into a bowl of this sauce. Those garlic shrimp zoodles I shared last month are begging for this topping!
It’s just so much silkier than melted butter, and it coats everything perfectly without getting too oily. You feel like you’re eating something incredibly sophisticated, but you made it while the oven preheated!
Frequently Asked Questions About Making garlic aioli
People always have questions when trying out shortcuts, and that’s fair! I want you to feel confident making this garlic aioli perfectly the first time. Here are the things I get asked most often about this quick recipe.
Can I use raw garlic straight from the bulb without soaking it first?
You absolutely *can*, but I’m going to gently steer you away from it if you can help it! If you just smash that garlic in and immediately mix it with the mayo, the flavor will be incredibly sharp, almost aggressively spicy, and a little bitter. That’s why the five-minute pre-soak in the lemon juice is my best tip for a truly gourmet result. If you skip the soak, you’ll still have good flavor, but it won’t be the smooth, integrated taste of the Best Aioli for Fries we’re aiming for. If you absolutely can’t wait, just chew that garlic really, really well first!
What if I absolutely refuse to use mayonnaise in my Homemade Aioli Recipe?
Oh, you purist! That’s tough, because this entire recipe hinges on using mayo as the shortcut base for that amazing texture. If you are dead set on skipping the mayo, you are stepping into the world of traditional emulsion, which takes more time and technique. You would need to start with egg yolks, a whole lot of good oil (like grape seed or a very mild olive oil), and emulsify slowly, slowly, slowly. It’s delicious, but it’s not the Five Minute Condiment experience you came here for! My honest advice? Stick to the mayo base for this recipe, and enjoy the speed.
How long does this easy garlic sauce really last in the fridge?
Because this Easy Garlic Sauce uses raw, fresh garlic, it doesn’t have the preservative power of something cooked. I always recommend keeping it covered tightly in the fridge and aiming to consume it within seven days. Honestly, the flavor probably peaks around day three or four—that’s when the garlic flavor has truly deepened. If you notice any weird discoloration or it starts smelling remotely off, toss it out immediately. Always prioritize food safety over saving a bit of sauce! You can find more general food storage safety info over at our usage guidelines.
Is this recipe suitable for making a Gourmet Sandwich Spread?
Yes! If you want it thicker for spreading, try to keep your mayonnaise cold right up until you mix it, and skip adding any extra water during the whisking process. A slightly heavier mix holds its shape much better when you spread it thickly like an awesome Gourmet Sandwich Spread. It’s incredible on grilled chicken sandwiches.
If you have other questions about making your own garlic aioli, leave a comment below—I read every single one!
Nutritional Estimates for This Creamy Condiment
Because we are using a full-cup of mayonnaise as the base for this Creamy Condiment, the fat content is what you expect from a rich dip. These counts are just estimates based on standard store brands, so your macros might shift a bit based on the specific mayo you choose.
- Serving Size: 2 tablespoons
- Calories: 180
- Fat: 20g
- Saturated Fat: 3.5g
- Carbohydrates: 0.5g
- Sugar: 0.5g
- Protein: 0.5g
Remember, this is a flavorful addition to meals, not a low-calorie base! Enjoy the richness it brings to your table. We appreciate you checking in with our ingredient statements over at the disclaimer page.
Share Your Simple Homemade Sauce Creations
Okay, I’ve given you the secrets to the quickest, creamiest garlic aioli you will ever make. Now the ball is in your court! I desperately want to know what you use it on first. Are you traditional with French fries? Are you brave and dunking roasted asparagus in it? Let me know in the comments below!
If you made this and loved how your Simple Homemade Sauce turned out—or if you have a little tweak that made it even better for you—please leave a rating! Your feedback helps other home cooks feel super confident trying out this recipe. We love seeing your kitchen wins over at our privacy center!
Nutritional Estimates for This Creamy Condiment
Because we are using a full-cup of mayonnaise as the base for this Creamy Condiment, the fat content is what you expect from a rich dip. These counts are just estimates based on standard store brands, so your macros might shift a bit based on the specific mayo you choose.
- Serving Size: 2 tablespoons
- Calories: 180
- Fat: 20g
- Saturated Fat: 3.5g
- Carbohydrates: 0.5g
- Sugar: 0.5g
- Protein: 0.5g
Remember, this is a flavorful addition to meals, not a low-calorie base! Enjoy the richness it brings to your table. We appreciate you checking in with our ingredient statements over at the disclaimer page.
Share Your Simple Homemade Sauce Creations
Okay, I’ve given you the secrets to the quickest, creamiest garlic aioli you will ever make—the one that tastes like it spent hours simmering, not five minutes being whisked! Now the ball is totally in your court. We’ve talked fries, we’ve talked seafood, but I need to know what *you* are doing with this batch!
Did you follow my advice and let that garlic soak in the lemon juice first? Did you use it as a thick smear on a roast chicken sandwich? Tell me! Seriously, drop a comment below right now and let me know what you paired this Simple Homemade Sauce with first. I get so much excitement seeing what you all come up with.
And if you loved how easy (and flavorful!) this turned out, please don’t forget to give the recipe a star rating right underneath the instructions! That really helps other nervous cooks feel confident enough to try skipping the store-bought stuff. If you want to see our policies on reader submissions and comments, you can check them out over at our privacy center. Happy dipping, everyone!
PrintThe Ultimate 5-Minute Creamy Garlic Aioli
Make a rich, restaurant-style garlic aioli in under five minutes using a simple mayonnaise base. This creamy condiment works perfectly as a dip for fries, a spread for sandwiches, or a topping for seafood.
- Prep Time: 5 min
- Cook Time: 0 min
- Total Time: 5 min
- Yield: About 1 cup
- Category: Condiment
- Method: No Cook
- Cuisine: General
- Diet: Vegetarian
Ingredients
- 1 cup good quality mayonnaise
- 3 large cloves fresh garlic, minced very finely or pressed
- 1 tablespoon fresh lemon juice
- 1/2 teaspoon Dijon mustard
- 1/4 teaspoon salt, or to taste
- 1/8 teaspoon black pepper
Instructions
- Place the minced garlic, lemon juice, Dijon mustard, salt, and pepper into a small mixing bowl.
- Add the mayonnaise to the bowl.
- Whisk all ingredients together vigorously until the mixture is completely smooth and uniform.
- Taste the aioli and adjust salt or lemon juice as needed for your preference.
- Cover the bowl and chill in the refrigerator for at least 15 minutes before serving to allow the garlic flavor to fully infuse.
Notes
- For a stronger garlic flavor, let the minced garlic sit in the lemon juice for 5 minutes before mixing with the mayonnaise.
- If you prefer a thinner consistency, add 1 teaspoon of cold water while whisking.
- This aioli keeps well in an airtight container in the refrigerator for up to one week.
Nutrition
- Serving Size: 2 tablespoons
- Calories: 180
- Sugar: 0.5
- Sodium: 250
- Fat: 20
- Saturated Fat: 3.5
- Unsaturated Fat: 16.5
- Trans Fat: 0
- Carbohydrates: 0.5
- Fiber: 0
- Protein: 0.5
- Cholesterol: 15