

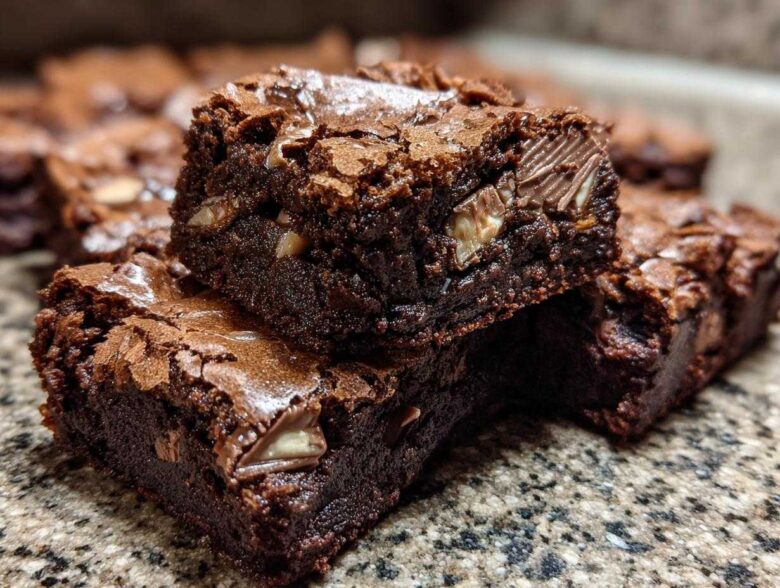
If you’re anything like me, you usually have chocolate calling your name, but sometimes you just don’t have the energy for a fussy, multi-step dessert. Enter the easiest, most ridiculously indulgent thing I’ve baked all year: my decadent **Kit Kat Brownie Bars**! Seriously, these bars are legendary. I brought a pan of these fudgy squares to my neighbor’s birthday BBQ last month, and they vanished before I could even cut a second piece.
They take standard brownies, kick them up a notch with layers of buttery, crispy Kit Kat goodness, and deliver unbelievable texture with almost zero fuss. If you want that bakery-style density without stressing over tempered chocolate—maybe something a bit more substantial than what you get with my banana bread brownies—you’ve found your new favorite weekend baking project. Trust me, the way the candy melts slightly into the chocolate is pure magic.
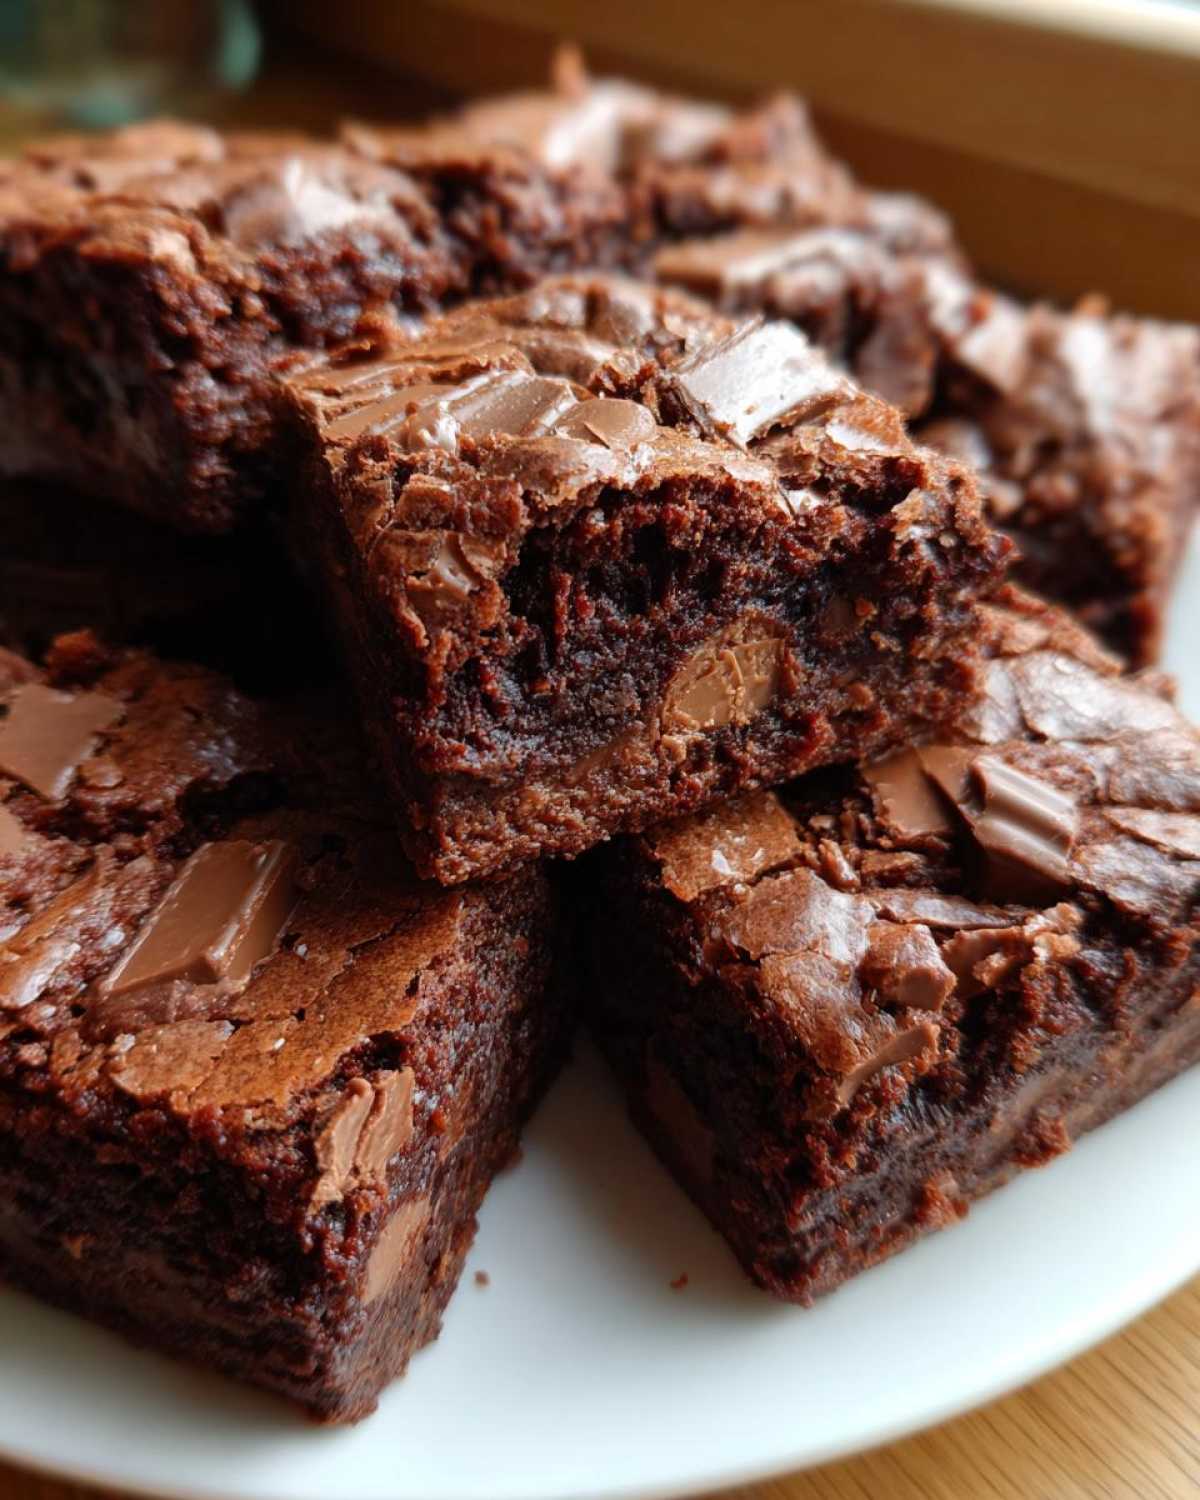
Why You Will Love These Kit Kat Brownie Bars
Honestly, these aren’t just brownies; they are an experience. If I had to convince you quickly why you should stop whatever else you’re doing and make a batch right now, here’s the breakdown. You won’t regret it!
- They nail that perfect texture—seriously fudgy in the middle, a little chewy around the edges. None of that cakey nonsense here!
- Incredibly easy prep time. We’re using melted butter, so no waiting around for butter to soften. It’s a true no fuss brownie recipe.
- That satisfying crunch! The pockets of Kit Kat stay perfectly crispy and add this lovely textural surprise throughout the gooey layered brownies.
- They look way more complicated than they are. Layering them makes them look like they came from a fancy bakery, perfect for potlucks.
- They are the ultimate crowd-pleaser. Kids, adults—everyone goes nuts for the classic chocolate and wafer combo baked right in. They’re great for any chocolate candy bake-off recipes!
When you need a reliable, decadent dessert, these always deliver. They are a fantastic pairing if you’re looking for something to go alongside my brown butter chocolate chip cookies.
Essential Ingredients for Fudgy Kit Kat Brownie Bars
Okay, gathering everything for this is half the battle, but it’s so simple. I always keep the key components ready because you never know when a chocolate craving will strike! You’ll need one cup of unsalted butter, melted down completely first. Make sure you grab four large eggs and two full cups of sugar—yes, two cups, that’s part of the fudgy magic!
For the chocolate punch, we’re using three-quarters of a cup of unsweetened cocoa powder and one cup of flour. Don’t forget that dash of salt and a teaspoon of vanilla. And of course, the star: twelve standard Kit Kat bars, unwrapped and roughly chopped up just before they go into the batter. Check out my Nutella brownies if you want a different twist!
Expert Tips for the Best Kit Kat Brownie Bars Texture
You want deep, dense, and chewy, right? That’s the goal with every batch of these **Kit Kat Brownie Bars**. The texture secrets here are honestly all about restraint in the final steps. If you overmix after the flour goes in, you’re suddenly baking cake, and that is a tragedy we need to avoid!
My biggest tip, which I learned the hard way, is to use room-temperature eggs if you can manage it. They incorporate much smoother into the melted butter and sugar. Also, when you chop those Kit Kats, don’t go too fine. You want real chunks in there for that satisfying crunch against the gooey chocolate base.
Achieving the Perfect Fudgy Kit Kat Brownies
The key to truly fudgy brownies is under-baking them just a tiny bit. When you test with that toothpick, remember what I always say: you are looking for *moist crumbs clinging* to the wood, not a completely dry stick. If the stick comes out clean, you’ve gone too far and you’ll end up with dry chocolate squares.
Also, do not panic about the batter looking slightly too thin or runny before you add the dry ingredients; that’s totally normal because we’re using melted butter instead of creamed butter. Just mix until you see *just* the last streaks of flour disappear. Don’t stir another time after that! If you want to see another brilliant fudgy recipe, check out my fudgy lemon brownies!
Step-by-Step Instructions: How to Make Kit Kat Brownie Bars
Okay, here is where the magic happens, and trust me, making these **Kit Kat Brownie Bars** is so much easier than you think. We move fast, but gently! First things first, we need that oven humming at 350°F (175°C). Line your 9×13 pan with parchment paper—and here’s a pro tip I always use—make sure you leave an overhang on the sides. That parchment hammock is your best friend for lifting them out later!
Preparing the Pan and Batter for Kit Kat Brownie Bars
Start by whisking that melted butter and sugar in a big bowl until they look happy together. Then, beat in your four eggs, one at a time, until everything is nicely emulsified. Stir in the vanilla. Now, grab your cocoa, flour, and salt—whisk those dry things separately so there are no hidden pockets of flour. Add the dry mix to the wet, and I mean it: mix *only* until you see no more white streaks. Stop immediately!
Layering and Baking Your Ultimate Candy Bar Desserts
Now for the layering, which is crucial for that gooey layered brownies feel. Spread half of your perfect batter into the prepared pan. Sprinkle half of your roughly chopped Kit Kats right on top of that first layer. Then, dollop the rest of the batter over the candy and spread it carefully to cover everything up. Finally, sprinkle the remaining Kit Kats right on top to stud the surface.
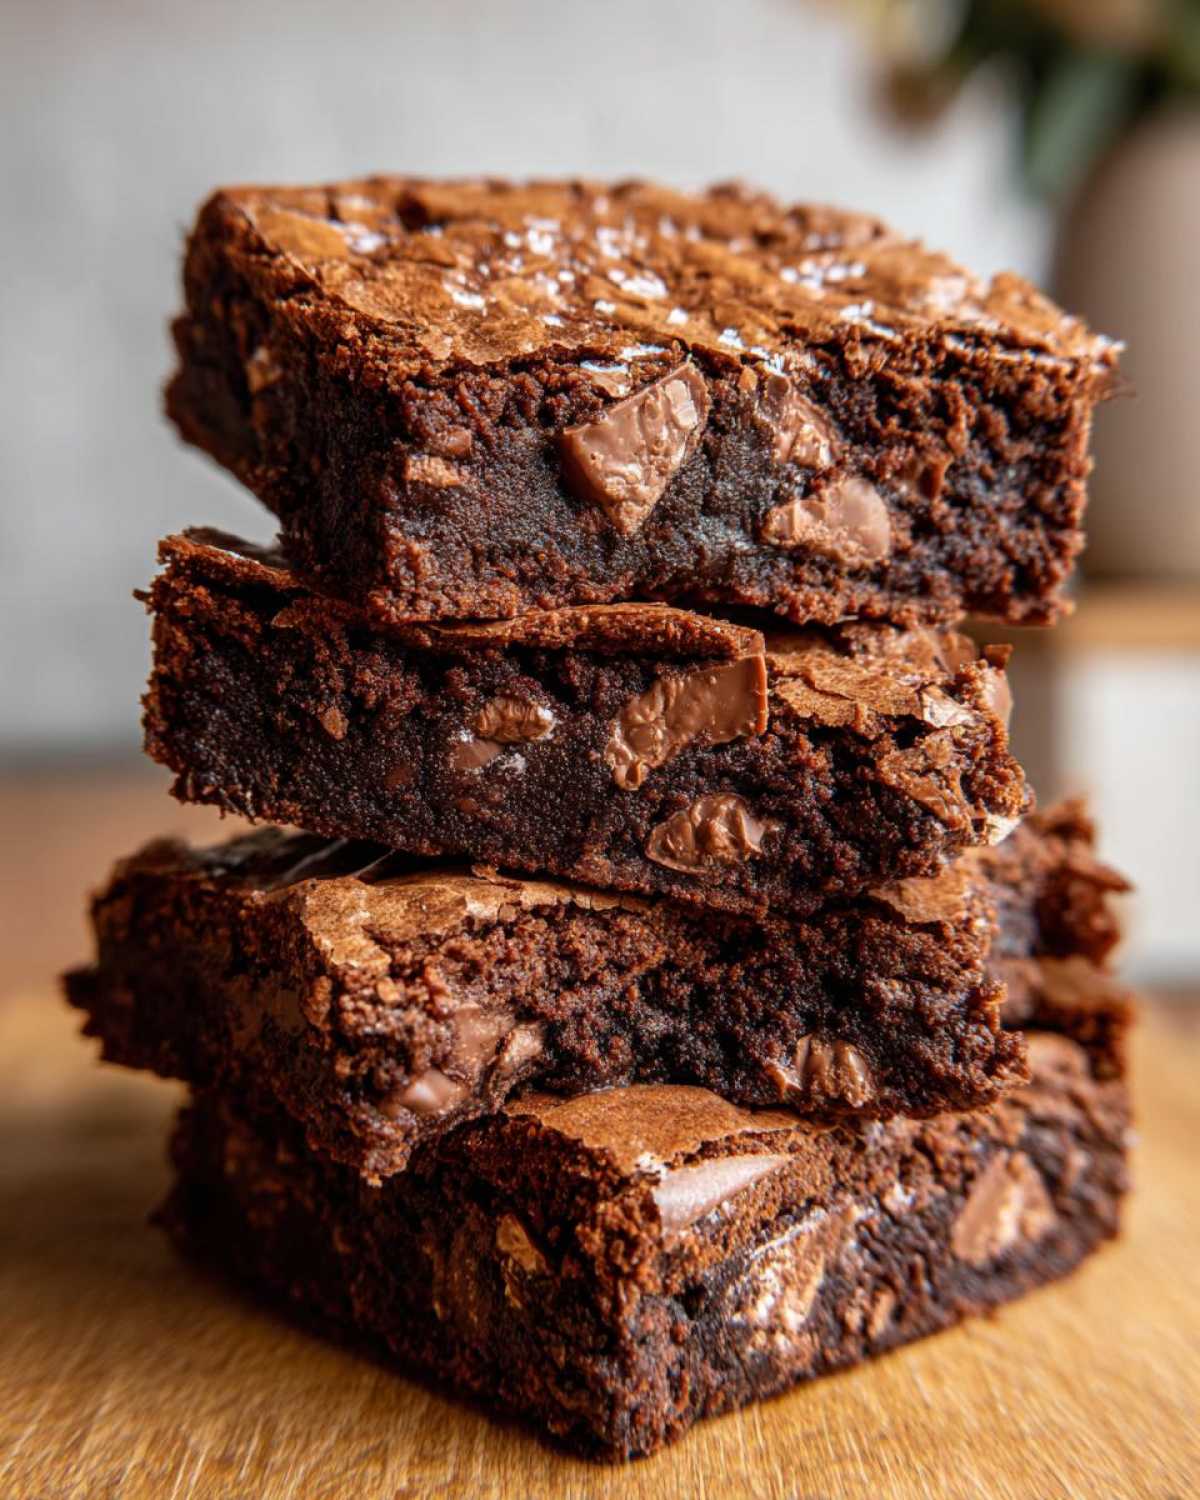
Bake time is short, usually 30 to 35 minutes. Remember our fudgy rule: pull them when that toothpick shows moist crumbs. Anything longer and they turn into tough squares! If you’re looking for an amazing recipe to compare with, check out my guide on making chewy brownies right here: chewy brownies!
Cooling and Cutting Clean Bakery Style Brownie Squares
Oh boy, this is the hardest part, waiting! You absolutely cannot try to cut these **Kit Kat Brownie Bars** while they are even slightly warm. If you rush it, you’ll get a gooey, delicious mess—which is great for eating with a fork right out of the pan, but not great for neat squares!
You have to let them cool completely on a rack, which takes at least two hours. Seriously, walk away! For that true bakery style brownie squares look—those sharp edges just like you see in the display case—I have a little trick I swear by. Once they are completely cooled in the pan, lift them out using the parchment handles and pop the whole slab into the fridge for about 30 minutes.
Chilling them firms up that chocolate and butter just enough so your knife slides through like a dream. Use a big, sharp knife, wipe it clean between cuts, and you’ll get perfect, gorgeous squares every single time! These are so good with my chocolate chip cookies when you want a counter full of sweets.
Storage and Reheating Instructions for Your Kit Kat Brownie Bars
Because these **Kit Kat Brownie Bars** are so incredibly fudgy, we need to treat them right when storing them. Keep them right on the counter in an airtight container for up to four days. Why not the fridge? Well, refrigeration tends to dry out the chewy parts and makes the chocolate base a little too firm, which you definitely want to avoid if you’re aiming for those soft squares.
If it’s super hot in your kitchen, a quick stint in the fridge is okay, but let them sit out for about 20 minutes before digging in so they soften up again, just like we let our dough rest when making my easy moist lemon loaf. If you want to reheat one for a truly gooey experience, 10 seconds in the microwave does the trick every time. They are just as amazing the next day, believe it or not!
Ingredient Notes and Substitutions for Candy Bar Brownies
This recipe is built around that classic Kit Kat crunch meeting the fudgy base, but I know sometimes you don’t have exactly what’s on my list, or maybe you just want to try something new! If you swap out the main candy, just make sure whatever wafer bar you use is roughly the same size so it mimics the texture well. Keep in mind that substituting a candy with a lot more caramel might make things a little gooier in the middle—which isn’t necessarily bad, but it changes the structure of the chewy chocolate squares recipe we are aiming for!
What about the sugar? Do not mess with that two cups of granulated sugar unless you absolutely have to. That amount is vital for controlling the fudginess; less sugar means more gluten development when you mix, and suddenly your bars firm up too much. If you’re out of cocoa powder, I’ve heard some people substitute with melted dark chocolate, but honestly, the flavor profile changes significantly, so I always stick to the unsweetened cocoa powder for the richest, uncomplicated chocolate flavor.
Frequently Asked Questions About Kit Kat Brownie Bars
I always get questions after I share these because everyone wants to know my secrets for making the absolute best **Kit Kat Brownie Bars**! Some people worry about the candy not surviving the baking process, and others just want that perfect texture every time. I’m happy to clear up any confusion!
Can I use other candy bars in this Kit Kat brownie recipe?
Absolutely, you can experiment with other additions if you’re looking to make some really fun easy candy bar brownies! Think Reese’s cups, chopped up Snickers, or even mini peanut butter cups. Just remember that you’re changing the structural integrity slightly. Since the Kit Kat bars have that wafer, they hold up nicely during baking. When you swap, just try to keep the amount of candy roughly the same so you aren’t throwing off the batter balance too much. It’s fun to try different things for a simple bar cookie recipes challenge!
What makes these the best chocolate brownie bars?
It all comes down to two things: melted butter and not overbaking. That melted butter mixed with the high amount of sugar creates such a dense, gooey base. We’re focusing on creating that fudgy structure rather than a cakey top. When you check for doneness, pull them when that toothpick is still a little dirty—that’s the secret to making these the **Best chocolate brownie bars**! Dry brownies are the enemy here, they just aren’t allowed in my kitchen.
How long should I chill the brownies before cutting?
If you want those pristine, sharp edges, you really should chill them. After they have cooled completely (which can take two hours on the counter), slide them into the fridge for at least 30 minutes. This firms up the whole slab so you can get clean cuts without squishing the fudgy insides out. If you don’t chill them, you’ll end up with something closer to a scoopable, warm dessert, which is delicious, but not the bar shape we’re aiming for. Don’t forget to check out my recipe for Oreo cinnamon rolls if you want another easy bake!
Serving Suggestions for Gooey Layered Brownies
These rich squares are perfect all on their own, but presentation is half the fun, especially when you’ve made such divine gooey layered brownies! My favorite way to serve them is slightly warmed up with a big scoop of vanilla bean ice cream melting right over that warm chocolate. A nice, strong cup of coffee helps cut through the richness, too.
If you’re serving them after they’ve cooled completely, just a light dusting of powdered sugar makes them look instantly professional. We have a great guide on making homemade nice cream that pairs perfectly if you want something colder but healthier!
PrintFudgy Kit Kat Brownie Bars
Make rich, chewy brownie bars studded with pieces of Kit Kat candy bars for an easy, crowd-pleasing dessert.
- Prep Time: 15 min
- Cook Time: 35 min
- Total Time: 2 hours 50 min
- Yield: 24 bars
- Category: Dessert
- Method: Baking
- Cuisine: American
- Diet: Vegetarian
Ingredients
- 1 cup (2 sticks) unsalted butter, melted
- 2 cups granulated sugar
- 4 large eggs
- 1 teaspoon vanilla extract
- 3/4 cup unsweetened cocoa powder
- 1 cup all-purpose flour
- 1/2 teaspoon salt
- 12 standard size Kit Kat bars, unwrapped and roughly chopped
Instructions
- Preheat your oven to 350°F (175°C). Line a 9×13 inch baking pan with parchment paper, leaving an overhang on the sides for easy removal. Lightly grease the paper.
- In a large bowl, whisk together the melted butter and sugar until combined.
- Beat in the eggs one at a time, mixing well after each addition. Stir in the vanilla extract.
- In a separate bowl, whisk together the cocoa powder, flour, and salt.
- Gradually add the dry ingredients to the wet ingredients, mixing only until just combined. Do not overmix to keep the brownies fudgy.
- Spread half of the brownie batter evenly into the prepared pan.
- Sprinkle half of the chopped Kit Kat pieces over the batter layer.
- Dollop the remaining brownie batter over the Kit Kats, spreading gently to cover.
- Top with the remaining chopped Kit Kat pieces.
- Bake for 30 to 35 minutes. A toothpick inserted near the center should come out with moist crumbs attached, not wet batter.
- Let the brownies cool completely in the pan on a wire rack, about 2 hours, before lifting them out using the parchment paper overhang.
- Cut into squares before serving.
Notes
- For the fudgiest texture, avoid overbaking; slightly underdone is better than dry.
- If you prefer a chewier edge, bake closer to 35 minutes.
- Chill the cooled brownies for 30 minutes before cutting for cleaner squares.
Nutrition
- Serving Size: 1 bar
- Calories: 250
- Sugar: 28g
- Sodium: 110mg
- Fat: 13g
- Saturated Fat: 8g
- Unsaturated Fat: 5g
- Trans Fat: 0.2g
- Carbohydrates: 33g
- Fiber: 1g
- Protein: 3g
- Cholesterol: 60mg