

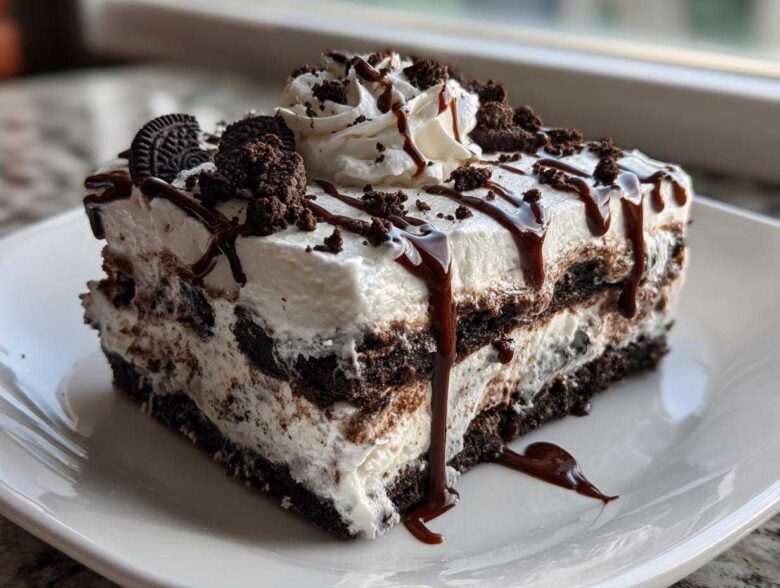
When the summer heat hits, honestly, the last thing I want to do is turn on the oven. Julian and I, we’re all about intention here at Magazine Meal, but sometimes intention means finding the easiest, most satisfying route to dessert! If you need a showstopper for a birthday or just a way to end a perfect summer day, this ice cream cake is it. I’m calling this the Easy No-Bake Oreo Ice Cream Sandwich Cake because it genuinely requires zero baking skill—just freezer space and a love for layers. It’s designed to be simple, beautiful, and ready when you are.
For anyone who feels like they need a complicated, multi-stage recipe to prove themselves in the kitchen, trust me, this isn’t one of those. This is the kind of straightforward, crowd-pleasing frozen treat that lets you focus on celebrating instead of stressing. You can find more about how we aim for intention over perfection over on our About Us page. Let’s make some magic!
Why This Easy No-Bake Oreo Ice Cream Cake is Your New Favorite Frozen Party Dessert
When you’re hosting, you want the dessert to be a highlight, not a hurdle. This ice cream cake is truly what I turn to when I need a guaranteed win for a crowd. It just takes the usual fuss out of building a fantastic layered frozen dessert. Seriously, who doesn’t love an irresistible oreo ice cream cake?
- It’s incredibly flexible, letting you swap out flavors if you want to try a fun twist on a simple ice cream dessert.
- It requires zero actual baking, meaning our oven stays off, and you stay cool! We’ve done the same intentional baking balance with our chocolate chip cookies recipe, and this follows that simple philosophy.
- It looks infinitely more impressive than the effort you actually put in—it’s a visual stunner for any celebration.
Simple Assembly for the Perfect Layered Frozen Dessert
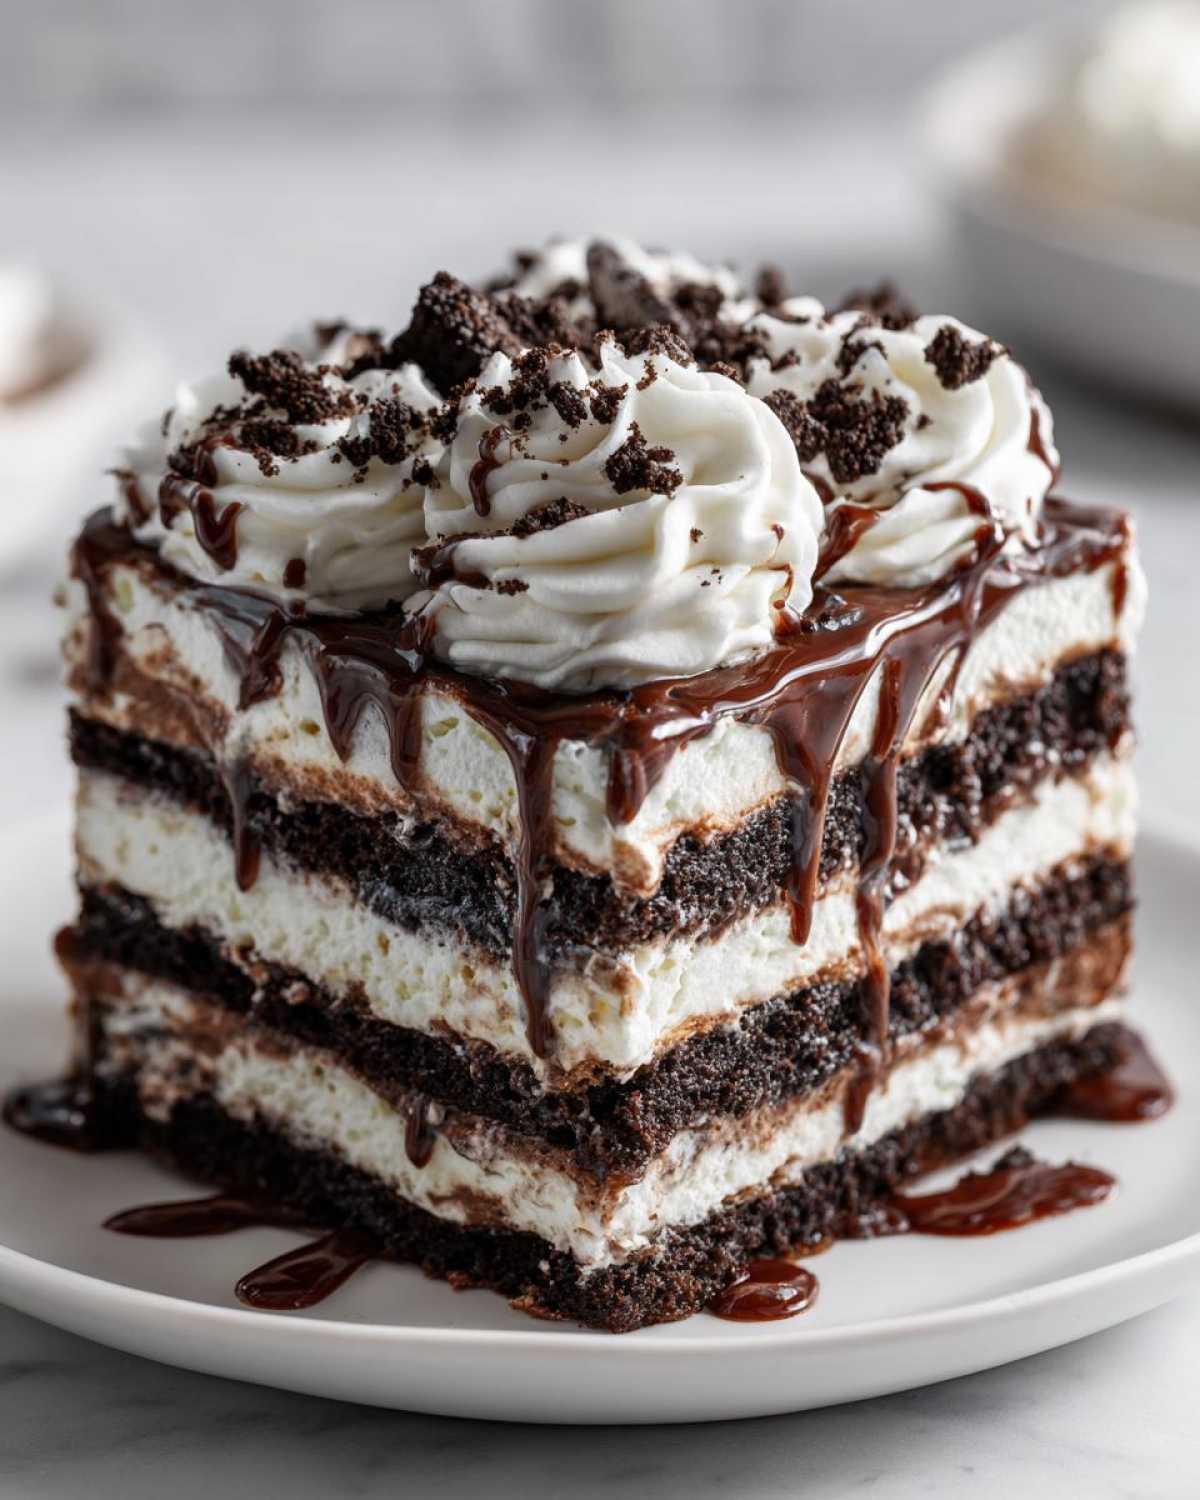
The secret weapon here is those pre-packaged ice cream sandwiches. We use them instead of fussing with crushing cookies for the base layer and then baking a separate brownie, which just adds unnecessary steps. They fit perfectly edge-to-edge in the pan, giving you a solid, even foundation. This makes sure every single slice of this easy homemade ice cream cake has that satisfying, sturdy structure we crave.
Make Ahead Ice Cream Cake: Planning Ahead Made Simple
This recipe is a lifesaver for party planning. Because it needs so long chilling in the freezer, it becomes the ultimate make ahead ice cream cake. You assemble it the day before, and then you’re totally free on party day. That hands-off freeze time is crucial when you’re aiming to serve a memorable frozen party dessert without running around at the last minute.
Gathering Ingredients for Your Oreo Ice Cream Cake
Okay, for this ice cream cake, precision in preparation—not in cooking, since there’s no heat involved!—is what makes the layers look magazine-worthy. Because we are just assembling, we need everything ready to go before we commit to layering. I always lay out my list and check off the exact state of each component. You don’t want rock-hard ice cream or soup when you’re building this thing!
Here is what you need to collect. Don’t skimp on that fudge sauce; you’ll thank me later! If you want another simple but delightful recipe where ingredients really matter, check out my guide on easy three-ingredient cookies; the same principle applies here!
- 1 (14.3 ounce) package frozen chocolate ice cream sandwiches
- 1 quart vanilla ice cream, softened slightly
- 1 quart chocolate ice cream, softened slightly
- 1 cup crushed Oreo cookies (about 12 cookies)
- 1 (8 ounce) container frozen whipped topping, thawed
- 1 cup fudge sauce, warmed slightly
- 1/2 cup crushed Oreo cookies for topping
Ingredient Clarification and Preparation
This is where we ensure our layered frozen dessert sets up perfectly. The most important thing is timing the ice cream softening. You want it soft enough to spread smooth in under a minute—think of soft-serve consistency, not melted soup. If it gets too liquid, your layers will bleed together, and we want crisp differentiation!
Speaking of crushing, notice we need Oreos in two spots. That first cup gets crushed finely for sneaking between the ice cream layers. The last half cup for the very top can be slightly chunkier; I like the texture variation. And make sure your whipped topping is completely thawed out on the counter before you start assembly. We want fluffy cloud-like topping, not icy chunks, especially since we are making an easy homemade ice cream cake!
How to Make an Easy Homemade Ice Cream Cake Step-by-Step
Alright, it’s time to build this beauty! Because we’re not using any heat, this whole assembly moves pretty fast, but you need to be organized. Think of this less like baking and more like slightly messy, delicious stacking. I love how straightforward this ice cream cake recipe is; it truly feels like cheating!
If you’re digging the assembly process of this no-bake wonder, you might want to check out the tips Julian and I laid out for our moist lemon loaf—it shares a similar philosophy about structure and texture!
Preparing the Pan and First Layer
First things first: grab a 9×13 inch pan. You absolutely must line it really well with plastic wrap, making sure you leave a good amount of overhang on all sides. This overhang is your handle later! Once wrapped, lay your chocolate ice cream sandwiches tightly across the bottom. I mean snugly. Cut a few to fill in any gaps so you have one completely solid starting plane. This structure is what keeps this whole ultimate ice cream cake from falling apart when you slice it later.
Building the Creamy Ice Cream Cake Layers
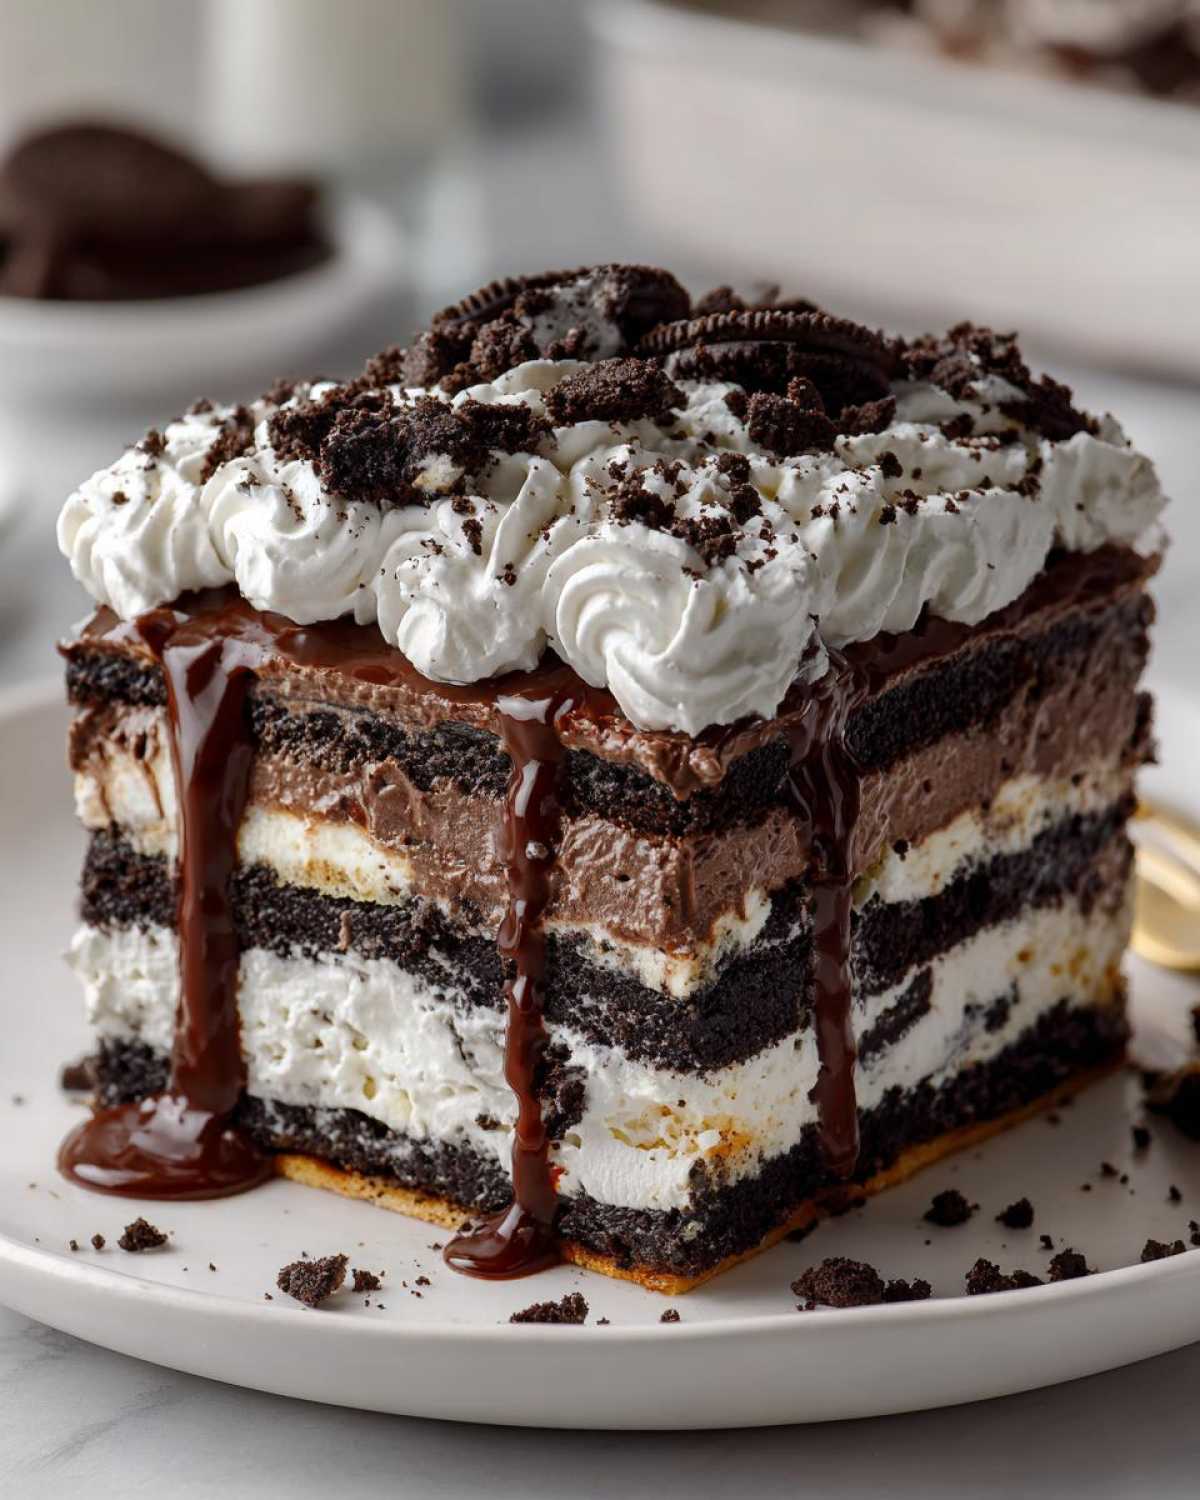
Now for the good stuff. Take your slightly softened vanilla ice cream and spread it evenly over that sandwich layer. Don’t press down hard, we just want a smooth blanket. Next, sprinkle half of those crushed Oreos right over the vanilla. Don’t be shy! Then, take your second ice cream flavor—the chocolate—and spread that smoothly over the cookies. Follow that immediately by sprinkling the remaining cookie crumbs on top of the chocolate layer. This middle crunch layer is the signature of a great ice cream cake!
Topping and Final Freeze Time
Once the layers are stacked, spread out your fully thawed whipped topping evenly across the top layer of cookies. Then, gently drizzle that warm fudge sauce all over the topping—it sinks in just enough. Finish it off with that last sprinkle of crushed Oreos for decoration. Now, cover it tightly with your plastic wrap overhang. This needs serious chill time! Tuck it into the back of the freezer for at least six hours, but honestly, overnight is *always* better for an easy homemade ice cream cake. If you want inspiration for other fun frozen treats, check out the method over at Sweet Craft Recipes!
Tips for the Best Ice Cream Cake Presentation
Okay, your incredible ice cream cake has been perfectly chilly overnight, and now comes the moment of truth: getting it out of the pan and making it look like the stunning cover feature it is! Since this is a make ahead ice cream cake, you want the final presentation to be flawless, even if the assembly was super casual.
We lined that pan with plastic wrap for a reason, remember? Now, grab those overhang pieces (don’t tug on the cake itself!) and gently lift the entire solid structure straight out of that 9×13 pan and onto your serving platter. It should pop right out. If you wanted cleaner, sharper edges, I highly recommend using a springform pan next time; it makes releasing the sides unbelievably simple. Julian, who handles most of the plating, really prefers the springform pan for that picture-perfect moment we always talk about!
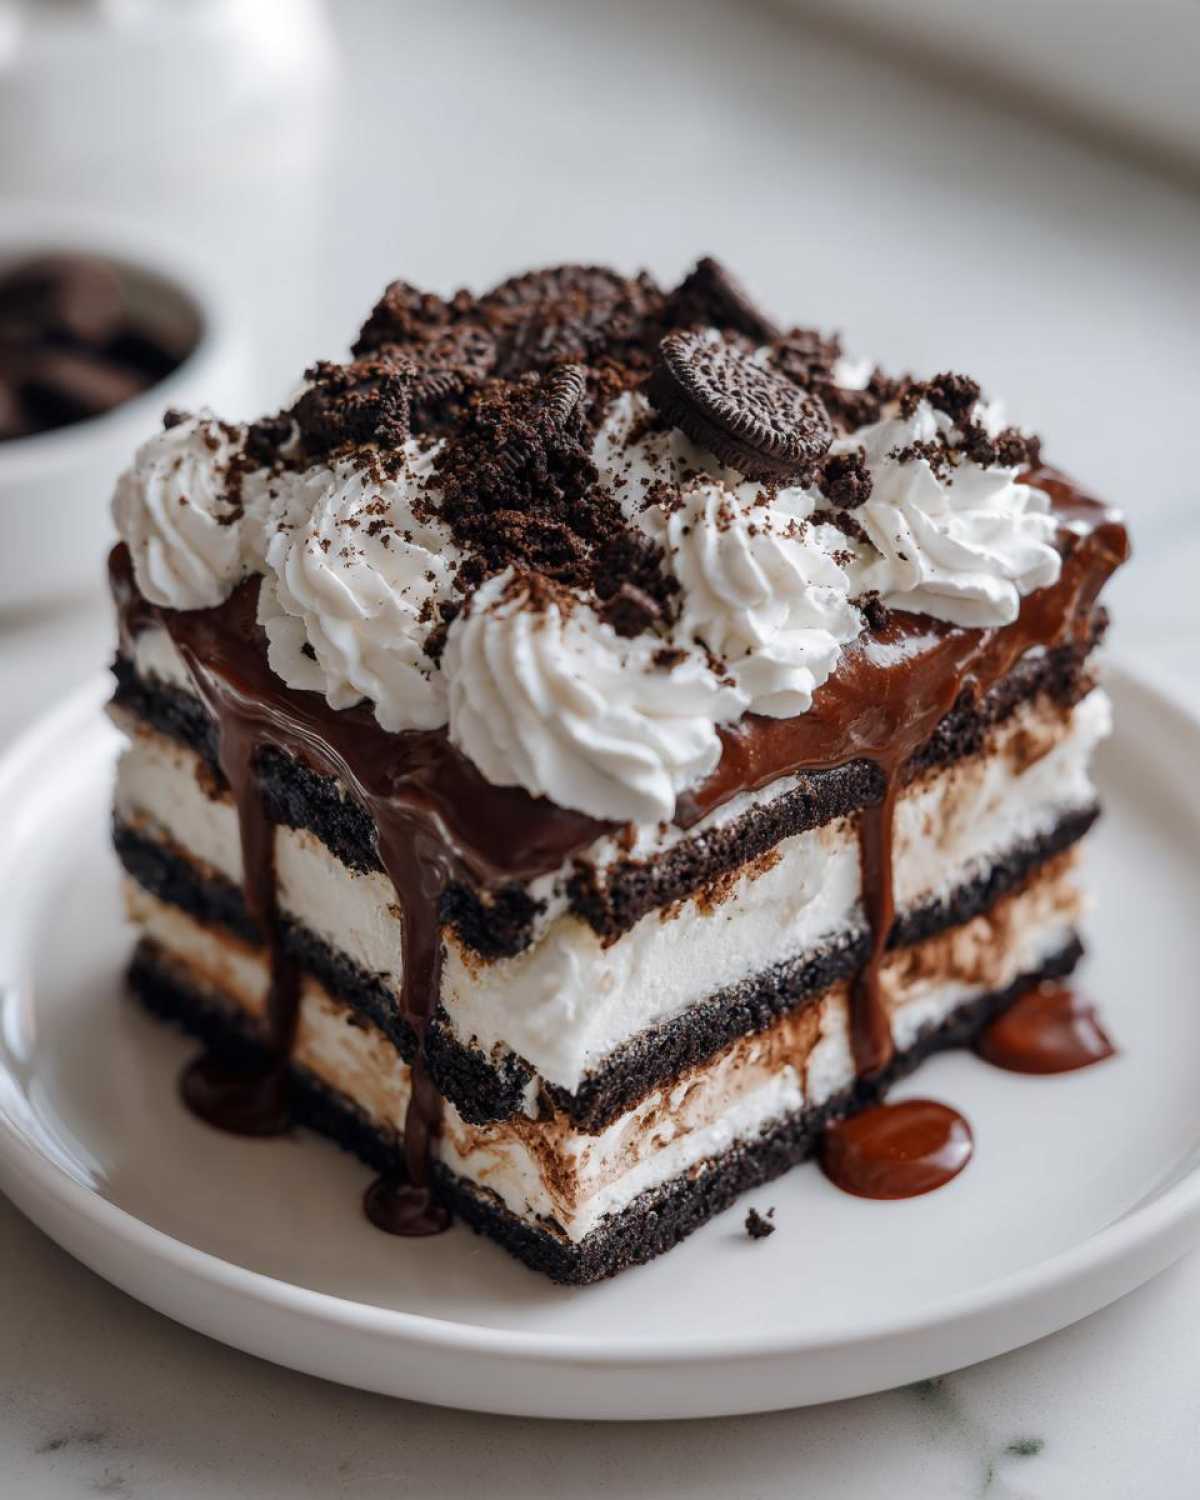
Now, even though this is frozen, you can’t just grab a knife and hack at it. Trust me, that leads to disaster and very sad-looking slices of layered frozen dessert. You absolutely need to let it sit on the counter for about 5 to 10 minutes before slicing. This short rest time softens the edges just enough so your knife glides through those cookie crumbs and ice cream without forcing anything. If I see any stray crumbs on the edge, I just wipe my knife clean, maybe dip it quickly in hot water like I do when plating sauces for our garlic aioli, then slice again. It keeps those sides looking sharp!
For inspiration on making a really gorgeous, structured dessert, take a look at the presentation techniques used in this copycat Dairy Queen style cake. Seeing how they manage those layers always gives me great ideas for how to place my final fudge drizzle!
Serving Suggestions for This Crowd Pleasing Frozen Treat
Since this ice cream cake is already such a powerhouse of chocolate, vanilla, and crunch, I often find it doesn’t need much else. It’s already the main event, bless its frozen heart! But if you are serving it after a big meal, sometimes you just want a little something vibrant on the side to cut through all that richness.
For us, simple is best. We usually serve it straight up, but if we’re feeling fancy—maybe we invited friends over after a big summer barbecue—I like preparing a quick bowl of fresh berries. A handful of raspberries or sliced strawberries adds such a gorgeous pop of color against the dark fudge and white whipped topping. It’s so simple, but those slightly tart fruits just refresh your palate perfectly.
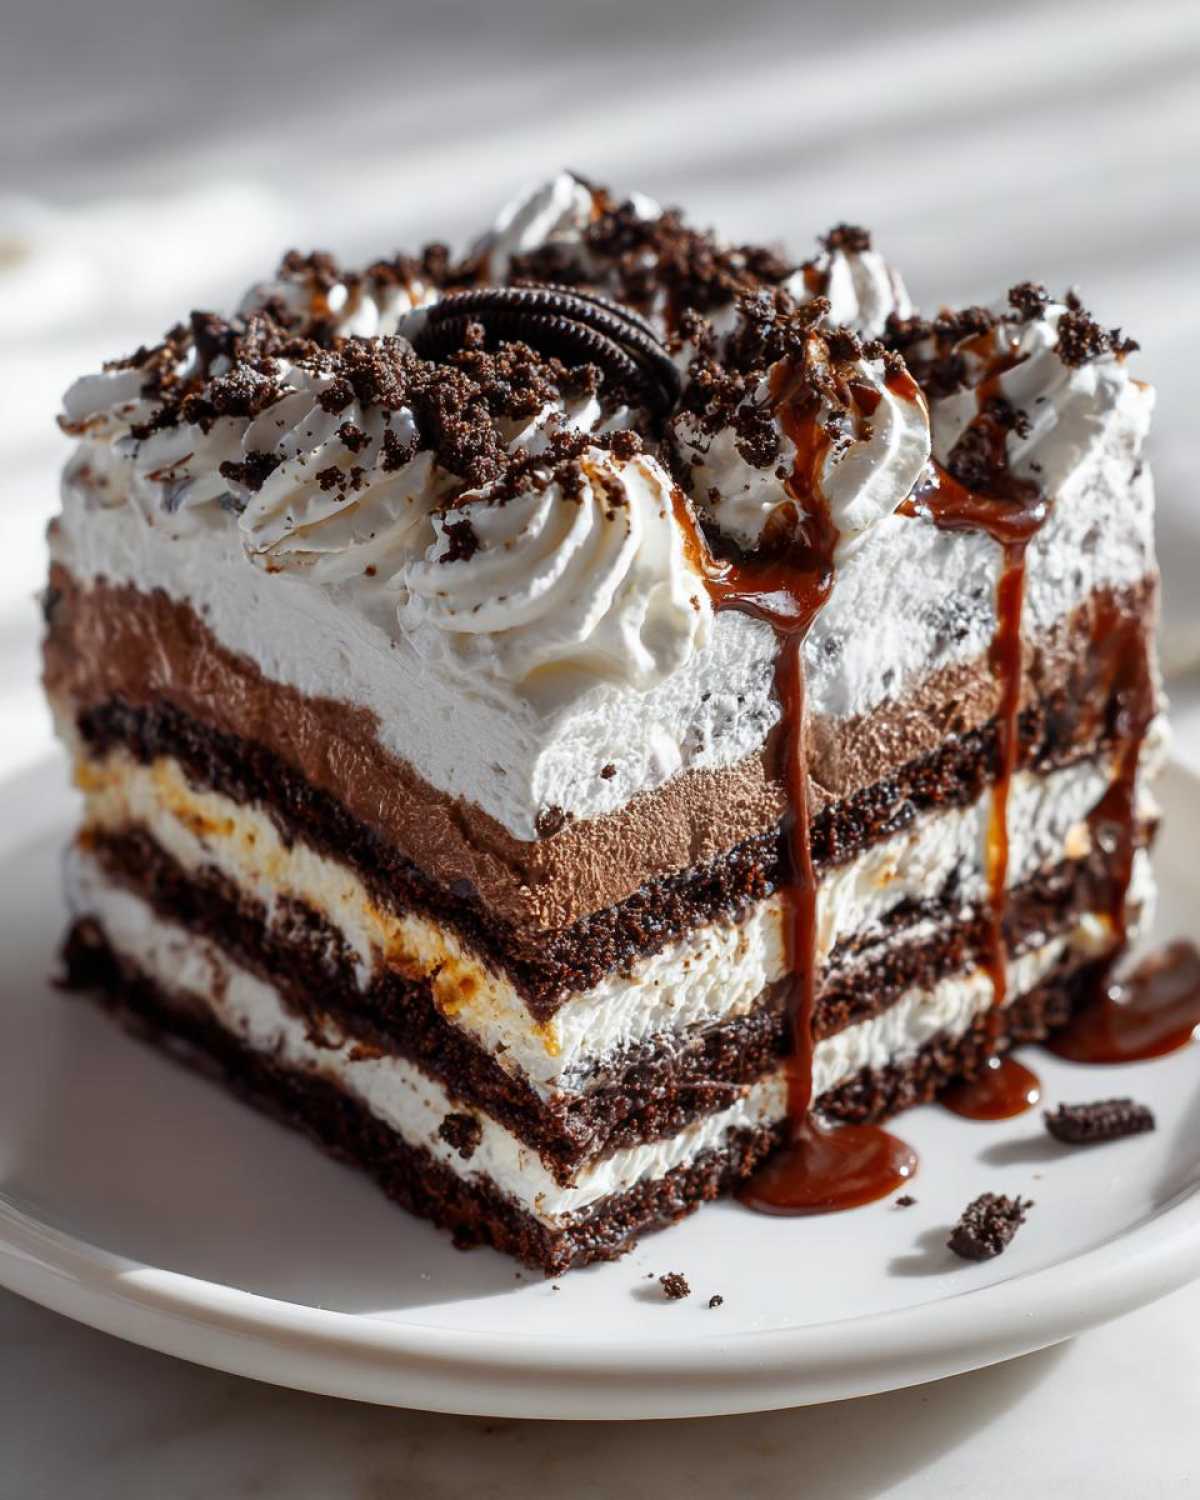
Another small thing that makes a huge difference? A tiny extra drizzle of warm fudge right before it hits the plate. I just keep a little bit of the fudge sauce warm in a mug near the serving station. It looks intentional and adds a professional touch without taking any extra effort. It’s one of those little styling tricks I picked up over the years that makes everything look like it belongs on the cover of a magazine, even if it’s just Tuesday night dessert!
If you enjoy making dipping sauces that feel fancy but are secretly simple, you have to check out the recipe Julian developed for our Cowboy Butter. It gives you that same feeling of serving something exceptional with minimal actual work!
Storage and Reheating Instructions for Your Ice Cream Cake
One of the best things about this ice cream cake is that it’s essentially designed to be stored! Since we spent all that time layering and perfecting the structure, we definitely want it to last more than one afternoon. Remember how I stressed that freezing it overnight is ideal for slicing? Well, that long freeze time is also fantastic for long-term storage. This really is the ultimate make ahead ice cream cake solution for busy weeks.
Since we made sure to wrap this thing tightly in plastic wrap—using those big overhang flaps we tucked in snugly—it’s already set up perfectly for the freezer. You don’t need to do much more work to keep this easy homemade ice cream cake fresh for your next party.
Here is the deal on keeping it pristine:
- If you’re using a standard 9×13 pan (still wrapped tightly!), it should keep beautifully in the freezer for up to two weeks. The plastic wrap stops it from absorbing any weird freezer smells, which is key!
- If you used a springform pan for those cleaner sides, make sure the locking clasp is holding tight, or just transfer the whole thing (still on the base) to a large, sealable container or wrap it extra heavily in foil.
Now, about reheating—hah! That made me laugh. We aren’t reheating this; we’re thawing it! The goal is always to bring it back to that perfect, sliceable state, not to melt it into soup. If you baked something like our air fryer gnocchi, you’d reheat it, but freezer meals are different!
When it’s time to serve, pull your gorgeous ice cream sandwich cake out of the freezer and let it hang out on the counter for those crucial 5 to 10 minutes we talked about earlier. That’s the “reheating” period. Any longer than that, and you risk the whipped topping layer starting to sweat, and we don’t want that shiny puddle on top of our beautiful decoration! If you are planning way ahead, just remember that the longer it sits, the softer the layers will get once you finally take it out.
For more ideas on no-bake desserts that handle long freeze times well, check out the inspiration Sarah shares over at Fresh April Flours on her sheet cake version!
Frequently Asked Questions About Making an Ice Cream Cake
Even though this ice cream cake is super simple, I know sometimes those questions pop up once you start laying things out on the counter. It’s my job here at Magazine Meal to make sure nothing stands between you and that perfect, creamy slice. I’ve gathered the questions I usually get when I bring this dish to parties. Julian always asks the same things, even after eating it three years in a row!
If you’re curious about making your own base, we have a great article coming soon about banana-based ice creams which is perfect if you want to explore the no-churn route further, you can peek at the guide on nice-cream methods!
Can I substitute the Oreos in this no bake ice cream cake recipe?
Absolutely! This is your personal feature story, so you get to choose the leading actors, right? If you aren’t an Oreo fanatic, or maybe you just don’t have them on hand, swapping those crunchy cookie layers is easy. You can absolutely use vanilla wafers or even Nilla Wafers if you want a slightly milder flavor that lets the ice cream shine more. My favorite alternative, if I’m feeling ambitious, is crushing up some of my homemade fudge brownies—that turns it into an amazing brownie ice cream cake!
The important part is maintaining that textural contrast. We need a dry, slightly crisp element between the soft ice cream layers to make it count as a proper crunchy cookie layer dessert. Graham crackers work too, though remember they are a bit more fragile than the dense Oreos are.
What is the best way to cut this layered frozen dessert cleanly?
This is the moment where presentation can break down if you aren’t careful! Remember how I mentioned letting the cake rest on the counter for 5 to 10 minutes first? That’s trick one. Trick two is using hot water. You need a large, sharp knife—not a flimsy butter knife! Heat up some water in a tall glass or pitcher until it’s nice and hot.
Dip the knife blade completely into the hot water, let it sit for just three or four seconds, wipe the blade completely dry, and then press straight down through your ice cream cake. You want a clean slice on the first try. As you slice each piece, dip the knife again, wipe it dry, and cut the next slice. It seems fussy, but it keeps the fudge and whipped topping from smearing all down the sides of your beautiful slice of layered frozen dessert!
Nutritional Estimates for This Simple Ice Cream Dessert
Now, let’s talk facts, because even though this ice cream cake feels like pure indulgence—and trust me, it is!—it’s good to have a general idea of what we’re serving up, especially for those friends who are tracking things!
I want to be totally transparent: Julian and I are cooks, not dietitians. These numbers are just ballpark estimates based on standard ingredient brands listed in the recipe. When you swap out ice cream flavors or use different cookies, these values change, so take this as a guideline for your amazing creation, not gospel!
Here is what you can generally expect per slice of this frozen treat:
- Serving Size: 1 slice
- Calories: 450
- Sugar: 45g (That’s where the deliciousness comes from!)
- Fat: 25g
- Saturated Fat: 15g
- Carbohydrates: 55g
- Protein: 6g
- Cholesterol: 35mg
It’s definitely rich, but remember, this is a celebration dessert! You make a no bake ice cream cake recipe like this, you aren’t expecting a salad, you know? It’s a huge, crowd-pleasing treat designed to be the unforgettable feature of your gathering. Enjoy every bite!
Share Your Ultimate Ice Cream Cake Creations
Well, friends, we’ve reached the end of the feature article on this incredible ice cream cake! We started with a goal to make something truly special without spending all day in the kitchen, and I really hope this ice cream sandwich cake lives up to being the main event at your next party. Julian and I poured all our focus into making this recipe as foolproof as possible so you can focus on making memories instead of chasing perfect piping lines.
Now that you’ve had a chance to assemble this masterpiece, I genuinely want to see what you created. Did you stick to the vanilla and chocolate, or did you go rogue and build a completely custom layered frozen dessert? Did you add some chopped pecans for texture, or maybe swap the fudge for salted caramel? We love hearing about your creative variations!
Please take a moment and leave a rating for the recipe right here on the blog. Your feedback helps other folks scrolling through our articles decide if this is their next great culinary feature. If you’ve snapped a picture of your glorious, towering ice cream cake, tag us on social media! We feature reader photos on our main blog page sometimes, and honestly, nothing inspires us more than seeing your beautiful, intentional creations coming to life in your own kitchens.
Thank you so much for flipping through these pages with us. Keep making meals that matter, and keep treating your everyday eats like the cover story they deserve to be. Happy freezing, everyone!
PrintEasy No-Bake Oreo Ice Cream Sandwich Cake
You can make this crowd-pleasing, layered frozen dessert without turning on your oven. This easy homemade ice cream cake uses ice cream sandwiches for a simple structure perfect for birthdays or summer parties.
- Prep Time: 25 min
- Cook Time: 0 min
- Total Time: 6 hours 25 min
- Yield: 12 servings
- Category: Dessert
- Method: No-Bake Freezing
- Cuisine: American
- Diet: Vegetarian
Ingredients
- 1 (14.3 ounce) package frozen chocolate ice cream sandwiches
- 1 quart vanilla ice cream, softened slightly
- 1 quart chocolate ice cream, softened slightly
- 1 cup crushed Oreo cookies (about 12 cookies)
- 1 (8 ounce) container frozen whipped topping, thawed
- 1 cup fudge sauce, warmed slightly
- 1/2 cup crushed Oreo cookies for topping
Instructions
- Line a 9×13 inch baking pan with plastic wrap, leaving an overhang on the sides to help lift the cake later.
- Arrange a single layer of ice cream sandwiches tightly across the bottom of the prepared pan, trimming them if necessary to fit snugly.
- Spread the softened vanilla ice cream evenly over the layer of ice cream sandwiches.
- Sprinkle half of the crushed Oreo cookies over the vanilla ice cream layer.
- Spread the softened chocolate ice cream evenly over the Oreo layer.
- Top the chocolate ice cream with the remaining half of the crushed Oreo cookies.
- Spread the thawed whipped topping evenly over the top layer.
- Drizzle the warm fudge sauce over the whipped topping.
- Sprinkle the final 1/2 cup of crushed Oreos over the fudge layer.
- Cover the pan tightly with the plastic wrap overhang and freeze for at least 6 hours, or preferably overnight, until completely firm.
- When ready to serve your ultimate ice cream cake, use the plastic wrap overhang to lift the cake from the pan onto a serving platter.
- Let the cake sit at room temperature for 5 to 10 minutes before slicing into thick servings.
Notes
- For the best layering, make sure your ice cream is softened enough to spread but not melted.
- If you want a copycat ice cream cake look, use a springform pan instead of a 9×13 pan for easier removal and cleaner sides.
- You can substitute any ice cream flavors you prefer for a custom layered frozen dessert.
Nutrition
- Serving Size: 1 slice
- Calories: 450
- Sugar: 45g
- Sodium: 250mg
- Fat: 25g
- Saturated Fat: 15g
- Unsaturated Fat: 10g
- Trans Fat: 1g
- Carbohydrates: 55g
- Fiber: 2g
- Protein: 6g
- Cholesterol: 35mg