

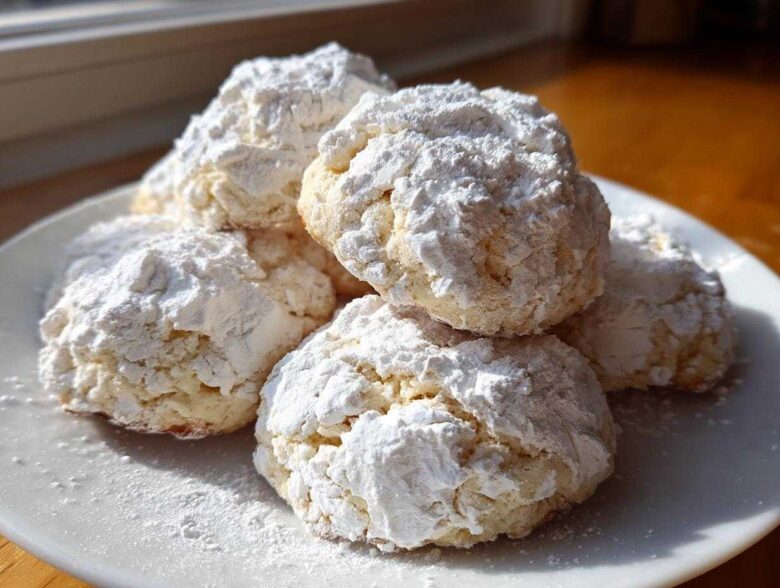
When you need a dessert—and I mean *need* it right now—there’s no time for sifting flour or chilling dough for hours. You just need sweet, comforting baking magic using what you already have. Believe me, I’ve perfected dozens of pantry baking hacks over the years. I’m always sharing my best finds over on the main blog page, which is why I’m so excited to share these **cool whip cookies** with you. They are genuinely the softest, fluffiest treats you will ever whip up, often needing just three basic pantry staples: cake mix, whipped topping, and an egg. If you’re looking for reliable texture and almost zero fuss, these little wonders deliver every single time. Seriously, they are a game-changer for busy weeknights!
Why These Cool Whip Cookies Are the Ultimate Simple Baking Hack
If you’re tired of the creaming butter and sugar marathon, these cookies are your answer. I’m telling you, these are the key to instant gratification in the baking world. They’re perfect for a sudden craving or when you need a quick batch of treats for friends without spending an entire afternoon in the kitchen. People often ask me for **quick dessert ideas**, and this recipe always tops the list. You can see some other fast recipes like my peanut butter pie over here, but nothing beats these cookies for speed!
- They come together in less than five minutes of active mixing time.
- Cleanup is a breeze—you only dirty one bowl!
- They provide incredibly **fluffy cookies** that stay soft for days.
- They are a budget-friendly way to use up that half-empty box of cake mix in the pantry.
Achieving That Signature Melt in Your Mouth Cookies Texture
The secret weapon here isn’t the cake mix, though that helps! It’s the thawed Cool Whip. When you mix that stabilized topping into the dough, it introduces air and moisture that traditional recipes have to work ages to incorporate. Think about it: you’re basically starting with a pre-whipped, stabilized base!
This means you skip all the creaming of butter and sugar required for lift. The Cool Whip holds onto that fluffiness during the short bake time, giving you a wonderfully light, airy crumb. That’s why folks call them **melt in your mouth cookies**—they just dissolve the second you bite in. Trust me, it’s baking genius!
Gathering Ingredients for Your 3 Ingredient Cookies
Okay, let’s talk ingredients. This is the section where I stress how crucial precision is when you’re working with just a few components. If you mess up one part, the whole soft texture can go sideways on you, and we definitely don’t want that for our **cool whip cookies**! You need a standard box of cake mix—we’re talking the 15.25-ounce size—and whatever flavor your heart desires. Next up is the magic ingredient: one cup of frozen whipped topping, and this is important, it absolutely has to be thawed completely before you start mixing.
You will also need one large egg to bind everything together. And finally, don’t forget the powdered sugar for rolling! You’ll need about a cup for a good, thick coating. If you’re planning to try my next recipe idea, these are the absolute **staple ingredient cookies** you need on hand. Before you go whipping up a batch, check out my recent apple pie oats recipe for another pantry win!
Ingredient Notes and Staple Ingredient Cookies Swaps
The cake mix flavor makes a huge difference in the final color and taste. If you want a classic, light sugar cookie flavor, go for vanilla or yellow cake mix. Of course, I always push the limits, so if you use chocolate cake mix, you get these incredibly dark, fudgy cookies!
I’ve tried substituting the standard whipped topping before, and here’s my honest take: stick to the container brand or a generic equivalent that mimics its structure. Why? Because those stabilizers in the commercial tubs are what keep the structure light and airy during mixing and prevent it from collapsing into soup when it hits the oven. Homemade whipped cream just doesn’t have that staying power for this particular recipe. Don’t risk it if you want that signature **cool whip cookies** fluff!
Step-by-Step Guide to Making Cool Whip Cookies
Alright, let’s get baking! This process is so fast you’ll wonder why you ever bothered with recipes that require chilling time. First things first, get your oven warmed up to 350 degrees F (175 degrees C). I always line my cookie sheets with parchment paper. I know, some people claim it’s extra, but trust me, lifting delicate **cool whip cookies** off a hot sheet without one sticking is worth the tiny effort!
Next, you’re going to mix the dough. Grab a medium bowl—ideally one large enough that you aren’t afraid of a little splatter! Dump in your dry cake mix, scoop in that fully thawed whipped topping, and crack in your egg. You just need to mix this with a wooden spoon or a sturdy spatula until **just combined**. I have to stress this: do not reach for an electric mixer here! Overmixing equals tough cookies, and we are aiming for that fluffy texture. Mix until you no longer see white streaks of topping, then stop immediately. It will look like a very soft, slightly sticky batter.
Now, set up your dipping station. You’ll need a shallow plate filled with powdered sugar. Roll the dough gently into small balls, about the size of a teaspoon, and then roll them thoroughly in the sugar until they are completely hidden. Just a quick note—if the dough is super messy, pop the whole bowl into the fridge for fifteen minutes. It firms up enough to handle. While you’re waiting for the oven, check out my recipe for amazing orange chicken—it’s another one of my weeknight heroes!
The Secret to Perfect Powdered Sugar Cookies Coating
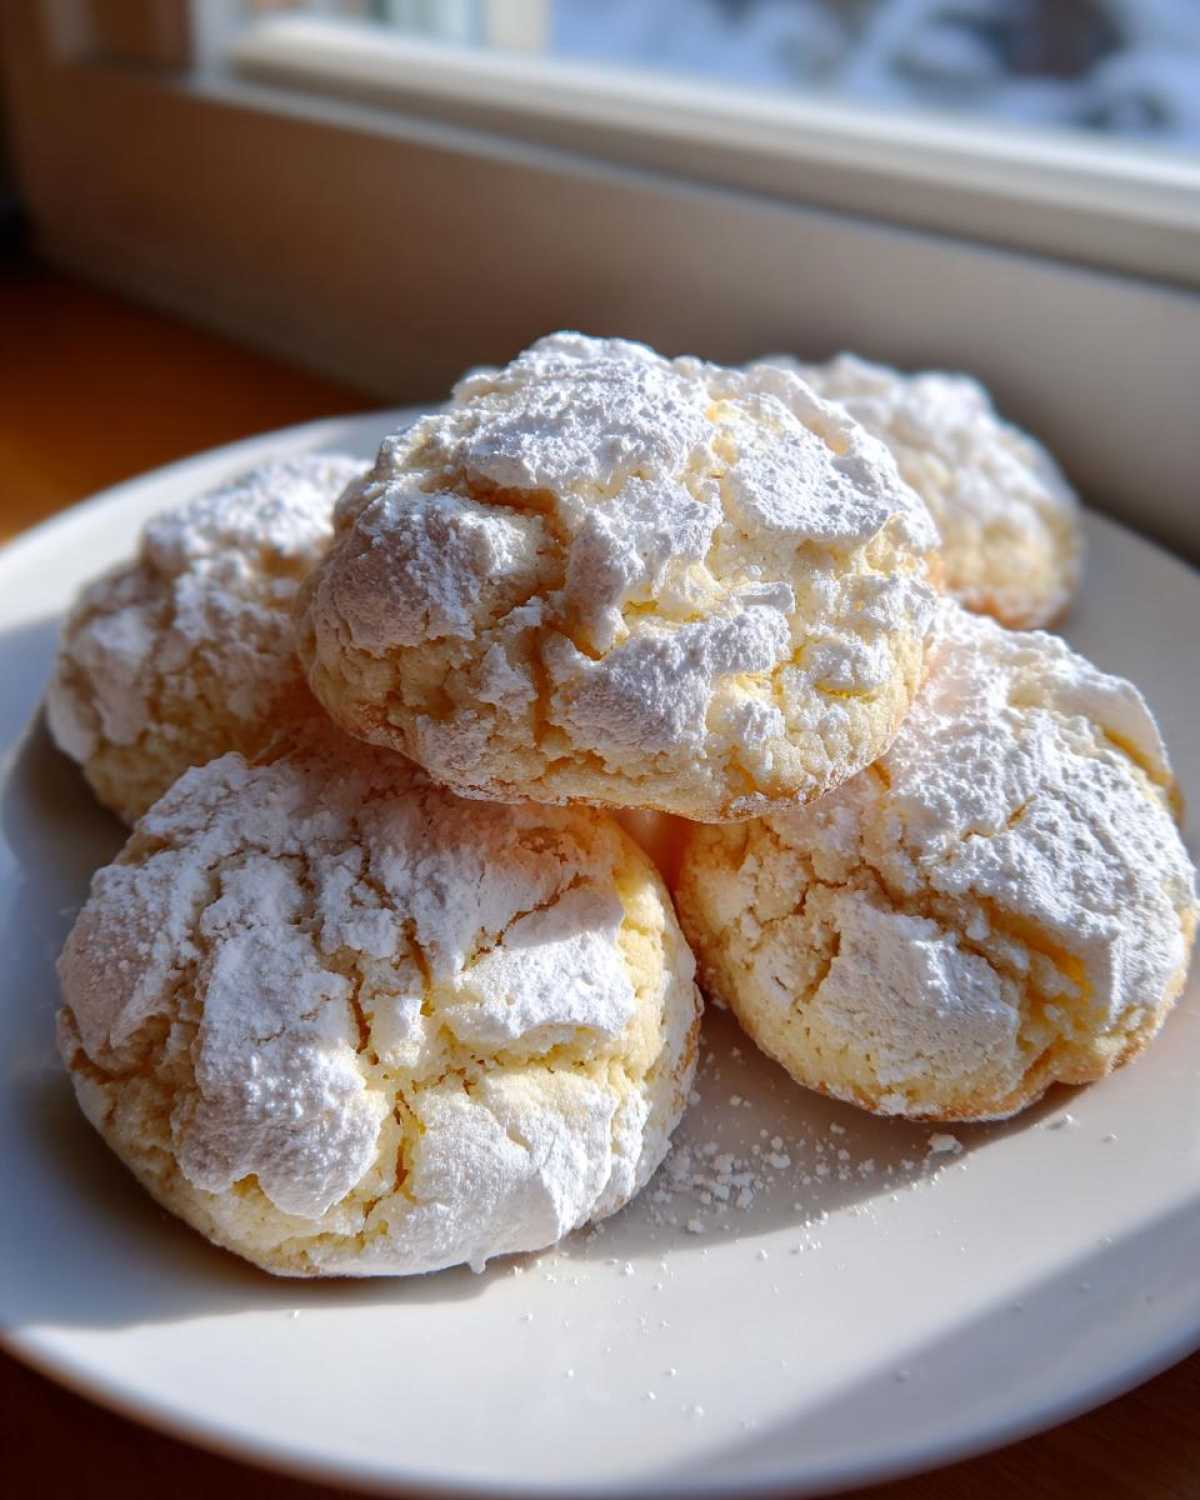
When you roll these, you want to do it firmly to create a nice, tight little ball. That firmness actually helps the cookie hold its shape while it spreads a bit in the oven, which is what creates those gorgeous cracks we love in **crinkle cookies recipe** variations. Make sure every single bit of dough is coated in sugar before it hits the pan!
For the best visual effect on these **cool whip cookies**, some people do a double-dip. Roll them once, bake them for about 5 minutes until they start to set, pull the sheet out quickly, and roll them *again* in the sugar before finishing the bake time. This locks in a really thick, snowy white crust. It’s an extra step, but wow, does it look impressive.
Baking Times for Soft Baked Treats
We’re baking these low and slow, relatively speaking. Set your timer for 10 to 12 minutes at 350 degrees F. Since they are so airy, they bake incredibly fast. You’re looking for visual cues here, not just time. The edges should look firm and set, maybe just slightly golden if you’re using a standard vanilla cake mix.
The centers, though? They should still look a tiny, tiny bit soft when you pull them out. Don’t panic! As these **soft baked treats** cool on the hot pan for about five minutes, they finish baking from residual heat. If you wait until the centers look completely firm and dry in the oven, you’ll end up with hard little hockey pucks when they cool down. Trust me on the slightly underbaked look; it results in perfection.
Tips for No-Fail Cookie Recipe Success
These **cool whip cookies** are wonderful because they rarely fail, but there are a couple of little hiccups that can throw off that dreamy, fluffy texture. If you follow my simple path, you’ll have success every time. My very first attempt? Let’s just say it wasn’t perfect.
I rushed the thaw on the Cool Whip—big mistake! I ended up with a dough that felt more like leaky soup than actual dough. It was impossible to roll into clean little balls, and they just melted into flat puddles on the sheet. Rookie error! I almost gave up, but then I remembered my mom always telling me to take a break when things get messy.
So, I threw the whole sticky bowl into the fridge for about fifteen minutes. Seriously, chilling the dough when it’s too sticky is my number one tip for this **no-fail cookie recipe**! It allows the flour/mix starches to absorb that extra moisture, and the whipped topping firms up just enough to roll.
Here are my top three quick fixes to ensure they turn out right:
- Don’t Overmix: I cannot stress this enough. Once you add the egg and topping, mix *just* until the streaks disappear. If you keep beating it, you are deflating the air pockets provided by the Cool Whip, and you’ll end up with a denser, chewier cookie instead of the soft ones you’re dreaming of.
- Use the Whole Egg: Don’t try substituting just the egg white for lower fat! The yolk is necessary fat and richness needed to balance the moisture from the whipped topping. It helps bind those light ingredients together.
- Mind the Scoop Size: Because these cookies bake so fast, having them all the same size is essential for even baking. Use a small cookie scoop or consistently roll teaspoon-sized balls. If they are different sizes, some will be raw while others are overdone.
If you’re looking for another simple recipe to try while you wait for these to cool, you absolutely have to check out my pumpkin spice pancakes—they are just as quick to assemble!
Storage and Reheating Instructions for Your Whipped Topping Cookies
Since these **whipped topping cookies** are so incredibly soft, they can get a little sticky if you aren’t careful with storage! The best way to keep them velvety and fresh is in a completely airtight container. I usually layer mine with pieces of parchment paper between the layers so they don’t stick together once they’ve cooled completely. They honestly stay great at room temperature for a good three days—if they last that long, that is!
If you’re lucky enough to have extras, good news: they freeze beautifully. Place them on a tray in the freezer until they are solid, then pop them into a freezer-safe bag. When you want one, just let it thaw on the counter for about twenty minutes. If you’re in a rush, you can give them ten seconds in the microwave, but be careful! Because of the whipped topping, they can get gummy if you overheat them. Always prefer the slow thaw! For more fantastic make-ahead ideas, take a peek at my freezer breakfast burrito prep guide.
Variations on the Classic Cool Whip Cookies
This base recipe is so delightfully simple that it begs you to play around with it! It’s like a blank canvas made of sugar and air. If you’re looking for something different for a holiday platter or just a change of pace, you can swap out the cake mix entirely. This is how we turn a simple three-ingredient cookie into something special for different seasons.
My absolute favorite seasonal twist involves using spice cake mix. Think about it: those warm spices—cinnamon, cloves, nutmeg—they bake up perfectly with the moisture from the whipped topping. They come out a bit darker and smell incredible while baking. If you use that, you’ll want to roll the dough balls in regular granulated sugar instead of powdered sugar before baking. That gives you a slightly crunchy exterior on those **cool whip cookies** rather than the messy crinkle look, which works better for fall.
If you want something bright and sunny, grab a lemon or strawberry cake mix. These are excellent for **quick holiday baking** if you want to ditch the traditional dark colors. Since these are going to be brighter, you definitely want a heavy coating of powdered sugar to make them sparkle! And speaking of sprinkles, here’s a fun trick: either stir your sprinkles directly into the dough *after* it’s mixed (be gentle, though!) or add them right on top of the powdered sugar coating before they go into the oven. Just remember, the more stuff you add, the slightly denser they might become, so don’t go crazy!
Don’t forget to check out my recipe for a homemade Pumpkin Spice Latte copycat later if you are really leaning into those seasonal flavors! You can find that recipe right here on the site.
Answering Common Questions About Cake Mix Cookies
I’ve gotten so many questions about these **cool whip cookies** since I first posted them—they become an instant obsession, I swear! It’s because they feel like cheating, right? Using a box mix and whipped topping makes people nervous they might mess up the texture. Don’t worry! I’ve compiled the most common things I hear people ask when they are trying these **cake mix cookies** for the first time so we can troubleshoot everything right now.
If you want to know more about me and why I share these **easy cookie recipes**, you can always read up on my background over at the About Us page. But let’s get down to business!
Can I use homemade whipped cream instead of Cool Whip in these Easy Cookie Recipes?
Oh, this is the million-dollar question! My short answer is: No, I wouldn’t risk it if you want this specific texture. When I talk about **soft baked treats**, I mean *soft* because of the stabilizers in frozen whipped topping. Homemade whipped cream is just heavy cream, usually with a bit of sugar, and it doesn’t have those necessary gums and emulsifiers that commercial brands use.
If you use regular homemade whipped cream, it will deflate the moment you start mixing it in, and it will melt almost immediately in the oven. You’ll end up with a dense, flat cookie that tastes vaguely of cake mix but lacks that wonderful airiness. See, the Cool Whip is doing some heavy lifting here; it’s acting like a magic, pre-portioned leavening agent that also adds fat. Stick to the tub for these **whipped topping cookies**!
How do I get the crinkle effect on my Crinkle Cookies Recipe?
That beautiful snowy crackle everyone loves in a good **crinkle cookies recipe** is all about surface tension and dough temperature when you roll them. If you want those deep, dramatic cracks that look so professional, speed is your friend right after coating them in sugar.
Make sure your dough balls are very small—teaspoon-sized is great—and that they are well chilled if you had to refrigerate them earlier. Roll them firmly in the powdered sugar, shake off the excess, and get them onto the hot pan right away. As the cookie bakes and spreads, the sugar coating on the dry, set surface cracks open, creating that perfect texture contrast. If you want that *extra* dramatic look, use the double-roll trick I mentioned before: bake for 4 minutes, pull them out, roll them *lightly* again in fresh sugar, and pop them back in to finish. That locks in a thicker white coat and guarantees maximum crinkle!
Estimated Nutritional Data for Minimal Ingredient Baking
I know some of you are tracking everything, and I totally get it. When you’re busy, having a quick count helps you plan your day! Since these **cool whip cookies** rely so heavily on the type of cake mix you choose—vanilla versus chocolate, for example—these numbers are just an estimate. I always advise folks to check the nutrition label on their specific box for the most accurate count.
For the sake of reference, here’s my basic breakdown based on using a standard yellow cake mix. Remember, this is for just one little cookie, and most people eat more than one because they are so light!
- Serving Size: 1 cookie
- Calories: About 140 calories
- Sugar: Roughly 18 grams (Watch out, that powdered sugar adds up!)
- Fat: Around 6 grams total fat
- Protein: About 2 grams
Because these are such ultra-simple **minimal ingredient baking** treats, they definitely lean toward the sweeter side, which is fine for an occasional treat! You won’t find a ton of fiber or vitamins, but you will find a whole lot of happy eating. If you want to see the full disclosure on how I calculate this stuff, you can hop over to my full recipe disclaimer page. Happy crunching!
Share Your Experience with This Family Friendly Cookies Recipe
I absolutely love hearing from you all when you try my recipes! These **cool whip cookies** are such a staple in my house because they are so genuinely **family friendly cookies**; my kids can even help roll the dough balls, which saves me time and keeps them busy!
So, what did you think? Did you use Funfetti cake mix? Did you stick to the classic vanilla? I need to see your results! When you try these out, please dash down below and leave a review. Let me know how fast they disappeared from your cooling rack! A quick rating—say, five stars if they blew you away—really helps others find these amazing, simple baking hacks.
And don’t forget, if you have a brilliant tweak that I haven’t thought of yet, share it in the comments! Maybe you rolled yours in cinnamon sugar for a Mexican wedding cookie vibe? I’m always looking to evolve my favorite recipes, and you all come up with the most creative ideas.
If you have any specific questions about the assembly or troubleshooting that weren’t covered above, head over to my contact page, and I’ll get back to you as soon as I can! Happy baking!
PrintEasy 3-Ingredient Cool Whip Cookies

Make soft, fluffy cookies using only cake mix, Cool Whip, and an egg. These require minimal effort and bake quickly.
- Prep Time: 10 min
- Cook Time: 12 min
- Total Time: 22 min
- Yield: 24 cookies
- Category: Dessert
- Method: Baking
- Cuisine: American
- Diet: Vegetarian
Ingredients
- 1 box (15.25 oz) cake mix (any flavor)
- 1 cup frozen whipped topping (Cool Whip), thawed
- 1 large egg
- About 1 cup powdered sugar (for rolling)
Instructions
- Preheat your oven to 350 degrees F (175 degrees C). Line baking sheets with parchment paper.
- In a medium bowl, combine the dry cake mix, thawed whipped topping, and the egg. Mix with a spoon or spatula until just combined into a soft dough. Do not overmix.
- Place the powdered sugar in a shallow dish.
- Scoop the dough by rounded teaspoons and roll each piece firmly into a ball.
- Roll each dough ball completely in the powdered sugar until fully coated.
- Place the coated dough balls onto the prepared baking sheets, leaving about 2 inches between them.
- Bake for 10 to 12 minutes, or until the edges are set. The centers may still look slightly soft.
- Let the cookies cool on the baking sheet for 5 minutes before moving them to a wire rack to cool completely.
Notes
- You can use any flavor of cake mix; chocolate cake mix makes excellent dark crinkle cookies.
- If the dough seems too sticky to handle, chill it in the refrigerator for 15 minutes before rolling.
- For a crinkle effect, you can roll the cookies in powdered sugar twice: once before baking, and again lightly after they have cooled slightly.
Nutrition
- Serving Size: 1 cookie
- Calories: 140
- Sugar: 18g
- Sodium: 150mg
- Fat: 6g
- Saturated Fat: 2g
- Unsaturated Fat: 4g
- Trans Fat: 0g
- Carbohydrates: 21g
- Fiber: 0g
- Protein: 2g
- Cholesterol: 15mg