

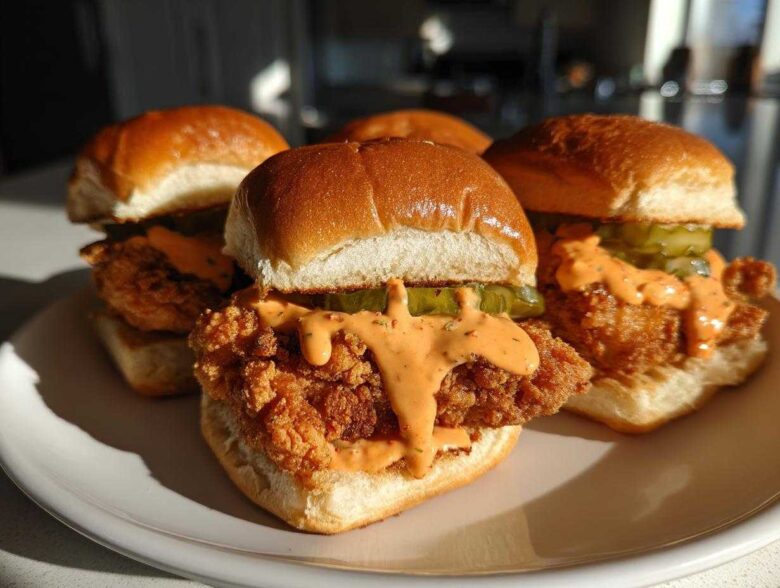
Oh my gosh, you know that craving? The one where you just need that shatteringly crisp, golden-brown texture of perfectly fried chicken, but you don’t want a huge meal? That’s exactly where my love for making the ultimate **Crispy Chicken Sliders with Spicy Mayo** was born. Forget those soggy, sad little sandwich attempts; we are going for maximum crunch here, folks!
I spent way too many weekends testing breading recipes, trying to figure out why my chicken always seemed to lose that snap right after it hit the bun. Seriously, I nearly gave up! But I finally nailed the technique—it all comes down to a wet-dry dance and a little bit of chill time before it hits the hot oil. Trust me, once you bite into one of these, you’ll understand why I think this is my best game day appetizer ever.
We are creating a perfectly balanced little bite here: an impossibly crunchy piece of thigh (or breast, if you prefer!), nestled on a soft slider bun, all unified by a creamy, sassy spicy mayo. It’s quick, it’s fun, and it absolutely delivers on that crispy promise. If you’re ready to make some serious appetizer noise, grab your flour and let’s get started!
Before we dive into the nitty-gritty of coating, check out our story for why we obsess over kitchen perfection around here—it really does matter!
Why You Need This Crispy Chicken Sliders with Spicy Mayo Recipe
Listen, you don’t just *need* this recipe; you deserve this level of crunch in your life! We aren’t messing around with mediocre snacks here. These **Crispy Chicken Sliders with Spicy Mayo** are fast enough for a weeknight dinner panic, but impressive enough to be the star of the game day spread. They are ridiculously satisfying, and honestly, a little addictive.
Why ditch the usual party spreads for these? Swing by our dedicated slider party roundup if you need more convincing, but here’s the quick sell:
Key Highlights of Our Crispy Chicken Sliders with Spicy Mayo
- Superior Crunch: We perfected the twofold breading trick so the coating stays attached and crunchy for ages.
- Flavor Explosion: The spice mix in the flour is just right—warming, not scorching.
- Speedy Preparation: You can get these assembled and fried faster than you think!
- The Sauce Factor: That creamy, tangy spicy mayo pulls everything together beautifully.
- Perfectly Portioned: They’re small, which lets you eat three instead of one giant sandwich!
Essential Ingredients for Perfect Crispy Chicken Sliders with Spicy Mayo
Okay, ingredient quality really makes or breaks your final crunch factor, especially when we are talking about these **Crispy Chicken Sliders with Spicy Mayo**. We need three main components: the chicken itself, the powerful triple threat breading station, and the magic sauce that ties it all together. Don’t skimp on the temperature checks—that’s how you keep the chicken tender inside while that coating gets beautifully golden brown!
Here’s what you need to gather for this small-batch masterpiece:
- 1 pound boneless, skinless chicken breasts, cut into 12 small pieces (About one ounce each!)
- 1 cup all-purpose flour
- 1 teaspoon salt
- 1/2 teaspoon black pepper
- 1/2 teaspoon paprika (I like sweet paprika here, not smoked)
- 1/4 teaspoon cayenne pepper (Just a little kick!)
- 2 large eggs, beaten
- 1 cup buttermilk (Don’t panic, there’s a backup plan for this!)
- 2 cups vegetable oil, for frying (If you are doing the air fryer route, you’ll need just a quick spritz.)
- 12 small slider buns
- 1/2 cup mayonnaise
- 2 tablespoons sriracha or hot sauce
- 1 teaspoon lime juice
- 12 thin dill pickle slices
Ingredient Notes and Substitution Tips
The buttermilk is absolutely non-negotiable for tenderness; it adds a slight acidity that tenderizes the chicken beautifully before it even hits the breading. If you don’t have buttermilk on hand, totally fake it! Just take 1 cup of regular milk and stir in a tablespoon of white vinegar or lemon juice, let it sit on the counter for ten minutes, and boom—you’ve got buttermilk.
For the spices, that blend of salt, pepper, paprika, and cayenne creates the classic Southern Style chicken flavor that pairs so well with the fiery **Spicy Sandwich Sauces** we are making later. Now, if deep frying just isn’t your style, check out our air fryer guide; you can totally adapt this for air fryer crispy chicken sliders, though the flavor profile will shift slightly compared to a proper fry.
Oh, and if you want a different flavor profile for your creamy dressing, you might want to check out my recipe for Cowboy Butter Dipping Sauce—it’s richer, but works great if you want to skip the Sriracha!
Mastering the Spicy Mayo: The Best Spicy Mayo for Chicken
You can have the crunchiest fried chicken in the world, but if your sauce is boring, you’re missing the whole point! That sharp, creamy kick of the spicy mayo is what elevates these simple bites into truly craveable **Crispy Chicken Sliders with Spicy Mayo**. This sauce is so simple, it’s almost embarrassing to call it a recipe, but the balance of tang and heat is everything.
You only need three things, and trust me, you probably have them sitting in your fridge right now. This mix acts as the glue, the moisture, and the flavor booster for the entire slider experience. It’s the secret weapon behind the **Best Spicy Mayo for Chicken** I’ve ever tasted, which is why I always make a double batch!
To get started, grab a small bowl. We want the full 1/2 cup of your favorite mayonnaise—I use Hellmann’s, I’m old school like that. Then comes the fire! Add 2 tablespoons of Sriracha. If you’re nervous, start with one tablespoon, then taste it. We are aiming for a nice, vibrant redness in the mix.
The crucial final touch that truly makes this sauce sing is the acidity. Add just 1 teaspoon of fresh lime juice. It cuts through the richness of the mayo and the fat from the frying process perfectly. Whisk it all together until it’s totally smooth and pale pink. That’s it! Seriously, that’s the whole thing.
If you are looking to try out another mind-blowingly easy sauce for your next batch, you have to check out my recipe for a 5-Minute Creamy Garlic Aioli Recipe. But for these sliders, stick to the Sriracha lime blend!
Step-by-Step Instructions for Crispy Chicken Sliders with Spicy Mayo
Alright, this is where the magic happens! Making these **Crispy Chicken Sliders with Spicy Mayo** is a process, but if you set up your station correctly, it goes lightning fast. Think of it like setting up an assembly line for maximum crunch potential. You absolutely need three separate shallow dishes ready before you even touch the chicken. Trust me on setting up your station first—it saves so much mess later!
First things first, let’s get that breading station ready. In Dish One, combine all your dry seasoning: the flour, the salt, pepper, paprika, and that dash of cayenne. Give that a good whisk around so everything is evenly distributed. In Dish Two, whisk up those two eggs and mix in your buttermilk until it’s bubbly and happy. If you’ve already made the spicy mayo, Dish Three is where the chicken will rest briefly after frying, so line a small rack with paper towels and have that ready to go nearby.
Now, let’s handle the oil. You need a deep skillet or Dutch oven filled with about an inch and a half of vegetable oil. Get this heated up to 350°F. You absolutely need a thermometer here—if the oil is too cool, the chicken absorbs grease and gets soggy, and if it’s too hot, the crust burns before the inside cooks. We are aiming for perfection!
Achieving Maximum Crunch: Breading and Frying Technique
This breading technique is what separates the good sliders from the *great* ones. Take one piece of your pre-cut chicken breast. Dip it completely into the buttermilk mixture, let the excess drip off back into the bowl for just a second. Then, immediately move it to the flour mixture. This is key: really press that flour onto the chicken, almost massaging it in, to make sure every single nook and cranny is coated thickly.
My biggest secret for that amazing, craggy crust? Once it’s fully dredged, put those crusted pieces onto a plate and pop them in the fridge for about 15 minutes. That chilling time helps the coating set up so it won’t fall off when it hits the heat. It’s a small pause, but it makes a huge difference in crispiness!
When the oil hits 350°F, carefully lower the chicken pieces in. Do not crowd the pan! I usually fry about four or five at a time. Let them sizzle away for about 4 to 6 minutes, flipping them halfway through. You are looking for that deep, rich golden-brown color. Safety first, always use tongs and never, ever splash hot oil! Once they look perfect, pull them out and place them on that paper towel-lined rack so the excess oil can drain away.
Remember that spicy mayo we mixed earlier? If you haven’t made it yet, now is the perfect time while the chicken drains. Then, lightly toast your slider buns under the broiler for just 30 seconds so they warm up nicely.
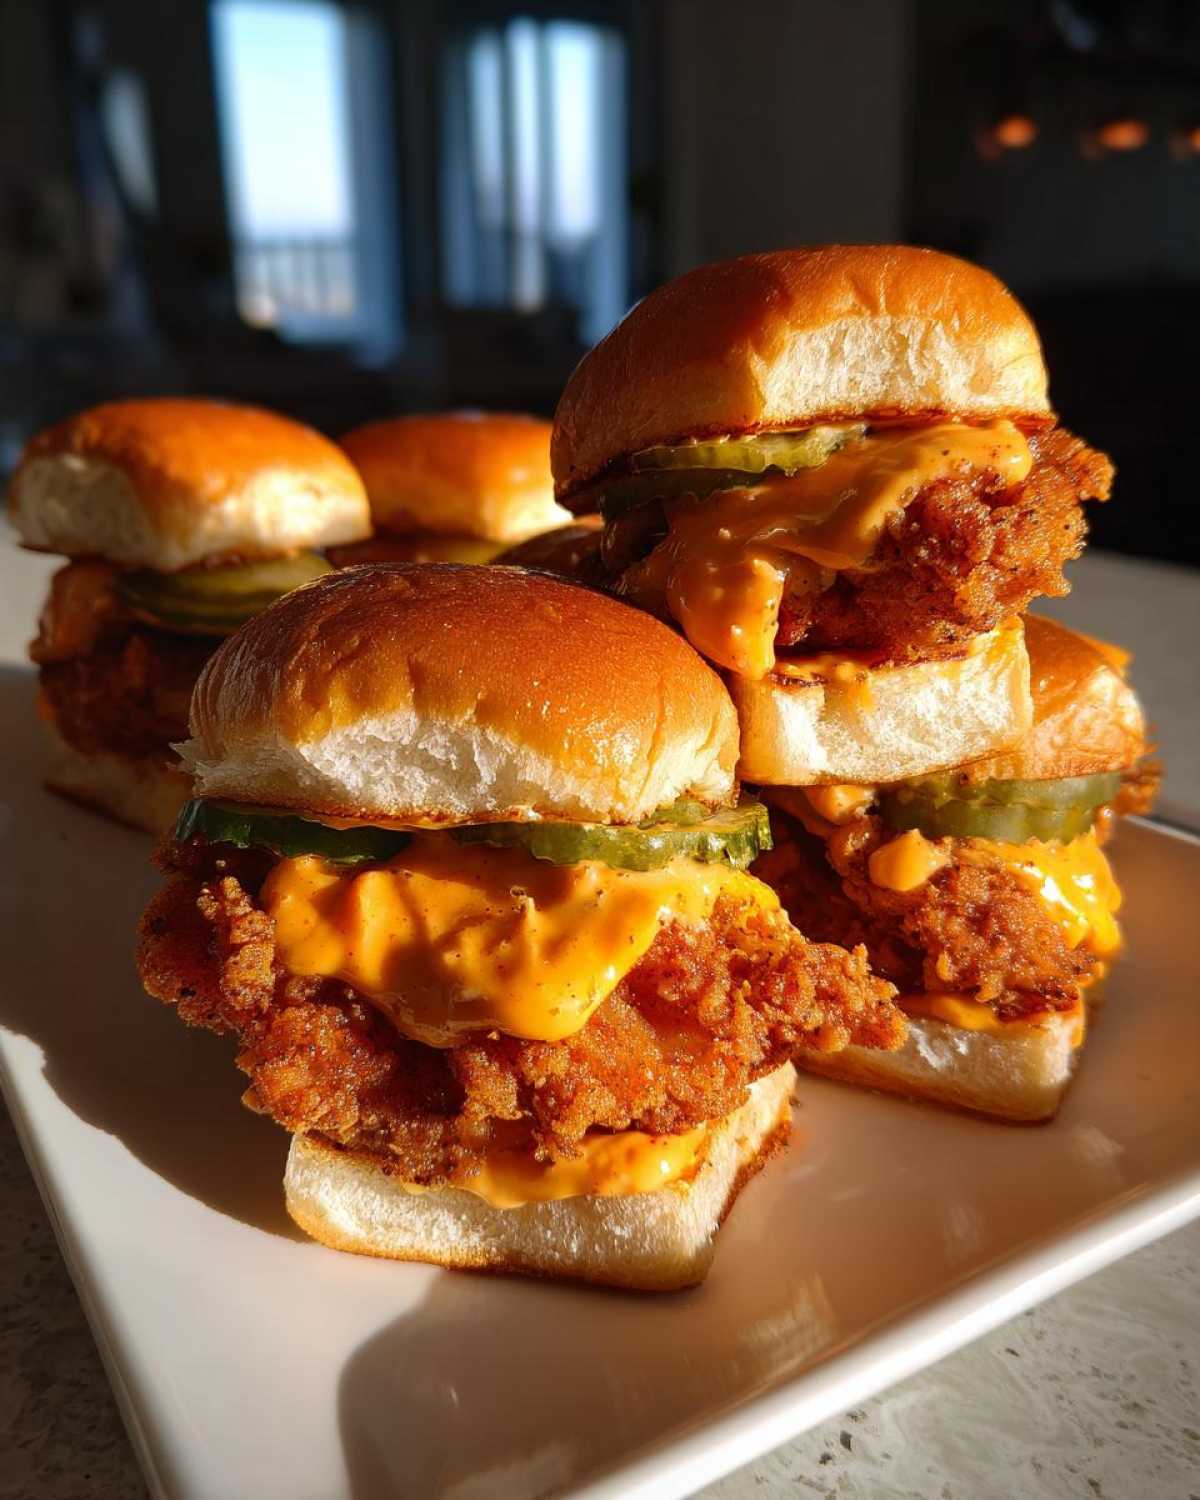
The Final Assembly Guide for Crispy Chicken Slider Assembly Guide
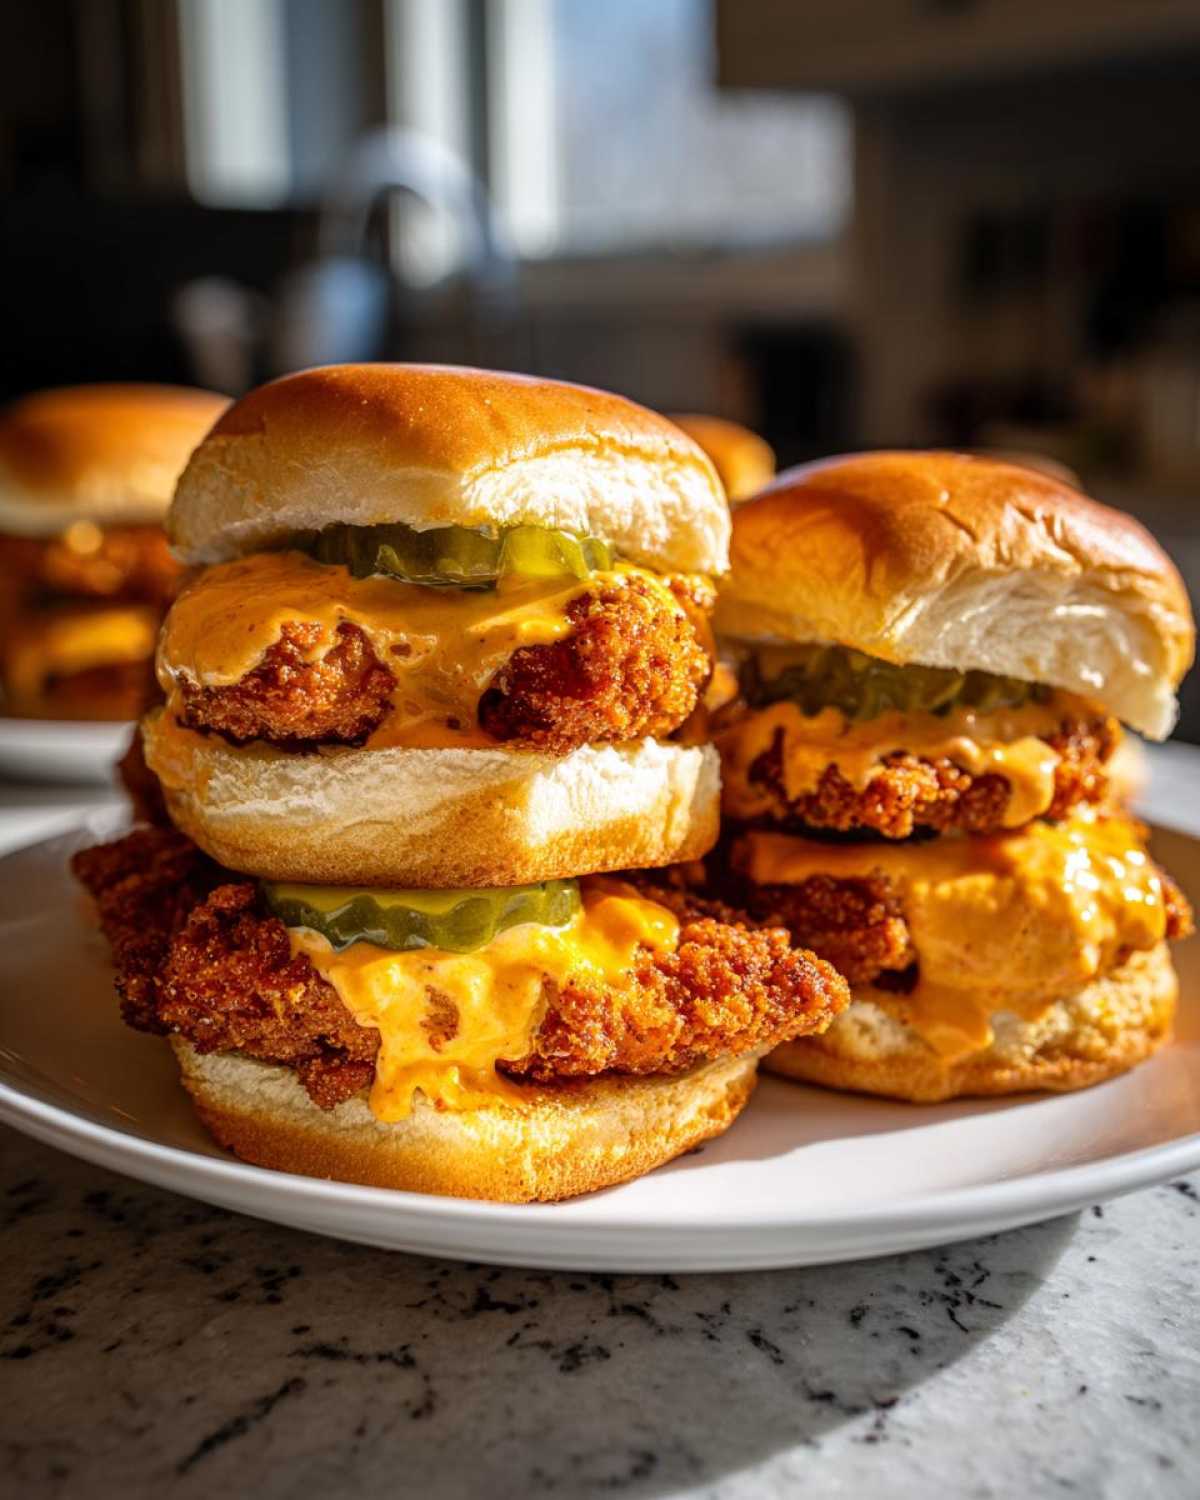
This is the payoff! We are moving fast so that chicken stays hot and crispy. Take your toasted bun halves. Spread a generous layer of that homemade spicy mayo on both the top and bottom bun—don’t be shy, the sauce is key! Next, place one beautiful, crispy chicken piece right on the bottom bun. Top the chicken with one thin dill pickle slice—that vinegary snap is essential.
Pop the top bun on, and boom! You have a masterpiece. Just look at how perfectly golden that breading is. Follow this **Fried Chicken Slider Assembly Guide** step-by-step, and you’ll never end up with a soggy slider again. Now go grab a plate before I eat them all!
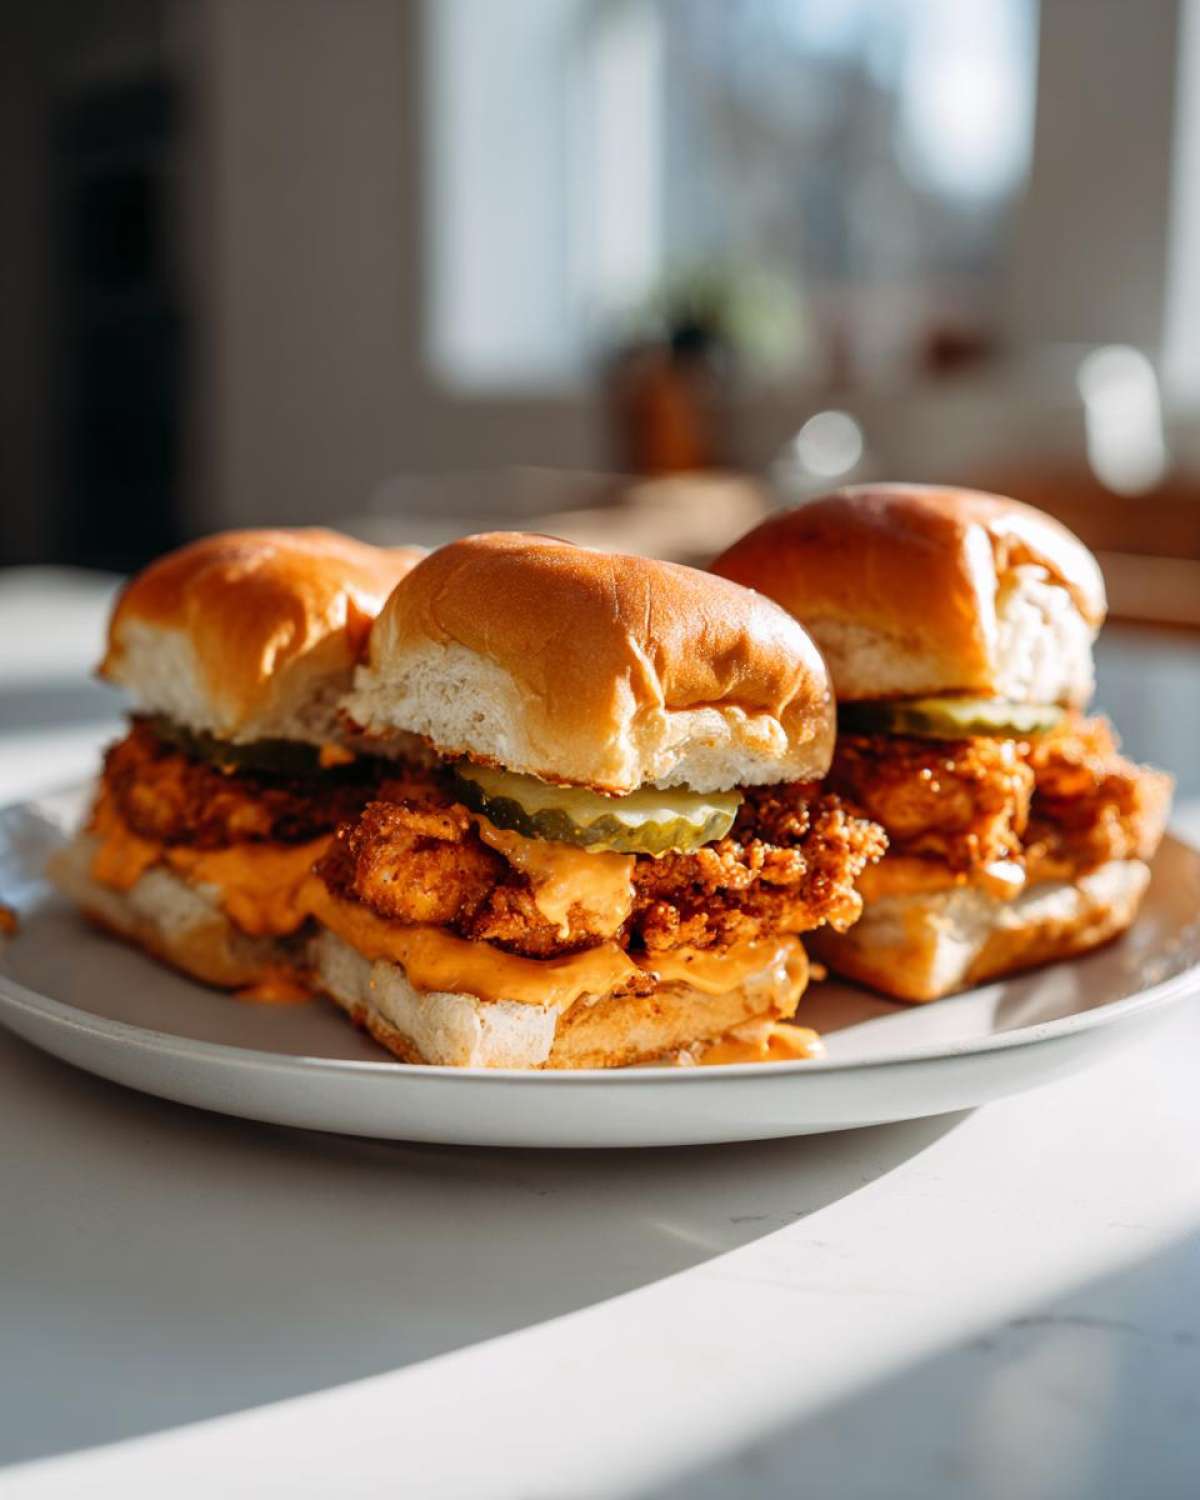
Speaking of making things easy, I always refer back to my guide on perfect air frying if I want to skip the oil entirely, but deep frying still wins for that classic texture!
Tips for Success with Your Crispy Chicken Sliders with Spicy Mayo
Okay, you’ve nailed the breading, you’ve got the spicy mayo ready, but a few little tricks can take these **Crispy Chicken Sliders with Spicy Mayo** from fantastic to legendary. I’ve learned these lessons through trial, error, and a whole lot of happy eating. Pay attention to these final steps, and you’ll be the MVP of your next get-together!
First, the single best thing you can do to ensure that crust holds up is the chilling step I mentioned before. Seriously, bread the chicken, lay it on a tray, and let it sit in the fridge while the oil heats up. That 15 minutes lets the moisture in the egg/buttermilk get absorbed by the flour coating, creating a shell that is far more resistant to separating into the hot oil. It’s a game-changer!
Second, don’t be tempted to overload your frying pan! That is the number one way to drop the oil temperature instantly, which results in greasy, floppy chicken. We want that beautiful 350°F temperature to stay steady so it cooks fast and crisps hard. Fry in small batches, just like you’re turning out perfect little portions every time.
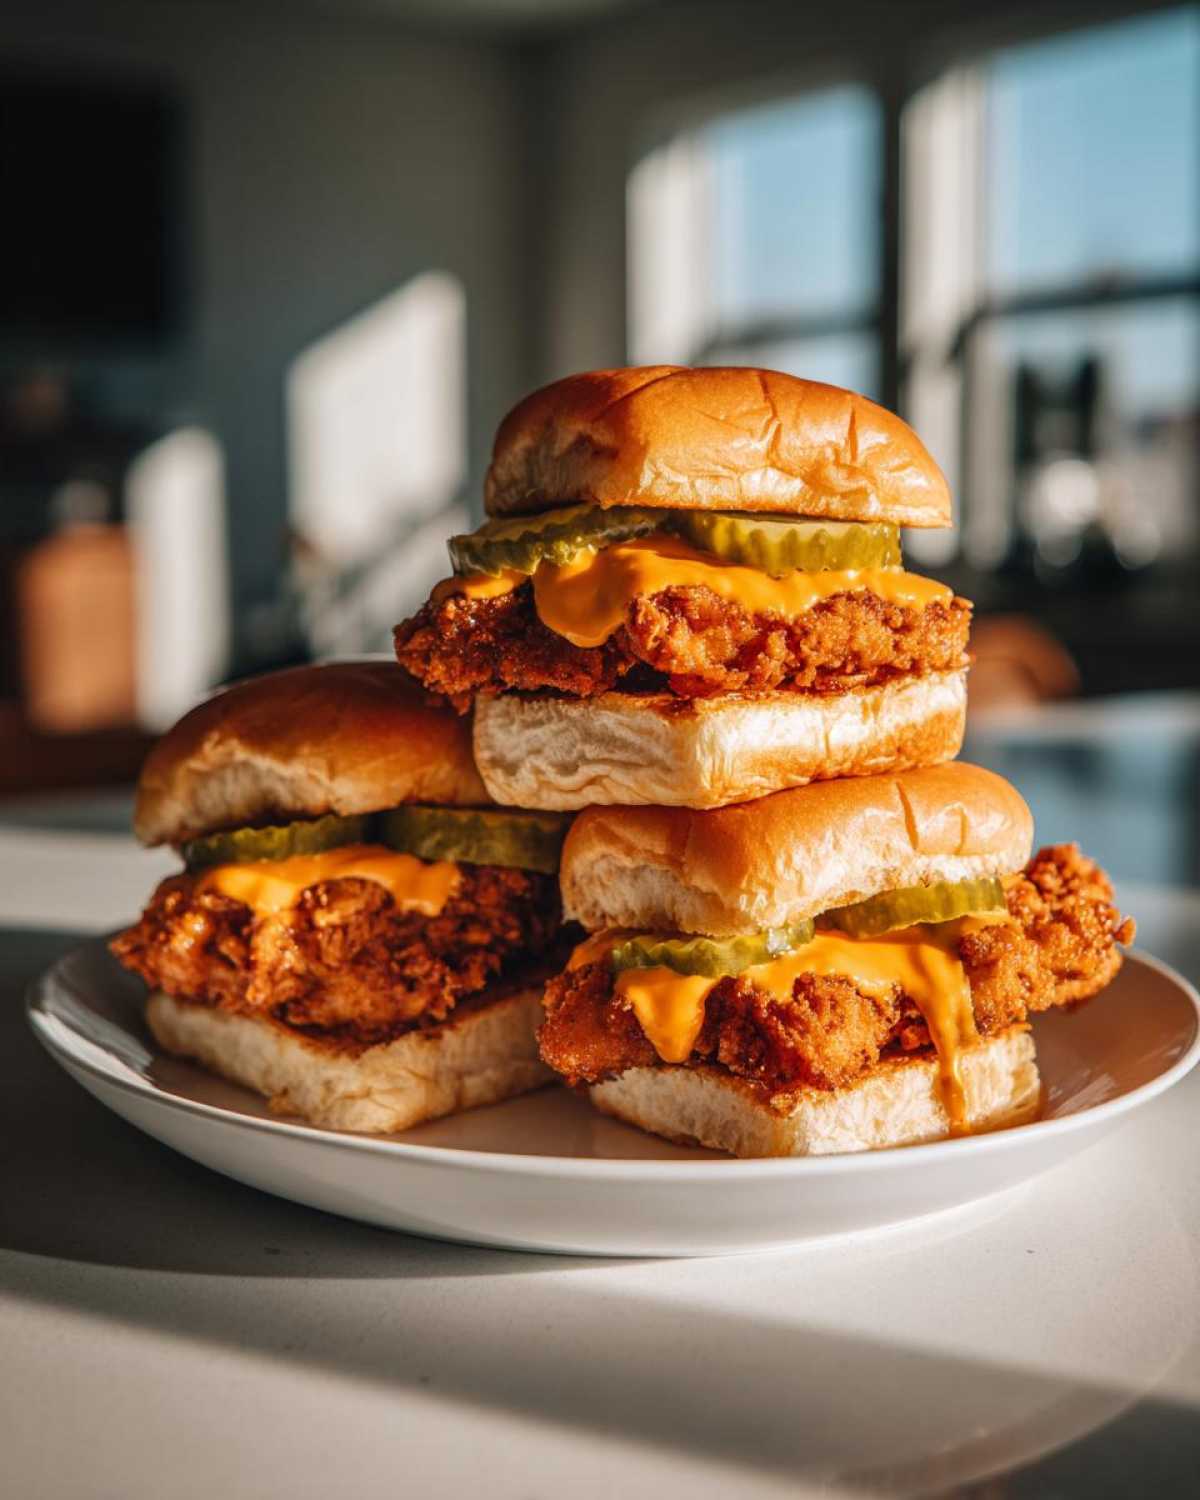
Third, the reheat rule! If you happen to have leftovers (which is unlikely, trust me), you absolutely cannot reheat these in the microwave. That heat steams the crispy coating right into oblivion. If you need to reheat them for later serving, pop them on a wire rack set over a baking sheet at about 375°F in the oven, or even better, use your air fryer for just 5–7 minutes. If you’re planning ahead, check out my guide on marinades—while we aren’t marinating here, understanding how moisture affects texture is key!
Finally, about that oil—if you’re trying to be a little lighter, remember you can use the air fryer method I mentioned. Set it to 400°F and cook those breaded pieces for about 12 to 15 minutes, flipping them halfway through. They won’t be *identical* to the deep-fried version, but they are still wonderfully crunchy and a fantastic alternative for a crowd.
Serving Suggestions and Crunchy Chicken Sandwich Toppings
We’ve got the main event—the **Crispy Chicken Sliders with Spicy Mayo**—but what about the side dishes? You can’t just serve perfect little sandwiches on their own, can you? Nope! These sliders are rich and spicy, so we need things that cut through that flavor profile and give you a nice, fresh break between bites. And we also need to talk about making sure the crunch factor extends beyond the chicken!
When I serve these at a party, I always keep the sides light and tangy. A simple, crisp vinegar-based coleslaw is my absolute favorite partner. The acidity cleanses the palate, and the cabbage offers its own fresh crunch that complements the fried coating. You could also whip up a small side of quick pickles if you find dill slices aren’t enough tang on the sandwich itself.
If you’re serving these up as a bigger dinner meal rather than just appetizers, keep the main plate simple. A side salad with a light vinaigrette works wonders. Since we’re aiming for the title of **Crunchy Chicken Sandwich Toppings** champion, let’s discuss what else you can pile on top of that beautiful chicken before you place the bun on.
We already have the great pickle slice for that essential zap, but don’t stop there if you’re feeling adventurous! If you didn’t use the pickles, thinly sliced raw onion adds a lovely, sharp bite. Or, for texture, try thinly shredded cabbage—it mimics the slaw experience right there on the slider!
If you want something totally different to go along with your sliders, instead of a heavier side dish, try my lighter Chicken and Zucchini Stir Fry recipe. While it’s a totally different style of chicken, it satisfies that craving for poultry without weighing down the meal established by these rich fried sliders!
Storage and Make Ahead Chicken Slider Prep
So, you made too many glorious **Crispy Chicken Sliders with Spicy Mayo**? Happens to the best of us! Now comes the tricky part: storing them so they don’t turn into sad, soggy triangles of disappointment. The secret to success here, especially with fried food, is separating the components and knowing how to revive that glorious crunch. You want to plan your **Make Ahead Chicken Slider Prep** smartly so assembly is fast, but storage requires a little division of labor.
First rule of leftover fried chicken: never, ever store the assembled slider. The moisture from the spicy mayo and the pickle immediately starts attacking that perfect coating. If you want leftovers, you *must* store the chicken, the buns, the pickles, and the sauce separately. Honestly, the spicy mayo keeps beautifully in the fridge for up to a week in an airtight container—it gets even better if you ask me!
For the actual crispy chicken pieces, let them cool completely on a wire rack (no paper towels, as trapped moisture breeds sogginess). Once fully cool, place them in a large, airtight container or a zip-top bag. They’ll stay perfectly crunchy for about two days this way, provided they are completely cool before sealing them up.
Now for the crucial part: reheating! If you try to microwave these, I give you permission to throw the whole batch out right now. Microwaves are the enemy of crispiness. Instead, you have two excellent options to bring that crunch back to life.
For the best results, use the air fryer! Heat it up to 375°F (about 190°C) and cook the chicken for 5 to 7 minutes. If you don’t have an air fryer, the oven works well. Set it to 400°F (200°C) and bake the chicken on a wire rack set over a baking sheet for about 10 minutes. This allows the heat to circulate all around the piece, drying out any residual moisture and crisping up that coating again instantly.
If you are planning ahead for a party, the best prep you can do the night before is preparing the breading station (mix the dry ingredients, mix the wet ingredients) and mixing up that stellar spicy mayo. You can even bread the chicken and keep it chilled for up to 12 hours before frying—that is my go-to strategy for Game Day chaos! It’s all organized ahead of time so that frying is the very last step.
If you’re looking for more make-ahead wins, check out my guide on how to manage freezer breakfast burritos; prepping ahead is definitely a major kitchen skill!
Frequently Asked Questions About Crispy Chicken Sliders with Spicy Mayo
I know you’re probably eager to get these fried up, but let’s tackle a couple of the questions I always get asked after people try these little bursts of flavor! Getting the texture right on **Crispy Chicken Sliders with Spicy Mayo** is the biggest hurdle, so if you have questions about frying or sauce heat, you’re in good company!
Can I bake these instead of frying for my Crispy Chicken Sliders with Spicy Mayo?
You totally can, and I’ve given the air fryer temps above, but if you are sticking to a standard oven, yes! If baking, you’ll want to fully preheat your oven to 400°F. Lay those breaded chicken pieces out on a wire rack placed over a baking sheet—the rack is super important so air can circulate underneath them. You’ll probably need to bake them for about 18 to 22 minutes, flipping them over halfway through the cooking time. Keep an eye on them until they reach that internal temperature of 165°F and look golden brown. They won’t have the exact same heavy, satisfying crunch as the deep-fried version, but they’re still delicious!
How do I adjust the heat level of the Spicy Mayo?
This is totally personal, right? The recipe calls for 2 tablespoons of Sriracha, which gives a nice middle-of-the-road kick that lets the spice shine without overwhelming the chicken. If you are sensitive to heat, just start with 1 tablespoon and taste as you go. You can always add more, but you can’t take it out!
For something milder, try swapping out the Sriracha for something like Gochujang or even just a very mild chili garlic sauce. If you want to ramp up the heat level, try using a hotter sauce directly, or—and this is a great trick—add a tiny dash of pure cayenne pepper, or even a few drops of a super-hot tincture like Cholula or Tabasco to your base mayo mixture. Just add the extra heat a drop at a time until you hit the sweet spot!
If these questions didn’t cover what you needed, feel free to drop me a line over on my Contact Page—I love hearing how your sliders turned out!
Nutritional Estimates for This Recipe
Now, nobody is making these **Crispy Chicken Sliders with Spicy Mayo** because they’re trying to eat kale for dinner, right? Let’s be real here, these are fried chicken sliders topped with creamy, sassy dressing. They are pure indulgence, and you should absolutely enjoy every bite! But, because I believe in being totally transparent about what you’re putting into your body—even when it’s this much deliciousness—I’ve compiled the general nutrition estimates for one slider based on the standard ingredients we used.
Keep in mind these numbers are just ballpark figures, influenced heavily by the cut of chicken you use and how vigorously you drain that oil. For the most accurate information, you should look up the specific brands you use. You can always find more details about my commitment to transparency over on my full disclaimer page.
Here’s what we are looking at for one single, perfect slider (biscuit, chicken, pickle, and mayo):
- Serving Size: 1 slider
- Calories: 350 (Wow, not too bad for something this good!)
- Fat: 18g
- Saturated Fat: 3g
- Unsaturated Fat: 15g
- Protein: 19g
- Carbohydrates: 28g
- Fiber: 1g
- Sugar: 4g
- Sodium: 650mg (Pickles and breading are sneaky culprits!)
See? Pretty impressive stats for something that tastes like pure party food! The high protein keeps you satisfied, and while the fat content is what makes it taste incredible, the simple ingredients help keep that saturated fat low relative to the total fat count. Enjoy your **Crispy Chicken Sliders with Spicy Mayo** completely guilt-free—or at least, guilt-lightly!
PrintCrispy Chicken Sliders with Spicy Mayo
Make small, crispy fried chicken sandwiches topped with a simple, spicy mayonnaise.
- Prep Time: 15 min
- Cook Time: 20 min
- Total Time: 35 min
- Yield: 12 sliders
- Category: Appetizer
- Method: Frying
- Cuisine: American
- Diet: Low Fat
Ingredients
- 1 pound boneless, skinless chicken breasts, cut into 12 small pieces
- 1 cup all-purpose flour
- 1 teaspoon salt
- 1/2 teaspoon black pepper
- 1/2 teaspoon paprika
- 1/4 teaspoon cayenne pepper
- 2 large eggs, beaten
- 1 cup buttermilk
- 2 cups vegetable oil, for frying
- 12 small slider buns
- 1/2 cup mayonnaise
- 2 tablespoons sriracha or hot sauce
- 1 teaspoon lime juice
- 12 thin dill pickle slices
Instructions
- Combine flour, salt, pepper, paprika, and cayenne pepper in a shallow dish.
- In a second dish, whisk the eggs and buttermilk together.
- Dip each chicken piece first into the buttermilk mixture, letting excess drip off.
- Dredge the chicken thoroughly in the flour mixture, pressing to coat well.
- Heat the vegetable oil in a deep skillet to 350°F (175°C).
- Carefully place chicken pieces into the hot oil, ensuring not to overcrowd the pan. Fry for 4 to 6 minutes, turning once, until golden brown and cooked through (internal temperature of 165°F or 74°C).
- Remove chicken and place on a wire rack lined with paper towels to drain excess oil.
- While chicken drains, mix the mayonnaise, sriracha, and lime juice in a small bowl to create the spicy mayo.
- Lightly toast the slider buns if desired.
- Assemble the sliders: Spread spicy mayo on both halves of each bun. Place one crispy chicken piece on the bottom bun, top with a pickle slice, and place the top bun on.
Notes
- For extra crispiness, chill the breaded chicken pieces in the refrigerator for 15 minutes before frying.
- You can air fry the chicken at 400°F (200°C) for 12-15 minutes, flipping halfway, instead of deep frying.
- Use shredded cabbage or a thin slice of onion as an alternative topping.
Nutrition
- Serving Size: 1 slider
- Calories: 350
- Sugar: 4
- Sodium: 650
- Fat: 18
- Saturated Fat: 3
- Unsaturated Fat: 15
- Trans Fat: 0
- Carbohydrates: 28
- Fiber: 1
- Protein: 19
- Cholesterol: 75