

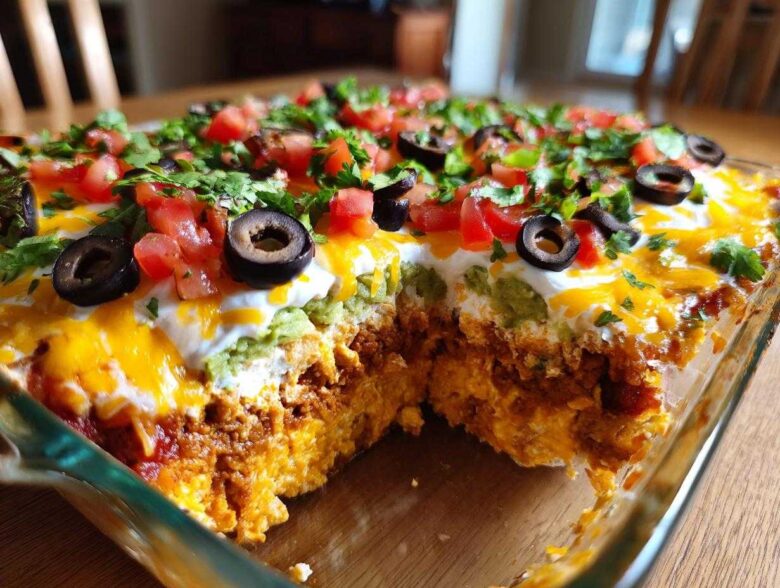
If you’re hosting people, whether it’s for the big game or just a random Tuesday movie night, you need food that disappears fast and requires almost zero effort from you. I’m talking about the kind of recipe that makes people ask, “Did you really just whip this up?” That’s exactly what this classic Seven Layer Dip is! Seriously, making this incredible layer dip has been my secret weapon for years; it always pulls me out of a party-planning jam. It looks impressive with all those distinct colors, but it’s just assembly, my friends. Trust me, if I can pull this off while juggling a dozen other things, anybody can master this! You can see more of my absolute favorite quick-fix recipes over on my blog where I keep all my best ideas.
Why This Classic Seven Layer Dip is the Ultimate Party Layer Dip
When the doorbell rings and you realize you haven’t set out anything substantial, this layer dip is your superhero. It really is the *Best Seven Layer Dip* because frankly, it checks every single box a host needs filled. It’s vibrant, it’s flavorful, and it’s ridiculously easy!
- It requires absolutely zero oven time! That means your kitchen stays cool, and your oven is free for whatever else you might be cooking.
- It’s a genuine crowd-pleaser. I’ve never seen a plate of this dip go unfinished, making it the perfect Easy Party Dip for any occasion.
- You can tailor it perfectly—want it spicier? Swap the salsa! Want it creamier? Check out my tip below! It’s completely adaptable for your guests.
- Perfect every time for a chaotic Game Day Appetizer setup. Since you just assemble it, cleanup is a breeze, too!
If you’ve already mastered that amazing inspiration from my Buffalo Cauliflower Bites post—yep, I’m talking about the spicy stuff—this dip offers a cool, creamy Tex-Mex contrast that everyone loves. You can find the recipe for those spicy treats right here: Buffalo Cauliflower Bites.
Ingredients for Your Perfect Layer Dip
Okay, let’s talk about what actually goes into this amazing stack of deliciousness. The beauty of this layer dip is that most of these items come straight from the can or container, which is why my prep time is barely anything! Just make sure you spring for good quality ingredients where it counts.
For example, don’t skimp on your guacamole! It needs to be rich and flavorful since it’s the core of our flavor profile. If you love that zingy flavor from my Spicy Mexican Street Corn, you know I always stress fresh elements, so grab the best guac you can find!
- 1 (16 ounce) can refried beans, softened
- 1 cup guacamole (the good stuff!)
- 1 cup sour cream
- 1 cup shredded cheddar or Mexican blend cheese
- 1/2 cup salsa
- 1/4 cup sliced black olives, drained
- 2 tablespoons chopped fresh cilantro
- 1/4 cup diced tomatoes (this is my little optional add-in for extra color on top!)
See? Simple! Grab these things, check out the Spicy Mexican Street Corn Recipe here for another great potluck dip idea, and let’s get layering!
How to Make the Best Seven Layer Dip: Step-by-Step Instructions
It’s time to put this beautiful Tex-Mex puzzle together! Honestly, if you can spread something evenly (and I know you can!), you know exactly how to make layer dip. This is where you get to show off the gorgeous colors. I usually grab a wide, shallow dish—mine is a 9-inch pie plate—because you really want those layers visible when people dig in.
We’re going step by step to make sure every guest gets a taste of every flavor. Don’t forget to check out my recipe for Mexican Street Corn Dip for another guaranteed party hit!
Assembling the Nacho Dip Layers
Start with the beans; that’s your sturdy base. Take your softened refried beans and spread them right across the bottom of the plate. You want a nice, even carpet of brown underneath everything else!
Next up, the guacamole. Just gently spoon that over the beans and spread it out carefully so you don’t mix the brown layer up into the green. Then comes the white layer: the sour cream. Spread that smoothly over the guac.
After that creamy layer, toss on your shredded cheese. This acts like a nice little barrier before we move to the wet stuff. Then, spoon the salsa over the cheese, followed by those pretty black olives. Finally, sprinkle the fresh cilantro right over the top for a pop of green. If you’re using those optional diced tomatoes, they go on last of all!
Chilling and Finalizing Your Layer Dip
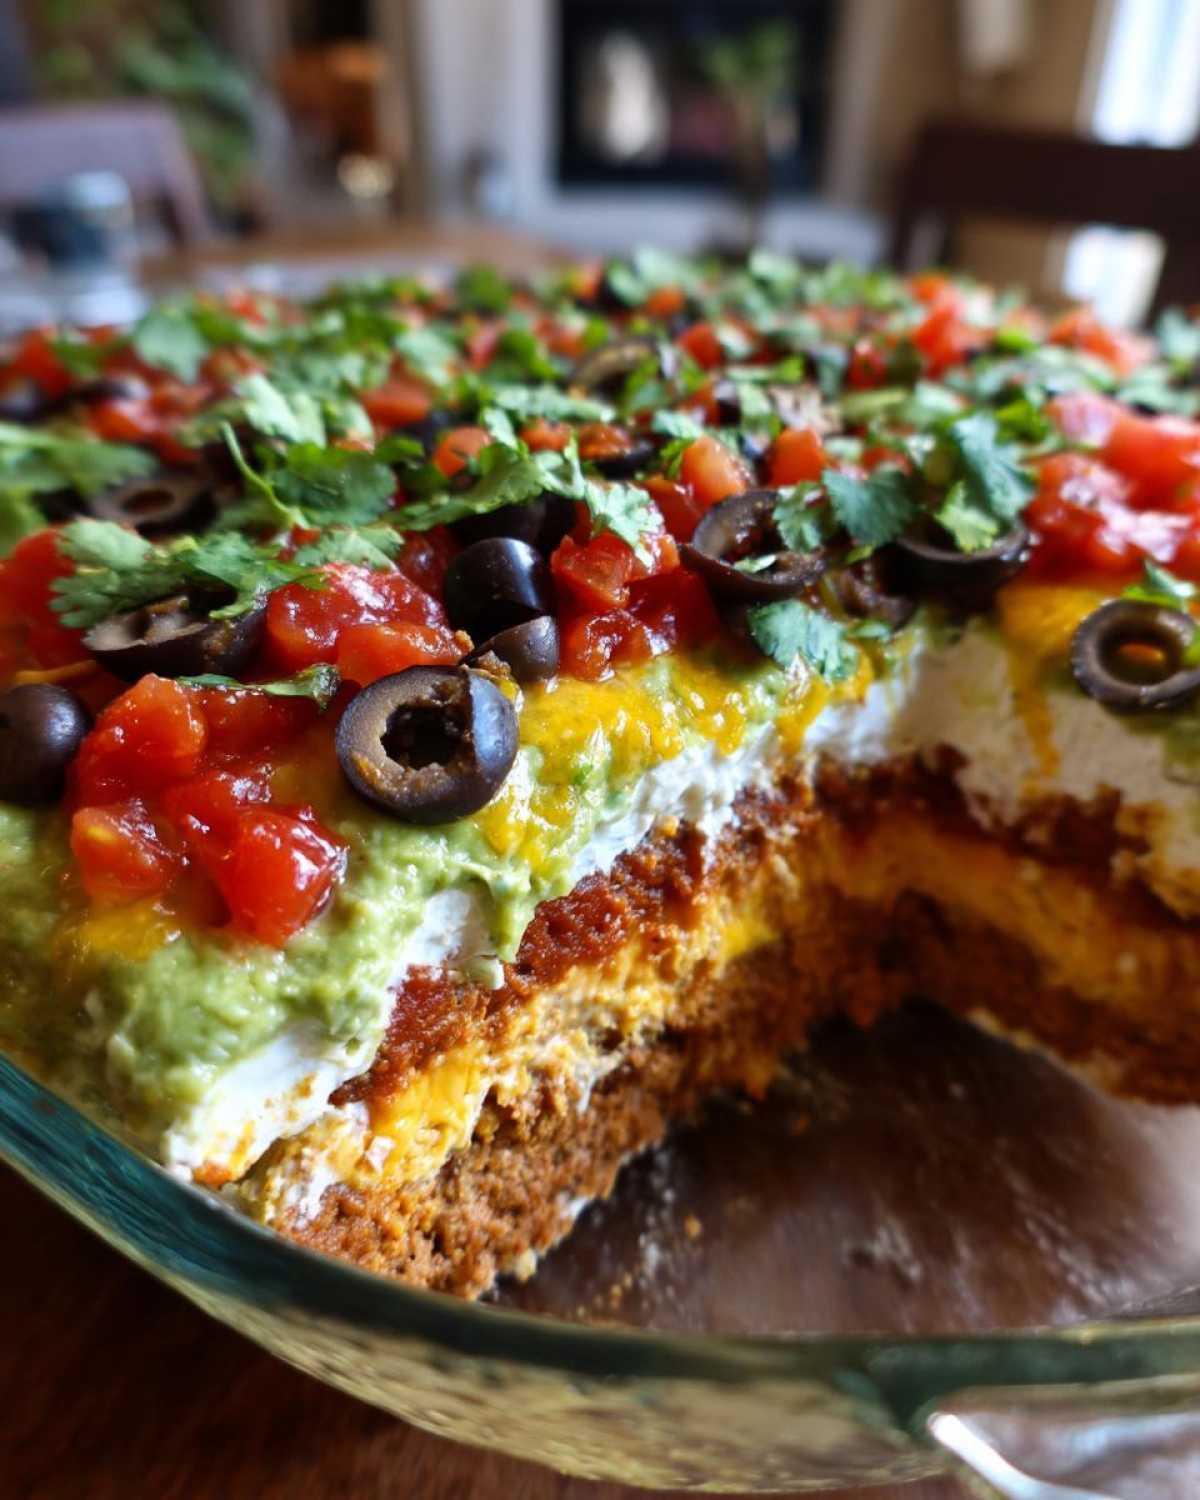
This is the most important, yet most overlooked, tip for any great layer dip: you MUST chill it. Don’t just make it and immediately start serving. Cover the whole thing up tightly with plastic wrap.
You need at least 30 minutes in the fridge—ideally an hour if you can manage it! This short chill time lets the layers firm up slightly so they don’t slide all over the place when someone scoops deep into your perfect creation. Seriously, patience pays off here; it makes your amazing classic layer dip look professional!
Expert Tips for an Ultimate Layer Dip
So, you’ve got the layers down, but you want this layer dip to go from “good” to “I need the recipe right now!” I totally get it. Achieving those distinct, beautifully stacked layers and keeping that sour cream layer perfectly flavorful is what sets my recipe apart, making it the ultimate Creamy Layered Appetizer.
Here’s my number one game-changer: don’t just use plain sour cream! Take that cup of sour cream and mix it with one half-packet of taco seasoning before you spread it. Seriously, it boosts the flavor so much. It keeps the layer thick and creamy without tasting bland against the beans and guac.
Also, when you’re spreading any layer that’s going directly on top of a wetter ingredient—like the sour cream on the guacamole—use the back of a spoon and work gently from the center outward. This minimizes feathering between the colors!
And yes, you read that right: this is a true make ahead party dip. I assemble the whole thing, cover it tightly, and stick it in the fridge for up to four hours before the party starts. It solidifies everything beautifully. If you want to see another fantastic, slightly different dip idea, you should check out my recipe for the Mexican Street Corn Salad—it has so much incredible zest!
Variations on the Classic Layer Dip
While my traditional seven-layer setup is definitely the gold standard for a layer dip that brings everyone to the snack table, sometimes you just need to switch things up a bit! Don’t feel like you have to stick to the literal seven if you don’t want to. These small tweaks can transform it into something new while still keeping that wonderful, easy assembly vibe we love.
One of the easiest things to jazz up is the cheese. Cheddar is classic, but have you tried using Pepper Jack? It melts slightly softer even when cold and gives you just a little kick for your Tex Mex Dip. That’s an instant flavor upgrade!
If you’re looking for something slightly different for your next event, totally ditch the layers and go for a giant Layered Bean Dip base. Just warm up those refried beans first, mix in half a packet of taco seasoning right into them, and spread them warm in the dish. Then, layer everything else cold on top! It’s technically still a layer dip, but that warm foundation changes the whole texture.
Another great idea, especially if you know you have big guacamole lovers, is creating an eighth layer! Just add half a cup of seasoned, mashed avocado *right* on top of the sour cream before your cheese goes on. It adds an intense burst of fresh flavor. If you need inspiration for how to serve things that look cool but are secretly easy, you HAVE to peek at my recipe for Mason Jar Taco Salad—it uses some similar flavor profiles!
Feel free to experiment! That’s the fun part of any casual, make-ahead appetizer like this layer dip.
Serving Suggestions for Your Layered Dip Recipes
Okay, you’ve made the most beautiful, perfectly seasoned layer dip known to humankind. Now, what do you use to get it from the platter to your mouth? This is just as important as the layers themselves! You need things that can stand up to that sturdy refried bean base, especially if Aunt Carol tries to scoop out half the container in one go.
For the most authentic experience, you absolutely must go with sturdy tortilla chips. I look for the thick, restaurant-style chips—the ones that don’t break when you hit the dense bean layer. Anything flimsy is just asking to become chip shrapnel at the bottom of your dish.
If you want to keep things a little lighter or offer veggie options, I always include firm vegetables. Thick slices of bell pepper (red and yellow look gorgeous next to the dip!) or celery sticks work perfectly. Even carrot sticks can handle the load, and they add a nice crunch against the creamy texture of the sour cream and guacamole.
If you’re looking for some really hearty options that pair well with these kinds of Layered Dip Recipes, I recently shared my favorite easy weeknight meal, the Chipotle-Style Burrito Bowls. The flavors harmonize so well! But for dipping, stick to the tried-and-true sturdy chips or crisp veggies!
Storage and Make Ahead Party Dip Instructions
This is seriously one of the main reasons this layer dip is my MVP appetizer! You absolutely need to know that this recipe is built for making ahead. You can assemble the entire thing right up to the cilantro and olives, cover it tightly with plastic wrap—I mean *tightly*—and pop it in the fridge for up to about four hours before guests arrive.
That chilling time is essential, as I mentioned, for setting those distinct layers you worked so hard to create. It’s the ultimate Make Ahead Party Dip because when you pull it out, it looks freshly made!
What about leftovers? Well, cover it again and keep it chilled for up to two days. Things might get a little watery on the very top layer (that’s usually the salsa separating a touch), but you just stir that top layer gently before serving again. For storage tips on other make-ahead meals, you should definitely check out my guide on Freezer Breakfast Burritos!
Frequently Asked Questions About Layer Dip
I get asked the same few questions every single time I make this layered dip for a crowd. It’s totally normal when you’re trying to plan the perfect spread! Here are my best answers to keep your party planning smooth and delicious.
Can I freeze this layer dip?
Oh, honey, I really wouldn’t recommend it! This is a fantastic make ahead party dip, but freezing and thawing tends to ruin the lovely texture we worked for. The refried beans and sour cream get weirdly separated and watery once thawed, and the fresh guacamole definitely turns brown and mushy. Stick to preparing it the morning of the party or the night before for the best results!
What if I really hate olives or want a Vegetarian Layer Dip alternate?
That is completely fine! Olives are totally optional, and if you don’t like them, just skip them! For your Vegetarian Layer Dip, you could substitute those olives with a layer of lightly seasoned, chopped green onions or even some finely diced jalapeños if you want to kick up the heat factor instead. It’s your dip; make it work for you!
What are the best chips to scoop up this dip?
This is crucial snack wisdom, so listen up! You need structural integrity, you know? Anything too thin will snap off right in the dip, leaving you with a sad chip remnant. I always reach for sturdy scoops or the thick, restaurant-style tortilla chips when serving any kind of Tex Mex Dip. If you’re looking for some other great appetizer ideas that feel a little fancier but are just as easy, check out my Stuffed Bell Peppers—they make a great side!
Can I use low-fat sour cream or cream cheese instead?
You technically can use low-fat versions, but it will change the texture of your Creamy Layered Appetizer, and I’ll be honest: it won’t be as good! The full-fat dairy is key to that rich, mouth-coating thickness. If you substitute, you’ll find the dip gets much looser, which makes those defined layers harder to maintain.
What’s the difference between this and a cold dip recipe?
That is such a smart question! For this specific recipe, it *is* a Cold Dip Recipe because everything is spread cold and served cold after chilling. It’s different from say, a Layered Bean Dip that you might warm up with melted cheese on top. This Seven Layer Dip is designed to stay cool and refreshing throughout the whole party!
Estimated Nutrition Facts for This Layer Dip
I know some of you wonderful cooks are keeping track of everything, and I totally respect that! While this is my go-to, super easy appetizer, I always want to give you the best info I can on what’s in it. I ran the numbers on a standard serving size based on the ingredients list above.
Remember, this is just an estimate, you know? How much you layer on your own chip, or whether you pile on extra olives, is going to change things! For the official details, always check the fine print on your containers, but this should give you a really good frame of reference for your classic layer dip.
If you want to read up on how I track nutrition on all my recipes—especially regarding sourcing and cross-contamination—you can check out my full details over on the site disclaimer page.
- Serving Size: 1/8 of dip
- Calories: About 210 per serving
- Total Fat: Around 15g (with 7g saturated fat)
- Carbohydrates: Roughly 12g
- Protein: About 8g
- Sugar: Very low, generally around 3g
- Sodium: This one’s higher, around 350mg, thanks to the canned beans and olives, so maybe watch the chips we serve it with!
See? It’s a rich dip, but in moderation, it’s perfect for a party spread. Enjoy it, and don’t worry too much about tracking every bite when everyone is having fun!
PrintClassic Seven Layer Dip

A simple, crowd-pleasing Tex-Mex dip featuring seven distinct layers, perfect for parties and game days.
- Prep Time: 15 min
- Cook Time: 0 min
- Total Time: 15 min
- Yield: 8 servings
- Category: Appetizer
- Method: Assembling
- Cuisine: Tex-Mex
- Diet: Vegetarian
Ingredients
- 1 (16 ounce) can refried beans, softened
- 1 cup guacamole
- 1 cup sour cream
- 1 cup shredded cheddar or Mexican blend cheese
- 1/2 cup salsa
- 1/4 cup sliced black olives, drained
- 2 tablespoons chopped fresh cilantro
- 1/4 cup diced tomatoes (optional, for extra layer)
Instructions
- Spread the refried beans evenly across the bottom of a 9-inch pie plate or shallow serving dish.
- Spread the guacamole layer evenly over the beans.
- Spread the sour cream layer over the guacamole.
- Sprinkle the shredded cheese evenly over the sour cream.
- Spoon the salsa over the cheese layer.
- Distribute the sliced black olives over the salsa.
- Sprinkle the chopped cilantro over the top. If using diced tomatoes, add them as the final top layer.
- Cover the dip and chill for at least 30 minutes before serving to allow the layers to set.
Notes
- You can make this dip up to 4 hours ahead of time. Keep it covered in the refrigerator.
- For a thicker sour cream layer, mix 1 cup sour cream with 1 packet of taco seasoning.
- Serve with tortilla chips, sturdy crackers, or vegetable sticks.
Nutrition
- Serving Size: 1/8 of dip
- Calories: 210
- Sugar: 3
- Sodium: 350
- Fat: 15
- Saturated Fat: 7
- Unsaturated Fat: 8
- Trans Fat: 0.5
- Carbohydrates: 12
- Fiber: 3
- Protein: 8
- Cholesterol: 30