

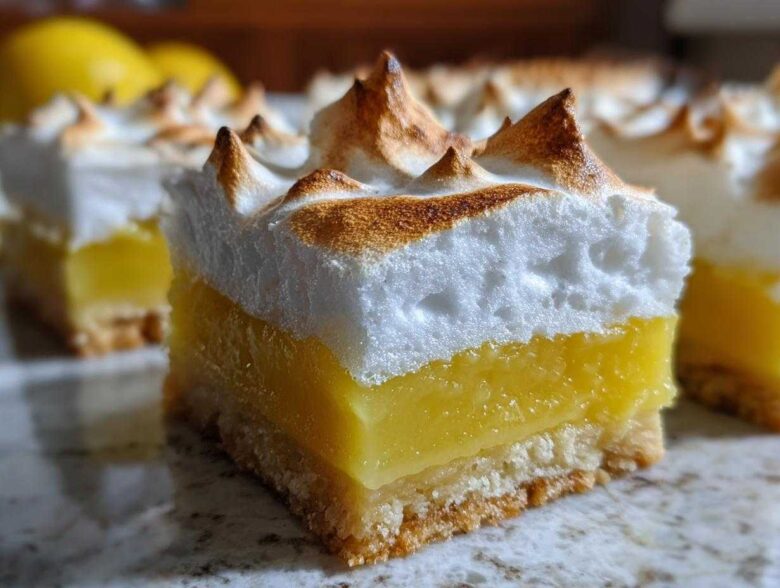
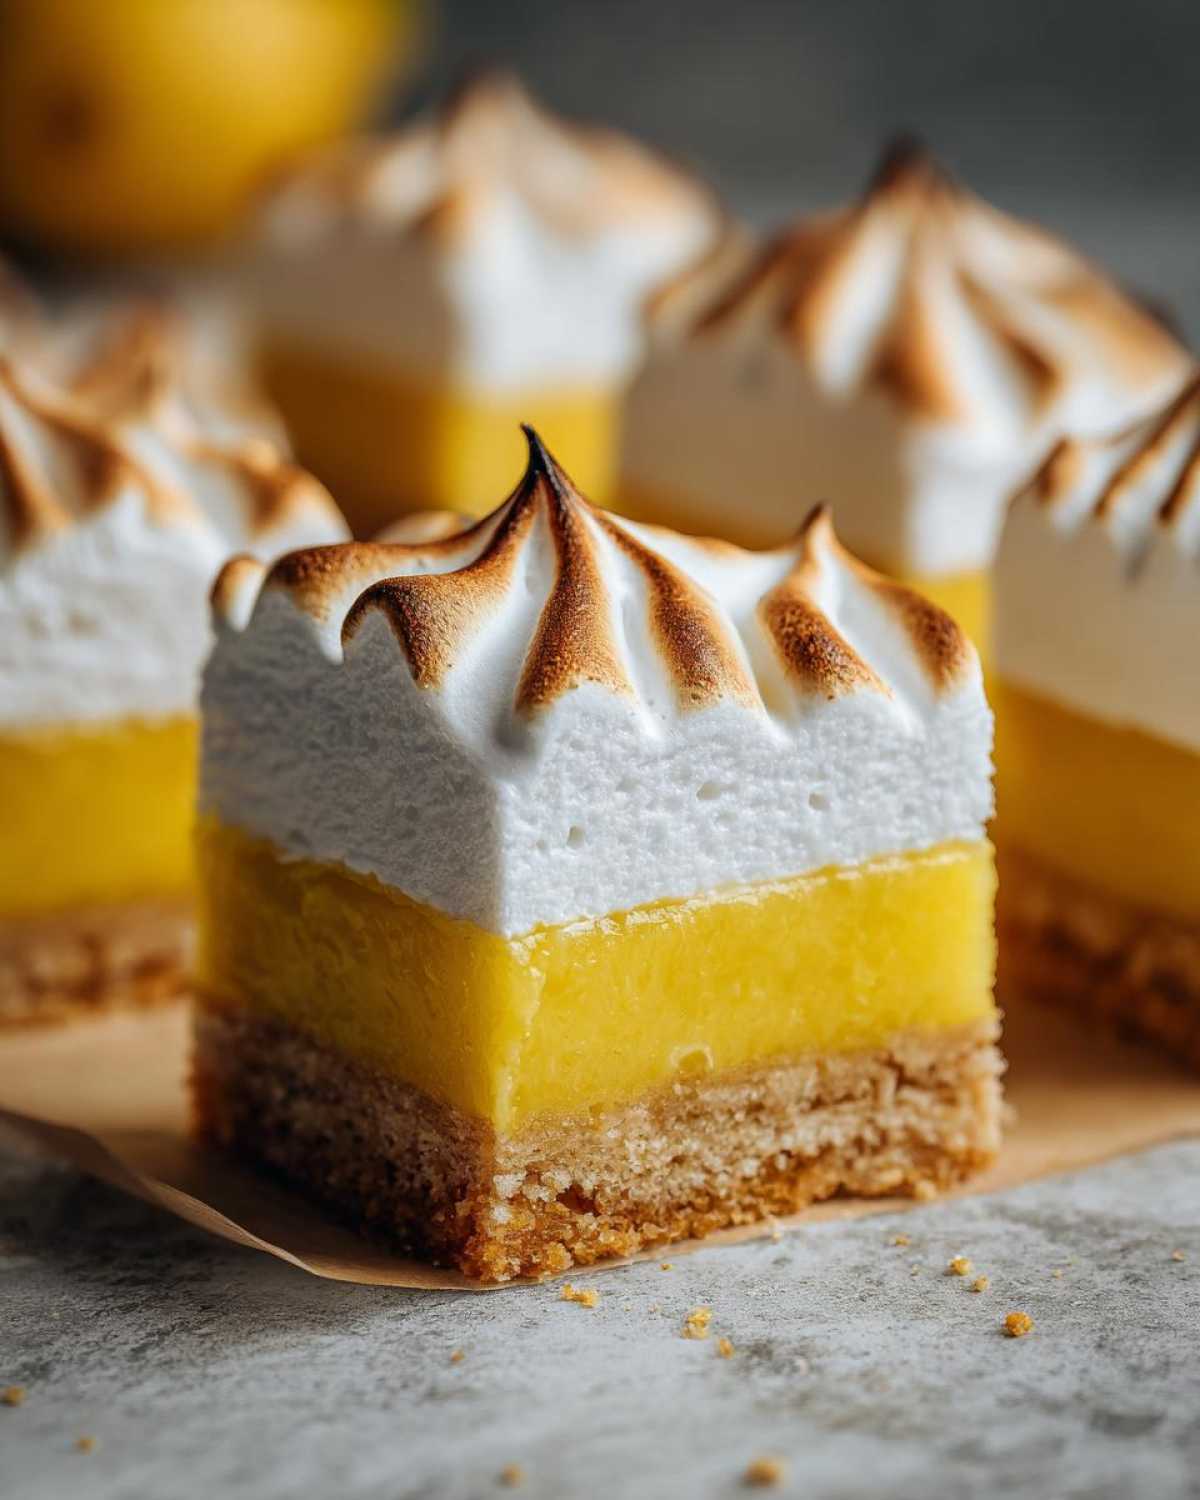
You know how much I adore a breathtaking lemon meringue pie, right? The way that fluffy white cloud sits atop that impossibly bright, tangy filling? Divine! But let’s be real for a second: cutting slices at a party is messy, and trying to transport a whole, wobbly pie is a high-stakes operation. That’s why I spent way too much time perfecting these **Lemon Meringue Pie Bars**! We get all the wow-factor of the classic—that buttery shortbread crust, that electrifying lemon punch, and the sweet, toasted meringue—but in easy, portable squares. Trust me, once you switch to bar format, you won’t look back. I wanted a dessert that could survive a picnic basket, and wow, did we nail it. If you love citrus, maybe you’ve tried my easy lemon loaf, but this hits different! You absolutely must try these.
Why You Will Love These Lemon Meringue Pie Bars
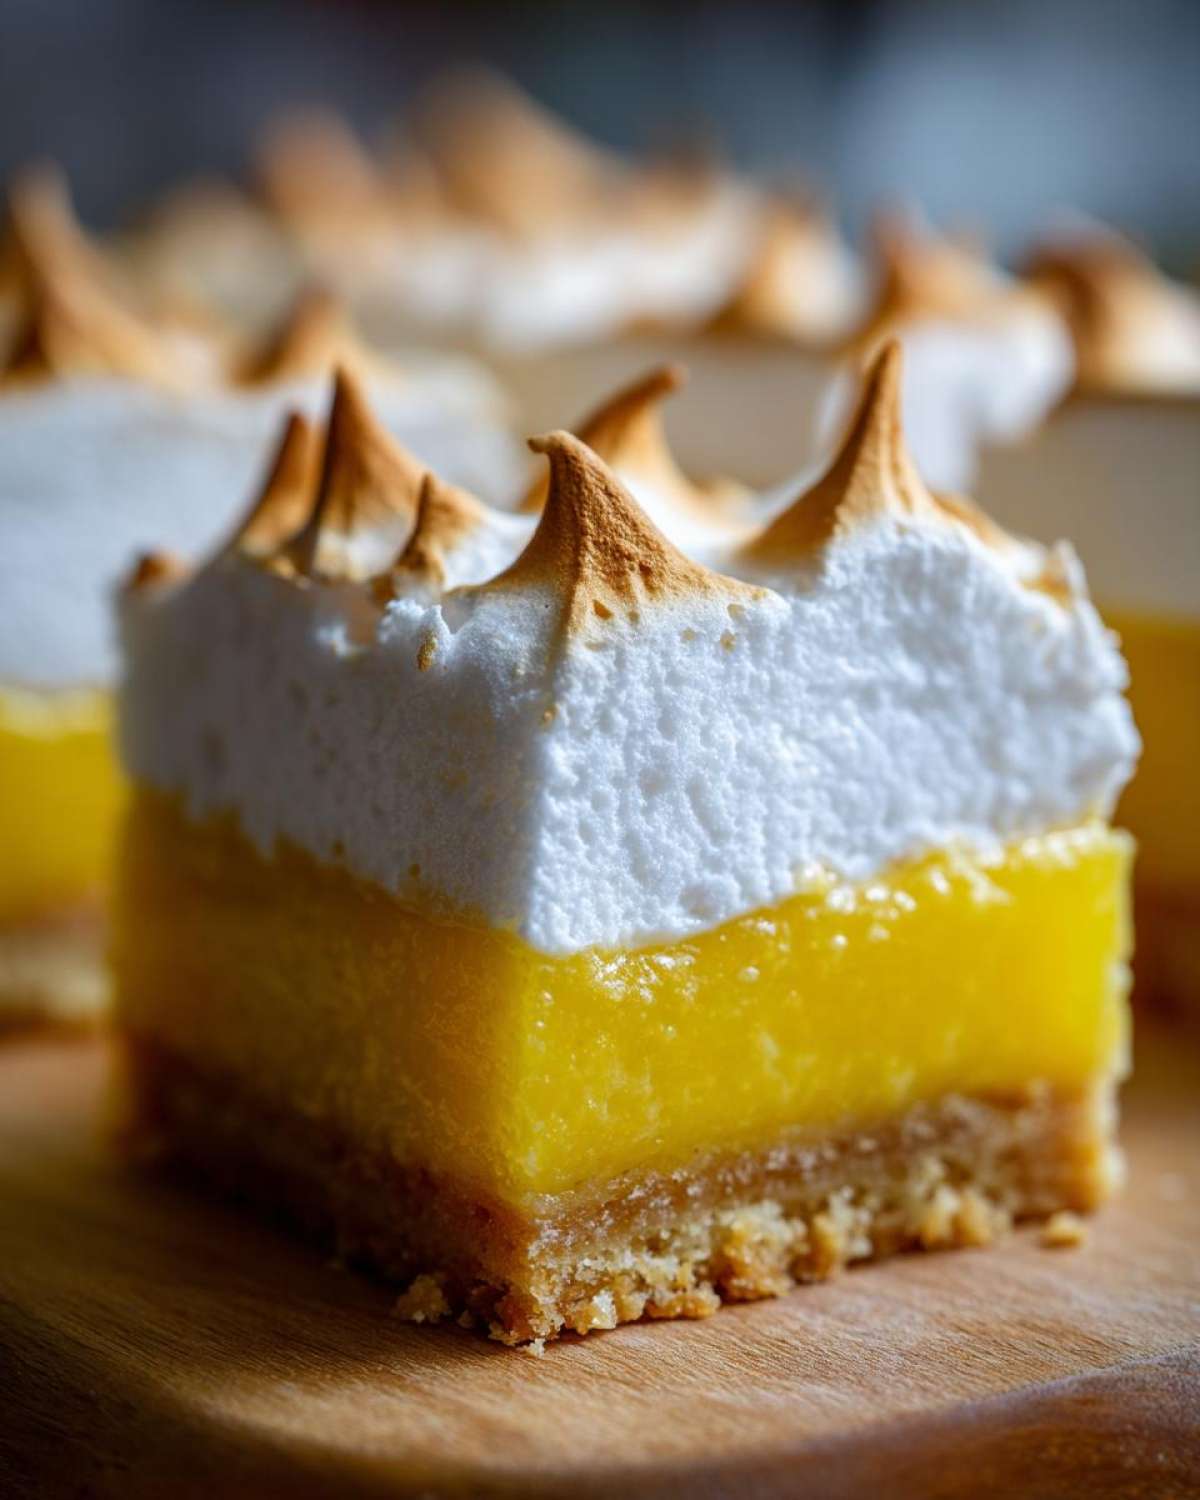
I know, I know, you want to know why these are better than the OG pie. Well, I whipped up these bars specifically to solve all my entertaining problems! They are absolutely perfect for potlucks and bake sales because they don’t need careful slicing.
- Ultimate Portability: Because they are chilled and set, you can easily transport them anywhere without worrying about a collapsing meringue layer. Talk about a handy no fuss lemon meringue dessert!
- Perfectly Balanced Flavor: The buttery shortbread crust is the ideal sturdy base to cut through that punchy, bright lemon filling—it’s sweet and tart in every single bite.
- Super Easy Serving: Forget spoons and plates! These are hand-held. Just use the parchment overhang to lift them right out of the pan.
- Stable Structure: We bake the filling for an extra few minutes to ensure it sets firmly into the crust, unlike a wobbly traditional pie filling.
Essential Ingredients for Ultimate Lemon Meringue Pie Bars
Having all your ingredients ready before you start is my biggest secret to stress-free baking. When you’re making something with three distinct layers like these Lemon Meringue Pie Bars Recipe, organization is everything! I’ve broken down the ingredients based on which part of the bar they belong to. Pay close attention to temperature requirements—they make a huge difference, especially for that gorgeous meringue topping!
If you’ve ever made my classic creamy buttermilk pie, you know how much the quality of the base matters. It’s the same here!
For the Buttery Crust
We need a sturdy, sweet base to hold all that tart filling, so we are going classic shortbread style:
- 1 1/2 cups all-purpose flour
- 1/2 cup powdered sugar
- 1/4 teaspoon salt
- 1/2 cup (1 stick) cold unsalted butter, cubed
- 2 large egg yolks
- 1 teaspoon vanilla extract
For the Bright Lemon Filling Recipe for Bars
This is where the tangy magic happens, and please, please use fresh lemons. It’s non-negotiable for that vibrant flavor!
- 1 1/2 cups granulated sugar
- 1/4 cup all-purpose flour
- 1/4 cup cornstarch
- 1/2 teaspoon salt
- 3 large egg yolks
- 1 cup cold water
- 1/2 cup fresh lemon juice (This is key!)
- 2 tablespoons lemon zest
- 2 tablespoons unsalted butter
For the Toasted Meringue Topping
For the meringue to get tall and glossy, your egg whites must be at room temperature. Don’t skip that step!
- 4 large egg whites, room temperature
- 1/4 teaspoon cream of tartar (This helps stabilize the fluff!)
- 1/2 cup granulated sugar
Step-by-Step Guide to Making Lemon Meringue Pie Bars
Alright, get your 9×13 pan ready! This process moves pretty quickly once you get going, which is why these Lemon Meringue Pie Bars feel like a weeknight miracle. We tackle this in three main phases: the base, the zingy center, and the cloud on top. Don’t rush the crust, though; it’s the foundation holding all that amazing lemon goodness!
Make sure you preheat your oven right away to 350°F (175°C). For easy removal later—seriously, you want this overhang—line that 9×13 pan with parchment paper, letting the sides stick up like little handles. You’ll thank me when it’s time to lift these beauties out.
Baking the Shortbread Crust Lemon Bars Recipe
For this buttery crust, you need to work fast while the butter is cold. Dump the flour, powdered sugar, and salt into a bowl. Then, use your fingers or a pastry blender to cut in that cold, cubed butter until it looks like rough sand or those lovely coarse crumbs. Mix in the egg yolks and vanilla until the mixture just clumps together. Don’t overwork it! Press that dough firmly and evenly into your prepared pan. We’re baking it until it just whispers a little gold around the edges—about 18 to 20 minutes. Pop it out, but leave the oven running!
Creating the Tangy Lemon Dessert Bars Filling
This filling needs a little heat to get that perfect set consistency. Whisk together all your sugars, flour, cornstarch, and salt in a saucepan. Now, slowly whisk in the yolks, water, lemon juice, and zest until everything is incorporated. Get this over medium heat and you MUST stir constantly. Once it starts bubbling, let it boil for a minute while you keep stirring like crazy—this cooks out the starchiness. Take it off the heat, stir in those last two tablespoons of butter until it melts in, and immediately pour this hot, bright lemon filling recipe for bars right over your warm crust. Back into the oven it goes for just 10 to 12 minutes. This ensures the filling is set before the meringue goes on.
How to Make Meringue on Bars and Final Bake
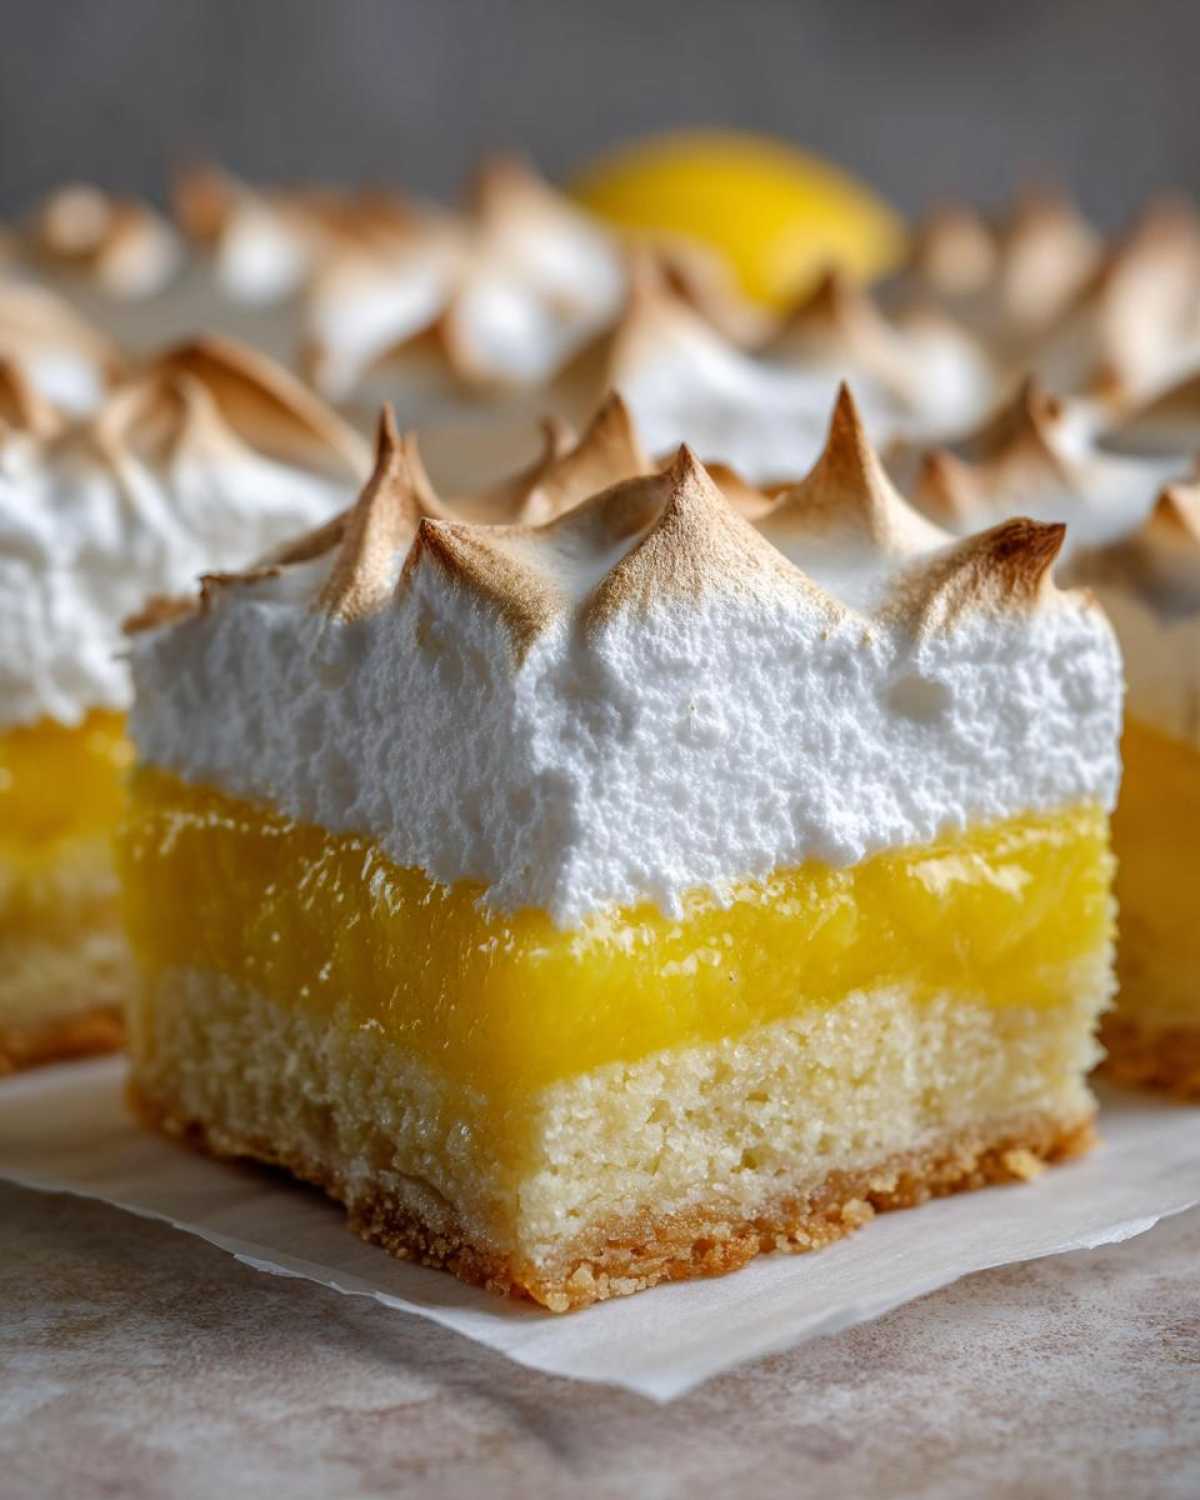
While the filling sets, whip those room-temperature egg whites with the cream of tartar until they get soft peaks—they should look a bit like fluffy clouds starting to form. Now, slowly sprinkle in that final half cup of sugar, one spoonful at a time, beating the mess out of it until you get those stiff, ridiculously glossy peaks. This is crucial for stable Lemon Meringue Pie Bars! Spread this beautiful meringue over the warm lemon layer. Make sure you push the meringue right to the edges of the crust; this seals it up so it doesn’t shrink as it bakes. Bake for 10 to 15 minutes until lightly browned, or if you’re feeling flashy (I usually am!), use a kitchen torch! Let these cool completely before you even *think* about slicing them. Patience pays off here, just like when making sheet pan pancakes!
Tips for Success with Your Lemon Meringue Pie Bars
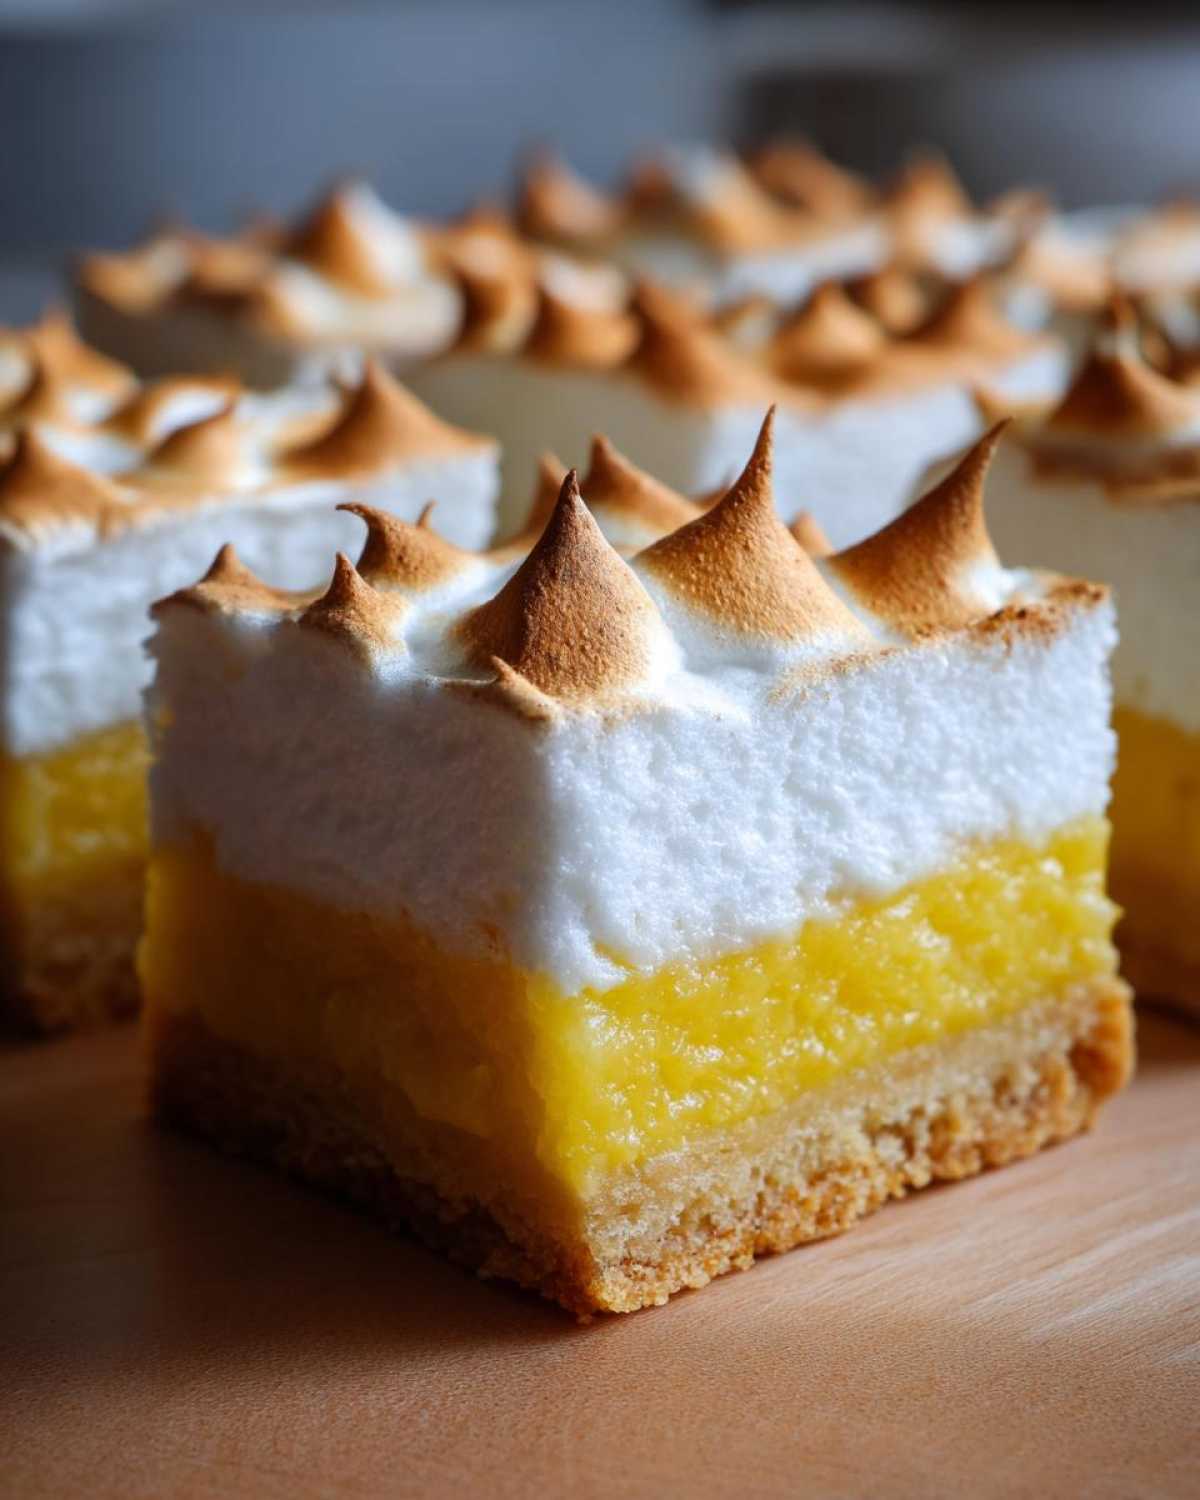
Baking something this layered can be intimidating, but honestly, it’s just a few simple rules that make all the difference between a triumph and a sticky mess. I’ve gathered my best secrets for making sure your Lemon Meringue Pie Bars are perfect from the bottom crust all the way to the toasted peaks.
First, use that fresh lemon juice! Seriously, bottled lemon juice just doesn’t have the necessary brightness to cut through the sugar. That “Bright Lemon Filling Recipe for Bars” really depends on good, fresh zest and juice, otherwise, it tastes flat.
Next up, the meringue’s enemy is grease. When whipping your egg whites, your bowl and whisk attachment have to be surgically clean. Any trace of fat—even from your fingers—will stop those whites from whipping into stiff, glossy peaks. No exceptions!
Finally, remember to press that meringue all the way down to the edges of the crust when you spread it on. This seals the filling in, which is my best defense against that dreaded weeping. It locks out moisture, and you get a nicer slice because the whole thing holds together better.
Make Ahead Lemon Bars and Storage Instructions
I know for big gatherings, you need a plan, and that’s why I love that these are great Make Ahead Lemon Bars! You can totally bake the crust and whip up that beautiful lemon filling a whole day before you plan to serve them. Just store those two layers covered tightly in the fridge; they hold up like champs. But here’s the catch: the finished bar with the meringue topping absolutely needs refrigeration because of those fluffy egg whites.
Once they are completely cooled and set (and believe me, you must let them cool before slicing!), I wrap the whole batch tightly in plastic wrap, taking care not to smash that topping. They keep really well in the fridge for about three days. If you’re taking them somewhere, just keep them cool until serving. If you have leftovers, and I hope you do, keep them chilled; they taste great cold right out of the fridge, almost like a lemon custard candy!
For transporting them, I highly recommend baking them in the parchment paper sling we talked about for the baking prep. Just let the bars cool almost completely first, then carefully lift the whole set out using the overhang before cutting. If you cut them before chilling fully, you’re just asking for trouble!
Ingredient Notes and Substitutions for Lemon Meringue Pie Bars
Let’s talk specifics, because substitutions can sometimes ruin a delicate bar like this, especially when you have something as temperamental as meringue involved! I know sometimes life throws you lemons—literally, if you’re stuck with bottled juice—but you need to be careful.
My first non-negotiable? Fresh lemon juice. I’m firm on this for these Lemon Meringue Pie Bars. Bottled lemon juice has a stale, almost metallic flavor that just won’t give you that clean, sharp tang we are aiming for in the filling. If you’re using fresh, you should get about enough juice from 3 to 4 large lemons, but always measure it out to the half-cup required.
Now, about that crust. The recipe calls for butter because that’s what gives you that rich, crumbly, luxurious shortbread texture—it’s the best for holding up to a wet filling. If you absolutely must substitute, you could try using a mix of shortening and butter, maybe 50/50. But honestly, the flavor won’t be as deep, and you might lose some of that gorgeous sandy crumble we worked so hard for during the mixing stage.
Also, be extremely mindful of your sugar measurement, especially in the filling! We need that specific amount of granulated sugar to work with the cornstarch and egg yolks to create a stable, set filling that doesn’t separate. Don’t try to cut back too much on the sugar, or the filling won’t set up properly when baked, and then you’ll end up with a runny mess instead of the structured, tangy lemon dessert bars you deserve. It’s a careful balance of sweet and sour, so stick to the recipe here!
Serving Suggestions for Your Portable Lemon Meringue Dessert
Because these Lemon Meringue Pie Bars are already sweet, tangy, and rich, they don’t need much fuss for serving! If you want a little extra something on the side, skip heavy creams or butter-based toppings. They shine brightest when paired with something cold and bubbly to cleanse the palate.
My absolute favorite pairing is a tall, icy glass of homemade sparkling beverage. Have you checked out my recipe for a maple apple cider fizz? The warm spice notes from the cider balance that sharp lemon perfectly.
If you’re feeling like a garnish, a tiny sprinkle of finely chopped pistachios right over the toasted meringue adds a lovely green contrast and a nice little textural crunch that’s unexpected.
Frequently Asked Questions About Lemon Bars with Meringue
Okay, let’s tackle those last little sticking points that might pop up when you’re making these gorgeous Lemon Bars with Meringue. It’s normal! We all run into silly little issues sometimes, but I’ve got the fixes right here so you can produce perfect, sweet and tart lemon squares every time you bake.
Why is my meringue weeping on my Lemon Meringue Pie Bars?
Oh, weeping meringue—the nemesis of every lemon lover! This usually happens for one of two reasons with these bars, sadly. First, if the lemon filling underneath wasn’t baked long enough to be fully set, it releases steam, and that moisture pushes up through the meringue causing those little beads of sugar water to form. Second, if you didn’t spread the meringue right to the edges of the crust when applying it, that exposed edge shrinks faster than the center, leaving wet gaps. Remember what I said? Seal it to the edges!
Can I use a different pan size for these Lemon Meringue Pie Bars?
You definitely can, but you have to adjust your expectations—and your baking times! The recipe is written for a 9×13 inch pan because it gives us the perfect height for the crust, filling, and meringue stack. If you decide to use a smaller 8×8 inch pan, your bars will be super thick! That means the crust might need an extra 5 minutes, and the filling will require at least an extra 5 to 8 minutes to set up properly. If you go bigger, like a half-sheet pan, they’ll be thin, and you’ll need to reduce all baking times significantly. It’s easier to stick to the 9×13 for the Best Lemon Meringue Bar Recipe!
We want thick, substantial bars, not thin little wafers, thankfully! If you want to try something different later along the lines of a fudgy texture, you should check out my lemon brownies, but for meringue, stick to the standard pan size.
Another common question I get when folks make these Easy Lemon Meringue Dessert Bars is whether they can skip the second bake after topping with meringue. If you used a kitchen torch like I sometimes do for a quick toast, you could theoretically skip that final 10 minutes in the oven, but I really recommend that short bake to ensure the meringue adheres perfectly to that hot lemon layer underneath.
Estimated Nutritional Snapshot for Lemon Meringue Pie Bars
Now, I have to give you the standard disclaimer here because, let’s face it, baking is an art, not a science, and not every stick of butter weighs exactly the same! I always say you shouldn’t focus too much on the numbers when you’re eating something this joyful, but I know some of you like to keep track. These values are based on my estimations for 24 servings, using standard measuring practices. If you want the exact breakdown for your specific bake, you’ll need to plug your exact ingredients into a calculator, of course!
You can always find more detailed information regarding nutritional estimates on our general disclaimer page, but generally, these bars are a decadence! They are quite high in sugar because, hello, meringue and lemon curd! Even so, they offer a nice little protein boost from those four eggs we used in the filling and topping.
- Serving Size: 1 bar
- Calories: 220
- Sugar: 24g
- Sodium: 75mg
- Fat: 10g
- Saturated Fat: 6g
- Unsaturated Fat: 4g
- Trans Fat: 0g
- Carbohydrates: 33g
- Fiber: 1g
- Protein: 4g
- Cholesterol: 55mg
See? A perfectly reasonable treat when you consider how much happiness one little square of these Lemon Meringue Pie Bars brings! Just remember every batch is slightly unique, so treat these numbers as a close ballpark figure.
Share Your Sweet and Tart Lemon Squares Experience
Well, friend, that’s it! We’ve conquered the crust, tamed the tangy filling, and toasted the meringue to perfection. Now comes my favorite part: hearing from you! I put my whole heart into making this the definitive recipe for Lemon Meringue Pie Bars, and I really want to know what you think when you make them in your kitchen.
Did that shortbread crust come out just sandy and perfect? Did you manage to get those stiff, gorgeous peaks on your meringue? Please, don’t be shy! Drop a comment below and tell me how your sweet and tart lemon squares turned out. Did you serve them plain, or did you try one of my little serving suggestions?
If you made these bars and took a picture—especially if you caught my favorite part, that beautiful toasted cloud—please share it! You can tag me on social media; I love seeing my recipes come to life in your homes. Your feedback actually helps me make these articles even better and keeps me motivated to test more dessert bar creations for you. I’m already working on a blackberry version, thanks to a reader suggestion!
If you loved this recipe and want to see more tested-and-true family favorites, don’t forget to check out the About Us page to learn more about our baking philosophy. Happy baking, everyone!
PrintUltimate Lemon Meringue Pie Bars with Toasted Meringue Topping

Make portable, tangy lemon meringue pie bars featuring a buttery shortbread crust, bright lemon filling, and a stable, toasted meringue topping.
- Prep Time: 30 min
- Cook Time: 55 min
- Total Time: 85 min
- Yield: 24 bars
- Category: Dessert
- Method: Baking
- Cuisine: American
- Diet: Vegetarian
Ingredients
- 1 1/2 cups all-purpose flour
- 1/2 cup powdered sugar
- 1/4 teaspoon salt
- 1/2 cup (1 stick) cold unsalted butter, cubed
- 2 large egg yolks
- 1 teaspoon vanilla extract
- 1 1/2 cups granulated sugar
- 1/4 cup all-purpose flour
- 1/4 cup cornstarch
- 1/2 teaspoon salt
- 3 large egg yolks
- 1 cup cold water
- 1/2 cup fresh lemon juice
- 2 tablespoons lemon zest
- 2 tablespoons unsalted butter
- 4 large egg whites, room temperature
- 1/4 teaspoon cream of tartar
- 1/2 cup granulated sugar
Instructions
- Preheat your oven to 350°F (175°C). Line a 9×13 inch baking pan with parchment paper, leaving an overhang on the sides for easy removal.
- Prepare the crust: In a medium bowl, whisk together 1 1/2 cups flour, powdered sugar, and 1/4 teaspoon salt. Cut in the cold butter using a pastry blender or your fingers until the mixture resembles coarse crumbs.
- Mix in the 2 egg yolks and vanilla extract until the dough just comes together. Press the dough evenly into the bottom of the prepared pan.
- Bake the crust for 18 to 20 minutes, or until the edges are lightly golden. Remove from the oven and set aside while you prepare the filling. Keep the oven on.
- Prepare the lemon filling: In a medium saucepan, whisk together 1 1/2 cups sugar, 1/4 cup flour, cornstarch, and 1/2 teaspoon salt.
- Whisk in the 3 egg yolks, cold water, lemon juice, and lemon zest until smooth.
- Cook the mixture over medium heat, stirring constantly, until it thickens significantly and comes to a boil. Boil for 1 minute, stirring constantly. Remove from heat and stir in the 2 tablespoons of butter until melted.
- Pour the hot lemon filling evenly over the warm baked crust. Return the pan to the oven and bake for 10 to 12 minutes, until the filling is set. Remove from the oven and let cool slightly while you make the meringue.
- Prepare the meringue: In a clean, dry bowl of a stand mixer fitted with the whisk attachment, beat the egg whites and cream of tartar on medium speed until soft peaks form.
- Gradually add the 1/2 cup granulated sugar, one tablespoon at a time, beating until stiff, glossy peaks form.
- Spread the meringue evenly over the warm lemon filling, making sure to seal the meringue to the edges of the crust to prevent shrinking.
- Bake the bars for 10 to 15 minutes, or until the meringue is lightly golden brown. Alternatively, use a kitchen torch to toast the meringue to your liking.
- Cool the bars completely on a wire rack before lifting them out of the pan using the parchment overhang. Cut into squares.
Notes
- For the best results, use fresh lemon juice, not bottled.
- Make sure your bowl and whisk attachment are completely free of grease when making the meringue; any fat will prevent the egg whites from whipping properly.
- You can make the crust and filling a day ahead. Store them covered in the refrigerator before topping with meringue and baking.
Nutrition
- Serving Size: 1 bar
- Calories: 220
- Sugar: 24
- Sodium: 75
- Fat: 10
- Saturated Fat: 6
- Unsaturated Fat: 4
- Trans Fat: 0
- Carbohydrates: 33
- Fiber: 1
- Protein: 4
- Cholesterol: 55