

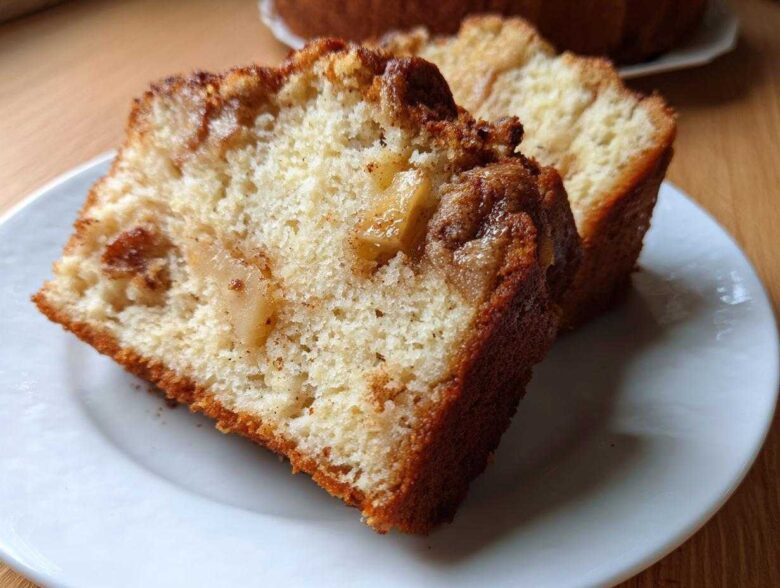
Oh, you know that smell? The one that just screams cozy sweaters, crisp air, and family gathering around the table? That’s the aroma of a truly perfect fall dessert, and for me, nothing beats my jewish apple cake. Forget those dry, crumbly things you sometimes find; I’ve cracked the code. Trust me when I say this is the best, most unbelievably moist jewish apple cake recipe you will ever tangle your apron strings with. I remember the first time I made this for Rosh Hashanah years ago—my Aunt Sheila nearly cried because it reminded her so much of home. It’s tender, packed with apples, and unbelievably simple to pull together. If you’re looking for that hug in dessert form, stick right here, because we’re about to make magic!
We pride ourselves on being authentic in the kitchen, and that commitment to quality flavor starts with tradition. You can read a bit more about our passion for classic baking here, but for now, let’s focus on getting those apples ready!
Why This Moist Jewish Apple Cake Recipe Stands Out
Honestly, there are a million apple cake recipes out there, but this one hits different. It’s the recipe you turn to when you need a showstopper that doesn’t stress you out. This isn’t just another dessert; it’s guaranteed flavor and texture every single time. It’s easy to see why this version of the jewish apple cake has become our family’s go-to.
- Unbeatable Moisture: Seriously, this cake stays perfectly damp for days.
- That Cinnamon Kick: We use cinnamon both mixed in with the apples and sprinkled on top for layers of warm spice.
- Holiday Ready: It’s sturdy enough to travel, but delicious enough for the highest table.
Achieving the Perfect Tender Apple Cake Texture
The secret weapon here is actually the oil! Using vegetable oil instead of butter makes all the difference in keeping the crumb soft. Butter is lovely, but oil coats the flour better, resulting in that incredibly desirable moist texture. It’s how we guarantee a beautiful, tender apple cake that melts in your mouth.
Ideal for Rosh Hashanah and Fall Baking Recipes
This cake just feels special. Whether the High Holidays are coming up or you just need a stunning centerpiece for your next gathering, this truly is the best rosh hashanah cake out there. It fits so perfectly into all your fall baking recipes—it’s fragrant without needing spices like cloves, keeping the apple flavor front and center.
Ingredients for the Best Jewish Apple Cake
Okay, let’s look at what we need! Shopping for this cake is half the fun, especially grabbing those perfect crisp apples. The list is simple, which is another reason I love bringing this centerpiece out for holidays. You won’t see temperamental ingredients here, just honest food that tastes amazing. Remember, precision matters, especially when we mix the apples later. Get everything measured out before you even turn the oven on; that’s my non-negotiable rule for stress-free baking!
Preparing the Apple and Cinnamon Sugar Mixture
This is where the flavor starts to build! You absolutely need 2 cups of apples that have been peeled, cored, and diced. I find about four medium apples get me right to that measurement. For the gorgeous spiced coating, we’re tossing those diced beauties with the remaining 1/2 cup of granulated sugar, the full teaspoon of ground cinnamon, and that 1/4 cup of packed brown sugar. Make sure that brown sugar is nice and fluffy; if it’s hard as a rock, microwave it for about ten seconds to soften it up before you toss it with the apples. That sugar melts down during baking and creates the signature ribbon of spice!
Dairy Free Apple Cake Components
One of the biggest perks of this recipe, especially when hosting large families, is that it’s naturally free of dairy. That means no worrying about separate platters or cross-contamination; this jewish apple cake fits right in everywhere. We rely on vegetable oil for moisture instead of butter, which keeps the entire cake wonderfully light and ensures that this delicious dairy free apple cake stays fresh longer than cakes made with butter.
Step-by-Step Instructions for Your Jewish Apple Cake
Alright, apron on! This is where we bring all those beautiful ingredients together. Remember, baking is fun, but rushing leads to tough cakes, and we absolutely will not stand for a tough cake. We want that soft, melt-in-your-mouth texture. Since you’ve already whisked your dry items and tossed your apples, we just need to focus on the mixing sequence and the oven time. Pay close attention to the very last mixing step; that’s the one that separates a good cake from the best apple cake!
First things first: get that oven humming at 350 degrees Fahrenheit! You want it fully heated before the batter even thinks about going in there. While it warms up, take your 10-inch tube or Bundt pan—the classic shape for this recipe—and grease and flour it really well. Don’t skip this step, or the sticking demons will get you later!
You can find our little refresher on home baking tips over on the blog if you need a quick refresher on pan prep.
Mixing the Batter for a Moist Apple Cake Recipe
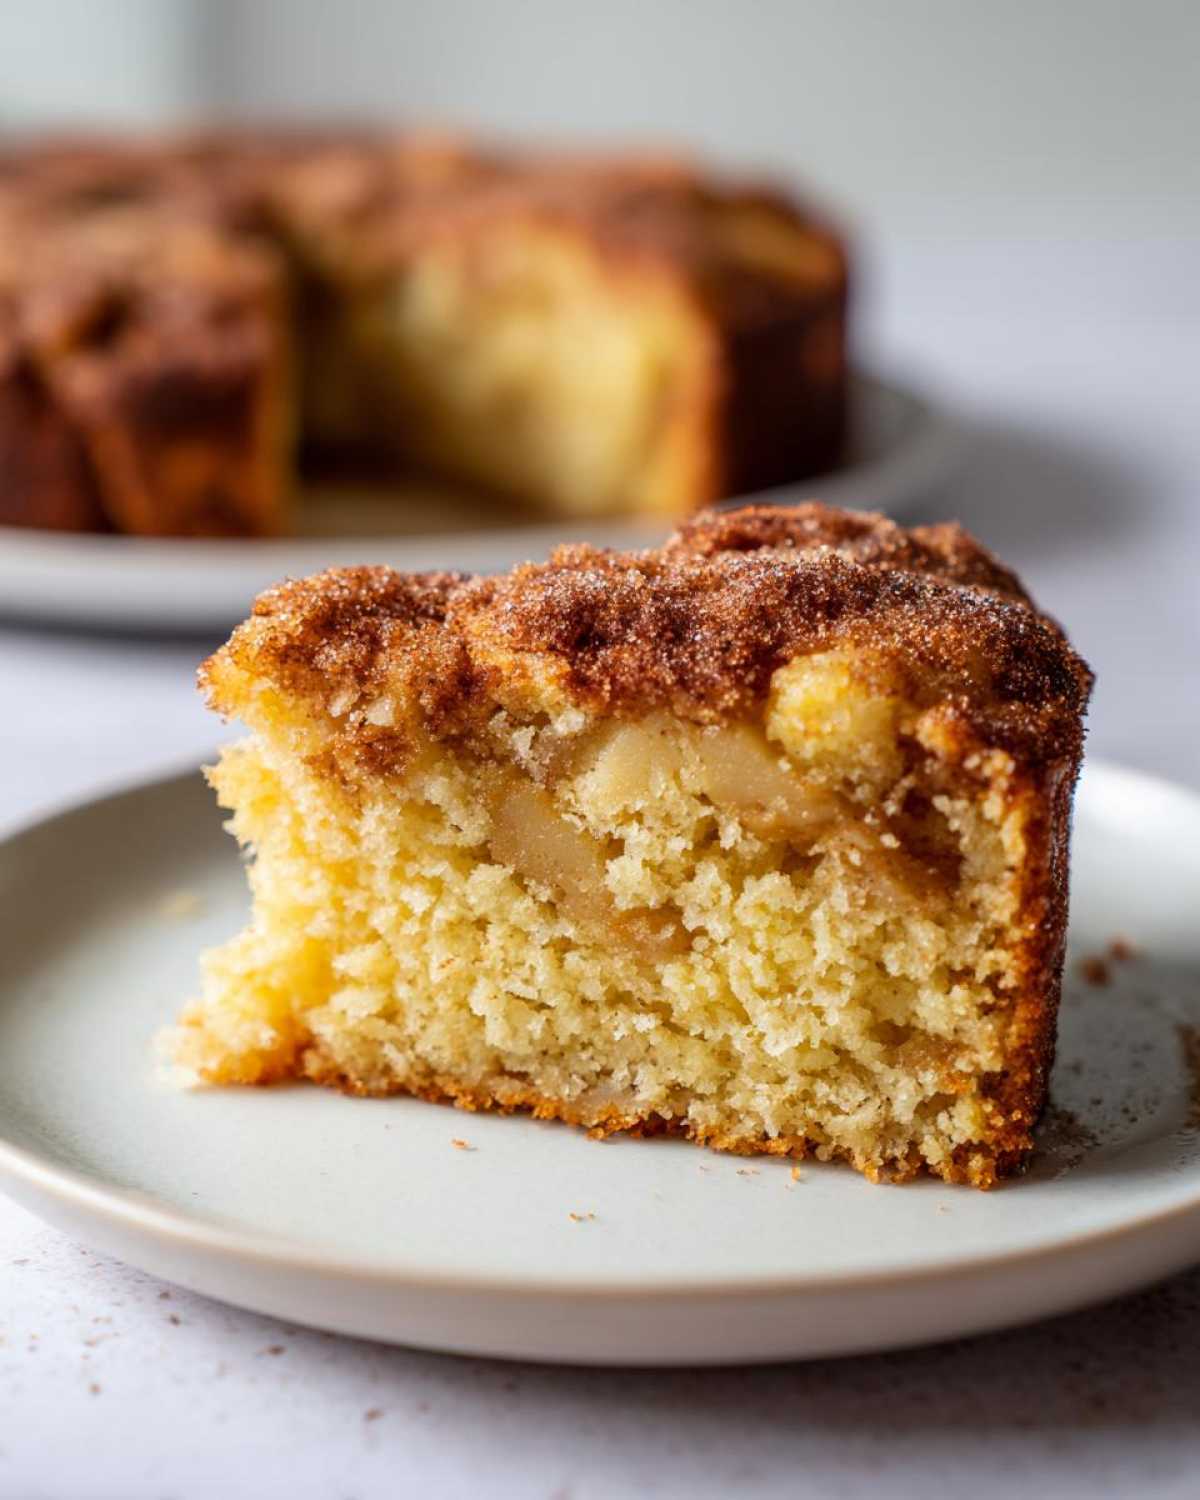
We start by combining the wet items—remember those four eggs, the oil, sugar, orange juice, and vanilla—in a big bowl until they look happy and smooth. Then, slowly, gradually, we introduce the dry mixture (flour, powder, salt) we set aside earlier. Here is my biggest E-E-A-T tip: Mix until *just* combined. I mean it! As soon as you see the last streak of flour disappear, stop the mixer or put down the spoon. Overmixing develops gluten, and gluten is the enemy of a light crumb. We are aiming for a wonderfully soft, moist apple cake recipe, not a chewy bread!
Once the batter is barely mixed, gently fold in those gorgeous, sugared apples. Use a spatula for this part, moving slowly to avoid deflating all the air we just worked hard to incorporate. Pour the whole wonderful mess right into your prepared pan.
Baking and Cooling the Classic Apple Cake
Now, slide the pan into that hot oven. This classic apple cake typically takes between 60 and 70 minutes to bake through completely. You need to test it properly! Give it about 60 minutes, then stick a wooden skewer right into the thickest part of the cake, avoiding an apple chunk. If it comes out clean, you’re done! If it has wet batter, give it another five minutes.
The cooling process is crucial for keeping this cake intact. Do *not* try to dump it out immediately! Let it sit right there in the pan on a wire rack for a full 15 minutes. This lets the structure set up slightly. After those fifteen minutes, flip it out gently onto the rack to cool completely. Trust me, patience during cooling prevents tragic cracks and sticking!
Tips for Success When Making Jewish Apple Cake
Even though this recipe is super straightforward, a couple of insider tips can take your jewish apple cake from good to legendary. Baking is all about respecting the chemistry, right? I’ve learned these tricks over years of making this cake for every single holiday, and they really prevent any kitchen mishaps!
Apple Selection and Substitution Guidance
If you want that perfect balance—not too mushy and not too tart—you have to mix your apples! I always use a 50/50 blend of Granny Smith (for that wonderful sharp tang) and Honeycrisp or Fuji (for sweetness and structure). If you see that optional streusel topping note where I mentioned using flour, brown sugar, and butter for crumbs instead of the simple cinnamon toss? Go for it once in a while! It makes for an amazing, crunchy contrast to the moist interior, though the simple dusting is more traditional.
Baking in a Bundt Pan Apple Cake
Listen, the Bundt pan is beautiful, but it’s notorious for ruining perfectly good cakes. Since this batter is thick, you must be aggressive with your prep work. Don’t just spray lightly! Brush a thin layer of softened butter or shortening into every single crevice, then dust heavily with flour, tipping the pan upside down over the sink to knock out the excess. If you skip that thorough greasing, you risk losing half the beautiful design when you try to turn out your bundt pan apple cake.
Serving Suggestions for This Traditional Jewish Dessert
The beauty of this cake is how wonderful it tastes all on its own, just waiting on your cooling rack. But if you want to dress it up for a holiday table or just feel like indulging a little more, I have easy suggestions. Since this is a traditional jewish dessert, many of us keep it pareve, so skip the butter frosting! A very light dollop of plain whipped cream or a scoop of vanilla bean ice cream is heavenly alongside a warm slice. If you’re looking for the perfect beverage pairing, try this amazing Maple Apple Cider Fizz—the bubbles cut right through the richness of the oil and apples perfectly!
Storing and Reheating Your Homemade Apple Cake
One of the greatest parts about using oil instead of butter in this recipe is how wonderfully this cake keeps! Unlike delicate layer cakes, this homemade apple cake is actually *better* the next day once the juices have settled into the crumb. Don’t even bother wrapping it airtight right away; let it cool completely on the counter first.
Once it’s totally cooled, I just cover it loosely with foil or put it under a big cake dome on the counter. It stays perfectly fresh at room temperature for a good three or four days. Seriously, no fridge needed! The sealed container is only necessary if you live somewhere super humid, but cold temperatures can actually dry out baked goods faster, and we definitely don’t want that here.
If you absolutely must freeze it—maybe you made two for Rosh Hashanah, oops!—wrap individual slices tightly in plastic wrap, then put them into a freezer bag. When you’re ready for a slice, just let it thaw on the counter for an hour or two.
Now, reheating is my favorite part if you want that ‘just baked’ warmth. Pop a slice onto a microwave-safe plate for about 15 to 20 seconds on medium power. That little bit of gentle heat brings the sugar and spices right back to life. You’ll get the softest, warmest bite of apple cake you can imagine!
Frequently Asked Questions About Jewish Apple Cake
I get asked about this cake all the time, and honestly, it’s because people worry they’ll mess up that perfect moisture level! Here are the top things folks want to know before they start mixing up their own batch. Don’t sweat the details too much; this recipe is quite forgiving!
Can I make this jewish apple cake ahead of time?
Yes, and I highly encourage it! This jewish apple cake tastes even better on the second day. The flavors really deepen overnight when the cinnamon and apples have time to fully integrate into the crumb. Store it covered loosely at room temperature—no need to refrigerate unless your kitchen is incredibly humid. As I mentioned before, it holds up beautifully for four days, which is perfect for holiday hosting!
What is the best apple to use for this cinnamon apple cake?
We talked about mixing apples, but if you have to pick just one, go for something that holds its shape well and offers a bit of tartness to balance the sugar. Granny Smith is always my standard go-to for structure. However, if you want fantastic flavor, try just mixing Granny Smith with Honeycrisp. That combination gives you the perfect sturdy slice and a bright flavor profile in every bite of your cinnamon apple cake.
If you’re looking for other ways to use up those fall apples, you absolutely have to check out my recipe for Apple Cider Donut Muffins later this season—they’re dangerously good!
Do I absolutely have to use orange juice?
This is a great question! Yes, I strongly recommend the orange juice—it’s one of those little flavor boosters that makes this cake feel so bright and special. It adds a subtle citrus note that marries beautifully with the cinnamon, which you usually don’t get if you just swap it for milk. If you’re out of orange juice, you *could* use apple juice or even just plain water, but you’ll lose a little bit of that necessary tanginess that cuts through the sweetness of the oil.
Can I substitute the oil for applesauce to make it lighter?
I know, I know, people always want to swap oil for applesauce to cut the fat, especially in a recipe that already feels quite comforting. But please don’t! The oil is essential for the unique, velvety, slightly dense texture that makes this the best apple cake. Applesauce adds moisture, yes, but it also changes the crumb structure dramatically, usually making it taste more like pudding than cake. Stick to the oil for that classic result!
Estimated Nutritional Data for This Holiday Apple Dessert
Okay, let’s talk fuel! I always feel better knowing generally what’s in the treats I bake, especially when I’m bringing out something rich like this for a big holiday gathering. Now, I want to be super clear: I am a baker, not a certified dietitian! These numbers are calculated based on the ingredients listed in the recipe JSON, and they should only be seen as a rough guideline, not gospel truth.
That being said, because this jewish apple cake uses oil instead of a ton of butter, it actually comes out surprisingly balanced for a weekend treat. Especially since it’s dairy-free, which cuts out a lot of saturated fat right off the bat!
Here’s a quick look at the general makeup per slice (assuming 10 slices, of course):
- Calories: Around 350
- Total Fat: About 17 grams
- Carbohydrates: Roughly 48 grams
- Protein: A modest 4 grams
- Sugar Content: About 35 grams (much of this is from the apples and natural sugars in the brown sugar!)
Just remember, these figures are estimates. If you add a dollop of sour cream or a drizzle of glaze, those numbers are going up! Enjoy it mindfully, knowing you baked something truly special for your family.
Share Your Experience Baking This Comfort Food Dessert
Whew! That’s the last piece of advice I have for you, but the story doesn’t end here! My favorite moment is hearing from all of you who have brought this jewish apple cake into your own kitchens. Did it make it to your Rosh Hashanah table? Did you take my advice about mixing the apple types, or did you try something wonderfully new?
I absolutely live for your feedback! Please take a moment, if you can, to leave a star rating right down below—it really helps other bakers find this recipe. And if you snapped a picture of your beautiful golden cake, tag me on social media! I love seeing your creations.
Now, tell me: What’s the one thing you look forward to most when you take that first slice of homemade apple cake? Is it the tender crumb, the warm smell of cinnamon, or maybe that little bit of tartness from the apples? Let me know in the comments below! If you have any burning questions that I haven’t covered, feel free to send them my way through the contact page, too. Happy baking, friends!
PrintMoist Traditional Jewish Apple Cake
A classic, moist Jewish apple cake recipe featuring tender apples and a sweet cinnamon topping, perfect for holidays or fall baking.
- Prep Time: 20 min
- Cook Time: 70 min
- Total Time: 90 min
- Yield: 10 servings
- Category: Dessert
- Method: Baking
- Cuisine: Jewish
- Diet: Low Fat
Ingredients
- 2 cups all-purpose flour
- 2 teaspoons baking powder
- 1/2 teaspoon salt
- 1 1/2 cups granulated sugar, divided
- 1 cup vegetable oil
- 4 large eggs
- 1/4 cup orange juice
- 1 teaspoon vanilla extract
- 2 cups peeled, cored, and diced apples (about 4 medium apples)
- 1 teaspoon ground cinnamon
- 1/4 cup packed brown sugar
Instructions
- Preheat your oven to 350 degrees Fahrenheit. Grease and flour a 10-inch tube or Bundt pan.
- In a medium bowl, whisk together the flour, baking powder, and salt. Set this aside.
- In a large bowl, whisk together 1 cup of the granulated sugar, the oil, eggs, orange juice, and vanilla extract until well combined.
- Gradually add the dry ingredients to the wet ingredients, mixing just until combined. Do not overmix the batter.
- In a separate small bowl, toss the diced apples with the remaining 1/2 cup of granulated sugar, the cinnamon, and the brown sugar.
- Gently fold the apple mixture into the cake batter.
- Pour the batter into the prepared pan.
- Bake for 60 to 70 minutes, or until a wooden skewer inserted near the center comes out clean.
- Let the cake cool in the pan on a wire rack for 15 minutes before inverting it onto the rack to cool completely.
Notes
- For extra moisture, use a mix of tart and sweet apples, such as Granny Smith and Honeycrisp.
- If you prefer a streusel topping instead of the cinnamon-sugar mix, substitute the topping ingredients with 1/2 cup flour, 1/4 cup brown sugar, 1/4 cup cold butter cut into pieces, and 1 teaspoon cinnamon. Mix until crumbly and sprinkle over the batter before baking.
- This cake is naturally dairy-free, making it suitable for many dietary needs.
Nutrition
- Serving Size: 1 slice
- Calories: 350
- Sugar: 35
- Sodium: 180
- Fat: 17
- Saturated Fat: 2
- Unsaturated Fat: 15
- Trans Fat: 0
- Carbohydrates: 48
- Fiber: 2
- Protein: 4
- Cholesterol: 75