

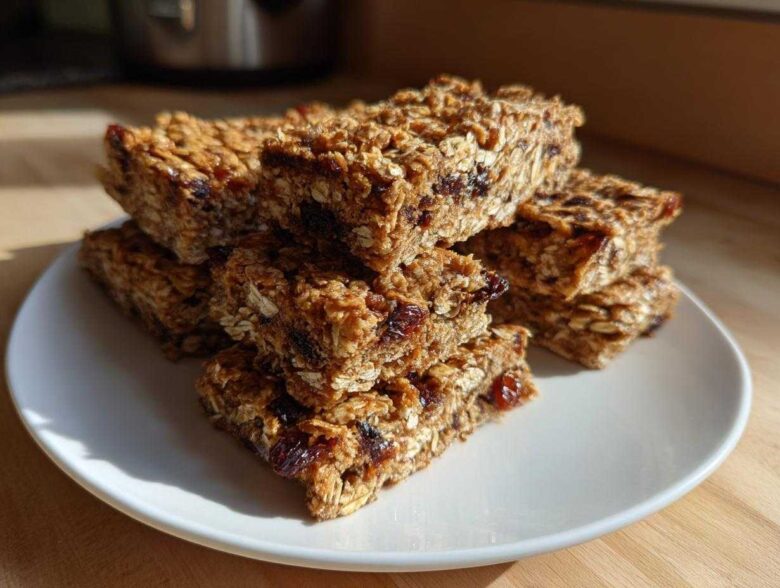
Listen, I get it. You’re standing in the grocery aisle staring at those plastic-wrapped bars and thinking, ‘Do I really need all those preservatives?’ Trust me, ditch them! We are going to make the absolute best homemade granola bars you’ve ever tasted, and they are way better than anything store-bought because we control every ingredient. I spent ages testing ratios just to nail that perfect, slightly sticky, utterly satisfying chewiness. If you want to learn more about how we put these amazing recipes together, you can check out our philosophy right here. Once you try this method, you’ll see making them at home is faster, cheaper, and honestly, so much tastier. We’re making wholesome, customized snacks that actually taste like real food.
Why This Chewy Homemade Granola Bars Recipe Stands Out
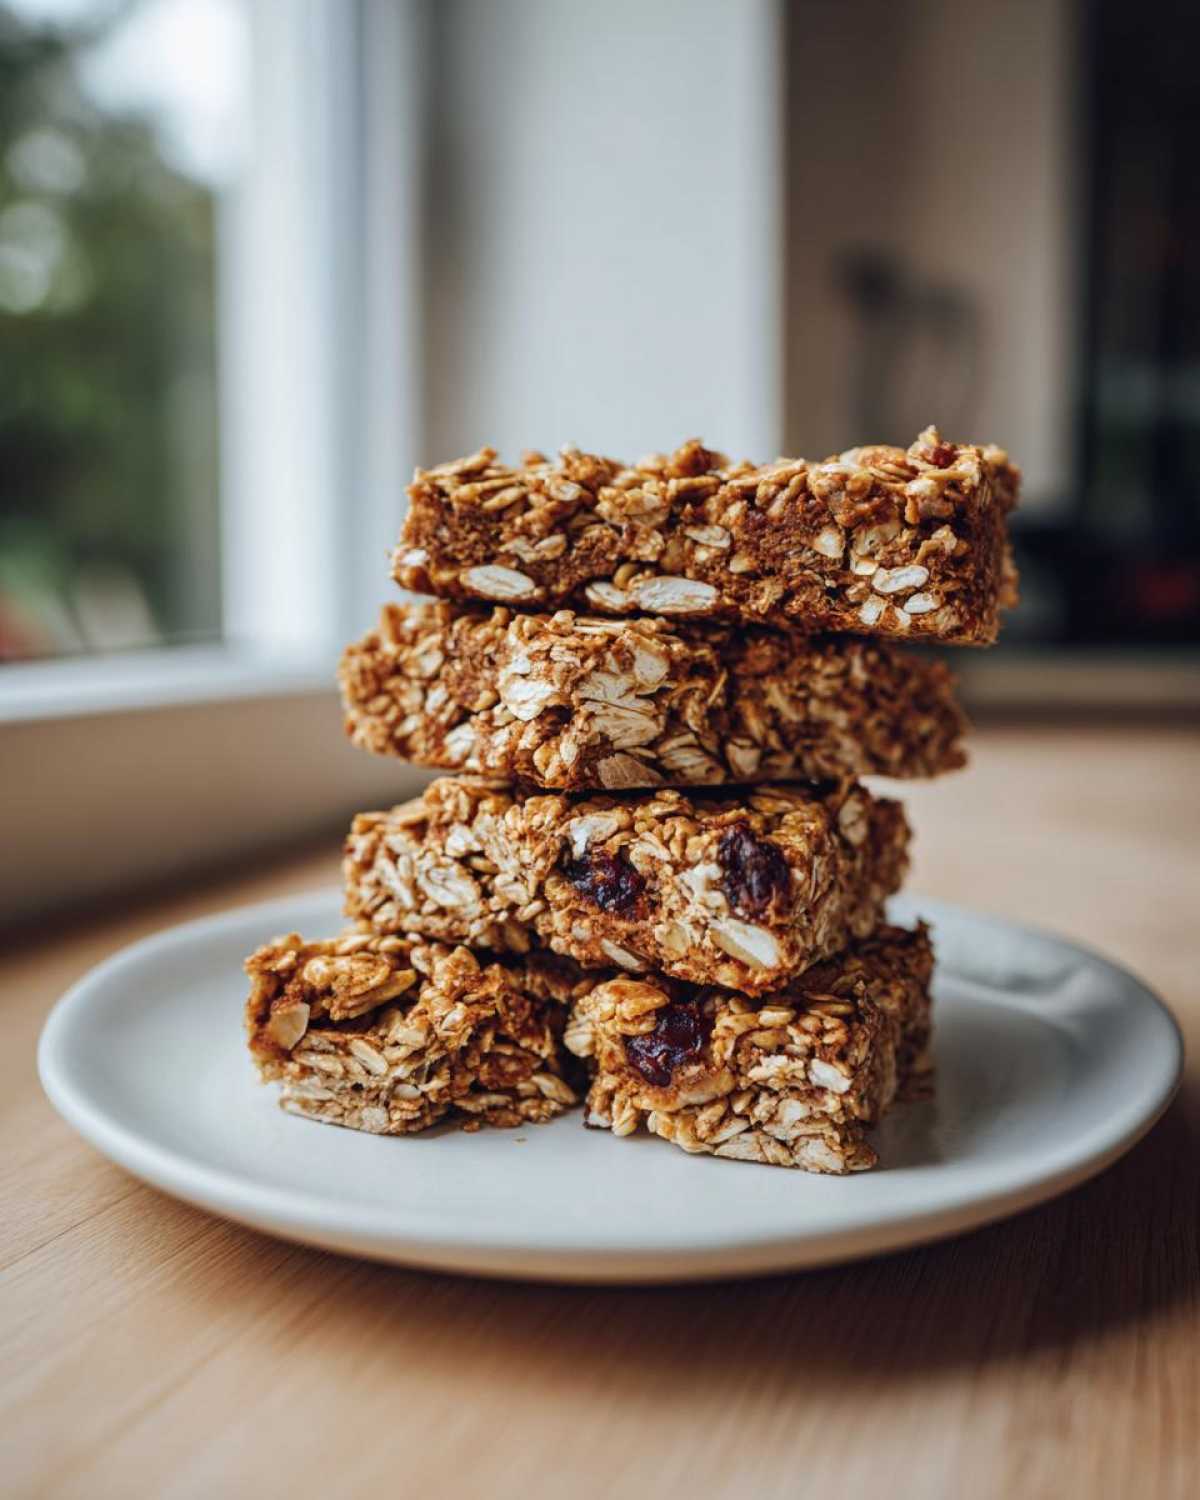
The secret to avoiding those rock-hard, crumbly bars—the ones that shatter when you try to bite them—is all about the binder ratio. We treat the wet ingredients like the glue holding a masterpiece together! When you get the honey (or maple syrup!) and the applesauce just right against the dry oats, the magic happens. People always ask me what makes my chewy homemade granola bars different, and it’s not just the ingredients; it’s the dedication to packing them down tight. That compression step is non-negotiable if you want that satisfying, dense bite.
Achieving the Perfect Chewy Texture in Homemade Granola Bars
Moisture is your best friend here, so don’t skimp on the applesauce or mashed banana; those are the moisture insurance policies! The nut butter coats every oat, stopping it from drying out, while the sweetener warms up just enough to become super pliable. This combination is what makes the whole mixture blend beautifully. If you’re looking for an easy granola bar recipe that just works every time without turning on the oven, this balance is precisely what you need. It comes together in minutes, and the chilling does all the hard work!
Gathering Ingredients for Your Homemade Granola Bars
Okay, let’s talk about what goes into these beauties! You don’t need a pantry full of fancy stuff, just quality base ingredients that play nice together. Remember, since we aren’t baking these most of the time—we’re letting them set up in the fridge—the quality of the liquid binders really matters for the final texture.
Ingredient Clarity and Preparation Notes
First things first: the oats! You absolutely have to use old-fashioned rolled oats here. The instant, quick-cook stuff turns into paste when you try to make homemade granola bars. We need those intact flakes for structure! Also, when you grab your peanut butter or almond butter, try to get the creamy, stabilized kind unless you’re prepared to stir that separated oil back in forever. If you do use the natural kind, make sure it’s completely smooth before introducing it to the honey.
For the mix-ins, this is where you get bossy! I usually grab about half nuts and half seeds, but dried fruit needs a little pre-treatment. If your raisins or dried cranberries are super dry, you might want to soak them in a tiny bit of hot water for five minutes and pat them dry. This stops them from stealing moisture from our perfect binder mix while they sit in the fridge. Trust me, preparing your ingredients right makes this whole easy granola bar recipe foolproof!
Step-by-Step Instructions for No Bake Homemade Granola Bars
Alright, let’s get messy! Since these are mostly no-bake, the technique is everything. Grab that 8×8 pan—don’t forget the parchment paper hanging over two sides like little handles; you’ll thank me later when it’s time to get them out! Dump your dry oats and all your nuts and seeds into a big bowl. That’s the easy part done!
Mixing Wet Components for Homemade Granola Bars
Time for the good stuff. We take the nut butter, the sweetener, and the applesauce and put them in a little saucepan. You need low heat, super low! We’re just trying to make them friends and get them runny enough to coat everything else perfectly. Seriously, do not let this mixture boil! If it gets too hot, it changes how the sugars interact, and you’ll lose that chewy factor we worked so hard for. Gentle warming creates the smoothest binder possible.
Binding and Pressing Your Homemade Granola Bars Firmly
Now, pour that smooth liquid gold over your oats and mix like crazy until every single oat flake is coated—no dry patches allowed! If you’re adding chocolate chips, fold those in last. Then comes the critical part: transfer the whole sticky mess to your prepared pan. Grab the bottom of a flat measuring cup or even a smooth drinking glass and push down. I mean really push. You can see a link for how I press my peanut butter pie here if you need visual motivation! Really pack it in there hard. Once it’s rock solid down, into the fridge it goes for at least two hours. Patience, my friend!
Customizing Your Homemade Granola Bars for Any Craving
One of the best parts about making your own snacks is that you never have to eat the same bar twice! This recipe is truly built for customization. If you’re stocked only with sunflower seeds instead of almonds, go for it! I usually follow a ratio: about 1.5 cups of combined dry mix-ins for every 2 cups of oats. If you swap out nuts for dried fruit, you might need just a tiny dribble more of warm liquid binder because dried fruit is wetter than crunchy nuts. These customizable granola bars mean no more staring at ingredient lists and wondering what exactly that stabilizer E-number is!
Variations: Peanut Butter Granola Bars and Beyond
If you decide to ditch the peanut butter for almond butter, your flavor profile instantly gets a little earthier and less sweet—it’s lovely! A tiny pinch of cinnamon added during the dry mix stage is fantastic, too. And for those days when you absolutely need dessert disguised as breakfast, just fold in those optional chocolate chips! That turns it into a spectacular chocolate chip granola bars recipe variation. If you want even more ideas for making food that tastes this good, you can always browse my general writing over on the blog!
Making Healthy Homemade Snacks for Meal Prep
This is honestly why I developed this recipe in the first place—because weekdays are chaos! Having these healthy homemade snacks ready to go saves me every single morning. I slice them up on Sunday night, stack them in a sealed container, and that’s breakfast or the afternoon slump cure sorted for days.
They are perfect for tucking into lunchboxes; my kids actually prefer these homemade ones over the stuff in the colorful wrappers! If you want another rock-solid, make-ahead option the kids devour, you should check out my recipe for veggie-packed breakfast muffins—they freeze like a dream, too.
My personal trick for making these homemade granola bars my ultimate make ahead breakfast is to stick them into single sandwich bags right after cutting. That way, when I’m rushing out the door, I just grab one bag. No thinking required, just clean, wholesome energy!
Storage and Keeping Your Homemade Granola Bars Fresh
Since these homemade granola bars have no weird preservatives hanging around, they live happily in the fridge! That’s where they stay nice and firm anyway. Pop them into an airtight container right after you slice them. You should totally get a solid week out of them stored this way. If you’re worried about them getting knocked around in the fridge or you want to stash some for later, you can totally freeze them! They thaw out perfectly on the counter in about 30 minutes.
Frequently Asked Questions About Homemade Granola Bars
It’s totally normal to have questions when you try a new recipe, especially one where texture is so important! People usually worry about sticking, or if they can make swaps. I tried to pack all the most common concerns right here so you can whip up the best batch of homemade granola bars without any guesswork.
Can I make gluten free granola bars using this recipe?
Oh, absolutely! This recipe structure is so solid that it handles gluten-free swaps beautifully. The binders do the heavy lifting here, not the oats themselves. You just need to make sure that when you buy the oats, they are certified gluten free granola bars. Sometimes, regular oats get contaminated during processing, so if you need them totally GF, look for that label. My favorite GF swap is using buckwheat groats mixed with the certified oats for extra crunch! If you want a totally different GF treat, check out my GF muffin recipe over here.
How do I make these into no bake granola bars if I skip the optional baking step?
That’s the fun part—this recipe is built to be a no bake granola bars wonder! The warming of the wet ingredients just helps they mix easier; you don’t technically *need* the oven at all. If you skip that optional 15 minutes of baking time, your only job is making sure you pack the mixture down super, super firmly into the pan, like you’re trying to set concrete. Chilling in the fridge for those full two hours is non-negotiable then, as that cold time is what solidifies everything instead of the heat.
Estimated Nutritional Breakdown for Homemade Granola Bars
So you want to know what you’re actually getting in these amazing, chewy snacks? I totally get it! Since we’re focusing on healthy homemade snacks and using natural sweeteners, these beat almost anything you find pre-packaged. Since we all use different mix-ins—maybe fewer chocolate chips, maybe extra nuts—these numbers are just estimates based on the base recipe I listed.
Remember, these figures are for one bar, assuming you cut the batch into 12 pieces from our recipe. If you’re making them for lunchboxes or a make ahead breakfast routine, this gives you a good ballpark idea!
- Serving Size: 1 bar
- Calories: 220
- Sugar: 10g
- Total Fat: 11g
- Protein: 6g
- Carbohydrates: 28g
- Fiber: 3g
If you load yours up with tons of dark chocolate or use tons of sugary dried fruit, those numbers are going to creep up a little, but that’s the trade-off for pure deliciousness, right? Enjoy knowing exactly what went into making these the best homemade granola bars around!
Share Your Best Homemade Granola Bars Creations
I’ve shared all my secrets for getting that perfect, non-crumbly, slightly tacky texture that makes these homemade granola bars so addictive. But now, I want to hear from you! This recipe is meant to be shared and customized, so please don’t be shy about experimenting with your favorite dried fruits or nuts.
Did you manage to get that incredible chewiness I talked about? Or maybe you tried a totally wild swap for the applesauce? I’m dying to know what combinations you came up with. Seriously, if you made these the afternoon you found the recipe, let me know in the comments below how they turned out!
Don’t forget to give us a rating—a 5-star rating is always lovely, but be honest about that texture score! If you have any burning questions that I missed, or if you just want to say hello, you can always reach out to me directly over on the contact page. Happy snacking!
PrintUltimate Chewy Homemade Granola Bars
Make chewy, customizable granola bars at home using simple ingredients and natural sweeteners. These bars are great for snacks or make-ahead breakfasts.
- Prep Time: 15 min
- Cook Time: 0 min
- Total Time: 2 hr 15 min
- Yield: 12 bars
- Category: Snack
- Method: No-Bake
- Cuisine: American
- Diet: Vegetarian
Ingredients
- 2 cups rolled oats
- 1 cup mix-ins (nuts, seeds, dried fruit)
- 1/2 cup peanut butter or almond butter
- 1/3 cup honey or maple syrup
- 1/4 cup unsweetened applesauce or mashed banana
- 1 teaspoon vanilla extract
- 1/4 teaspoon salt
- 1/2 cup chocolate chips (optional)
Instructions
- Line an 8×8 inch baking pan with parchment paper, leaving an overhang for easy removal.
- In a large bowl, combine the rolled oats and your chosen mix-ins.
- In a small saucepan over low heat, gently warm the nut butter, honey or maple syrup, and applesauce or banana until smooth and easily combined. Do not boil.
- Remove the mixture from the heat and stir in the vanilla extract and salt.
- Pour the wet ingredients over the dry ingredients. Mix thoroughly until everything is evenly coated.
- If using, fold in the chocolate chips.
- Press the mixture firmly and evenly into the prepared baking pan. Use the bottom of a glass or measuring cup to pack it down tightly for chewiness.
- Refrigerate for at least 2 hours, or until completely firm.
- Lift the bars out of the pan using the parchment paper overhang. Cut into 12 or 16 bars.
Notes
- For a firmer bar, bake at 350°F (175°C) for 15 minutes before cooling completely.
- Substitute maple syrup for honey to make these bars vegan.
- Store the finished bars in an airtight container in the refrigerator for up to one week.
Nutrition
- Serving Size: 1 bar
- Calories: 220
- Sugar: 10
- Sodium: 80
- Fat: 11
- Saturated Fat: 2
- Unsaturated Fat: 9
- Trans Fat: 0
- Carbohydrates: 28
- Fiber: 3
- Protein: 6
- Cholesterol: 0