

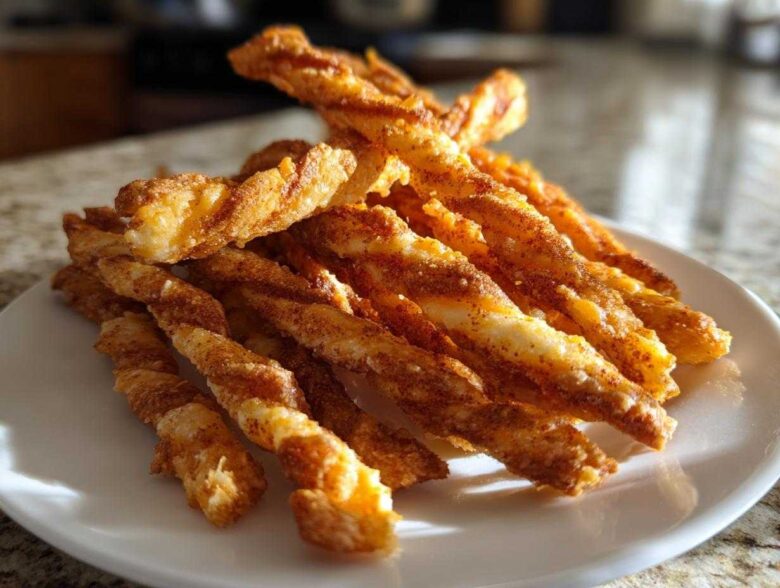
Oh my gosh, you need these in your life right now! When company walks through the door, you can’t just put out chips, right? You need something that screams, “I actually tried today!” That’s where these **cheese straws** come in. Forget those dense, hard crackers you find in souvenir shops; this is the real deal—the ridiculously flaky, deeply savory, authentic Southern Style Cheddar Cheese Straws recipe you’ve been searching for. Seriously, at my sister’s baby shower last year, they disappeared faster than I could pour the iced tea. They are simply magic mixed with sharp cheese. Get ready to bake the best appetizer you’ve ever made!
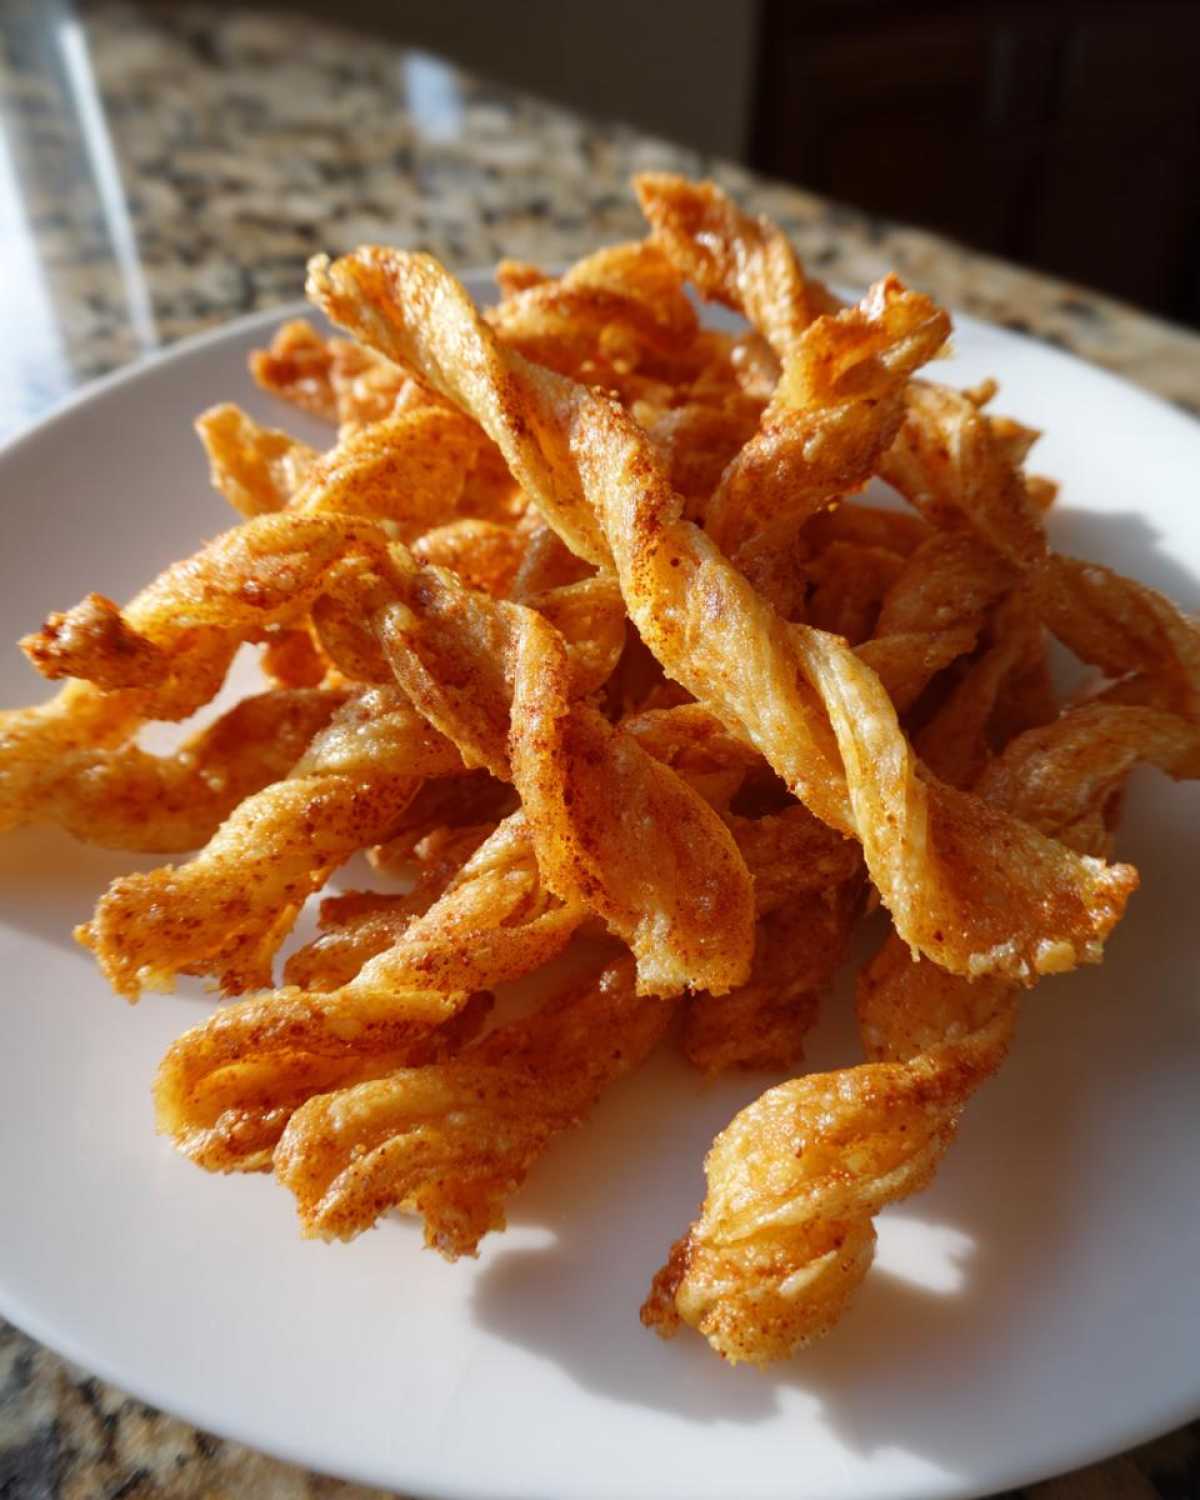
Why This Classic Southern Style Cheese Straws Recipe Works (E-E-A-T)
Trust me, while there are a billion recipes out there for quick snacks, these **Classic Cheese Straws** stand out because they follow the rules of good Southern Baking Recipes. It’s not just about smashing ingredients together; it’s about technique! We use the freshest ingredients handled just right to ensure every single straw snaps instead of bends. That beautiful, complex savory flavor comes from a careful balance of cold fat and quality cheese. These aren’t just snacks; they are a tradition! You can read more about our commitment to authentic recipes right here at our site.
I actually looked up the history for our site, and this method has remained unchanged for decades because it just produces the most heavenly results.
Achieving the Perfect Flaky Texture in Your Cheese Straws
The absolute secret here, the part you cannot rush or skip, is the butter. You need that butter stone-cold from the fridge, cubed up small. We treat this dough just like a delicate pie crust—we “cut” the cold butter into the flour mixture. When you bake that, the little pieces of butter melt, creating steam pockets that give you those flaky layers. That flakiness is what separates a good batch of **cheese straws** from an unforgettable one!
Flavor Depth: Why Sharp Cheddar is Essential for Great Cheese Straws
If you try to use mild cheddar, honestly, just don’t bother! We want intense flavor here. Sharp cheddar, preferably freshly grated (don’t use the pre-shredded stuff, it clumps!), carries the flavor profile. And that little whisper of cayenne pepper we add? It doesn’t make them hot, but it wakes up the richness of the cheese. This ensures your **cheese straws** are intensely savory, making them the perfect nibble.
Ingredients for Authentic Cheddar Cheese Straws
I want you to gather these items and lay them out before you start anything. Seeing everything lined up makes the whole process feel calmer, even though we are making something super savory! For the best **cheese straws**, the quality of the fat and the cheese truly matters more than anything else here. Don’t try to substitute that butter with anything else; it has to be cold, too! The recipe calls for sharp cheddar, and I mean sharp—it needs to stand up to the flour and spices. Here is exactly what you’ll need to gather for about four dozen incredible snacks.
- 2 cups all-purpose flour
- 1 teaspoon salt
- 1/4 teaspoon cayenne pepper
- 1/2 teaspoon paprika
- 1 cup (2 sticks) cold unsalted butter, cubed
- 10 ounces sharp cheddar cheese, grated
- 1 large egg, beaten
- 1 tablespoon cold water
Remember, grating your cheese fresh means it incorporates beautifully instead of clumping up. We aim for perfection when making these flaky **cheese straws**!
Step-by-Step Instructions for Making Perfect Cheese Straws
Alright, let’s get our hands dirty! Making incredible, crisp **cheese straws** is all about working quickly when the butter is cold, and then walking away to let the dough rest. You can find more detailed baking inspiration over at the main blog. Just follow these steps, and you won’t go wrong. The dough at the end should be stiff, not sticky, but still cohesive.
Mixing the Dough: Combining Dry Ingredients and Butter for Cheese Straws
First thing, whisk all your flour, salt, paprika, and that kick of cayenne together. Don’t dump the cold butter in all at once; use a pastry blender or your fingertips to work it into the flour until it looks like rough cornmeal or coarse crumbs. This tiny step is what guarantees your **cheese straws** have that amazing flaky structure when they bake up.
Chilling and Shaping Your Party Food Ideas
Once the dough comes together, divide it into two disks, wrap them tight, and stick them in the fridge for at least an hour—seriously, don’t rush this chilling! This resting time lets the fat firm up so you can roll it thin enough to cut those perfect strips for a stunning display of **Party Food Ideas**. Once chilled, roll it thin, cut the strips, and twist away!
Baking and Cooling Your Homemade Cheese Crackers
Okay, the oven should be roaring hot at 400 degrees F! We line those sheets with parchment paper because nobody wants to scrub baked-on cheese off a sheet pan—no thank you! When you slide these beautiful strips of savory dough in, keep one eye on them. They bake fast, usually between 10 and 14 minutes. You’re looking for that perfect visual cue: the edges should just be turning lightly golden brown. That’s how you know they’re done and crispy enough to be called **Homemade Cheese Crackers**!
When they come out, don’t panic and try to move them immediately! Seriously, let them sit right there on the hot baking sheet for about five minutes. That little bit of residual heat sets them firm. If you try to move them too soon, they might break or bend, and we want snappy **cheese straws**, not crumbled messes! After that short cooling period, transfer them gently to a wire rack to cool completely. That final air-drying step guarantees they stay crisp for days. You can always find more essential tips for baking savory items like these over at this post.
Tips for Success When Making Savory Appetizers
You know, even with a perfect recipe, sometimes little things can go wrong in the kitchen when you’re whipping up batches of **Savory Appetizers**. I’ve pulled the best advice straight from my grandmother’s notes and my own decades of trial-and-error. First off, that note about mixing cheese types? It’s gold. Using sharp cheddar paired with something creamier like Monterey Jack gives you the best melt and flavor combo. Also, pay attention to the dough’s temperature!
Here is my extra tip that Grandma never needed but I rely on: If your cheese starts to feel damp after grating, lay it on a paper towel for 15 minutes before adding it to the flour. Extra moisture makes your dough a nightmare to roll thin. Finally, if you have any dough left over that you don’t want to bake right away, just wrap those logs up tight and freeze them! You can always contact us if you run into trouble during baking! Feel free to reach out via our contact page if you need backup!
Variations: Making Spicy Cheese Straws Recipe or Herb Cheese Twists
Now, while I think this classic version is unbeatable, sometimes you need to shake things up, right? If you’re making a big spread of **party food ideas**, having a couple of flavors on the table is always smart. If you’re looking to amp up the heat and create a real **Spicy Cheese Straws Recipe**, I suggest ditching the paprika entirely and swapping in a half-teaspoon of smoked paprika along with boosting that cayenne pepper to a full quarter teaspoon. That smoky depth is incredible!
For something completely different—perfect alongside a nice Cabernet—you should try making **Herb Cheese Twists**. For those, leave out the cayenne completely. Mix in about two teaspoons of finely chopped fresh rosemary or dried thyme right along with that grated cheese. That savory, piney flavor completely transforms the **cheese straws**. They bake up perfectly aromatic, and everyone always asks how I made them seem so fancy! If you loved the spice idea, you have to check out these muffins too!
Serving Suggestions for Your Crowd Pleasing Recipes
Once you’ve got a big basket of golden, buttery, cheesy baked goodness, you have to think about what you’re serving them alongside! These are true **Crowd Pleasing Recipes** because they don’t need much fanfare. For big **Game Day Snacks**, I always set out a bowl of spicy pimento cheese dip right next to the straws for an extra layer of decadence. That combination is unbeatable.
If you are hosting something a little classier, like a wine tasting or just enjoying an evening by the fire, they make excellent **Cheese and Wine Pairing Snacks** by themselves. They pair so nicely with crisp white wines or even a dry sparkling rosé. For a fun twist, check out these buffalo bites if you need one more vegetarian appetizer on the table!
Storage and Reheating Instructions for Homemade Cheese Straws
These homemade **cheese straws** are great because they actually last! If you have leftovers—if you even can manage to have leftovers—store them in an airtight container right on the counter. They are happiest at room temperature, and they should stay perfectly crisp for a good four or five days, thanks to all that cheese and butter! Now, if you made a monster batch, remember that you can freeze the unbaked dough logs for up to three months; that’s a lifesaver!
If, heaven forbid, humidity gets to them and they lose a little snap, don’t worry. Just spread them back out on a clean baking sheet and pop them in a cool oven—say, 300 degrees F—for about five minutes. That little bit of gentle heat dries them out and brings back that amazing crispness we love!
Frequently Asked Questions About Recipe for Cheese Straws
I totally get it—when you find a keeper like this **Recipe for Cheese Straws**, you have a few questions before you dive in. I’ve gathered up the things people ask me most often when they try this Southern classic for the first time. Don’t be shy; we’re all learning together!
Can I use pre-shredded cheese for my cheese straws?
Oh, honey, please don’t! If you want those incredible flaky layers and that rich flavor that makes these **cheese straws** famous, you have to grate the cheddar yourself. The pre-shredded bags are coated in anti-caking agents, usually potato starch or cellulose, which stops the cheese from melting properly. That means your straws will be tougher and you’ll lose that gorgeous savory depth. Stick to the block!
What can I use instead of cayenne pepper?
If you are making these for little ones or just prefer zero heat in your **cheese straws**, you can totally omit the cayenne pepper. I always recommend using smoked paprika instead of regular if you do omit it, just to maintain some color and complexity. You could also try a tiny pinch of ground black pepper, but honestly, the cayenne mostly just balances the fat, so it’s not strictly necessary for the structure.
What is the best cheese substitute if I only have Monterey Jack?
If you absolutely must substitute, use another hard or semi-hard cheese that grates well—avoid anything too soft like fresh mozzarella, as it will just spread out into greasy puddles. Monterey Jack works okay for texture, but it’s much milder. For the absolute best results in this **Recipe for Cheese Straws**, I’d try to mix half of the required amount with Parmesan. Parmesan adds a great salty kick that sharp cheddar usually brings! You can review our privacy policy here if you have concerns about sharing your baking results!
How far ahead can I prepare the dough?
The dough is incredibly forgiving! I often make a huge batch of the dough, divide it into two or three logs, wrap them really well, and toss them in the freezer. They last perfectly fine for up to three months that way. Just pull a log out the night before you plan to bake, let it thaw in the fridge, and then you’re ready for **Holiday Finger Foods**!
Nutritional Estimates for These Buttery Cheese Wafers
Since we are all about full transparency here at the site, I wanted to give you a little snapshot of what you’re dealing with when you indulge in these fantastic **Buttery Cheese Wafers**. Now, remember, these numbers are just estimates because grating your cheese fresh or using different brands can change things slightly! You can read our official transparency guidelines at this page.
- Serving Size: 3 straws
- Calories: 110
- Fat: 8g
- Protein: 4g
- Carbohydrates: 6g
There’s virtually zero sugar, which is what I love! So go ahead, sneak a couple extra!
Share Your Favorite Cheese Straws Moments
That’s it, folks! You’ve got the recipe, you’ve mastered the chilling time, and now you know the secret to perfectly flaky **cheese straws**. I really, truly hope you love baking these as much as I do!
Now, I need to know what you think! Did you try the classic version, or did you sneak in some rosemary like I suggested? Please leave a star rating below—it helps me and other bakers know how this recipe stacks up. And if you made a huge batch for a tailgate or a family gathering, I would absolutely love to see them! Tag me on social media when you share your gorgeous platter of savory treats. Seeing your creations is seriously the best part of running this little blog. Happy baking, and enjoy those perfect, buttery snaps!
PrintClassic Southern Cheddar Cheese Straws

Make traditional, savory, and flaky cheese straws using sharp cheddar cheese and a hint of spice. This recipe yields a classic Southern appetizer.
- Prep Time: 25 min
- Cook Time: 14 min
- Total Time: 1 hour 39 min
- Yield: About 4 dozen
- Category: Appetizer
- Method: Baking
- Cuisine: American
- Diet: Vegetarian
Ingredients
- 2 cups all-purpose flour
- 1 teaspoon salt
- 1/4 teaspoon cayenne pepper
- 1/2 teaspoon paprika
- 1 cup (2 sticks) cold unsalted butter, cubed
- 10 ounces sharp cheddar cheese, grated
- 1 large egg, beaten
- 1 tablespoon cold water
Instructions
- In a large bowl, whisk together the flour, salt, cayenne pepper, and paprika.
- Cut the cold butter into the flour mixture using a pastry blender or your fingers until the mixture resembles coarse crumbs.
- Stir in the grated cheddar cheese until evenly distributed.
- In a small bowl, whisk the egg and cold water together. Add this liquid mixture to the flour and cheese mixture. Mix until a stiff dough forms. Do not overmix.
- Divide the dough in half, flatten each half into a disk, wrap in plastic wrap, and chill for at least 1 hour.
- Preheat your oven to 400 degrees F (200 degrees C). Line baking sheets with parchment paper.
- On a lightly floured surface, roll out one disk of dough to about 1/8-inch thickness.
- Cut the dough into strips about 1/2-inch wide and 6 inches long.
- Twist each strip two or three times to form a straw shape. Place the straws on the prepared baking sheets.
- Bake for 10 to 14 minutes, or until the edges are lightly golden brown.
- Let the cheese straws cool on the baking sheet for 5 minutes before transferring them to a wire rack to cool completely.
Notes
- For extra flavor, use a mix of sharp cheddar and Monterey Jack cheese.
- If you prefer a less spicy straw, omit the cayenne pepper entirely.
- You can freeze the dough logs for up to three months before rolling and baking.
Nutrition
- Serving Size: 3 straws
- Calories: 110
- Sugar: 0.2
- Sodium: 180
- Fat: 8
- Saturated Fat: 5
- Unsaturated Fat: 3
- Trans Fat: 0.3
- Carbohydrates: 6
- Fiber: 0.3
- Protein: 4
- Cholesterol: 25