

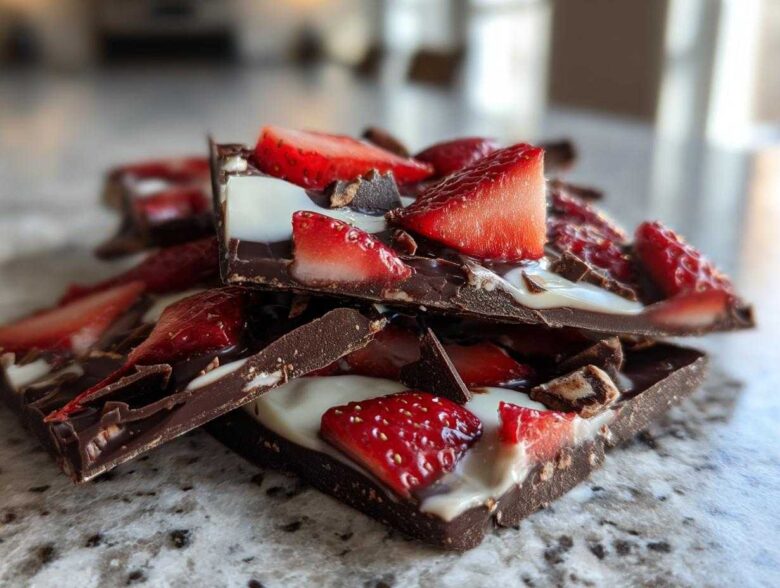
Oh my goodness, are you ready to make the easiest, most stunning dessert you’ve ever thrown together? Seriously, forget complicated baking! I’m talking about a gorgeous **Chocolate Covered Strawberry Bark** that looks like you spent hours fussing over it, but—shhh!—it takes minutes of actual work. When I first nailed down this specific recipe, it was for a last-minute Valentine’s Day tray, and people absolutely lost their minds over it.
This layered chocolate bark is practically foolproof. We’re layering rich semi-sweet chocolate, bright fresh strawberries, and creamy white chocolate. It requires zero oven time and sets up perfectly in the fridge. Trust me on this; if you’re looking for some gorgeous, quick homemade candy that screams “special occasion,” you’ve found it. My husband still begs me to make this Simple Dessert Idea, especially when we need something decadent but fast.
If you’ve ever struggled with tempering chocolate or making fussy candies, forget all that worry. We’re keeping things unbelievably simple here. You can check out my tips for an easy moist lemon loaf later, but for now, let’s focus on this layered chocolate masterpiece!
Why You Will Love This Chocolate Covered Strawberry Bark Recipe
Honestly, this recipe is going straight to the top of my list for my party dessert board ideas. It’s just the best because it ticks every single box when I’m feeling lazy but want something fancy. I can whip this up while dinner is simmering!
- It’s completely no-bake! Seriously, just melting and layering.
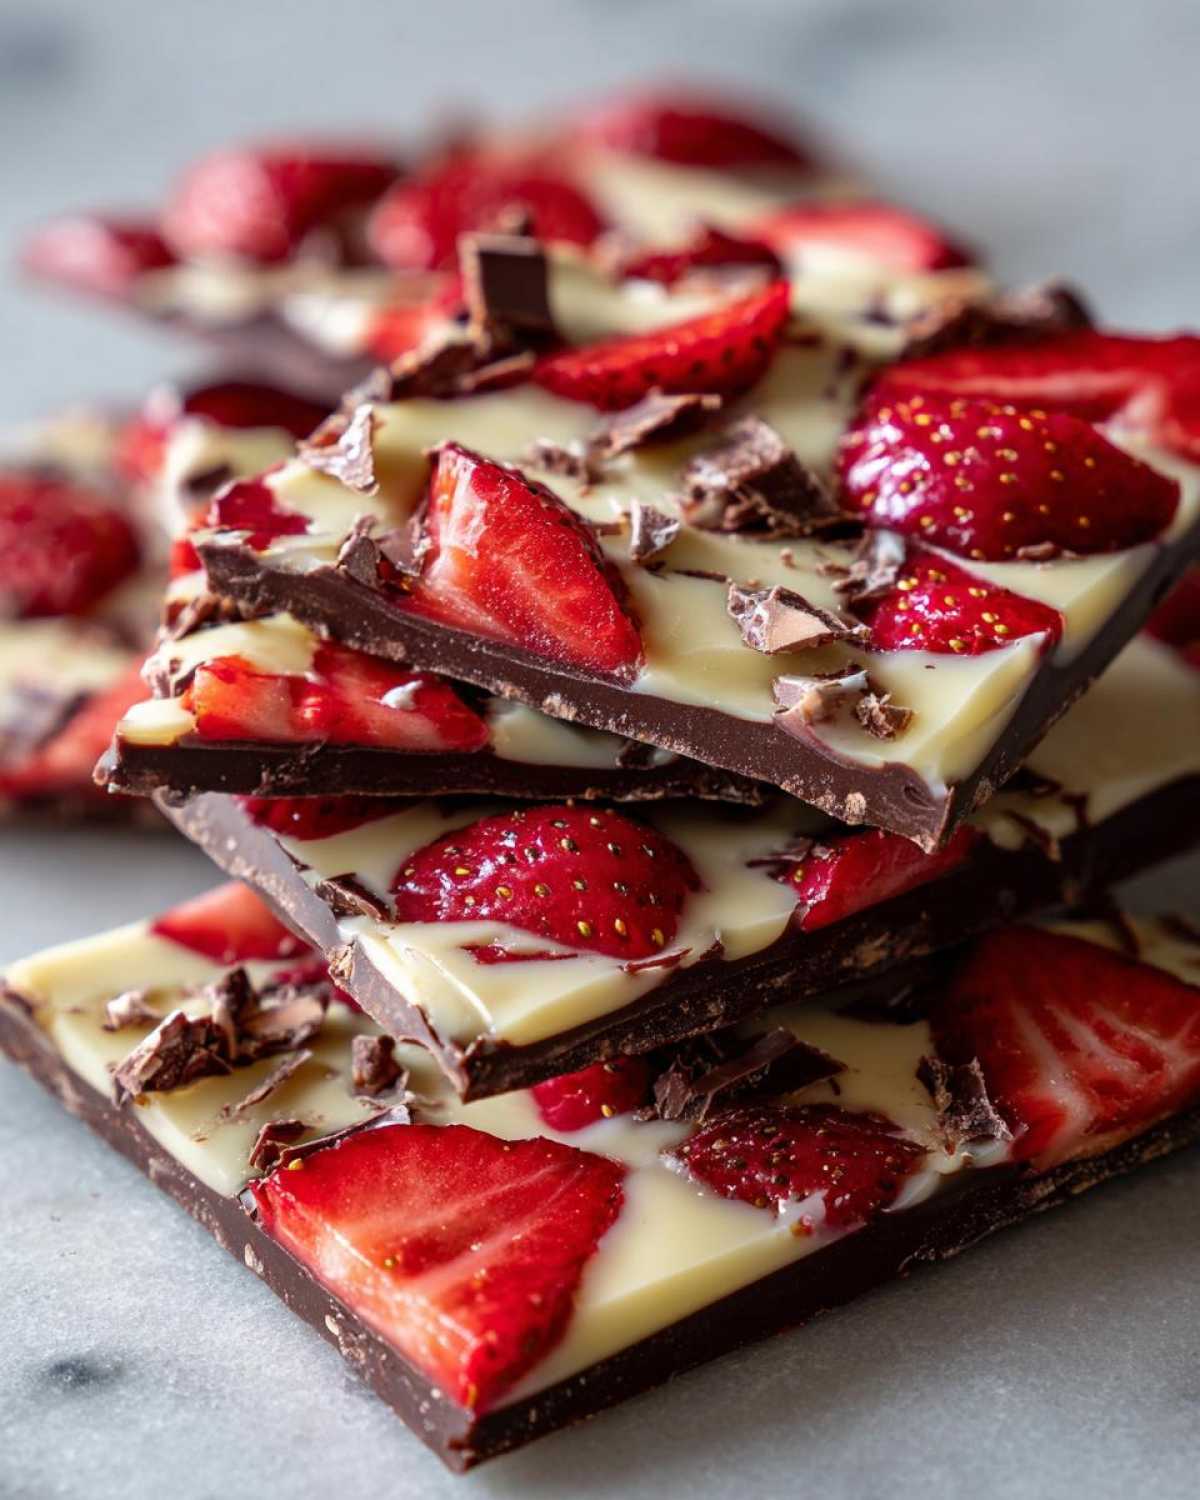
- The visual appeal is stunning—those bright red strawberries popping through the white chocolate? Gorgeous!
- It sets quickly in the fridge, meaning you don’t have to wait forever for a tasty reward.
- These pieces are perfect for gifting or just hiding in the back of the fridge for yourself, like my secret stash of my quick easy million dollar dip inspiration!
Essential Ingredients for Perfect Chocolate Covered Strawberry Bark
Okay, the secret to making this **Chocolate Covered Strawberry Bark** look professional isn’t technique—it’s actually starting with great ingredients! Since this is a no-bake treat, every single item gets to shine, so don’t skimp here. We need a specific ratio of dark and light chocolate to get that beautiful, contrasting layered look.
When I first tried this recipe using cheap melting wafers, it looked okay, but the texture was waxy and sad. These days, I stick to good quality chips because they melt down perfectly smooth. Remember, we aren’t making anything fancy like the brown butter chocolate chip cookies which requires more steps; this is pure layering magic!
Here is exactly what you need to grab before you start:
- 12 ounces semi-sweet chocolate chips
- 8 ounces white chocolate chips
- 1 cup fresh strawberries, thinly sliced
- 1 teaspoon coconut oil (optional, for smoother melting)
Ingredient Notes and Substitutions for Strawberry Bark
Listen up, because the quality of your chocolate really matters here. For the best flavor payoff, try to use chips that you actually enjoy eating on their own. Higher quality chocolate melts beautifully! If you find your chocolate is just too thick when it comes out of the microwave—and this is my little trick—a tiny teaspoon of coconut oil works wonders. It smooths everything out without affecting the set.
Now, about those strawberries! Fresh is absolutely best for that beautiful color and brightness. But, if it’s not peak strawberry season, don’t cry! You can use freeze-dried strawberries instead. Just crumble them up really finely and sprinkle that intense strawberry dust over the white chocolate layer before you chill it. It gives you an incredible, concentrated strawberry flavor without adding extra moisture that could ruin the set of your **Strawberry Bark**.
How to Make Chocolate Covered Strawberry Bark: Step-by-Step
Okay, here is where the magic happens—the actual assembly of your **Chocolate Covered Strawberry Bark**. Don’t stress about perfection here; the whole beauty of bark is that it’s supposed to be rustic and broken up later! Just follow these clear steps, and you’ll have a gorgeous **No Bake Chocolate Treat** in under an hour and a half.
We are using parchment paper as our trusty base, just like in my famous how to make chocolate bark guide. This makes the final step of getting it out of the pan absolutely painless. I promise you won’t regret prepping this step first!
Preparing the Pan and Melting the Base Chocolate
First things first, get your 8×8 inch pan ready! Line it with parchment paper, making sure you leave a little flap—that overhang is your handle later when you want to lift the whole slab out. Trust me, dealing with stuck chocolate is no fun at all.
Next, we melt the semi-sweet chocolate. If you are using the microwave, please, please, please do it in short bursts! I do 30 seconds, stir it like crazy, 30 more seconds, stir, 30 more seconds, and so on. If you get impatient and heat it too long, it scorches, and then you’re stuck with hard clumps. If you add that optional coconut oil, stir it in until the chocolate is liquid silk. Pour that beautiful dark layer into your prepared pan and spread it around evenly. Pop that pan into the fridge for just 10 quick minutes—this short chill firms up the bottom just enough so the strawberries don’t sink like anchors when we add the next layer.
Layering Strawberries and Setting the Chocolate Covered Strawberry Bark
While that first layer is setting up, melt your white chocolate using the same slow, cautious microwave method we used for the dark chocolate. While that’s melting, take those thinly sliced fresh strawberries and arrange them across the slightly firm bottom layer. Try to get them spread out nicely so every piece of bark you break off gets a little bit of fruit!
Once the strawberries are nestled in, pour that melted white chocolate **gently** over the top. I use an offset spatula to spread it just enough to completely cover the fruit. We don’t want to smash the strawberries down, so move slowly. Back into the refrigerator it goes! This layer needs at least a full hour, but honestly, give it an hour and a half just to be safe and totally hard.
Finishing and Breaking Your Homemade Strawberry Candy
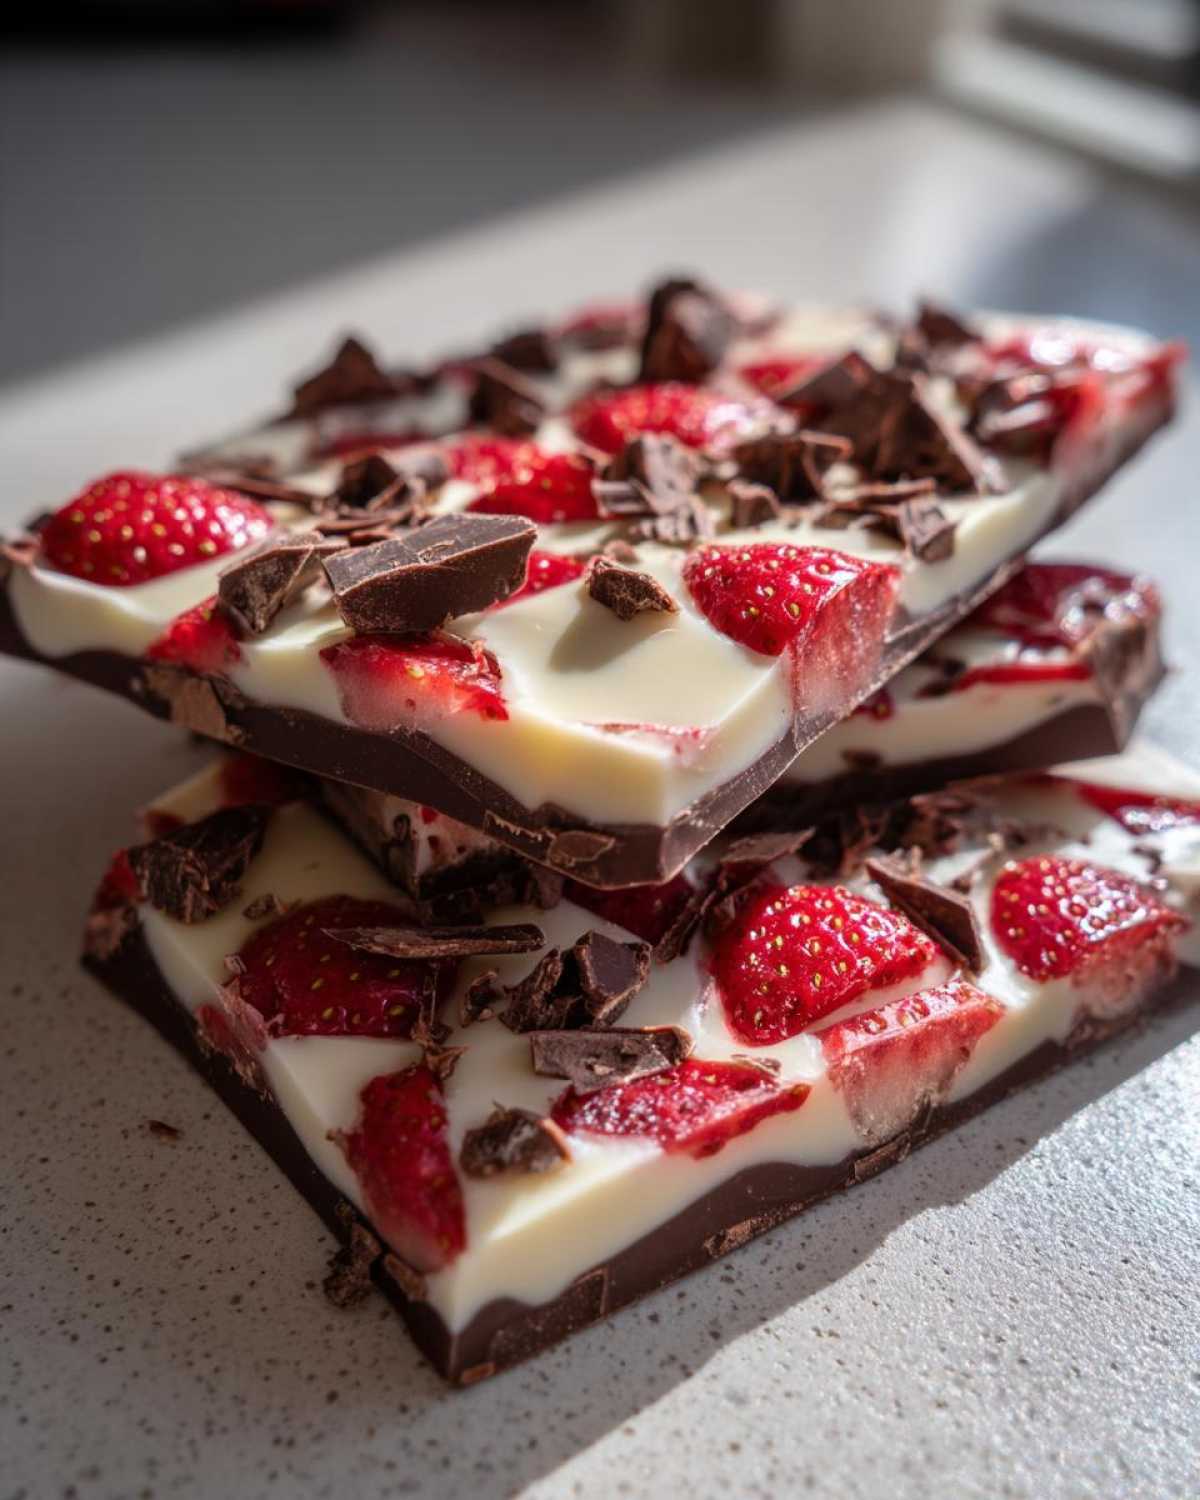
When you come back, the whole slab should be rock solid! Lift the whole block out using those parchment paper overhangs. Now for the fun part: breaking it! Don’t use a knife—that usually just snaps it awkwardly. Instead, place the bark on a sturdy cutting board and give it a few sharp, decisive taps with the flat bottom of a heavy mug or a rolling pin. You want those irregular shards, that’s what makes it look so professional and appealing on a platter. These pieces of **Homemade Strawberry Candy** are ready to eat immediately!
Tips for Success with Layered Chocolate Bark
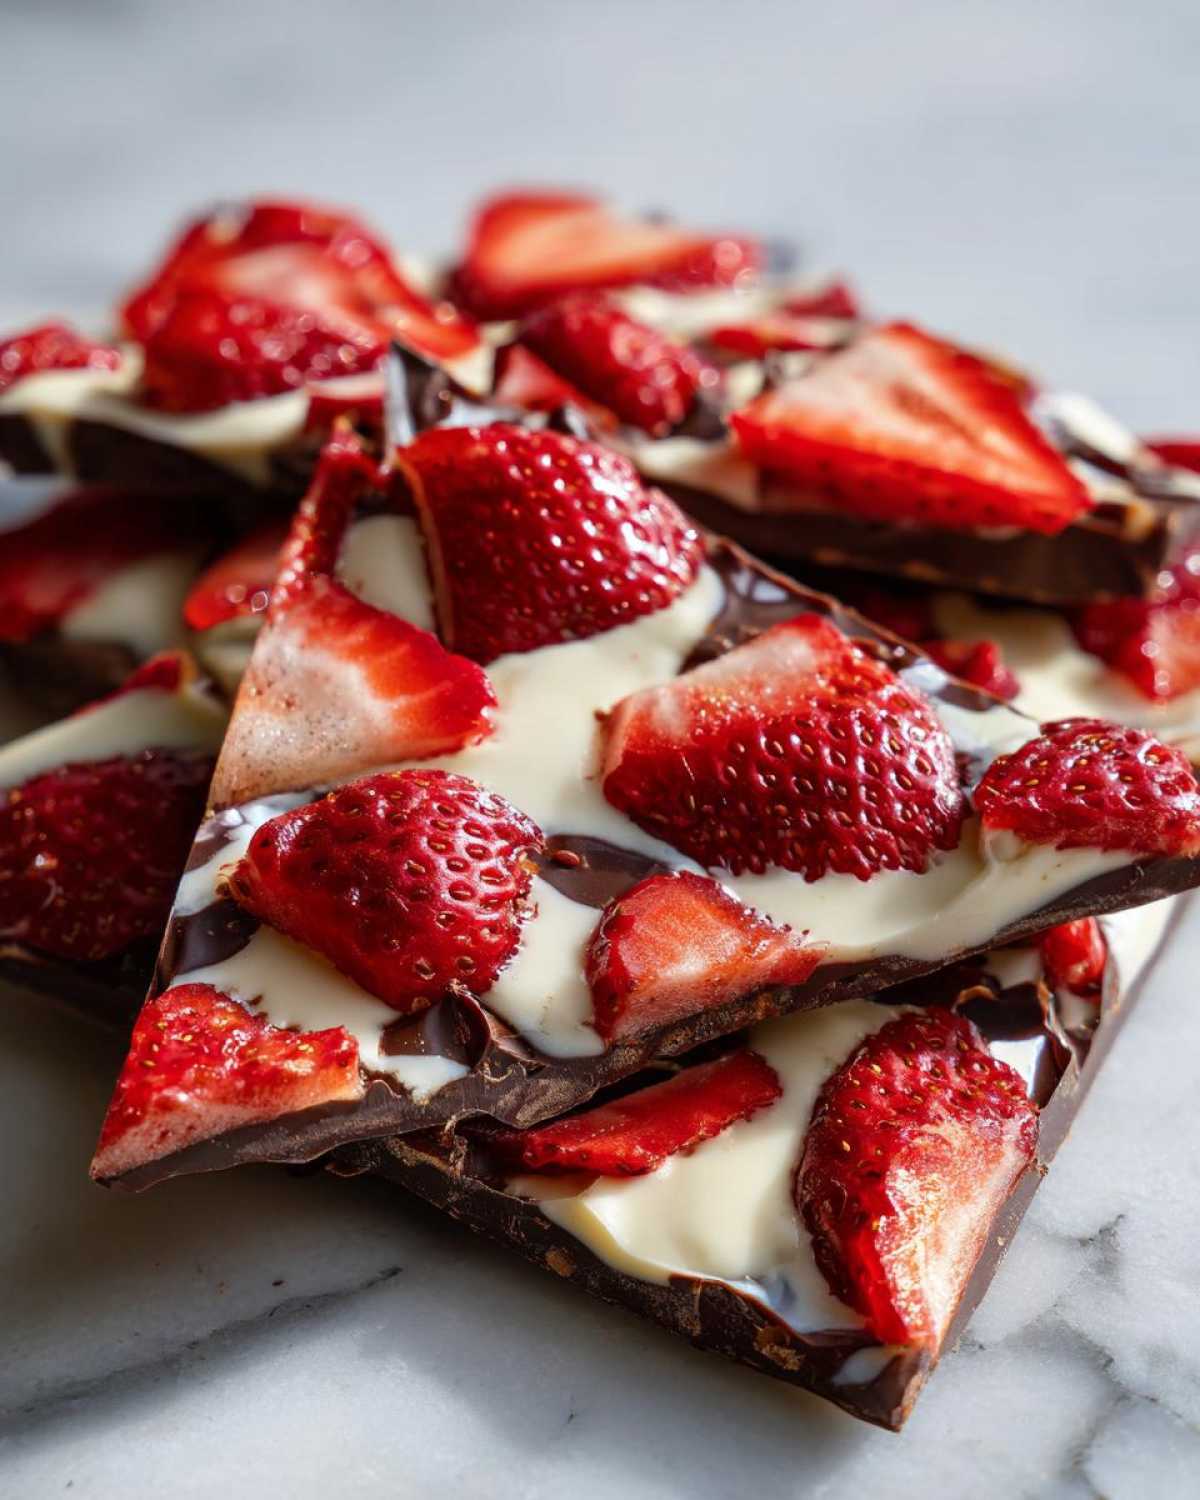
Even though this is one of the easiest **Chocolate Bark Recipe** ideas out there, success relies on a few small details. If you follow these tips, you’ll get perfect layers that don’t smear together and beautiful, crisp breaks every single time. Think of these as the final guardrails to make sure your **Decadent Strawberry Chocolate** is flawless!
We really need to talk about chocolate quality again. You aren’t mixing this chocolate into a cake batter where it disappears; you are eating it as pure chocolate coating! Use good quality chips or bars. Anything labeled “compound coating” is going to melt weirdly and taste waxy. Splurge a little here; it makes all the difference when you’re pulling apart these gorgeous shards.
My top tips focus heavily on temperature control, since that is the biggest disaster point for beginners:
- Don’t Rush the Chill Time: That 10 minutes between the semi-sweet layer and adding the strawberries is non-negotiable! If the bottom layer is still squishy, the strawberries will sink right through when you pour the white chocolate on top. We want distinct layers, not a strawberry landslide.
- Microwave Carefully or Double Boiler is Your Friend: I mentioned this before, but I’ll say it again—chocolate burns easily! If you use the microwave, stir every 20 seconds after the first minute. If you want zero risk, use a double boiler setup where a heat-proof bowl sits over simmering water. Make sure the bottom of the bowl never touches the water. Pure, smooth melted chocolate is key for a glossy finish.
- Keep It Dry: Any trace of water, condensation, or steam will make your melted chocolate seize right up. Be sure your bowls, spatulas, and especially your strawberries are perfectly dry. Use paper towels to gently blot moisture from those freshly sliced strawberries before nesting them on the chocolate base. If you’re worried about your strawberries weeping, check out my tips for making best chocolate chip cookies recipe—we talk a lot about controlling moisture in baking!
- Break It While Cold: Don’t let your finished bark sit out on the counter if you plan on breaking it immediately. If the chocolate warms up even slightly, it tends to shatter unevenly or smear your fingerprints everywhere. Keep it cold right up until the moment you break it into pieces for serving or storage.
Variations on Your Chocolate Covered Strawberry Bark
Part of the fun with making any **Chocolate Bark Recipe** is making it totally your own! This base recipe is fantastic, but it’s begging for you to play around with it just a little bit. Don’t feel locked into just semi-sweet and white chocolate; we can mix things up to create something truly unique for your dessert board. These little tweaks make it easy to adapt this recipe for any season or preference.
When I have leftovers from making chocolate chip cheesecake cookies, I sometimes grab those extra dark chocolate chips and use them for the base instead of semi-sweet. Dark chocolate is intense, so you might want to bump up the amount of white chocolate on top just to keep that perfect sweet-tart balance we’re looking for in this **Chocolate Covered Fruit Recipe**.
Here are a few fun ways I like to shake up the standard **Strawberry Bark**:
- The Triple Threat: Instead of just two layers, try a thin layer of milk chocolate first, then chill, then semi-sweet, then chill again, and finally top with white chocolate and strawberries. It complicates the melting process slightly, but the layered flavor is incredible!
- Nutty Crunch: For an extra texture pop, sprinkle some finely chopped, toasted pecans or slivered almonds over the white chocolate layer *before* you chill it. They stick right in, giving you a wonderful crunch against the soft fruit.
- Sprinkle Magic: This variation is perfect for parties or holidays! If you’re making this for Christmas, go heavy on the red, white, and green sprinkles over the top white layer. For Valentine’s Day, heart-shaped sprinkles are a must. Just make sure you add them immediately after pouring the white chocolate!
- Intense Strawberry Flavor: Like I mentioned before, if you absolutely crave that deep strawberry punch without the extra liquid, grab some freeze-dried strawberries. Crumble them fine and gently toss those crumbles onto the top white chocolate layer. It’s an absolute flavor bomb!
No matter which way you go, remember that simple usually wins out, but having options keeps your baking fun and exciting. This **Quick Homemade Candy** is just so versatile!
Storage and Reheating Instructions for Chocolate Bark Recipe
This is important: because we are using fresh strawberries in this **Chocolate Covered Strawberry Bark**, we absolutely cannot treat this like regular shelf-stable candy. Think of it more like a beautiful, chocolate-covered fruit platter! It needs to stay cold to keep those berries crisp and prevent any sogginess from setting in.
My general rule is to always store your finished **Strawberry Bark** pieces in an airtight container, and that container has to live in the refrigerator. This keeps the chocolate snappy and protects the fruit. If they are stored properly in a cool fridge, they’ll easily last up to four days. Any longer than that, and the moisture from the strawberries might start to bleed into the white chocolate layer, and we definitely don’t want a weeping candy disaster!
Now, here’s the serving secret—and this is critical for the best texture, especially if you’ve had them chilled for a few days. You do not want to serve them rock-hard straight out of the fridge, or the chocolate will shatter too sharply when you bite into it. Before you put them out on your platter or serve them for dessert, pull that airtight container out about 15 to 20 minutes before you plan on eating them. This little bit of “hang time” lets the chocolate soften just slightly, making it creamy and easy to bite through, but it keeps the strawberries cool and fresh. It’s the perfect balance!
If you’re making these ahead for a party—say, the day before—store them in the fridge, and then follow that 20-minute tempering rule right before your guests arrive. It makes all the difference between good **No Bake Chocolate Treats** and truly amazing ones. Remember how I talked about my Oreo cinnamon rolls needing a certain resting time? This is the same idea; time management is everything in the kitchen!
Frequently Asked Questions About Making Strawberry Bark
I totally get it—when you’re making something this beautiful, you end up with a ton of questions! Don’t worry, I’ve been there, and I’ve tinkered with this recipe enough to cover all the common wobbles people hit. Most of the questions are about getting that perfect set and avoiding mushy fruit, which we’ve totally nailed down by keeping things cold.
If you want to know more about general baking troubleshooting, check out the genius tips I gathered for my easy pizza casserole recipe; kitchen science is kitchen science, no matter if it’s sweet or savory!
Can I use frozen strawberries instead of fresh in this Chocolate Covered Strawberry Bark?
Oh, please don’t! This is a huge mistake people make with **Chocolate Covered Fruit Recipe** ideas. Frozen strawberries are full of ice crystals. When they thaw, even a little bit, they release a ton of water. Water and melted chocolate do not mix; they make the chocolate seize up and turn grainy, or worse, it turns your bottom layer into colorful, mushy soup. If you don’t have fresh strawberries, please skip the frozen ones and use freeze-dried instead! They are intense flavor bombs and won’t make your chocolate weep.
What is the best chocolate type for this Easy Chocolate Dessert?
For the iconic look of this **Layered Chocolate Bark**, you really need that combination of semi-sweet or dark chocolate on the bottom and white chocolate on top. The white chocolate really makes those red berries pop! You can certainly play with it—if you use all dark chocolate, you lose that colorful contrast, so I highly recommend using both. And please, use chips or finely chopped good-quality bars. If the chocolate doesn’t melt smoothly on its own, this pretty **Easy Chocolate Dessert** won’t look glossy when it sets.
How do I prevent my No Bake Chocolate Treats from melting too quickly?
Since we’re using fresh fruit, this **Homemade Strawberry Candy** is naturally more sensitive to heat than plain chocolate bark. The main takeaway is storage: always keep it airtight in the refrigerator. Don’t leave it sitting on the counter all day! If you are putting it out for a party, try to keep it in the fridge until just 15 or 20 minutes before serving. That short time lets the chocolate soften just slightly so it snaps nicely instead of crumbling, but it keeps the fruit cool so it doesn’t start sweating out that extra moisture. Keep it in the fridge whenever it’s not actively being eaten!
Estimated Nutritional Information for This Quick Homemade Candy
I’m not a nutritionist, so take this information with a grain of salt, okay? But since so many of you ask about the details, I always toss in the best estimates I can pull together for this **Quick Homemade Candy**. Because we’re sticking to really simple ingredients here—chocolate and fruit—the numbers aren’t too scary for a fun treat!
Remember, this is just a general guide for one piece of the finished bark. If you use richer dark chocolate or add extra drizzles of white chocolate swirls, those numbers will definitely shift. Always check your packaging if you’re tracking macros closely for specific dietary needs. For more details on what this means legally, you can always peek at my general disclaimer page.
Here’s the breakdown based on the standard recipe proportions:
- Serving Size: 1 piece
- Calories: 180
- Sugar: 18g
- Protein: 2g
- Fat: 12g (Saturated Fat: 7g)
- Carbohydrates: 19g
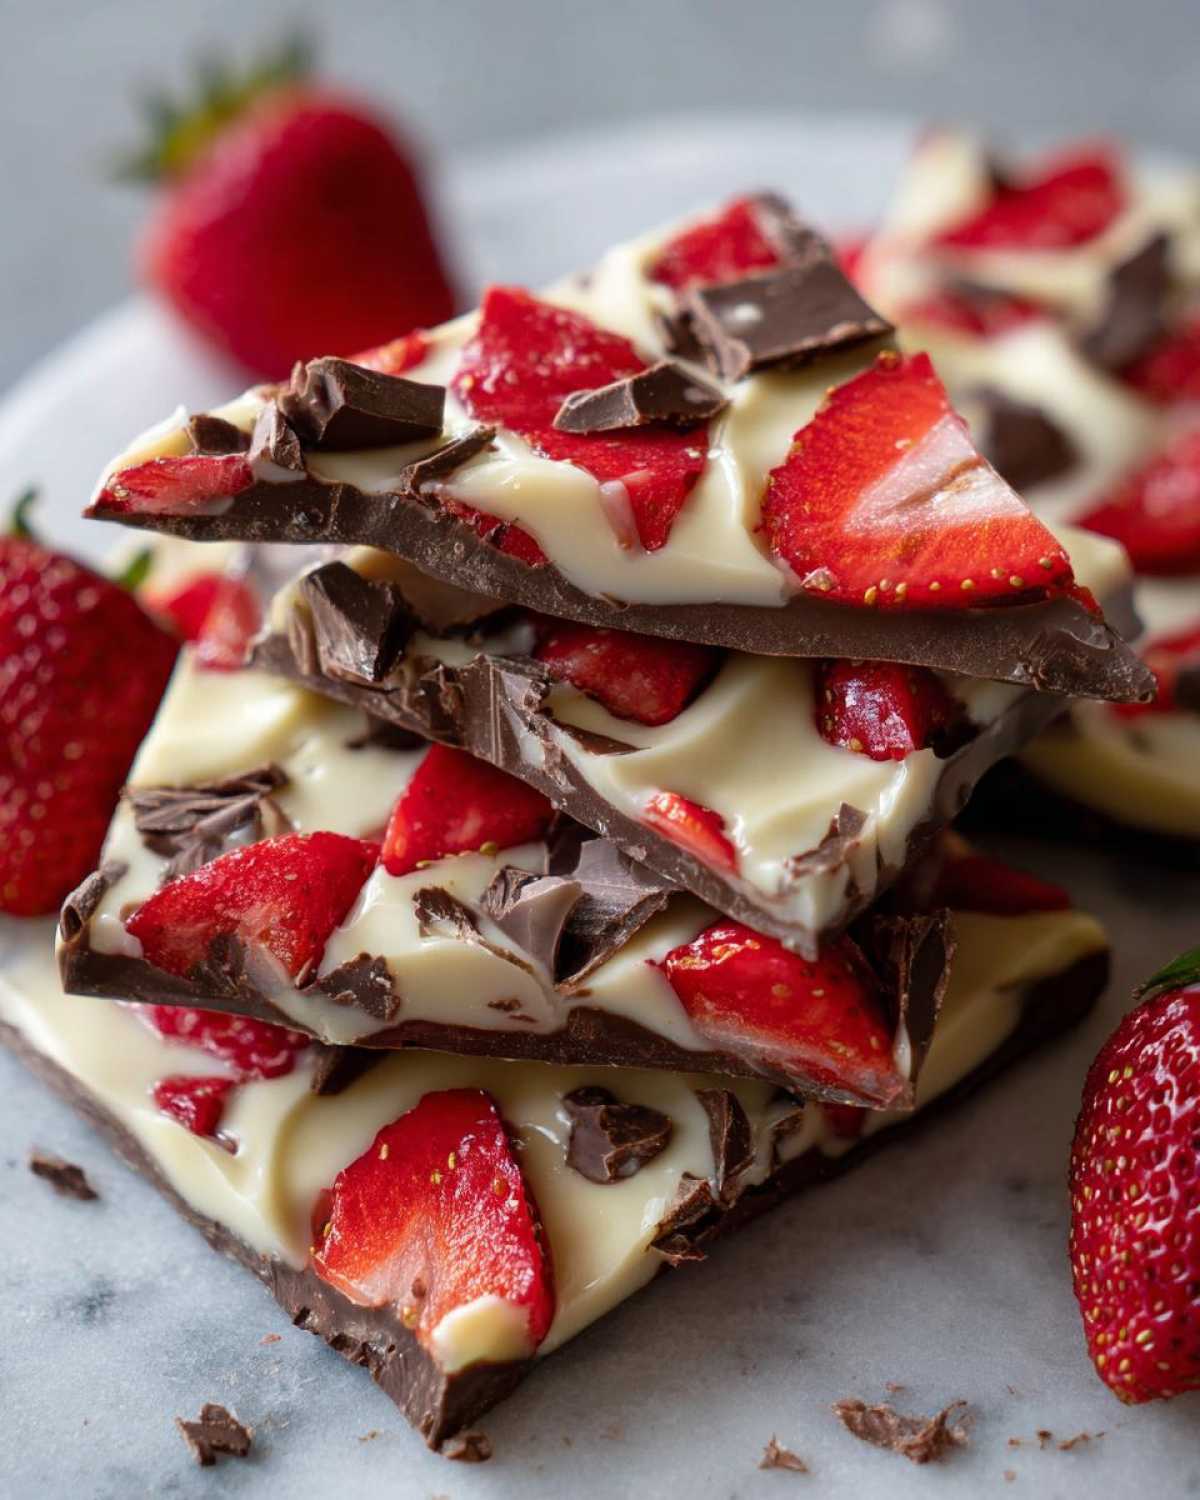
See? It’s decadent, but since it’s broken into irregular pieces, one serving size really does get you a satisfying amount. It’s a perfect little bite to finish off a meal or put on your **Party Dessert Board Ideas**!
Share Your Decadent Strawberry Chocolate Creation
Alright, my fellow kitchen adventurers, now it’s your turn! You’ve made the most stunning **Chocolate Covered Strawberry Bark**, and I am dying to see how yours turned out. Seriously, I get such a huge thrill seeing your successful bakes pop up online. Don’t let this gorgeous **Chocolate Bark Recipe** just live on your counter; show it off!
When you finish breaking those perfect shards of **Decadent Strawberry Chocolate**, take a quick picture! Snap one of the whole slab before you break it, or maybe one close-up highlighting those bright layers. Tag me on social media so I can see your beautiful creations. I love seeing how everyone manages to break their bark—are you going for big rugged chunks or delicate little slivers?
The best way you can help me keep bringing you the most reliable and easy-to-follow recipes, like this one for **Quick Homemade Candy**, is by leaving rating and feedback right here on the page. Did you try the freeze-dried strawberry trick? What chocolate combination did you end up using? Just scroll down and leave a comment below so we can chat about it!
If you have any questions at all while you are melting that chocolate or trying to get the parchment paper just right, please don’t hesitate to send me a message through my contact page. I’m always happy to troubleshoot. Happy baking—or, well, happy chilling!
PrintEasy Chocolate Covered Strawberry Bark
Make simple, no-bake chocolate bark layered with fresh strawberries. This recipe is quick to prepare and sets fast.
- Prep Time: 15 min
- Cook Time: 5 min
- Total Time: 80 min
- Yield: 12 servings
- Category: Dessert
- Method: Chilling
- Cuisine: American
- Diet: Vegetarian
Ingredients
- 12 ounces semi-sweet chocolate chips
- 8 ounces white chocolate chips
- 1 cup fresh strawberries, thinly sliced
- 1 teaspoon coconut oil (optional, for smoother melting)
Instructions
- Line an 8×8 inch baking pan with parchment paper, leaving an overhang on two sides for easy removal.
- Melt the semi-sweet chocolate chips. You can do this in a microwave safe bowl in 30-second intervals, stirring between each, or over a double boiler until smooth. Stir in coconut oil if using.
- Pour the melted semi-sweet chocolate into the prepared pan. Spread it into an even layer. Place the pan in the refrigerator for 10 minutes to allow this layer to firm up slightly.
- While the first layer chills, melt the white chocolate chips using the same method as the semi-sweet chocolate.
- Remove the pan from the refrigerator. Arrange the thin strawberry slices evenly over the semi-sweet layer.
- Pour the melted white chocolate over the strawberries, spreading gently to cover them completely.
- Return the pan to the refrigerator and chill for at least 1 hour, or until the bark is completely firm.
- Once set, lift the bark out of the pan using the parchment paper overhang. Break the bark into irregular pieces.
- Store the pieces in an airtight container in the refrigerator.
Notes
- Use high-quality chocolate for the best flavor.
- If you prefer a stronger strawberry flavor, you can use freeze-dried strawberries, crumbled, sprinkled over the white chocolate layer before chilling.
- For a decorative finish, you can drizzle a small amount of melted dark chocolate over the white layer before chilling.
Nutrition
- Serving Size: 1 piece
- Calories: 180
- Sugar: 18
- Sodium: 15
- Fat: 12
- Saturated Fat: 7
- Unsaturated Fat: 5
- Trans Fat: 0
- Carbohydrates: 19
- Fiber: 1
- Protein: 2
- Cholesterol: 5