

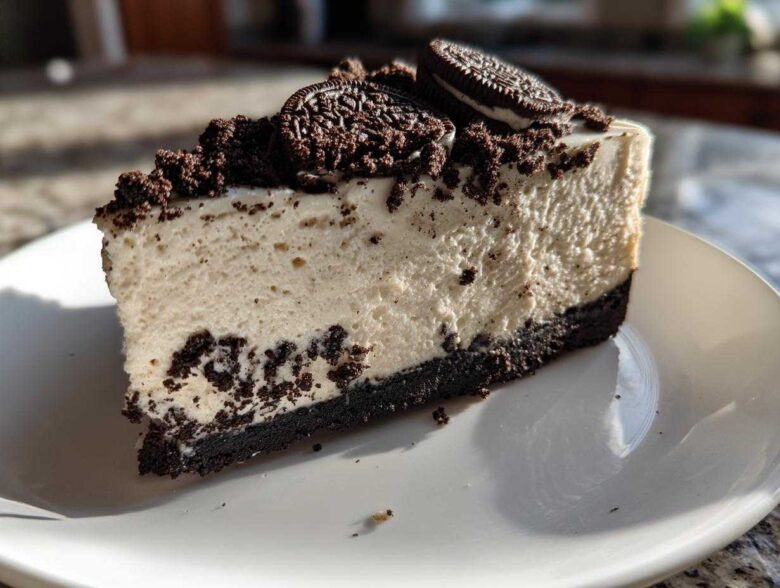
Okay, let’s be honest for a second—sometimes you just need something wildly decadent, something involving that perfect combination of cream cheese and chocolate crunch, but you absolutely refuse to deal with turning on the oven. That’s where my go-to, life-saving oreo cheesecake recipe slides in and saves the day! This isn’t just another dessert; it’s my emergency level-one treat when guests suddenly show up or when I need a massive sugar hit tonight, not tomorrow. Because it’s entirely no-bake, it pulls together faster than you can believe. Forget complicated water baths; we’re keeping this beautifully simple. If you’ve ever wanted a quick, creamy win, you absolutely must try the version I use when I need a moment of pure indulgence, similar to how I whip up my famous no-bake peanut butter pie when the craving hits!
Why This No-Bake Oreo Cheesecake Recipe Shines
There is a reason this oreo cheesecake shows up everywhere online—it just works wonders without any fuss! This recipe isn’t complicated; it’s an elegant solution to major dessert emergencies. It’s the best oreo cheesecake for people who love rich flavor but hate standing over a hot oven.
-
The Ultimate Quick Cheesecake Recipe
Seriously, the active prep time is only about 20 minutes! That’s practically instant gratification. You can mix this whole thing up while your coffee is brewing. It’s the definition of a quick cheesecake recipe.
-
Achieving a Creamy Cheesecake Recipe Texture Without Baking
The texture is unbelievable! We get that satisfyingly thick, creamy cheesecake recipe feel entirely from whipping cold heavy cream right into the mix. It sets up beautifully firm in the fridge, giving you that decadent bite every time.
Gathering Ingredients for Your Oreo Cheesecake
Getting ready for this oreo cheesecake is super simple because most of what you need is already in the fridge or pantry. Precision matters here, so please don’t just eyeball the amounts; this recipe relies on the balance we’re setting up! We need proper texture, and that starts with having everything at the right stage before we mix.
Before you start crushing, maybe check out my thoughts on some other chocolate treasures, like how I use zucchini in my double-chocolate zucchini bread—always sneaking in something extra!
Creating the Perfect Oreo Crust Dessert Base
For the base of this amazing oreo crust dessert, grab about 25 standard Oreos to get 1 1/2 cups of crushed cookies. You just mix those crumbs up with 6 tablespoons of melted unsalted butter. Trust me, if you have a food processor, use it! It turns those cookies into fine, even sand in seconds, which makes for such a beautifully uniform crust that actually holds together when you slice it. Don’t try to do this by hand unless you really, really enjoy smashing cookies with a rolling pin!
Components for the No Bake Oreo Cheesecake Filling
For the filling, the most important thing you are going to need is 16 ounces of cream cheese, and it absolutely *must* be softened—room temperature, soft enough for your finger to sink in easily. Then we bring in bulk with 1 cup of powdered sugar and a teaspoon of vanilla. The secret weapon, though, is 1 1/2 cups of heavy whipping cream. It has to be ice cold when you whip it up, otherwise, you just get sad, soupy goo instead of those beautiful stiff peaks we need for structure in this no bake dessert idea.
Step-by-Step Instructions for Easy Oreo Cheesecake
The beauty of making this homemade Oreo cheesecake is that we aren’t putting anything through the scrutiny of the big, hot oven! It’s all about careful mixing and patience while it chills out in the fridge. Follow these steps exactly, and you’ll see why this is such an easy Oreo cheesecake. Don’t forget, if you want to see more of my favorite kitchen processes, you can always check out my main blog page!
Preparing and Chilling the Oreo Crust Dessert
First up, we make that fantastic base. Take your mixed butter and cookie crumbs and press that down *really* firmly into the bottom of your springform pan. You want total, even coverage—no wobbles allowed! Then, you’ve got to let it sit. Pop that pan into the fridge for a solid 15 minutes. This brief chill time helps the butter firm up slightly, locking those crumbs in place so they don’t turn into mush when the filling goes on.
Mixing the Creamy Filling for Your Oreo Cheesecake
While the crust chills, get that filling sorted. Beat the softened cream cheese until it is perfectly smooth—we need zero lumps here. Then slowly work in the powdered sugar and vanilla until it’s all friendly and combined. Now, the crucial part: whip that cold heavy cream separately until you have stiff peaks! When you eventually fold that whipped cream into the cream cheese mixture, be gentle! Seriously, fold gently until *just* combined. If you overmix that fold, you knock all the lovely air out, and suddenly your no bake dessert isn’t fluffy anymore.
Setting and Finishing the Homemade Oreo Cheesecake
Once it’s all blended, spread that glorious, creamy goodness evenly over your chilled crust. Use a spatula to smooth the top. Then, cover it loosely and move it to the refrigerator. It needs at least 6 hours to properly set, but I always tell people, if you can stand it, leave it overnight! That extra time ensures that you can slice this cookies and cream cheesecake perfectly clean. Finally, right before you serve it—and only then!—sprinkle that last cup of crushed Oreos over the top for that final, stunning look.
Tips for the Best Homemade Oreo Cheesecake
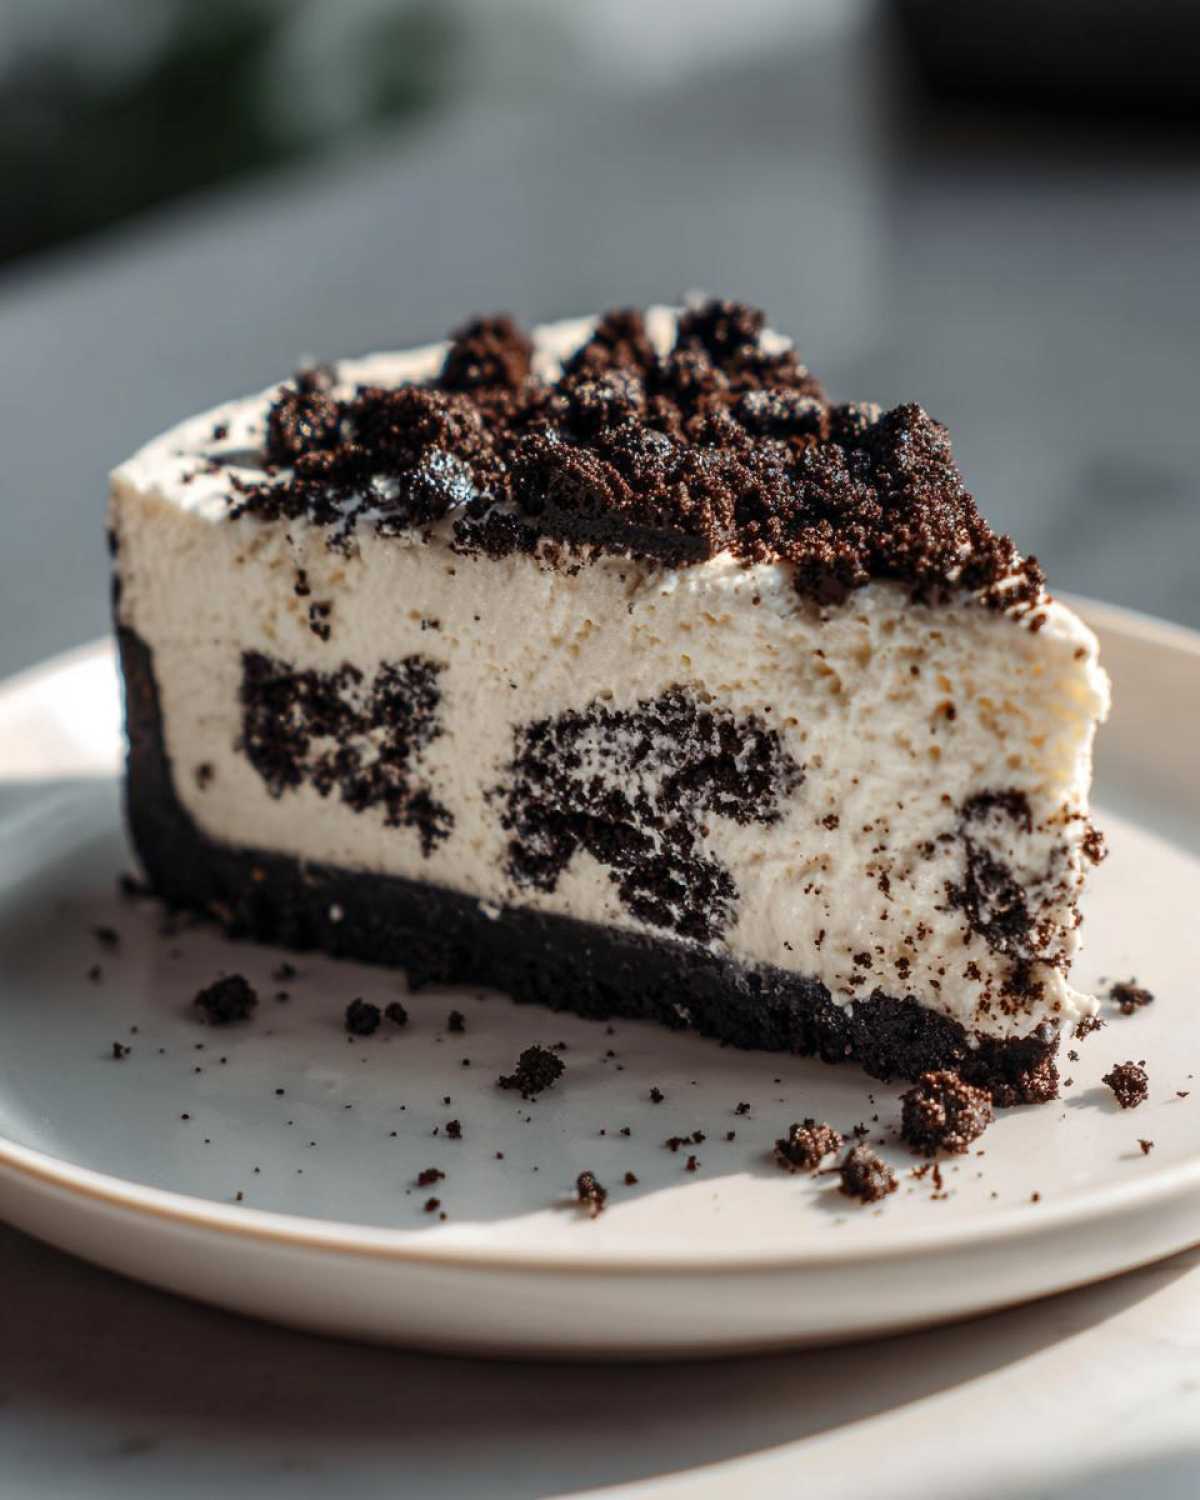
Making this oreo cheesecake is already pretty straightforward since we skip the oven, but I’ve picked up a few little tricks over the years to make sure every single cookies and cream cheesecake I pull from the fridge is absolutely perfect. These little bits of wisdom come straight from dealing with stubborn crusts and achieving that professional-looking slice. Don’t be afraid to experiment a little bit, especially when dealing with desserts with Oreos! If you want even more fun Oreo ideas, you have to check out my recipe for Cookies and Cream Puppy Chow; it’s completely addictive!
Ingredient Adjustments for a Tangier Oreo Cheesecake
Now, the recipe calls for pure cream cheese goodness, which is wonderfully rich, but sometimes I want just a little brightness to cut through that heavy sweetness. If you’re feeling that way, here’s the secret: take about 1/4 cup of that softened cream cheese out, and swap it for sour cream. It sounds small, but that little bit of tang really wakes up the flavor profile beautifully. It’s an easy switch, and it doesn’t mess with the setting process at all because you’re only changing a portion of the dairy base.
Techniques for Clean Slicing
This is the one tip that makes everyone think you bought this gorgeous oreo cheesecake from a fancy bakery. After chilling overnight, slicing can be a total nightmare—you pull, and the slice tears or sticks to the knife, right? Don’t worry about it! Just before you cut into that firmly set dessert, take a long, thin knife (like a serving knife) and dip the blade into a tall glass of very hot water. Dry it quickly with a clean towel, and then make your slice. Wipe the knife clean, reheat it by dipping it again, and slice again. It sounds fussy, but that hot blade just melts right through the cold filling and the crust, leaving you with unbelievably clean edges. Once you see those beautiful wedges, you’ll be doing it every time!
Variations on the Classic Oreo Cheesecake
While this giant, glorious no bake Oreo cheesecake is my absolute favorite, I totally get that sometimes you need something different, right? Maybe you’re packing lunches or hosting a huge crowd and need less commitment per person. That’s where switching up the vessel makes all the difference!
If you love the flavor but hate the slicing ritual, you absolutely have to try making mini Oreo cheesecakes. You just use a muffin tin lined with cupcake liners—no springform pan needed! Spoon in a little crust, fill it with the mixture, and let them chill. They are perfect bite-sized cheesecakes and look so cute on a platter.
Alternatively, if you want something sturdy that travels well, turn this into Oreo cheesecake bars recipe! You use a 9×13 baking dish (still no oven for the actual cheesecake part, of course!) and press the crust along the bottom. Pour the filling over, chill it overnight, and then cut them into neat squares. They hold their shape wonderfully, making them ideal for potlucks. For more cute, single-serving ideas, you should check out my guide on mini pumpkin cheesecakes—the technique is nearly identical!
Serving Suggestions for Your Cookies and Cream Cheesecake
So, you’ve made this perfectly creamy, rich, and absolutely stunning cookies and cream cheesecake. Congratulations! Now, how do you present this magnificent creation? Since this oreo cheesecake is so intensely flavorful and rich, you actually don’t need to load it up with a million toppings. Less is often more when the star of the show is this decadent!
My favorite way to serve it is keeping it dead simple, maybe just a light fresh raspberry garnish around the edge of the platter for a pop of color and acidity. But sometimes, you want a little something extra, especially if you aren’t using the crushed Oreos on top. A drizzle of chocolate ganache—made super simply by warming heavy cream and pouring it over good quality chocolate chips—is divine.
If you are looking for a beverage pairing, you have to go classic: a big, cold glass of milk! It just complements the Oreo crunch perfectly. For the grown-ups, I find that a strong, somewhat bitter coffee cuts through the richness wonderfully. In fact, if you love that coffee kick, you absolutely have to try my recipe for copycat Starbucks pumpkin cream cold brew; it’s the perfect pairing alongside a slice of this deep chocolate flavor.
Storage and Reheating Instructions for Leftover Oreo Cheesecake
Okay, this is important, because while this oreo cheesecake might be the first thing on the table, it is usually the last thing left! Since we didn’t bake this beauty, we have to be really mindful about how we store it to keep that texture perfect. Unlike baked cheesecakes, which can sometimes withstand a little room temperature lounging, this one needs the cold kiss of the refrigerator to stay firm and safe.
The absolute best way to store any leftovers is, hands down, keeping it in the springform pan or transferring the slices to an airtight container. If you leave it in the springform, make sure you press a layer of plastic wrap right over the surface of the cheesecake before putting on the lid. This prevents that dreaded fridge smell from creeping into your creamy filling.
How long does it last? Honestly, if you cover it well, this no bake Oreo cheesecake stays wonderfully fresh for up to four days in the fridge. That’s four days of snacking potential, which is fantastic! The crust might soften up ever so slightly as time goes on because the moisture from the filling migrates downward, but it never stops being delicious.
Now, do you ever reheat a cheesecake? Nope! That’s the joy of the no-bake method—it’s meant to be served chilled. If you’re noticing it getting a little too soft after sitting out during a party, just pop the leftovers back into the fridge for an hour. It firms right back up. Remember, this dessert is at its peak when it’s cold, firm, and just ready to snap when you cut into that crunchy Oreo crust dessert layer!
Estimated Nutritional Data for This Oreo Cheesecake Recipe
Okay, so we’ve established this oreo cheesecake is an absolute dream for the taste buds, but let’s talk turkey for just a moment about what’s going into that amazing slice. I pulled these estimates right from the recipe breakdown because, while we bake from the heart, it’s good to know roughly what we are getting into when we indulge in one of these creamy beauties. Remember, since this is a homemade Oreo cheesecake made with love, these numbers are just a target, and they can shift based on the exact brand of Oreos or cream cheese you use!
Here’s a quick snapshot of what a single serving—one generous slice—looks like:
- Serving Size: 1 slice
- Calories: 410
- Fat: 26g (with 16g saturated fat—we are using cream cheese, after all!)
- Carbohydrates: 40g
- Sugar: 35g (those cookies pack a punch!)
- Protein: 5g
- Cholesterol: 85mg
So, yeah, it’s definitely an indulgence, not exactly a light snack! But hey, that’s why we call it dessert, right? I always look at the fat content and think about how much butter and cream cheese went into achieving that incredible, smooth texture we love so much in a no bake dessert idea. It’s totally worth logging those stats if you’re counting macros, but for me? I just know it’s going to make my day!
A quick word of caution, because I have to keep things real with you: these estimations are based on standard ingredient quantities and how I portion mine out. If you decide to go for massive slices or maybe you use extra Oreos in the topping layer (I won’t judge!), those numbers are going to change! Treat this as a helpful guideline when enjoying your easy Oreo cheesecake.
Common Questions About Making No Bake Oreo Cheesecake
It’s only natural that when you find the perfect oreo cheesecake recipe, you’re going to have a few little questions pop up before you dive in. I sure did when I first started making this no bake Oreo cheesecake years ago! People always ask me about swapping out the cookies or how long it *really* needs to set up. Since this is one of my favorite desserts with Oreos, I’ve got the answers ready to go so your first attempt is absolutely flawless. You can also review my general site rules here: site privacy policy.
Can I use chocolate Oreos instead of regular ones in this Oreo Cheesecake recipe?
Oh, goodness, yes you can! That’s a fantastic idea if you ask me. The classic recipe calls for standard Oreos, but if you swap them out for Double Stuf Chocolate Oreos or those crispy chocolate-only ones, you are just leaning into that deep, dark chocolate flavor that makes those cookies and cream cheesecakes so addictive. It will make the whole thing richer and deepen the look of the crust and topping. No adjustment needed for timing; just go for it!
How long must the No Bake Oreo Cheesecake chill?
This is the most important question for a no oven cheesecake! You *must* let it chill. Technically, you can get away with 6 hours if you are absolutely desperate and you have used the cold knife trick, but I cannot stress this enough: let it chill overnight! Overnight setting allows the fats in the cream cheese and whipped cream to stabilize completely around the structure of the crust base. If you cut it too soon, you’re going to end up with a soft, spreading puddle rather than the gorgeous, firm slice you deserve.
Is this recipe achievable for beginner bakers?
One hundred percent, yes! This is honestly one of the best desserts I teach to people just starting out. If you can crush cookies and use a hand mixer to whip some cream, you can conquer this easy Oreo cheesecake. There’s no stress about burning the bottom or having the edges crack because there’s no baking involved at all! It’s all about mixing temperatures (softened vs. cold) and timing the chill. If you give it proper chilling time, you’ll look like a seasoned professional!
PrintNo-Bake Oreo Cheesecake
Make a simple, creamy Oreo cheesecake without turning on your oven. This recipe uses a crushed Oreo crust and a rich, no-bake filling.
- Prep Time: 20 min
- Cook Time: 0 min
- Total Time: 6 hr 20 min
- Yield: 10 servings
- Category: Dessert
- Method: No Bake
- Cuisine: American
- Diet: Vegetarian
Ingredients
- 1 1/2 cups crushed Oreo cookies (about 25 cookies)
- 6 tablespoons unsalted butter, melted
- 16 ounces cream cheese, softened
- 1 cup powdered sugar
- 1 teaspoon vanilla extract
- 1 1/2 cups heavy whipping cream, cold
- 1 cup crushed Oreo cookies, for topping
Instructions
- Mix the 1 1/2 cups of crushed Oreos with the melted butter until fully combined.
- Press the mixture firmly into the bottom of a 9-inch springform pan. Chill the crust for 15 minutes.
- In a large bowl, beat the softened cream cheese until smooth.
- Gradually beat in the powdered sugar and vanilla extract until fully incorporated.
- In a separate bowl, whip the cold heavy cream until stiff peaks form.
- Gently fold the whipped cream into the cream cheese mixture until just combined. Do not overmix.
- Spread the filling evenly over the chilled crust.
- Cover the pan and refrigerate for at least 6 hours, or preferably overnight, until firm.
- Before serving, sprinkle the top with the remaining 1 cup of crushed Oreos.
Notes
- Use a food processor to crush the cookies quickly for the crust and topping.
- For easier slicing, run a thin knife under hot water before cutting the chilled cheesecake.
- If you prefer a slightly tangier flavor, substitute 1/4 cup of the cream cheese with sour cream.
Nutrition
- Serving Size: 1 slice
- Calories: 410
- Sugar: 35g
- Sodium: 310mg
- Fat: 26g
- Saturated Fat: 16g
- Unsaturated Fat: 10g
- Trans Fat: 0.5g
- Carbohydrates: 40g
- Fiber: 1g
- Protein: 5g
- Cholesterol: 85mg