

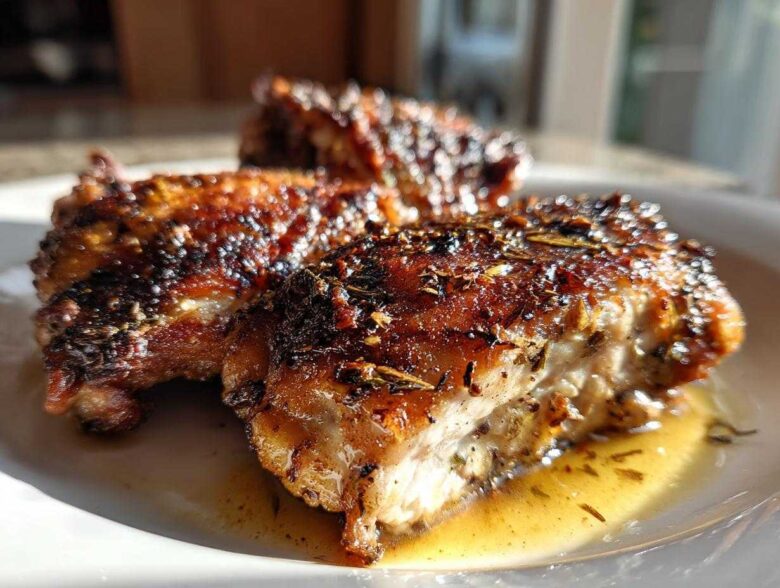
Oh boy, do I have a secret for you! For years, I fought the battle of the dreaded soggy chicken thigh skin. It was heartbreaking—rubbing all those spices on, getting everything ready, only to pull it out and have the skin peel off like damp paper. No thank you! I was ready to give up until I finally cracked the code, and it centers around this recipe for Garlic Butter Chicken Thighs with Crispy Skin. Trust me, this isn’t just another weeknight dinner; this is the recipe that changes everything. By combining a slow, skin-side-down sear with a quick finish in the oven, we nail incredible texture every single time. Plus, that rich, garlicky butter basting? It’s pure magic. If you want that shattering, golden-brown skin without drying out the meat inside, you’ve absolutely come to the right place. For more amazing flavor hacks, you should check out my guide on the best chicken marinade recipe for juicy flavor, too!
Why You Will Make This Garlic Butter Chicken Thighs with Crispy Skin Recipe Often
Seriously, this recipe ticks every single box. It’s fast enough for a Tuesday, but it tastes like something you’d order at a fancy steakhouse. You’re going to love it because:
- You finally master that shatteringly crispy skin the first time you try it.
- The meat comes out unbelievably juicy—no more dry dark meat, ever!
- It’s a true one-pan wonder, meaning cleanup is shockingly easy.
- The garlic butter sauce is so fragrant and rich, you’ll want to dip everything in it.
- It works perfectly as a simple weeknight chicken dinner but looks impressive enough for company.
Essential Ingredients for Perfect Garlic Butter Chicken Thighs with Crispy Skin
The beauty of this recipe is that it uses simple things you probably have on hand, but the quality of those simple things really matters when you’re aiming for perfection. We need four bone-in, skin-on chicken thighs. I insist on bone-in and skin-on because you simply cannot get that gorgeous, rendered fat layer without them! We’re using salt, pepper, and paprika for the basic rub, and then the flavor powerhouses: olive oil, four tablespoons of butter, four cloves of finely minced garlic, fresh thyme, and a splash of lemon juice and parsley for finishing.
Keep it clean, keep it simple, and you’re halfway there.
Ingredient Notes and Substitutions
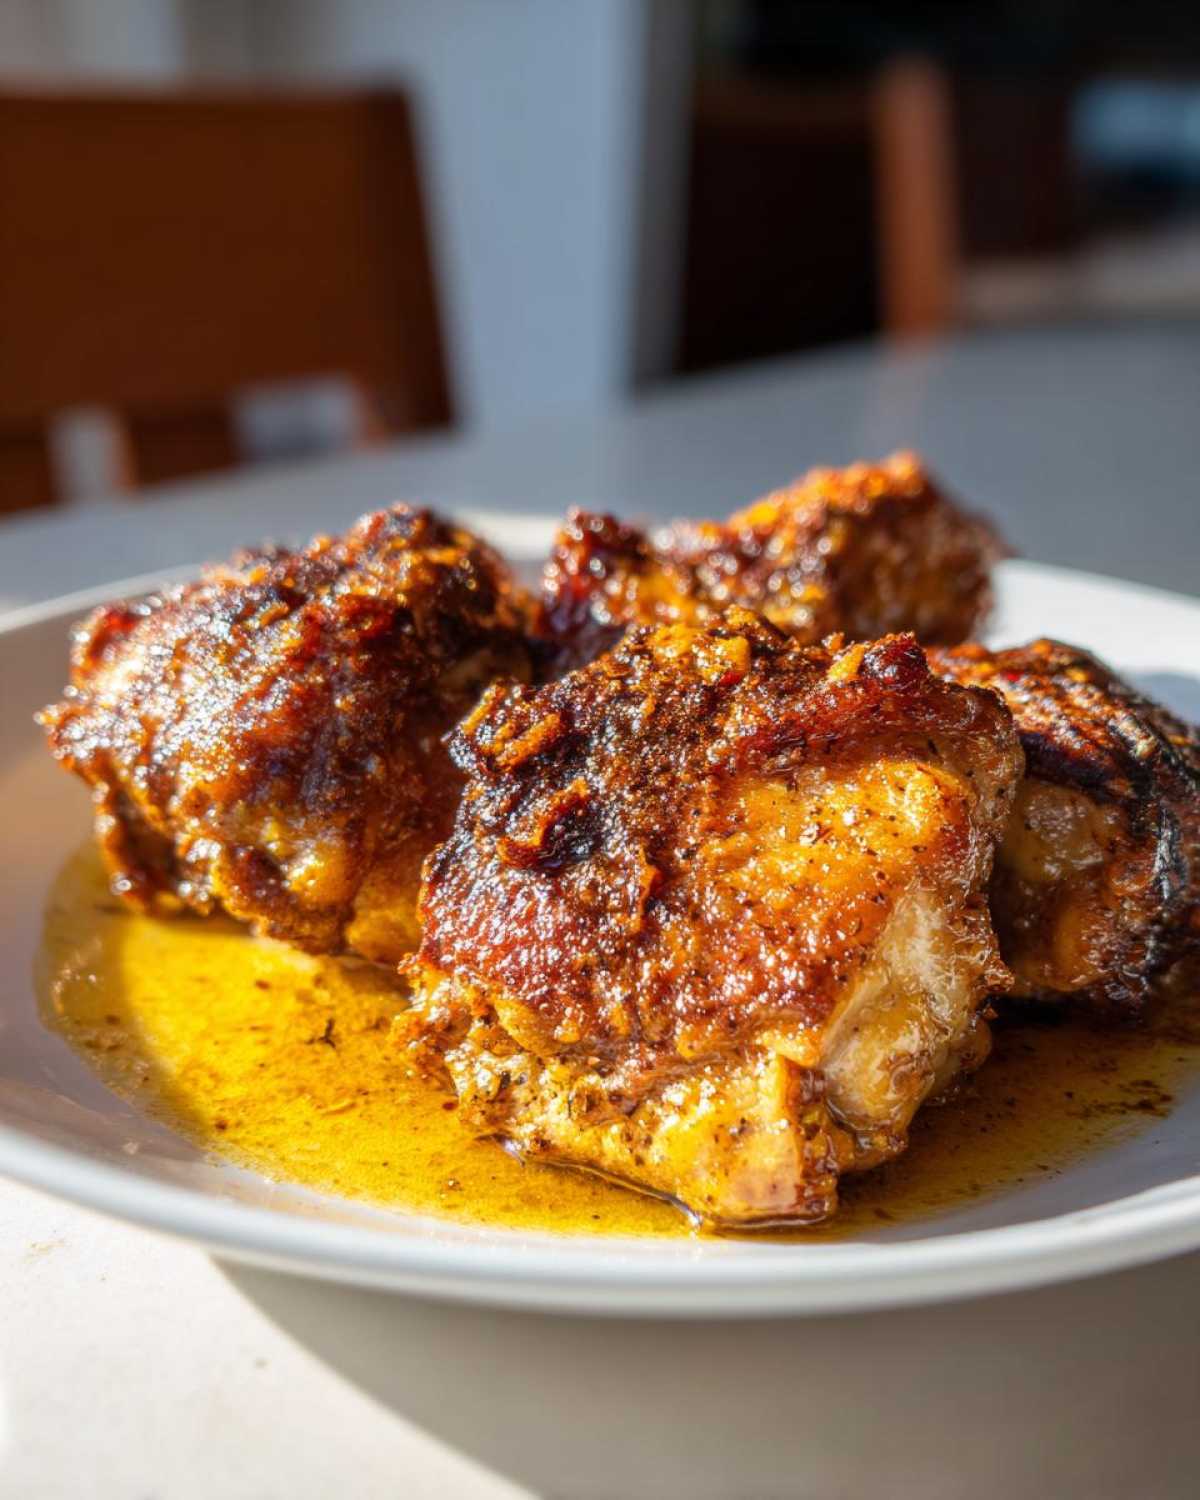
Listen, the salt choice here is key. You absolutely want to use kosher salt, not fine table salt. The larger crystals help draw moisture out of the skin during the drying phase and don’t dissolve too fast in the butter later on. Regarding fat, we need the olive oil to start because it has a higher smoke point, which keeps our initial sear clean. The butter comes in later for flavor and that beautiful, browned richness, which is why we call it Garlic Butter Chicken Thighs with Crispy Skin!
If you are stuck and don’t have fresh thyme, don’t panic! You can swap in about half a teaspoon of dried thyme when you add the butter in step six. Just remember dried herbs are more potent, so use less than you think you need. Fresh is always better for that aromatic punch, though!
The Secret to Crispy Skin: Preparing Your Garlic Butter Chicken Thighs with Crispy Skin
Okay, this is where we separate the soggy thighs from the superstars! If you want to know exactly how to get skin crispy pan seared chicken, listen up, because the cooking doesn’t even start until this prep work is done. First, you need paper towels. Lots of them. You must pat those thighs until they feel almost dry to the touch. Any moisture left on the skin turns straight into steam when it hits the heat, and steam equals rubbery skin—we want the opposite!
Once they are bone dry, we season them liberally with our salt, pepper, and paprika mix. Get that rub right into the skin crevices. Now, for the real hack, the one my neighbor learned after years of frustration: if you have time, put these seasoned thighs uncovered on a plate in the fridge for at least an hour, or even overnight. This dry-brining process removes even more surface moisture. It’s the absolute best way to ensure the skin turns into thin, crunchy gold.
Crucial Steps for How to Render Chicken Fat for Crispiness
People rush this part, and that’s why they fail! When we talk about the best crispy skin chicken thighs recipe, it all comes down to rendering the fat slowly. Here’s the secret sauce: Instead of heating your cast iron skillet up blazing hot first, put your oiled, seasoned thighs skin-side down into that *cold* or barely warm pan. Seriously, cold pan! As the pan gradually heats up over medium-high heat, the fat underneath the skin slowly melts out (this is rendering) without ever burning the skin on the surface.
You need low, slow heat release on the skin side—about 10 to 12 minutes, undisturbed. Don’t peek! Let that fat render out completely. That melted fat is what you’ll use to baste later, and once it’s gone, the skin sets up perfectly crisp. If you want the full deep dive on that process, I wrote a whole thing on how to render chicken fat for crispiness, but the short version is: start cold!
Step-by-Step Instructions for Skillet to Oven Crispy Chicken Thighs
Now for the exciting part! We’ve prepped the skin, and we’ve let the cold pan do the heavy lifting for the first 10 minutes. You should have deep golden, crunchy skin right now. Once you flip those thighs over—gently, please!—we change gears immediately. Reduce the heat down to medium-low. We don’t want to burn the butter we’re about to add. Toss in your four tablespoons of butter and those thyme sprigs right next to the chicken. As that butter melts, you need to tilt your skillet and use a spoon to continuously splash that fragrant, garlicky-smelling butter over the top side of the thighs for about two minutes. That basting step makes these skillet to oven chicken thighs truly unforgettable.
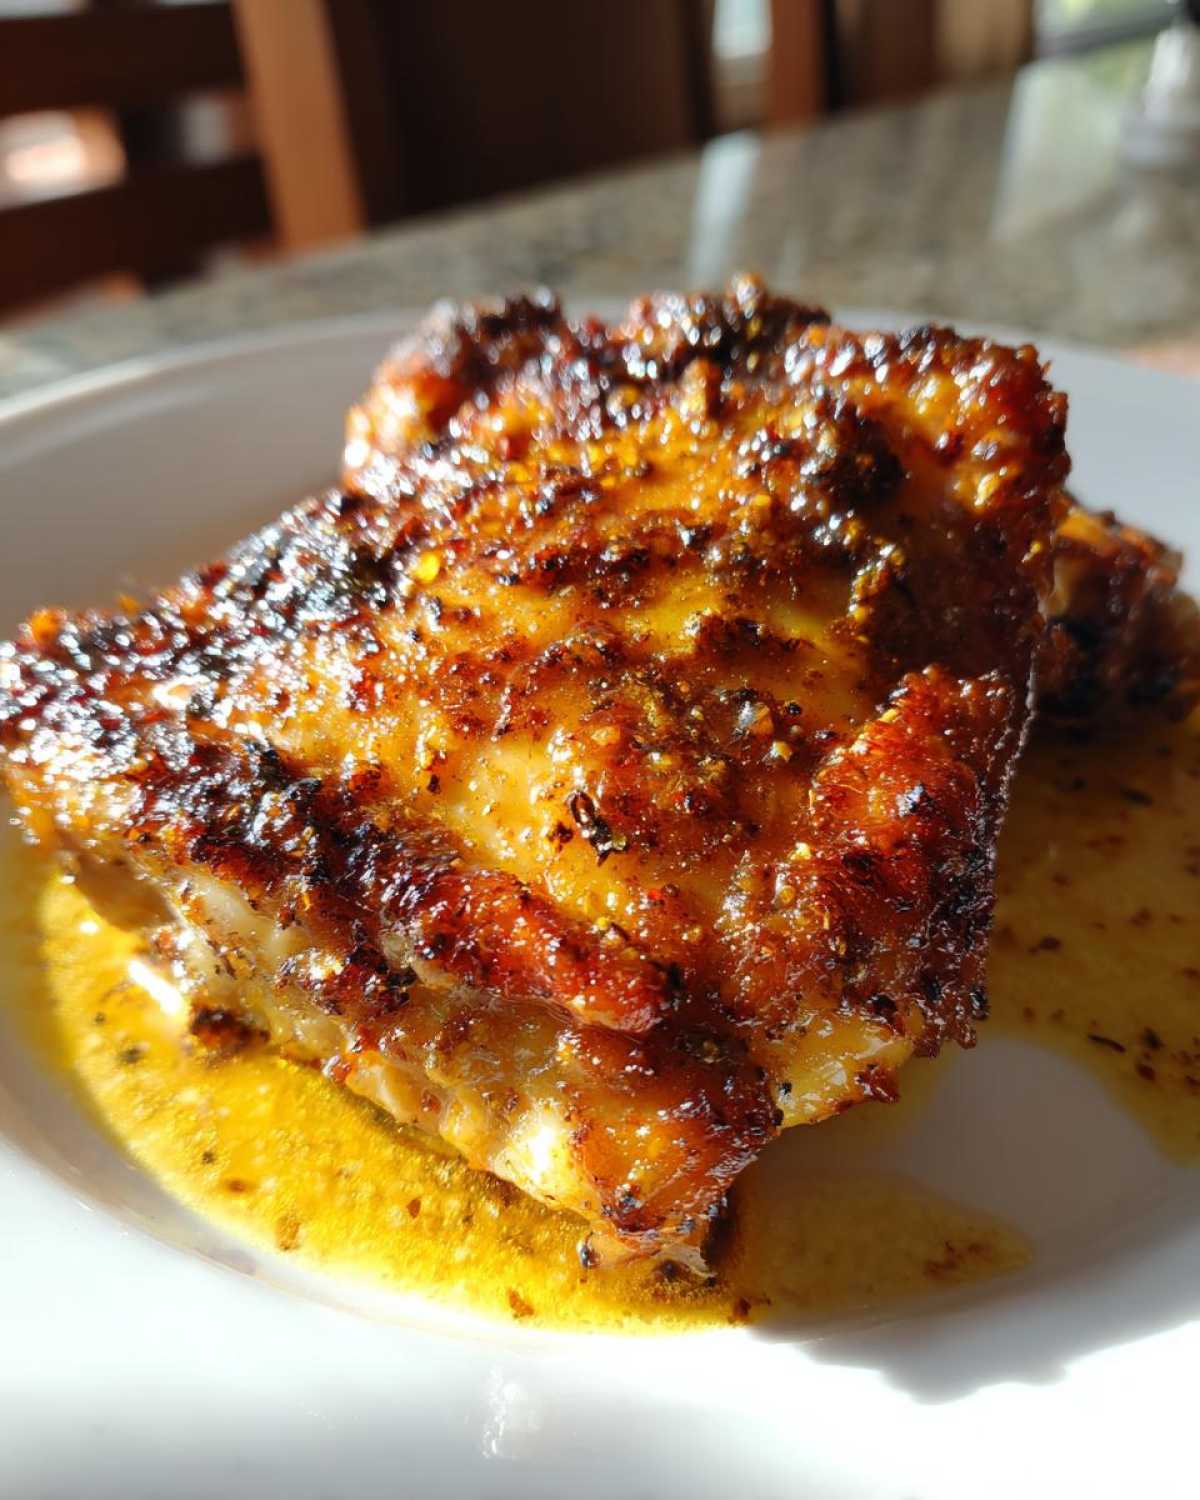
After that quick flavor injection, you have to get them into the oven. Make sure your oven is preheated already to 400°F. Pop the whole skillet right in. Roast them for about 15 to 20 minutes. This oven time is non-negotiable for even cooking; it finishes the job the stovetop started. Don’t forget to peek in with your meat thermometer! Once you hit that magic number, pull them out and let them rest on a cutting board for five full minutes. This resting time is critical to keep all those delicious juices locked inside.
Achieving Perfectly Cooked Chicken Thighs: Temperature and Resting
Listen, this is one of the most important lessons I learned in the kitchen: chicken breast and chicken thigh have completely different rules! Chicken breast is safe and best at 165°F, but dark meat—the thigh—is actually best when it reaches about 175°F. Don’t freak out! It sounds high, but that higher temperature helps break down the connective tissues in the dark meat, resulting in that meltingly tender texture we crave. Aiming for 175°F ensures you get the most amazingly juicy chicken thighs recipe with skin on.
And don’t skip the resting! Five minutes might feel like forever when you’re staring at dinner, but those five minutes allow the juices to redistribute throughout the meat. Slice them too early, and all that hard-earned moisture runs out onto your cutting board, turning your supposedly juicy chicken dry at the center. If you want more incredible dinner ideas like this one, check out my recipe for garlic butter steak bites!
Finishing Touches: The Garlic Butter Pan Sauce for Your Garlic Butter Chicken Thighs with Crispy Skin
The chicken is rested—don’t touch it early! Now we make the sauce using the glorious brown bits stuck to the bottom of your skillet, what we call the fond. Keep the heat on low; we don’t want to fry the garlic just yet. Carefully pour out most of that excess rendered fat if you have a swimming pool in the pan, but leave a tablespoon or two of that flavorful gold behind. Toss in your minced garlic. It’ll only take about 30 seconds until you can smell it popping—seriously, move fast here so it doesn’t burn!
Once it’s fragrant—and that smell is heavenly—pull the pan off the heat entirely. Stir in the lemon juice. That little hit of acid is super important because it cuts through the richness of all that butter and fat, making the flavor bright instead of heavy. Drizzle this incredibly flavorful, quick pan sauce right over the top of your resting chicken thighs. It’s the final flourish that completes the best Garlic Butter Chicken Thighs with Crispy Skin. If you love quick sauces, you absolutely have to try my recipe for 5-minute creamy garlic aioli recipe alongside this!
Tips for Success with Your Garlic Butter Chicken Thighs with Crispy Skin
Following the steps gets you 90% of the way there, but these final pro tips are what move this recipe from great to absolute legendary. If you treat your tools right, the cooking process becomes so much easier, especially when dealing with that high heat and rendered fat.
First and foremost: Commit to the cast iron skillet if you have one. Seriously! Cast iron holds heat incredibly evenly, which is exactly what you need when you’re searing skin-side down for 10 minutes straight. If the heat source is uneven, you end up with part of the skin burnt and part of it pale. A heavy stainless steel pan will work in a pinch, but cast iron is truly the best tool for achieving the best crispy skin chicken thighs recipe using this skillet-to-oven approach.
Second tip, relating to the oven: When roasting, make sure your oven rack is set toward the lower-middle position. Since we are searing first and rendering fat, we want the heat coming primarily from the top element during the roasting phase to finish setting that skin texture without overcooking the bottom. If your oven runs hot, keep an eye on the temperature, or consider bumping the roasting temperature down from 400°F to 375°F and just letting it cook for an extra five minutes.
Another crucial thing, especially if you’re making a big batch: Do NOT overcrowd the pan! This is the number one cause of steam. If you’re cooking for more than four people, I strongly suggest you cook these thighs in two separate batches. It’s worth the extra five minutes of searing time than trying to squeeze them all in and ending up with soggy skin for half your guests. Once you’ve perfected this method, you can try applying some of those rich flavor concepts to other dishes, like my guide for the best easy homemade BBQ sauce recipe!
Serving Suggestions for Your Garlicky Chicken Thigh Dinner Ideas
Since we’ve made these Garlic Butter Chicken Thighs with Crispy Skin so flavorful and rich, honest to goodness, they really just need simple partners on the plate. We want things that can soak up a little of that leftover pan sauce—don’t let that gorgeous garlic butter go to waste!
My absolute favorite weeknight companion is creamy mashed potatoes. I have a fantastic recipe for roasted garlic mashed potatoes that gives you an extra layer of that savory flavor without any extra work. Alternatively, if you want something green and fast, blistered green beans or simple steamed asparagus tossed with salt and pepper are perfect. They provide a nice, fresh crunch against the richness of the chicken. Keep the sides simple, let that crispy skin shine, and serve it up!
Storage and Reheating Instructions for Leftover Garlic Butter Chicken Thighs
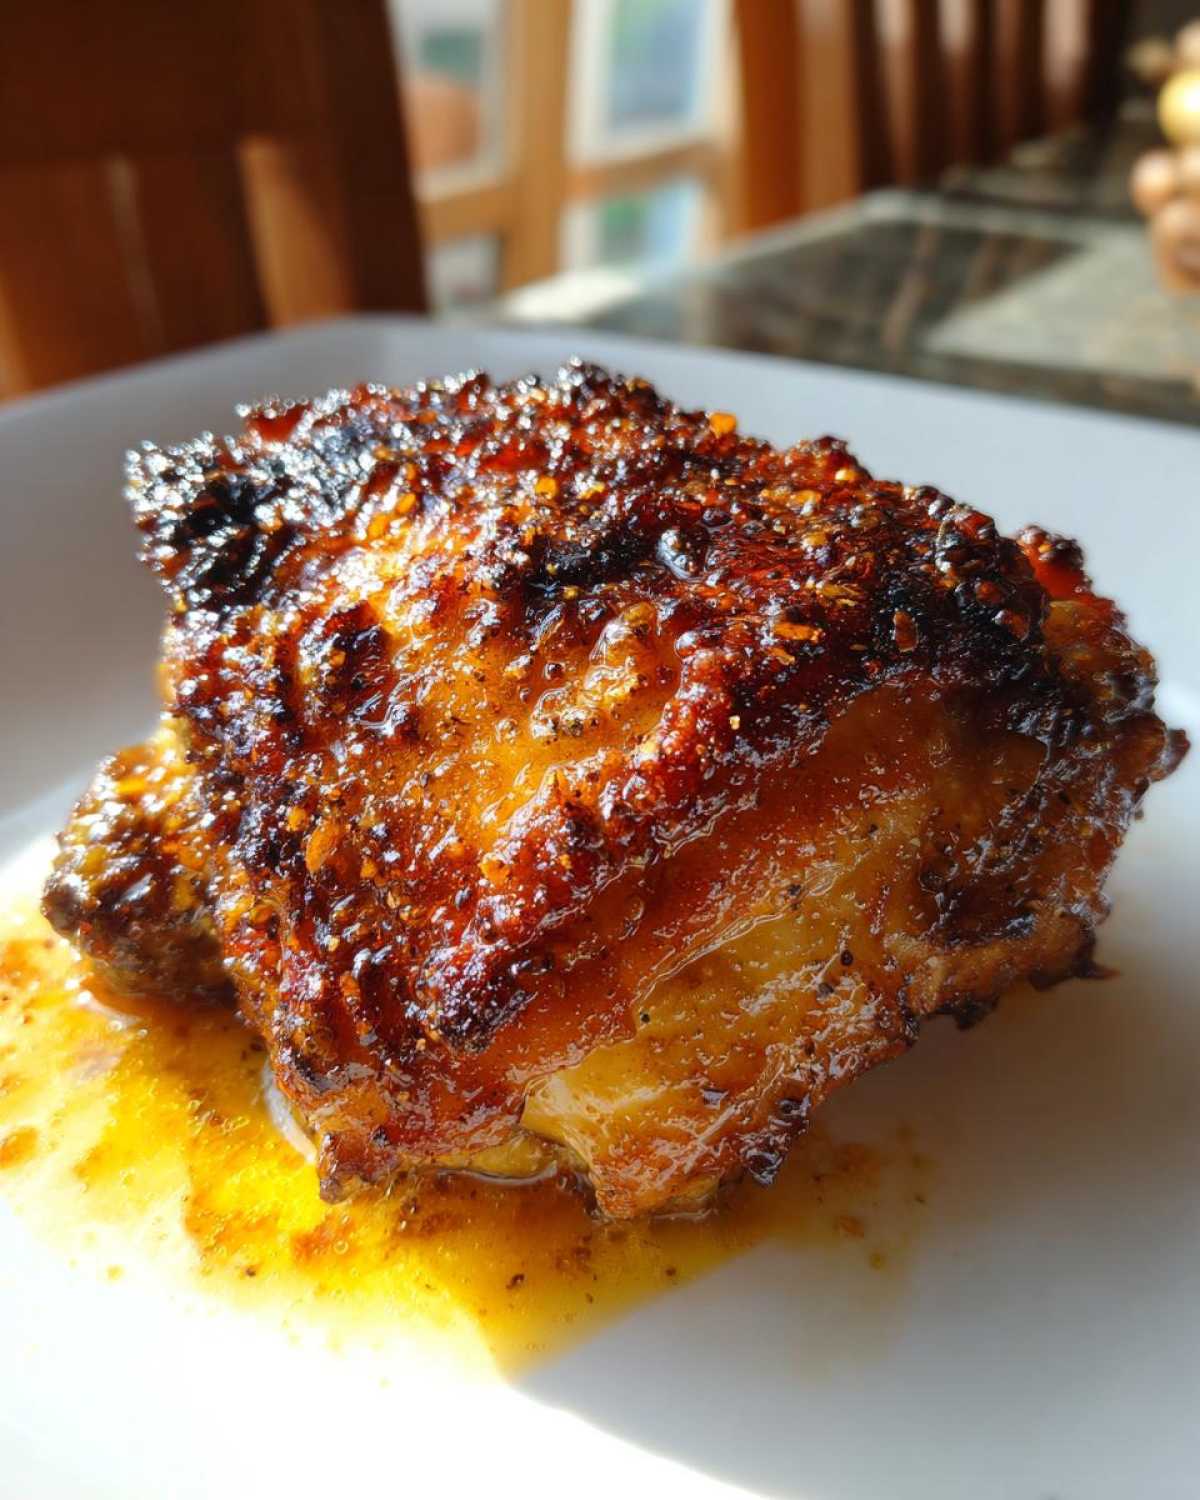
Okay, let’s be real here—if you have leftovers of this Garlic Butter Chicken Thighs with Crispy Skin, I’m impressed! But if you do, we need to treat them right. Store any remaining thighs in a shallow, airtight container in the fridge. Don’t just stack them in there, or that beautiful skin will steam itself soggy overnight! Make sure they are completely cooled first, of course.
When it comes time to reheat, please, for the love of all that is crispy, do not microwave them! Microwaves are the enemy of crispiness. The best trick is throwing them into a toaster oven or a regular oven preheated to about 375°F for about 8 to 10 minutes. If you have an air fryer, even better! I use mine all the time for leftovers. You can see my favorite methods in my guide on air fryer chicken, but typically, 5 minutes at 360°F brings that skin right back to life. It keeps the meat juicy while crisping up the exterior.
Frequently Asked Questions About Crispy Skin Chicken Thighs
I get so many questions about this recipe because everyone is tired of mushy skin! It’s totally normal to wonder about tweaks, but for this specific method, some steps are sacred. Here are the answers to the most common things folks ask when trying to nail that juicy chicken thighs recipe with skin on.
Can I make this recipe using boneless, skinless thighs?
Oh, honey, you really shouldn’t try this specific technique with boneless, skinless thighs if you want the result pictured here! The bone is essential; it acts like a heat sink, keeping the meat cooking evenly while the skin side renders down in the cold pan. Plus, without the skin, there’s nothing to crisp! If you only have boneless, skinless thighs, skip the searing and just roast them, but you’ll need to cook them to 165°F much faster, and they won’t have that incredible garlic butter crust. It’s a totally different outcome.
What is the safest internal temperature for juicy chicken thighs recipe with skin on?
This is one of my favorite teaching moments! Remember, dark meat is different from white meat. While the USDA says chicken is safe at 165°F (74°C), that’s the absolute minimum, and it can leave dark meat a little tough or stringy. For the most tender, flavorful result, we are aiming for 175°F (80°C). That higher temperature melts down the collagen and fat in the thigh perfectly. The chicken comes out incredibly juicy because we give it that mandatory 5-minute rest after pulling it from the oven. It’s the secret to the perfectly cooked chicken thighs!
How long can I dry brine the chicken for the crispiest skin?
If you have time, the longer, the better for that initial dry brine—but with a caveat! You can safely leave the seasoned chicken thighs uncovered in the fridge for up to two days. That full 48 hours really draws out moisture, guaranteeing a non-steamed result when you sear them. However, if you’re in a pinch and looking for a quick simple weeknight chicken dinner, even 30 minutes on the counter after seasoning makes a noticeable difference compared to cooking them straight from the package. Just make sure you pat them dry before seasoning if you skip the fridge!
Can I skip the oven step and cook them entirely on the stovetop?
You absolutely can, but you need to be very careful! If you cook Garlic Butter Chicken Thighs with Crispy Skin only on the stovetop, you risk burning the skin before the bone-in thigh cooks through to that crucial 175°F. If you must avoid the oven—maybe your oven rack is broken like mine was last Christmas—you need to flip the thighs skin-side down, then add the butter, and then flip them back to the skin side for the basting. After basting, you need to reduce the heat to the absolute lowest setting, cover the pan tightly, and let them steam-cook gently for another 15–20 minutes. Watch closely so the butter doesn’t scorch!
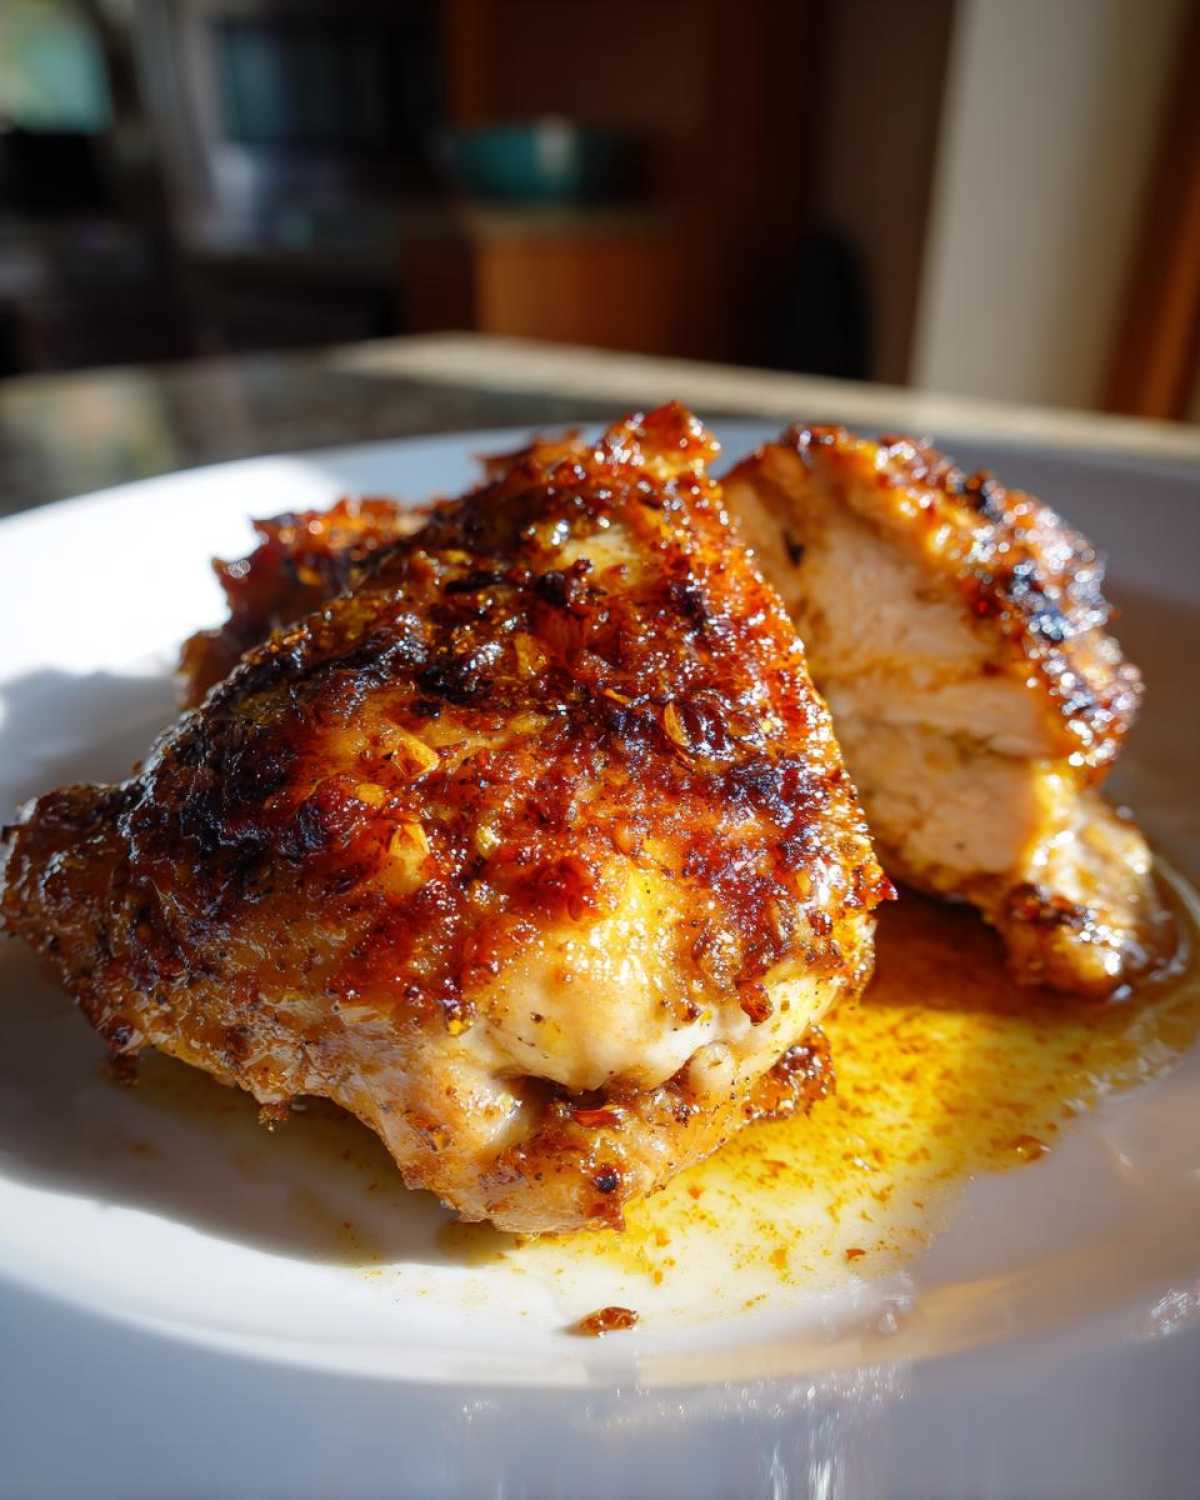
Garlic Butter Chicken Thighs with Crispy Skin

Follow these steps to cook bone-in, skin-on chicken thighs until the skin is perfectly crisp and the meat is juicy, finished with a rich garlic butter sauce.
- Prep Time: 15 min
- Cook Time: 35 min
- Total Time: 50 min
- Yield: 4 servings
- Category: Dinner
- Method: Pan Sear and Oven Roast
- Cuisine: American
- Diet: Low Fat
Ingredients
- 4 bone-in, skin-on chicken thighs
- 1 teaspoon kosher salt
- 1/2 teaspoon black pepper
- 1/2 teaspoon paprika
- 2 tablespoons olive oil
- 4 tablespoons unsalted butter
- 4 cloves garlic, minced
- 2 sprigs fresh thyme
- 1 tablespoon fresh parsley, chopped
- 1 teaspoon lemon juice
Instructions
- Pat the chicken thighs completely dry using paper towels. This step is crucial for crispy skin.
- In a small bowl, mix the salt, pepper, and paprika. Rub this mixture evenly over the chicken thighs, focusing on coating the skin.
- Place a large, oven-safe skillet (cast iron works best) over medium heat. Add the olive oil.
- Place the chicken thighs skin-side down in the cold skillet. Do not overcrowd the pan.
- Increase the heat to medium-high. Sear the chicken thighs, undisturbed, for 10 to 12 minutes until the skin is deep golden brown and crisp. You are rendering the fat during this time.
- Flip the chicken thighs. Reduce the heat to medium-low. Add the butter and thyme sprigs to the pan around the chicken.
- As the butter melts, tilt the pan and use a spoon to baste the chicken thighs with the melted butter mixture for about 2 minutes.
- Transfer the skillet to a preheated oven at 400 degrees Fahrenheit (200 degrees Celsius).
- Roast for 15 to 20 minutes, or until an instant-read thermometer inserted into the thickest part of the thigh (avoiding the bone) registers 175 degrees Fahrenheit (80 degrees Celsius).
- Remove the skillet from the oven. Transfer the chicken thighs to a cutting board and let them rest for 5 minutes.
- Return the skillet to the stovetop over low heat. Add the minced garlic to the remaining butter sauce and cook for 30 seconds until fragrant. Stir in the lemon juice.
- Spoon the garlic butter sauce over the rested chicken thighs. Garnish with fresh parsley before serving.
Notes
- For the crispiest skin, let the seasoned chicken sit uncovered in the refrigerator for at least 1 hour before cooking.
- The internal temperature for chicken thigh doneness is 175 degrees Fahrenheit for the best texture.
- If you do not have an oven-safe skillet, sear the chicken on the stovetop, then transfer it to a baking dish before placing it in the oven.
Nutrition
- Serving Size: 1 thigh
- Calories: 450
- Sugar: 1
- Sodium: 450
- Fat: 32
- Saturated Fat: 14
- Unsaturated Fat: 18
- Trans Fat: 0
- Carbohydrates: 1
- Fiber: 0
- Protein: 35
- Cholesterol: 140