

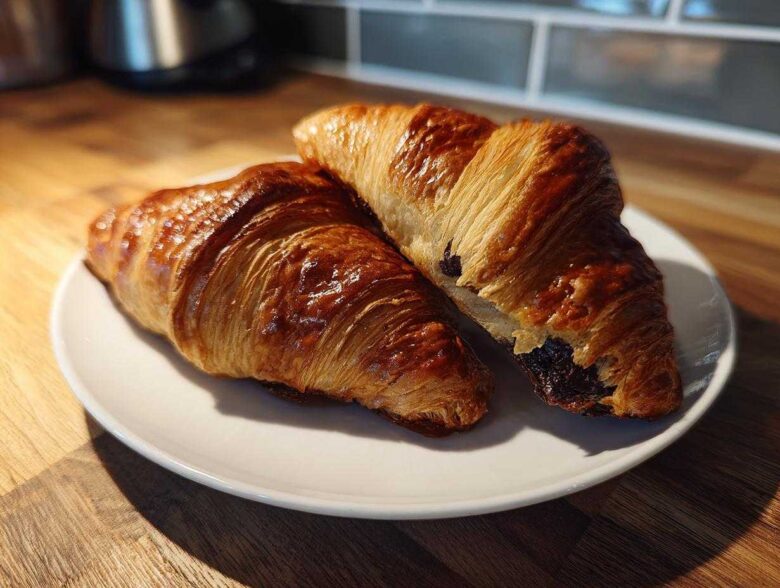
Oh my gosh, you walk past that fancy Parisian bakery window, and the sight of those perfectly golden, flaky beauties just stops you dead, right? I know that craving! For years, I thought making a proper chocolate croissant at home was some kind of secret, multi-day pastry operation. I felt defeated before I even started. But trust me when I tell you, you absolutely can whip up incredible, bakery-quality chocolate croissants in under an hour using a special shortcut. Honestly, the first time they came out of my oven looking that laminated and buttery, I almost cried tiny happy tears. Forget the kneading, forget the folding—this is the only way I make chocolate croissant now!
Why This Easy Chocolate Croissant Recipe Works So Well
If you’ve ever looked up real laminated dough recipes, you know they require chilling, folding, chilling again, resting—it feels like a full-time job! That’s why this method is utterly genius for us home bakers who want amazing results without dedicating an entire weekend to butter. This recipe respects your time while delivering that beautiful honeycomb interior you dream about when you crave a true chocolate croissant.
Shortcut Success with Puff Pastry Pain au Chocolat
Seriously, the single biggest game-changer here is skipping the lamination entirely. We are relying on high-quality, all-butter puff pastry that’s already done the hard work for us. Trust me, the package itself is doing most of the heavy lifting! Using that frozen block means you get that incredible, layered effect—that crispy shattering sound when you bite into it—without waiting days for your dough to rest.
Achieving Flaky Chocolate Filled Croissants Every Time
The secret to making sure those layers actually puff up and don’t just melt together is simple: temperature control. Keep that dough as cold as you can while you’re working it! When the super-cold dough hits that hot oven, the water inside turns instantly to steam, forcing those butter layers apart. That’s physics working in our favor to create perfect Flaky Chocolate Filled Croissants.
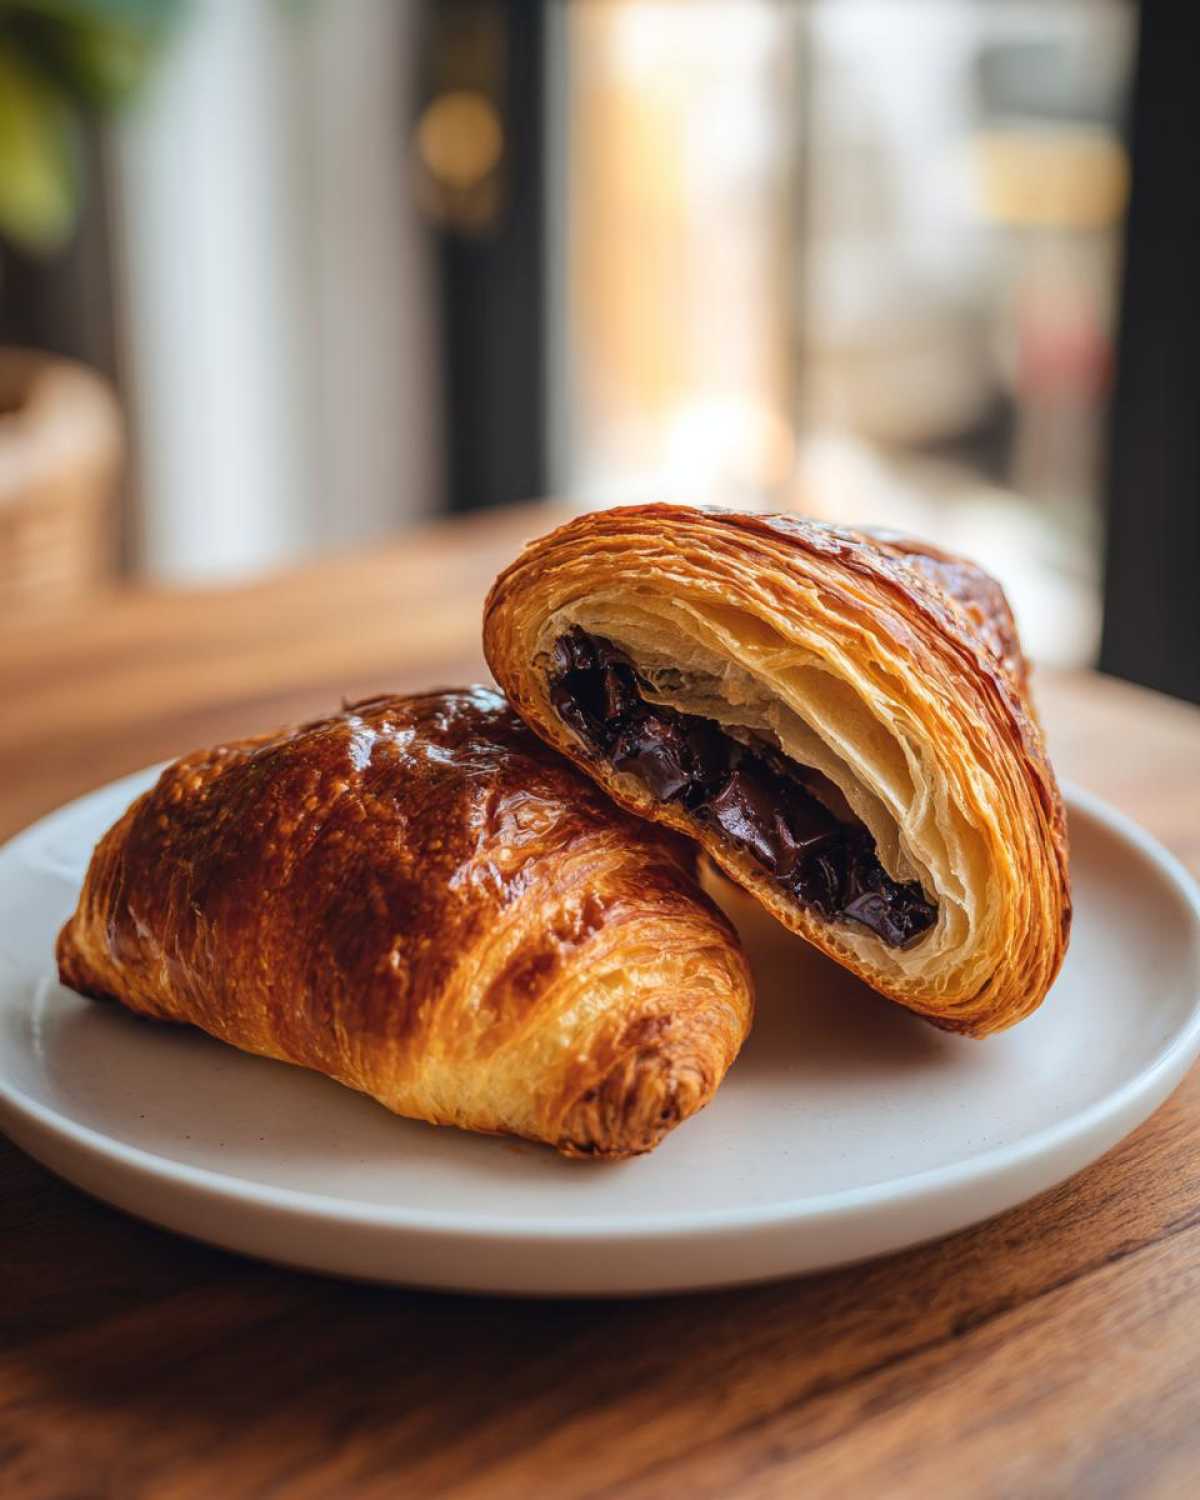
Ingredients for Your Quick Chocolate Croissant
The ingredient list for these stunners is ridiculously short, which is exactly how I like my brilliant weekend baking projects! You only need four main things, and one of them is technically optional, but I usually spring for it. Remember, since the pastry is the star, it really helps if you grab the best quality puff pastry you can find—look for one that specifically says “all-butter.” That makes such a difference in flavor!
Here’s what you need to gather before you even think about preheating the oven. Seriously, only five things total.
- One whole package of that amazing, all-butter puff pastry, thawed out just enough so it’s flexible—not floppy! (Check your package size, usually around 14 ounces.)
- About 4 ounces of really good dark or bittersweet chocolate. You want sticks, about a half-inch thick, or break up a good bar.
- One happy, large egg, whisked with just a tiny splash of water for the wash.
- One tablespoon of plain white sugar, just for sprinkling on top if you want that extra crunch. And yeah, I always do!
Expert Tip: Don’t substitute baking chocolate chips unless you absolutely have to! Chips have stabilizers that stop them from melting into that beautiful, gooey river inside the croissant. For a true bakery flavor, find actual baking sticks or chop a quality bar.
Step-by-Step Instructions for Perfect Chocolate Croissant
This is where the magic happens, and honestly, if you can cut dough and roll it up, you’ve basically mastered this recipe. Remember, we are aiming for that fast, flaky texture, so move with purpose! First things first: get that oven cranked up to 400°F (200°C) right now. We need it piping hot when these beauties are ready to go in. Also, grab your two baking sheets and line them with parchment paper; trust me, cleaning baked-on butter is not how I want you spending your morning! This process is so fast, it could even double as a great addition to your sheet pan breakfast bake experiments later.
Preparing the Pastry and Chocolate Sticks
Take your thawed puff pastry—it should still be cool to the touch, maybe a little stiff—and gently unroll it onto a surface where you’ve dusted just a whisper of flour. Don’t go crazy with the flour, or you risk sealing the layers shut! Now, using a sharp knife or pizza cutter, slice that whole rectangle right down the middle lengthwise. You should have two long strips now. Then, slice each strip straight across into 6 even pieces. You’re looking for 12 uniform little rectangles of potential pastry heaven here. Make sure your chocolate is prepped into those little sticks, ready to tuck inside.
Rolling and Shaping Your Chocolate Croissant
Alright, time to roll! This is the key to getting that lovely melt inside. Take one of your chocolate sticks and lay it right near the short edge of a pastry rectangle. Now, roll that dough just once over the chocolate. Stop! Place your *second* sticking right where that first roll landed, and then continue rolling the pastry all the way to the end. You’re essentially wrapping that chocolate stick in alternating layers of dough while rolling it toward you. Once rolled, tuck the whole thing seam-side down onto your parchment paper. That sealing is crucial! Keep going until you finish all 12 pieces for some wonderful Simple Chocolate Pastry Baking.
Egg Wash and Baking the Bakery Style Pastries Easy
Now for the golden glow! In a tiny bowl, whisk that single egg with just one tablespoon of water. This is your egg wash. Brush this gently over the tops of every single piece you just shaped. If you decided to use the sugar, sprinkle it on now for that irresistible, crackly top. Place them carefully into your preheated, hot oven for about 15 to 20 minutes. You are looking for them to be gorgeously puffed and deep golden brown—not pale! We want those Bakery Style Pastries Easy results!
When they look done, pull them out immediately and let them rest on the pan for five minutes before moving them to a wire rack. You need to smell your kitchen right now; it’s the best!
Tips for Success Making Homemade French Pastries
Even though this recipe is super simple because we are borrowing the credit from store-bought puff pastry, there are still a couple of little secrets I’ve picked up to make sure they taste like I spent three days laminating myself. The secret weapon here is keeping things cold, cold, cold! If your dough gets warm and starts feeling sticky or greasy while you’re cutting or rolling, just pop the whole baking sheet into the fridge for ten minutes. It firms right back up, and you save those crucial layers!
Also, let’s talk chocolate again because it matters so much for true Homemade French Pastries. If you use bar chocolate, try to get it as close to room temperature as possible without melting, which sounds contradictory, I know! Cold chocolate can sometimes stress the dough when it expands, causing little tears. If you’re using chips, just pile a few more in there because they don’t melt as beautifully. For more baking inspiration, you should check out my recipe for double chocolate zucchini bread, which also needs a little temperature patience!
Storage and Reheating Instructions for Leftover Chocolate Croissant
Now, let’s be real: these Easy Chocolate Croissant Recipe treats are absolutely best eaten within minutes of coming out of the oven. That shatter, that melted center—it’s pure magic when fresh! But if, by some miracle, you have any leftovers, you need to store them properly so they don’t turn sad and chewy on the counter.
You must use an airtight container. If you don’t have one, use a zip-top bag and squeeze every bit of air out. Storing them for up to two days is totally fine this way. When you’re ready to relive the glory, skip the microwave!
The microwave just turns flaky dough rubbery. Instead, reheat them in a toaster oven or a regular oven set to 300°F (150°C) for about 5 to 7 minutes. This brings back the crispness and warms that chocolate center perfectly. Seriously, this makes the reheated chocolate croissant taste almost brand new!
Ingredient Notes and Substitutions for Your Pastry
We talked about the short ingredient list, but I want to dive deeper into why the choices you make here really matter. Since we are using store-bought pastry, we need to maximize the flavor contribution of the chocolate and the dough base. If you accidentally grab the wrong type of pastry, you might end up with something flat, and nobody wants a flat croissant, right? That’s why this specific type of dough is essential for a truly Buttery Croissant Recipe.
Let’s start with the structure. You must opt for all-butter puff pastry if that’s your option. I know the shortening-based ones are sometimes cheaper or easier to find, but they just don’t puff the same way. Shortening has a higher melting point, which means it takes longer to liquefy in the oven, and that delay ruins that rapid, layered steam explosion we need. All-butter melts at a temperature that perfectly corresponds with the puffing action, giving you those huge, airy gaps.
Now, speaking of the filling—what if you can’t find those perfect little chocolate sticks? Don’t panic! I’ve done it plenty of times when the baking aisle was bare. If you are stuck using chocolate chips, follow the note in the recipe and just use more of them—I usually count out about 4 or 5 for each pastry rectangle. Just place them closer together near the edge where you start rolling. They might not create one long, beautiful melted ribbon like a true stick, but they will melt enough to give you those delicious pockets of chocolate within the flaky layers. It’s a decent compromise for a quick bake!
Serving Suggestions for Quick Breakfast Pastries
Okay, so you’ve got these magnificent, piping-hot pastries staring back at you. Now what? You absolutely cannot let a treasure like this go unappreciated while it’s at its peak temperature! While these are wonderful all on their own, pairing them elevates the whole experience into a proper weekend brunch event. These flaky wonders are so rich that they really shine next to something bright or tart.
My absolute favorite pairing has to be a really strong, dark roast coffee. The bitterness cuts right through the buttery richness of the pastry. If you’re doing a spread, offer a small bowl of tart raspberry jam—none of that overly sweet stuff, please! Fresh sliced strawberries or raspberries also work wonders. We even whip up a batch of that maple apple cider fizz to serve alongside these Quick Breakfast Pastries for a truly special morning!
Frequently Asked Questions About This Easy Chocolate Croissant Recipe
When you’re trying a new favorite recipe, you always have a few questions pop up, and that’s totally normal! I’ve been making these shortcut pastries so long now that I have the answers to all the weird little things that used to trip me up. Because let’s face it, we want perfect results without a huge hassle, right?
Can I make these chocolate croissants ahead of time?
Yes, you absolutely can! This is great news if you want to wake up to the incredible smell of fresh pastry without doing any work in the morning. After you roll up your formed chocolate croissant (Step 4), put them on the baking sheet lined with parchment paper, cover them loosely with plastic wrap, and stick the whole thing in the fridge. They can hang out there for up to 24 hours.
When you are ready to bake them, let them sit on the counter for about 20 minutes just to take the deepest chill off—they don’t need to proof like real yeasted dough, but getting them slightly less stone-cold helps. Then, you’ll brush them with the egg wash as usual and bake them. You might need to add just 3 to 5 minutes to the bake time since they started out cold from the fridge. Keep an eye on that gorgeous golden color!
What is the best way to get a shiny finish?
That bakery-level shine comes entirely from the egg wash—and how you apply it! The mixture of one egg whisked with a tablespoon of water is crucial because the yolk gives you that deep, rich color, and the water helps thin it out so it doesn’t glob up the beautiful flakes.
For the shiniest finish, make sure your brush strokes are light and even. Don’t let the egg wash pool in the crevices; you want a thin coating on the raised surface. If you want that *extra* extra gloss, right when they come out of the oven—I mean, hot!—you can brush the tops lightly with a little bit of melted, unsalted butter. It sinks right in, seals in the heat, and gives them a sheen that looks professionally lacquered. It pairs really nicely with the optional sugar sprinkle we talked about earlier. For more legal information on things like our recipe testing, please check out our disclaimer.
Estimated Nutritional Data for Your Chocolate Croissant
Now, I have to be upfront with you; these are rich, buttery, chocolate-filled pastries wrapped in glorious, flaky dough. They aren’t exactly a bowl of plain yogurt! But hey, that’s why we make treats, right? Because we deserve a little indulgence sometimes. Since we are using store-bought puff pastry and semi-sweet chocolate sticks, the numbers can vary slightly based on the brands you use inside your kitchen.
The following table shows the estimated nutritional breakdown for one single, freshly baked chocolate croissant based on the ingredients listed in the recipe. Please remember this is just an estimate, but it gives you a good idea of what you are enjoying!
- Serving Size: 1 croissant
- Calories: Approximately 280
- Total Fat: Around 17g (With about 9g of that being Saturated Fat—that’s the butter doing its work!)
- Carbohydrates: About 26g
- Sugar: Roughly 12g
- Protein: Around 5g
- Cholesterol: Estimated 55mg
- Sodium: Approximately 210mg
See? Totally worth every single flaky layer, if you ask me! This is what satisfying a really serious sweet craving looks like. Enjoy every bite!
Share Your Weekend Brunch Ideas Baking Experience
Now that you’ve baked these, I absolutely must know how they turned out! Seriously, send me a picture of your golden beauties when you serve them up for your next round of Weekend Brunch Ideas Baking. Did the chocolate ooze out just right? Let me know in the comments below if you tried the sugar sprinkle or if you kept it simple. Don’t be shy—your success inspires me to keep sharing these shortcuts!
If you enjoyed this ridiculously quick method, please consider dropping a rating below. If you’re looking for more simple baking inspiration or just want to send a note, my contact page is always open over at their contact page!
PrintEasy Puff Pastry Chocolate Croissants

Make flaky, buttery chocolate croissants quickly using store-bought puff pastry. This recipe delivers bakery-style results with minimal effort.
- Prep Time: 15 min
- Cook Time: 20 min
- Total Time: 35 min
- Yield: 12 servings
- Category: Breakfast
- Method: Baking
- Cuisine: French
- Diet: Vegetarian
Ingredients
- 1 package (14.1 ounces) all-butter puff pastry, thawed
- 4 ounces bittersweet or semi-sweet chocolate, cut into 1/2-inch thick sticks (about 12 sticks)
- 1 large egg
- 1 tablespoon water
- 1 tablespoon granulated sugar (optional, for sprinkling)
Instructions
- Preheat your oven to 400°F (200°C). Line two baking sheets with parchment paper.
- Unroll the thawed puff pastry sheet onto a lightly floured surface. If the pastry is rectangular, cut it in half lengthwise to create two long strips.
- Cut each strip crosswise into 6 equal rectangles, resulting in 12 rectangles total.
- Place one chocolate stick near the short edge of a rectangle. Roll the pastry over the chocolate once, then place a second chocolate stick near the new edge. Continue rolling until you reach the end of the rectangle, forming a croissant shape.
- Place the formed croissants seam-side down on the prepared baking sheets. Repeat with the remaining pastry and chocolate.
- In a small bowl, whisk the egg and water together to create an egg wash. Brush the tops of the croissants lightly with the egg wash. Sprinkle with granulated sugar if desired.
- Bake for 15 to 20 minutes, or until the croissants are puffed, golden brown, and flaky.
- Remove from the oven and let cool on the baking sheets for 5 minutes before transferring to a wire rack to cool slightly. Serve warm.
Notes
- Use high-quality chocolate bars for the best flavor inside the pastry.
- If you do not have chocolate sticks, use chocolate chips, placing about 4 to 5 chips near the edge before rolling.
- For extra shine, brush the baked croissants with melted butter immediately after they come out of the oven.
Nutrition
- Serving Size: 1 croissant
- Calories: 280
- Sugar: 12
- Sodium: 210
- Fat: 17
- Saturated Fat: 9
- Unsaturated Fat: 8
- Trans Fat: 0.2
- Carbohydrates: 26
- Fiber: 1
- Protein: 5
- Cholesterol: 55