

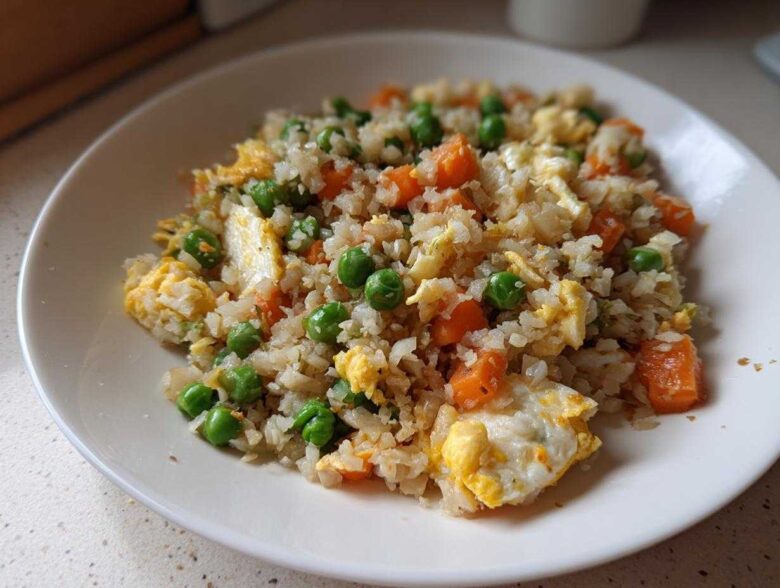
You know those nights? The ones where you desperately crave the ease of takeout—that salty, umami flavor explosion that hits just right—but you look at the clock and think, “Nope, too late for that heavy meal.” We’ve been there, time and time again. That’s what inspired Julian to really push the concept of making our simple weeknight dinners the actual feature story here at Magazine Meal. This Flavor-Packed Cauliflower Fried Rice is the perfect headline for exactly those evenings!
Forget everything you think you know about eating your veggies. This isn’t some meek side dish; this is a robust, delicious, low-carb rice substitute that tastes unbelievably close to the classic. It cooks up in under 25 minutes, making it an absolute dream for a busy schedule. When Julian conceptualized this, he wanted a dish that completely satisfied that savory craving while keeping things light enough for a Tuesday night. This cauliflower rice recipe just fits that vision perfectly. Seriously, get ready to start making this your go-to healthy takeout swap! For more on how we approach making every meal the main feature, you can check out our story here.
Why This Flavor-Packed Cauliflower Rice is Your New Weeknight Hero
When Julian and I talk about feature meals, we mean dishes that deliver big flavor without demanding your entire evening. That’s the heart of this recipe. We designed this cauliflower rice to be the ultimate dependable star. It comes together in about 25 minutes total, which means it beats any drive-thru wait, hands down. It’s wonderfully keto and diabetic friendly recipes approved, ticking all those important boxes without tasting like a compromise.
We know you want a great low carb rice substitute that actually tastes like it belongs on your plate, and this recipe delivers. It’s amazing how well the rice grains grab onto the savory notes from the soy sauce and ginger. It truly shines as an easy weeknight meal.
Quick Vegetable Side Dish Ready in Minutes
Seriously, look at the timing! 10 minutes prep, 15 minutes cook time. That’s it! This isn’t just a quick vegetable side; it’s a powerful centerpiece when paired with whatever protein you have kicking around. We love throwing it next to our Sheet Pan Greek Chicken when we’re running low on time. It’s fast, but it feels substantial.
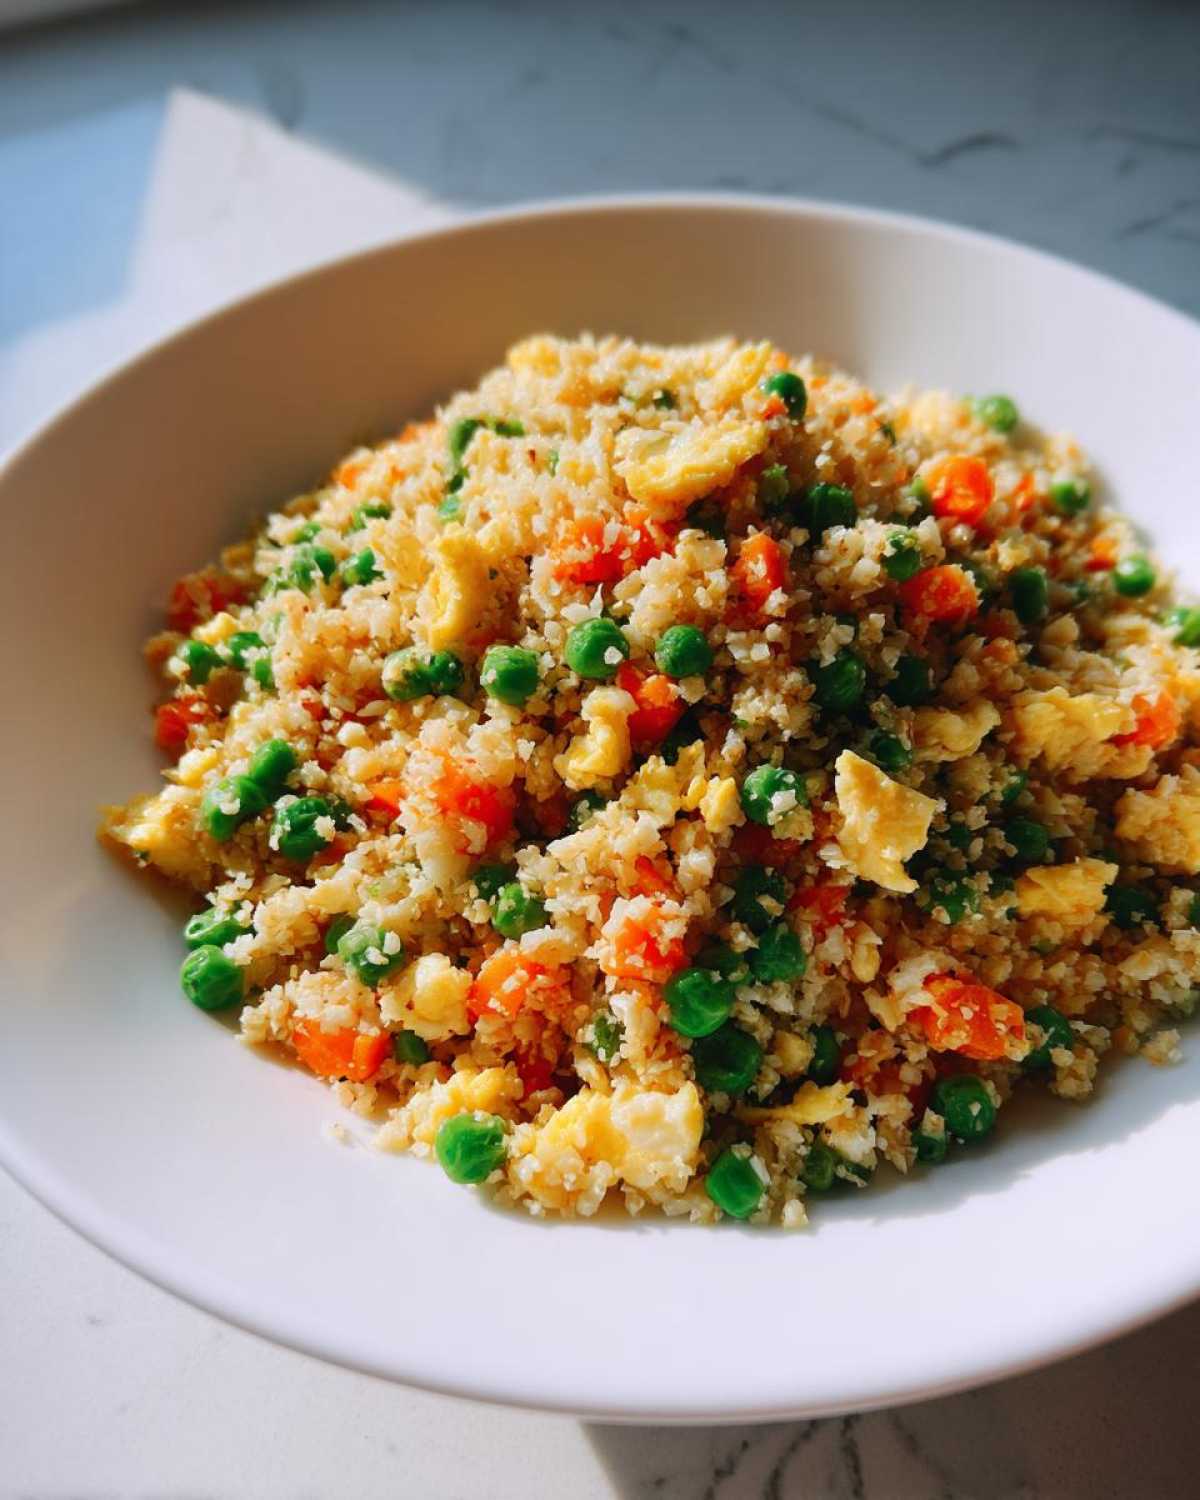
The Best Cauliflower Rice Technique for Fluffy Results
Okay, here is the biggest secret to making sure your cauliflower rice isn’t just watery steamed cauliflower: you have to cook the moisture out! That’s the core of the fluffy cauliflower rice technique. Too many times I’ve tried recipes where the rice ends up soggy, and honestly, that’s a culinary disaster. We spend crucial minutes in the pan making sure our rice grains are tender-crisp, not mushy. Pay attention to that sauté time; it makes all the difference!
Ingredients Needed for Your Cauliflower Fried Rice
When you’re trying to get a feature meal on the table fast, you need your cast of characters ready to go! Transparency is key here, which is why we list everything out precisely. Having these items ready makes the 25-minute cooking time absolutely achievable. Don’t skimp on the good oils—that sesame oil is crucial for that authentic, restaurant-style depth of flavor!
- 1 head cauliflower (about 4 cups riced—make sure you pulse it right, see instructions below!)
- 1 tablespoon olive oil
- 1 teaspoon sesame oil
- 1 small onion, diced
- 2 cloves garlic, minced
- 1 cup mixed frozen vegetables (peas, carrots, corn)
- 2 large eggs, lightly beaten
- 2 tablespoons low-sodium soy sauce or tamari
- 1 teaspoon fresh ginger, grated
- 1/4 teaspoon ground white pepper
- 1 green onion, sliced for garnish
See? Simple, quality ingredients. That’s all you need to transform a basic vegetable into the star of your dinner plate!
How to Prepare Flavor-Packed Cauliflower Rice Step-by-Step
Since this is going to be the main feature of your meal, we need to give it a little directorial attention! Julian always says that stirring a wok is like directing a small, delicious scene—everything has to happen in the right order and at the right temperature. Don’t worry if you don’t have a massive commercial wok; a large, heavy skillet works just fine for this cauliflower rice recipe. We’re aiming for speed and flavor absorption here!
Processing the Cauliflower Rice Base
Okay, Step 1 is where most home cooks mess up their cauliflower rice, and we can’t have that. You’ve got your cauliflower florets ready, right? We need them to look like actual rice grains, not baby food mush! Pop the florets into your food processor. Now, pulse quickly—seriously, just quick little taps on the button. If you just hold it down, you’ll get mushy, wet pulp, and that’s the opposite of the fluffy texture we want. Pulse until everything looks like distinct little grains. If you’re doing a full head, you might have to work in two batches. This initial preparation is vital for the final outcome!
Sautéing Aromatics and Eggs for Your Cauliflower Fried Rice
Time to heat things up! Get that large skillet or wok over medium-high heat and warm up your olive oil and that beautiful, fragrant sesame oil. First up go the diced onions; let them cook down until they’re nice and soft—that takes about three mindful minutes. Then, toss in your minced garlic and grated ginger. Here’s Julian’s E-E-A-T moment for you: make sure the heat isn’t cranked too high right when the garlic goes in. If it burns in the first 60 seconds, it turns bitter, and sadly, the whole beautiful scene is ruined! Cook until you can really smell those aromatics singing. Next, toss in those frozen veggies and let them thaw out for around four minutes.
Now for the classic trick: push all your veggies and aromatics to one side of the pan. That empty space? That’s where the magic happens. Pour your lightly beaten eggs onto the empty side. Let them set just a tiny bit, then quickly scramble them up. Once the eggs are cooked through, mix them right into the rest of your veggies. It all comes together nicely, right?
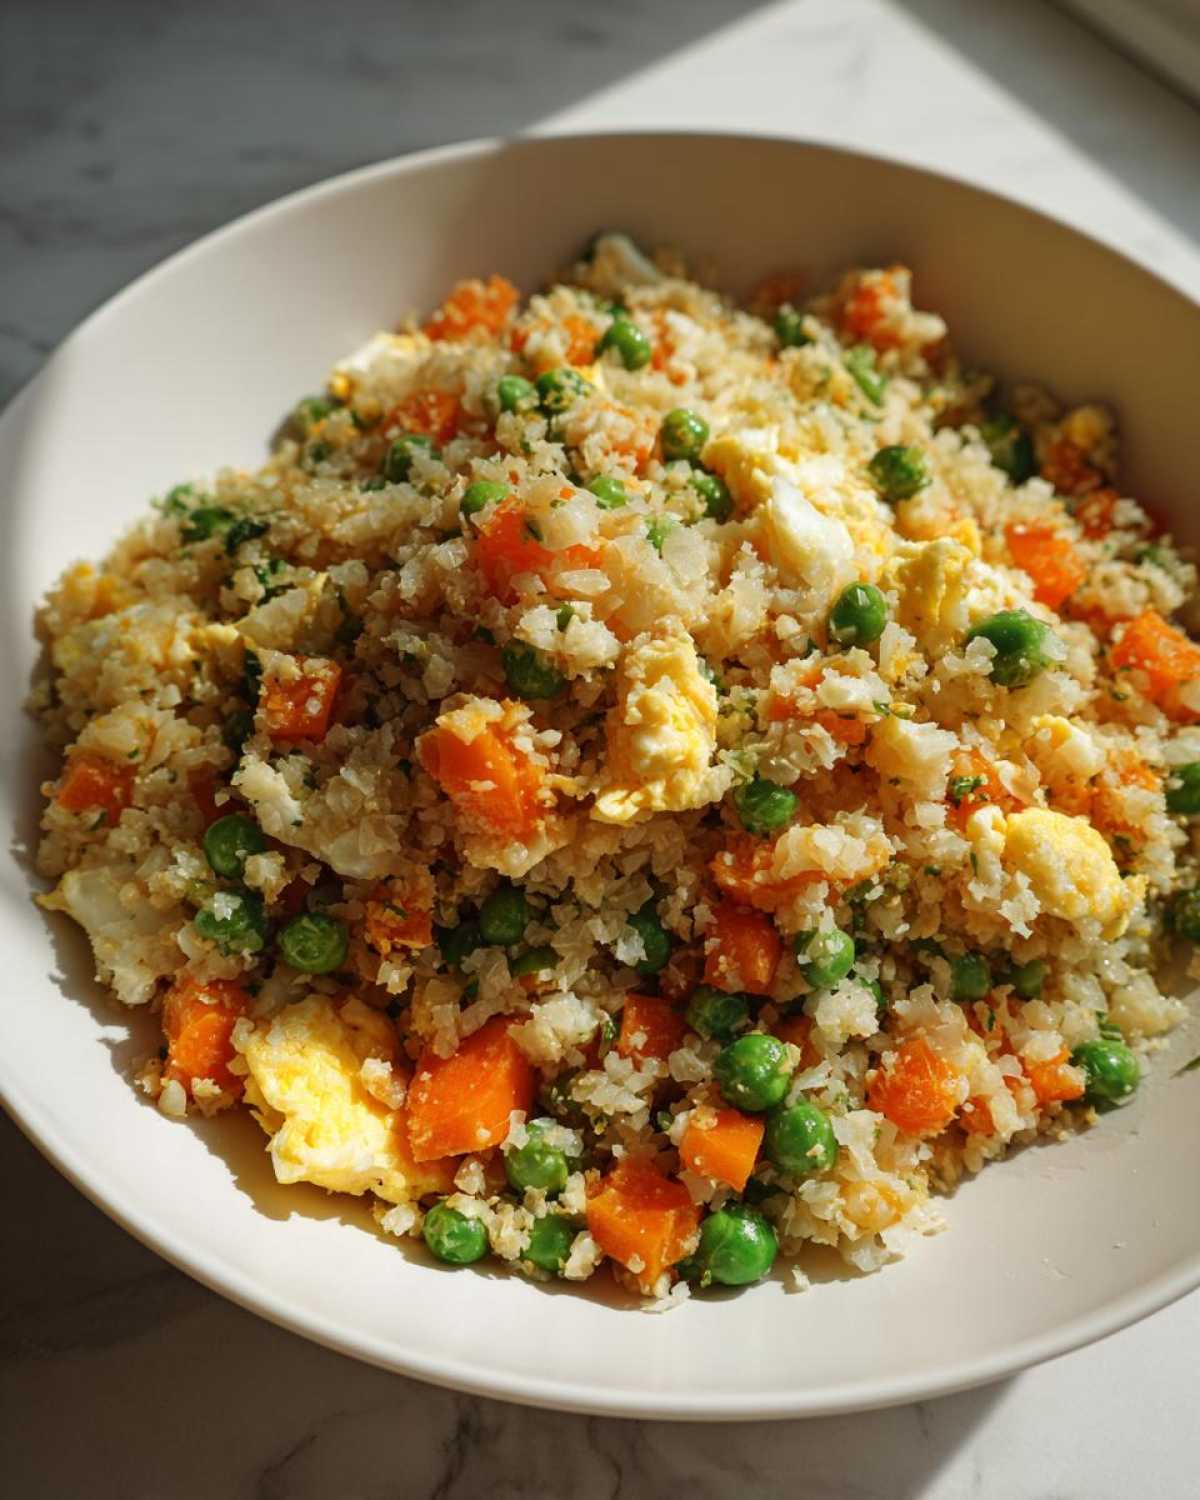
Finishing the Cauliflower Rice: Achieving Perfect Texture
This is the final push where we officially turn this into a cauliflower fried rice worthy of the cover! Add your prepared cauliflower rice right into the pan with the eggs and vegetables. Now, you absolutely must stir constantly for about five to seven minutes. This step is non-negotiable for a great healthy takeout swap! You are using the heat to gently cook the cauliflower rice grains and, most importantly, evaporate any sneaky moisture they’ve held onto. Keep stirring until it feels tender-crisp under your spatula—you want it light and separated, not clinging together.
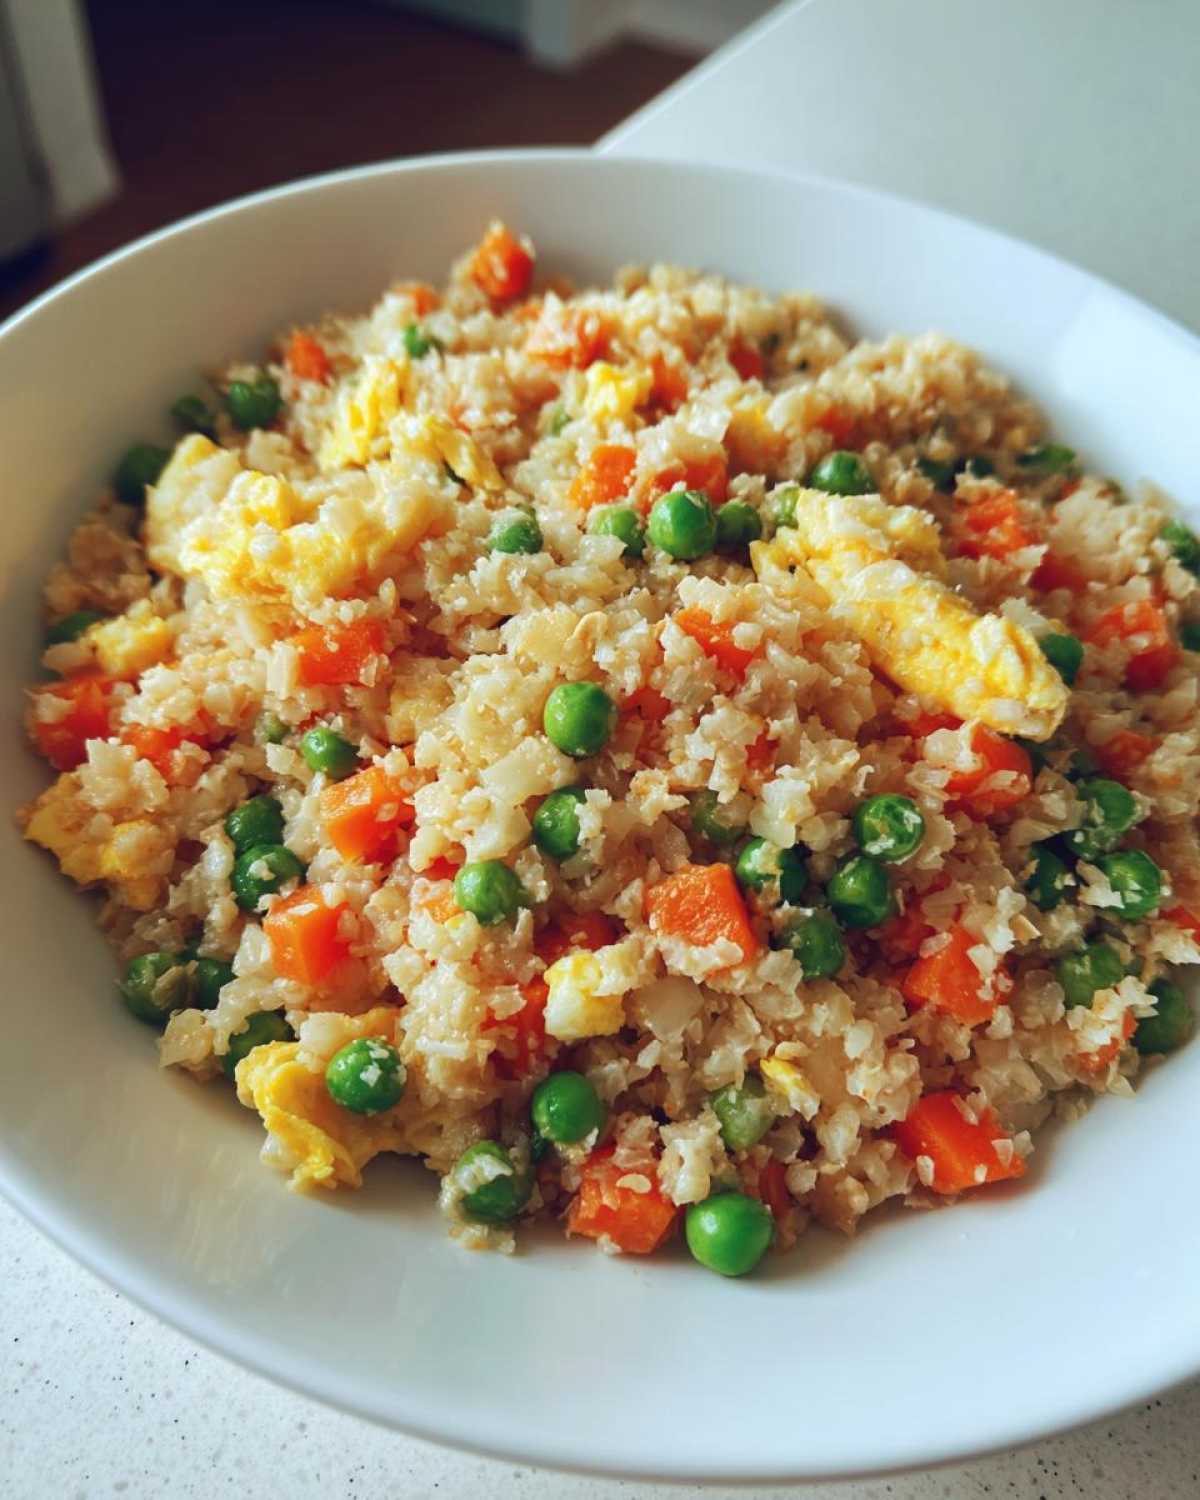
Once all that moisture is gone, quickly stir in your low-sodium soy sauce (or tamari if you’re out of soy sauce or avoiding gluten) and that tiny pinch of white pepper. Give it a quick taste. Does it need a tiny bit more salt or pepper? Go ahead and adjust it now. Take it off the direct heat immediately once seasoned, garnish it with that sliced green onion we saved, and serve it right away! That’s how you capture that perfect, flavorful moment.
If you love quick, flavorful Asian-inspired dishes like this, you absolutely have to check out our recipe for 20-Minute Restaurant-Style Garlic Noodles. It uses the same philosophy of big flavor, fast execution!
Tips for the Ultimate Cauliflower Rice Success
Julian and I have tested this cauliflower rice countless times, trying to get that elusive restaurant-quality texture every single time, even on a chaotic Wednesday. We learned a few things the hard way—mostly involving soggy bottoms! To ensure your flavor packed cauliflower rice is always a showstopper and never a culinary flop, keep these non-negotiable tips in your editor’s playbook.
The most important thing we learned, which we pulled straight from our notes, is moisture management. A little dampness is the enemy of a good stir-fry base. If your fresh batch of cauliflower rice feels even slightly clingy when you first put it in the pan, take an extra step before adding anything else! Sauté that riced cauliflower all by itself for three or four minutes over medium heat until you see some steam lifting away. That step seems small, but it guarantees you don’t end up with a soupy mess later on.
Also, don’t be shy about adding heft if you need a real main course, not just a side dish. We often bulk this up for our own dinners. If you have some cooked chicken breast or shrimp ready to go—maybe leftovers from last night—toss about half a cup in during the final three minutes of cooking. It’s a fantastic way to turn this simple side into a full-on feature dinner, and it soaks up all that salty, gingery flavor beautifully.
Finally, Iris has tested this for meal prep, and it holds up incredibly well! Once it’s completely cooled down, store it in a truly airtight container in the fridge. We find it tastes perfect for up to four days, making it a lifesaver for grabbing a healthy lunch throughout the week. You can reheat it quickly in the microwave or in a dry skillet to crisp it up slightly again. It’s our favorite way to have a prepared, low-calorie base ready whenever we need it. If you’re looking for other amazing flavor boosters, you have to try putting a little dab of our Cowboy Butter Dipping Sauce on top instead of soy sauce—wow, what a switch!
Ingredient Substitutions and Variations
Part of making a Magazine Meal is knowing you can take the concept and style it for your own life, right? This flavor base is incredibly flexible, which is why it works so well for different dietary needs or just when you’re missing one thing in the pantry. Don’t let a missing ingredient stop you from making this amazing cauliflower rice!
The first big swap people usually ask about is the soy sauce. If you need this to be strictly gluten-free, reaching for tamari is a fantastic move; it gives you that deep, salty, umami hit without any gluten worries. If oils are your concern, you can definitely skip the sesame oil if you don’t have it, but be warned—you lose a little of that classic takeout aroma! In that case, lean hard into the ginger and garlic. Or, if you want a richer feel without the soy sauce tang, try swapping in coconut aminos for a slightly sweeter, less salty profile.
We also love playing with creaminess! Some of my followers have gone wild making a creamy cauliflower rice version. Have you seen the way this creamy coconut cauliflower rice looks? It’s absolutely stunning! You can achieve something similar by whisking about two tablespoons of full-fat coconut milk into the skillet right when you add the soy sauce. It adds a beautiful richness that feels decadent.
If you want something richer but not coconut-y, Julian recently developed a riff that hits hard: Garlic Butter Cauliflower Rice. Instead of the soy sauce/sesame oil combo in step 6, simply use 2 tablespoons of melted butter and two extra cloves of finely minced garlic right at the beginning, cooking them with the onions. It’s much more of a steakhouse side vibe, but trust me, it’s incredible. We use a similar, super satisfying butter base in our recipe for 5-Minute Creamy Garlic Aioli, so you know we love that garlic goodness!
Don’t forget, you can swap out those frozen veggies for anything you have! Broccoli florets, sliced mushrooms, even chopped bell peppers—whatever needs using up works beautifully in this cauliflower rice recipe.
Serving Suggestions for Your Vegetable Grain Substitute
I love that because this cauliflower rice is so neutral and absorbs flavor so well, it acts as the perfect supporting actor for all sorts of main features! It’s never competing for attention; it’s just there, perfectly textured, soaking up all the beautiful sauces and spices from around it. This versatility is why it keeps showing up in our rotation—it just works with everything.
Since we designed this recipe to be a truly excellent diabetic friendly recipe option, it pairs wonderfully with lean proteins. If we’ve had a long styling day and energy is low, we usually default to our Sheet Pan Greek Chicken. The lemon, oregano, and garlic from that marinade seep into the warm cauliflower rice underneath, and suddenly, you have a beautifully composed dinner with minimal cleanup. See? The feature (chicken) looks great, and the supporting element (the rice) has real substance.
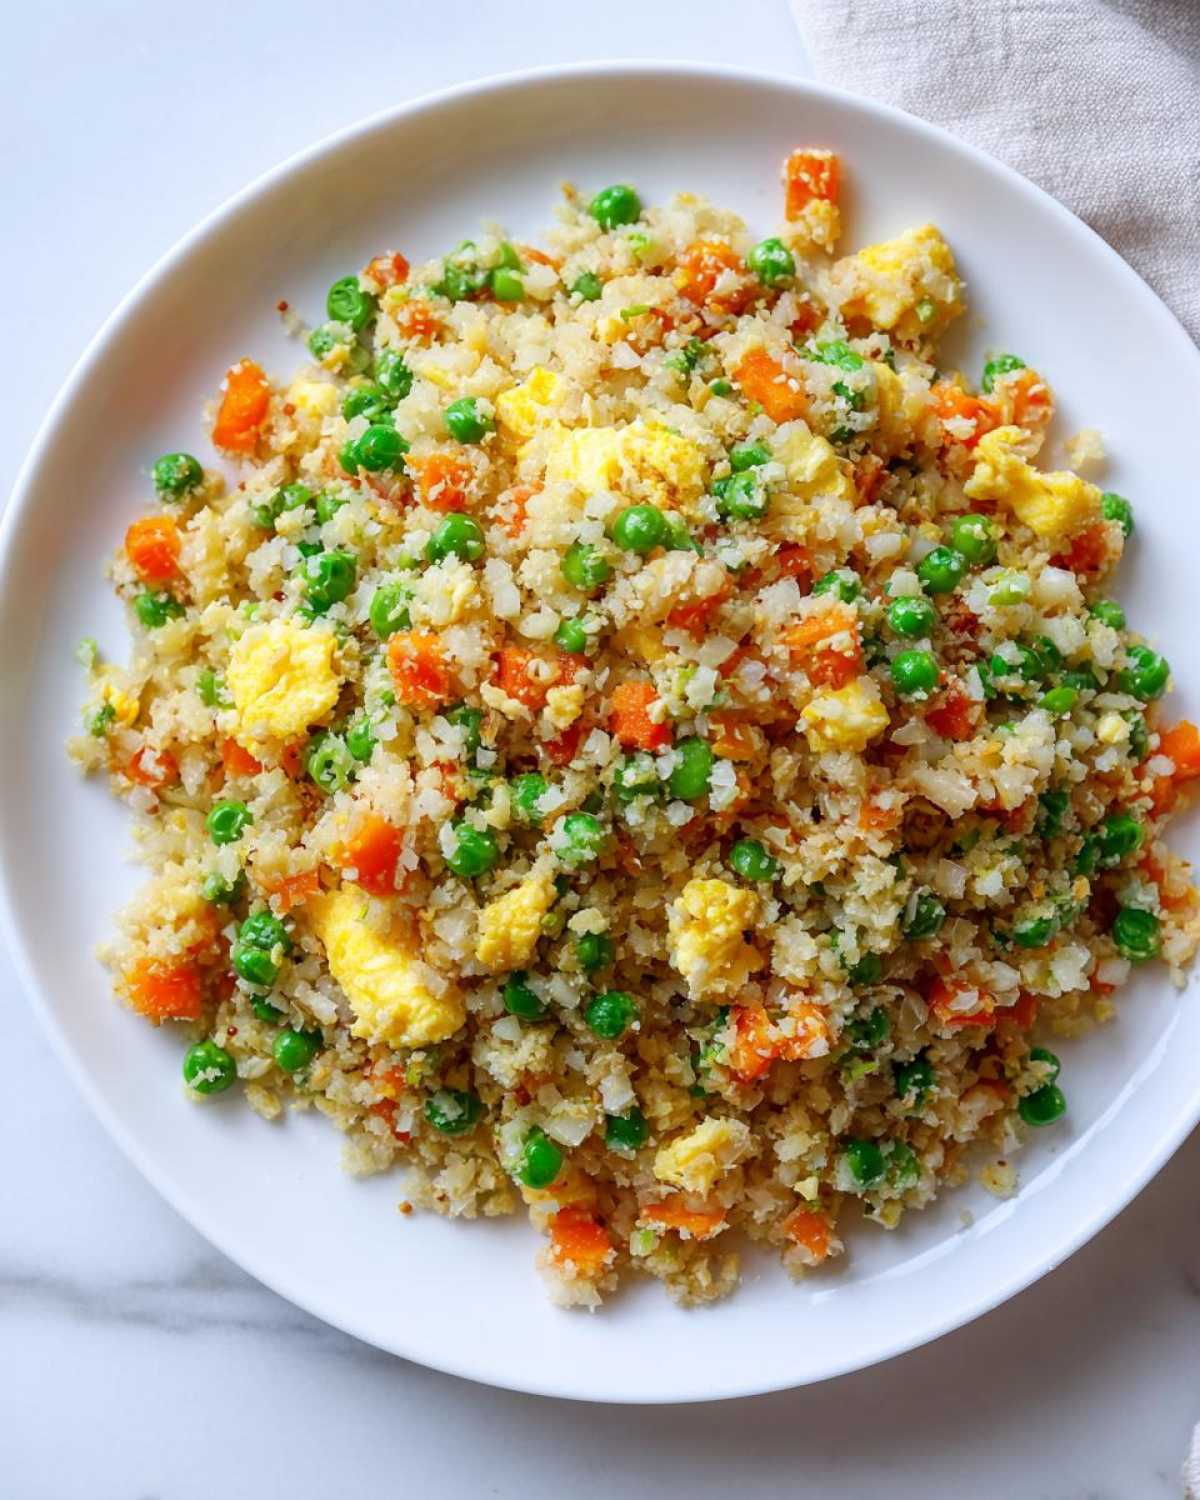
But don’t let it only play the side role! This is also a fantastic base for hearty bowls. Think of it as your ready-made “vegetable grain substitute” foundation. Layer it up with black beans, salsa, avocado, and a dollop of plain Greek yogurt (another low-carb win!), and you’ve got a Southwest bowl that feels indulgent but stays incredibly light. It’s perfect for keeping things low-calorie while still feeling completely satisfied. Julian often uses leftovers as the base for his quick lunch bowls the next day—just toss some leftover roasted broccoli and maybe a splash of hot sauce on top, and you’re good to go!
Storage and Cauliflower Rice for Meal Prep
Let’s talk about making this recipe last, because some days, even the fastest 25-minute meal needs a backup plan. This cauliflower rice might steal the show tonight, but it’s honestly even better when you’ve prepped it ahead of time. This is where our cauliflower rice for meal prep strategy comes into play, turning a quick dinner into several easy lunches!
The key here, and I learned this the hard way after leaving a container open once, is airtight storage. Once the rice has completely cooled down—and I mean completely cooled, no residual heat—transfer it into a sturdy, well-sealed container. We find that glass containers work best for even cooling and reheating. You can safely keep this batch of cauliflower rice tucked into the fridge for up to four days. It remains wonderfully flavorful; the texture holds up really well!
When it’s time to eat, you have two great options for reheating this low calorie rice option. If you’re in a true hurry, zap it in the microwave for about 60 to 90 seconds until it’s steaming. But, if you want to recapture some of that initial pan-fried crispness, Julian insists on a quick refresh in a dry skillet over medium heat for just a few minutes. You don’t need to add any extra oil, but stirring it constantly helps wake those grains back up, making them feel fresh-made again!
It’s fantastic for keeping your week on track. Imagine: you pull out perfectly seasoned cauliflower rice that you made on Sunday, pair it with some leftover Air Fryer Chicken, and suddenly your lunch break looks like a well-edited feature spread. If you’re interested in reading more foundational tips on preparing and storing cauliflower rice from its base vegetable form, I found this helpful guide over at Spice Cravings!
Frequently Asked Questions About Cauliflower Rice Recipes
We know you’re going to ace this recipe, but sometimes little questions pop up when you’re in the zone, and we want to make sure you have a direct line to the answers, just like flipping to a quick reference section in a magazine! Here are a few things Iris and I hear most often when people are trying out their first cauliflower rice recipe.
Can I use frozen riced cauliflower instead of fresh?
That’s a great question about efficiency! Yes, you absolutely can use frozen riced cauliflower, especially if you’re aiming for an even faster easy weeknight meal. The key difference is moisture content. Frozen cauliflower rice usually comes pre-steamed slightly, so it *will* release more water during cooking. If you use frozen, I highly recommend skipping the standard sauté aromatics step and instead cooking the frozen cauliflower rice completely alone in your hot pan first. You’ll need to cook it for a good 8 to 10 minutes, stirring often, until you see visible steam stopping and it looks dry again. Then, you can add your oil and aromatics and proceed with the rest of the steps.
How do I specifically prevent my cauliflower rice from getting watery?
This is the make-or-break moment for texture, honestly. Watery cauliflower rice is just sad! Besides the vital step of cooking out the excess moisture we talked about above, the absolute crucial step is twofold: First, don’t over-process your fresh cauliflower in the food processor; those grains need to stay distinct shells, not paste. Second, use medium-high heat when you sauté the rice at the end, stirring constantly. High, consistent heat evaporates the water quickly; low heat just steams the rice in its own liquid. If you follow that constant stirring rule for those 5-7 minutes, you’ll get a fantastic, flavor packed cauliflower rice!
Is this cauliflower fried rice truly keto-friendly?
It sure is! Because we’re using cauliflower as a low carb rice substitute instead of traditional white or brown rice, the carbohydrate count stays super low. As you can see in the nutrition breakdown, this recipe is loaded with fiber and has very few net carbs, making it a perfect fit for most keto cauliflower rice lifestyles or anyone monitoring sugar intake. Just be mindful of your soy sauce—always check the label if you’re being strict, especially if you aren’t using tamari or coconut aminos. It’s definitely one of our favorite diabetic friendly recipes!
Can I make this recipe without eggs?
You can! If you need to skip the eggs for any reason, you’ll miss out on that classic scrambled texture that makes it feel like actual cauliflower fried rice, but the flavor base will still be wonderful. If you skip the eggs, you’ll want to increase your fat slightly. I’d recommend increasing the olive oil slightly and maybe adding 1 tablespoon of butter when you sauté your veggies. You can also use two extra tablespoons of a thick, creamy element like mashed avocado or a teaspoon of cream cheese mixed in at the end to provide some binding richness where the eggs usually would.
Share Your Magazine Meal Creation
Alright, fellow editors and busy creatives, now it’s your turn to take the spotlight! We’ve given you the direction, the ingredients list, and all those little technical notes to ensure your Cauliflower Fried Rice lands perfectly on the page. But a magazine feature isn’t complete until we see how it looks in the real world, right?
We absolutely live for hearing how you adapted this recipe! Did you use chicken, shrimp, or maybe skip the protein altogether? Did you find a magical way to get extra crispness? Please, don’t keep that great styling a secret! Head down to the comments right now and leave us a star rating. Five stars, if it made your hectic Tuesday feel like a cover shoot!
Even better, snap a photo of your masterpiece! We want to feature your success story. Tag us on social media when you share your plate of lightened-up, flavor packed cauliflower rice. Let the world know that your dinner was, indeed, the main feature of your day. We might even share your beautiful shot on our feed! Remember, The Meal Is The Main Feature, and we can’t wait to see yours. If you have any specific burning questions that weren’t covered, you can always reach out to us directly through our Contact Page too!
PrintFlavor-Packed Cauliflower Fried Rice: Your Quick Weeknight Feature
Make this flavor-packed cauliflower fried rice tonight. It is a quick, low-carb base for any meal, absorbing spices well and providing a healthy takeout swap for your weeknight dinner.
- Prep Time: 10 min
- Cook Time: 15 min
- Total Time: 25 min
- Yield: 4 servings
- Category: Dinner
- Method: Stir-Frying
- Cuisine: Asian Inspired
- Diet: Low Calorie
Ingredients
- 1 head cauliflower (about 4 cups riced)
- 1 tablespoon olive oil
- 1 teaspoon sesame oil
- 1 small onion, diced
- 2 cloves garlic, minced
- 1 cup mixed frozen vegetables (peas, carrots, corn)
- 2 large eggs, lightly beaten
- 2 tablespoons low-sodium soy sauce or tamari
- 1 teaspoon fresh ginger, grated
- 1/4 teaspoon ground white pepper
- 1 green onion, sliced for garnish
Instructions
- Prepare the cauliflower rice: Pulse the cauliflower florets in a food processor until they resemble rice grains. Do not over-process into a paste.
- Heat the olive oil and sesame oil in a large skillet or wok over medium-high heat.
- Add the diced onion and cook until softened, about 3 minutes. Add the minced garlic and grated ginger; cook for 1 minute until fragrant.
- Add the frozen mixed vegetables to the skillet and cook until they are thawed and heated through, about 4 minutes.
- Push the vegetables to one side of the skillet. Pour the beaten eggs onto the empty side and scramble them quickly until just set. Mix the eggs into the vegetables.
- Add the cauliflower rice to the skillet. Stir constantly for 5 to 7 minutes until the cauliflower rice is tender-crisp and any excess moisture has evaporated. You want it fluffy, not soggy.
- Stir in the soy sauce (or tamari) and white pepper. Taste and adjust seasoning as needed.
- Remove from heat. Garnish with sliced green onion before serving immediately.
Notes
- For the best texture, ensure your cauliflower rice is dry before adding it to the hot pan. You can gently sauté it alone for a few minutes first if your fresh rice seems damp.
- This recipe works well for meal prep. Store cooled rice in an airtight container in the refrigerator for up to 4 days.
- If you want a richer flavor, add 1/2 cup of cooked, shredded chicken or shrimp during the last 3 minutes of cooking.
Nutrition
- Serving Size: 1 cup cooked
- Calories: 145
- Sugar: 5
- Sodium: 450
- Fat: 7
- Saturated Fat: 1.5
- Unsaturated Fat: 5.5
- Trans Fat: 0
- Carbohydrates: 16
- Fiber: 5
- Protein: 7
- Cholesterol: 75