

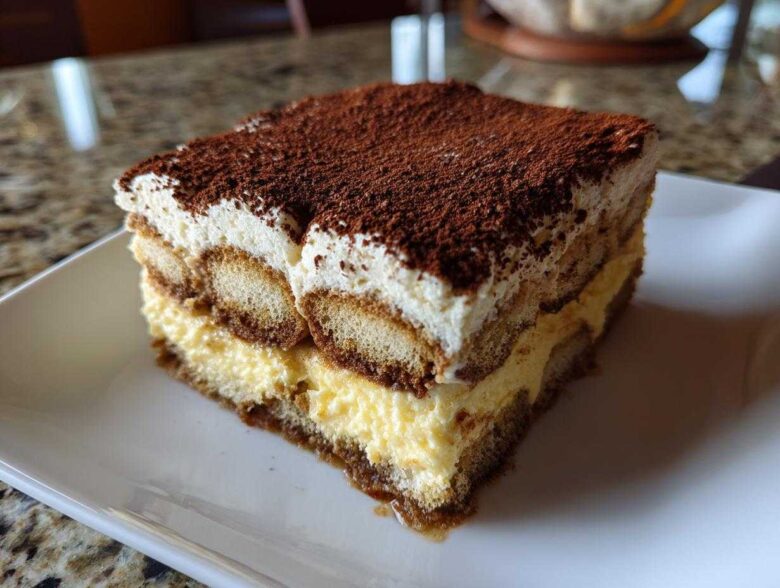
Oh, I am so excited to share this one with you! Julian and I spent ages trying to land the perfect tiramisu recipe that felt utterly luxurious but didn’t require a culinary degree or a trip to the emergency room just in case the yolks decided to misbehave. If you ever feel like we do—tired of chasing that flawless, magazine-cover perfection—this is your answer. We’ve cracked the code for the Best Ever Easy No-Bake Classic Tiramisu Recipe (No Raw Eggs).
This isn’t just simple instructions; it’s intentional indulgence. We figured out how to get those signature strong coffee notes and that unbelievably creamy mascarpone dessert texture using a simple double boiler method that cooks the yolks safely. You get that deeply authentic Italian flavor without turning on the oven or worrying about a thing. It’s the showstopper dessert you need when you want to impress without stressing. Trust me, this is the feature story your dinner party deserves!
Before we dive into the magic, if you’re loving this approach to low-stress, high-impact desserts, you might want to check out our guide on the best bread pudding recipe—another classic made totally approachable. Sometimes the oldest traditions just need a little modern editing, right?
We tested this method against the pros, including looking at trusted resources like Natasha’s classic take, to make sure our no-raw-egg version held up. And wow, does it deliver! Now, let’s get that mascarpone chilling.
Why This is the Best Ever Easy Tiramisu Recipe
When we design a feature meal, we want impact without the all-day setup. That’s exactly what you get here. This is the ultimate No Bake Tiramisu because the only active time is mixing; the rest is just waiting for the magic to happen in the fridge. We know some people love the convenience of recipes like the one from Lifestyle of a Foodie, but we wanted the classic elegance.
We tested our methods rigorously on this one. Julian insisted that skipping raw eggs couldn’t mean sacrificing that silky, decadent mouthfeel. The secret is a quick cook on the yolks over simmering water, which stabilizes them completely. This ensures we deliver on our promise: Tiramisu Without Raw Eggs that is absolutely foolproof and safe for everyone.
No-Bake, Maximum Flavor
It’s true, we skip the oven entirely! That means less heat in the kitchen, which is my favorite part, especially in the summer. All the robust flavor comes from the quality of your coffee-soaked ladyfingers and the richness of the mascarpone. It’s pure assembly, pure flavor.
Foolproof Tiramisu: No Raw Eggs Needed
If using raw eggs gives you pause, stop worrying right now. We use the traditional Italian method of gently cooking the egg yolks in a double boiler until they reach 160°F. This pasteurizes them beautifully, making the final cream incredibly stable and light, while keeping this an easy tiramisu recipe that’s perfect to serve at any gathering.
Gathering Ingredients for Your Classic Tiramisu Recipe
Okay, let’s talk about the supporting cast for this star dessert. Since this tiramisu recipe is all about texture and layers, the quality of what you bring in matters a ton. For us, Iris insists on making sure the mascarpone and heavy cream are ice cold—it’s the only way to guarantee that luxurious, creamy mascarpone dessert feel we are aiming for. Think of these ingredients as your styling kit; use the best quality you can find! We always keep a selection of amazing sauces ready for testing, like our 5-minute creamy garlic aioli, but for this Italian masterpiece, we stick to tradition.
We need two main groups of supplies: what makes the coffee bath exciting, and what builds that magnificent, light cream. You’ll see the full list below, but don’t skip reading the details in the next sections—a quick look at preparation makes all the difference.
The Coffee Soaked Ladyfingers Components
- 1 1/2 cups strong brewed espresso or coffee, cooled (don’t use lukewarm, trust me!)
- 1/4 cup coffee liqueur or dark rum (optional, but it really deepens the flavor!)
Crafting the Creamy Mascarpone Dessert
- 1 cup granulated sugar, divided
- 4 large egg yolks (we’ll cook these perfectly!)
- 16 ounces mascarpone cheese, cold
- 1 1/2 cups heavy whipping cream, cold
- 1 teaspoon vanilla extract
- 2 packages (7 ounces each) crisp ladyfingers (Savoiardi are the absolute best)
Oh, and don’t forget you’ll need some good unsweetened cocoa powder for the grand finale. That rich, dark color against the pale cream is pure drama!
Simple Tiramisu Instructions for Assembly
Alright, now we move to the assembly, which is the fun part! This is where we bring all those carefully prepared components together to create that incredible, layered look. Getting the structure right is key to nailing this tiramisu recipe so it looks as good as it tastes. Julian always reminds me that we are building architecture here, beautiful, edible architecture! We want height, we want defined layers, and we absolutely want that airy, perfect filling we worked so hard to create. We’re following the classic technique, but we’re making it foolproof for you.
If you need a reminder on how to get perfect structure in non-assembly bakes, check out my tips for the easy moist lemon loaf recipe—the principles of gentle mixing and layering still apply!
Creating the Safe Custard Base
First up, we are eliminating risk while building flavor. Set up that double boiler—just a bowl over simmering (not boiling!) water. Into that bowl go your egg yolks and 3/4 cup of your sugar. This is the most active part of the process. You must whisk constantly! I mean it, keep that whisk moving like you are trying to whip air into the mixture. You’re doing this until the mixture looks paler, thickens up nicely, and hits 160°F on an instant-read thermometer.
This step cooks those yolks perfectly, fulfilling our promise of a safe, Tiramisu Without Raw Eggs. Once you hit the temperature, pull it right off the heat and let it cool down a bit. If you try to mix hot yolks into cold mascarpone, you’re just asking for trouble!
Whipping the Cream and Combining the Mascarpone
While the yolks cool, move to the rest of your dairy. In a separate, very clean bowl, whip your cold heavy cream with the remaining sugar and vanilla until you have stiff peaks. You want this cream firm enough to hold its shape! That’s what gives the final dessert that light lift.
Once the yolk mix is merely warm (not hot!), whisk it gently until smooth, then fold in the cold mascarpone cheese until they are just combined into a beautiful, thick base. Now, the most important folding instruction: gently fold in the whipped cream in two batches. You’re trying to keep all the air we just whipped in there! If you overmix here, your lovely cream collapses, and you end up with something dense. We want light, velvety indulgence. Stop mixing the second you see uniformity.
Layering Your Authentic Italian Dessert
Now for the dipping! Grab your dish and your coffee soak. This is crucial for your Coffee Soaked Ladyfingers: quickly dip each ladyfinger, one side, then the other—maybe a second, very brief dip, max. If you let them sit, they turn to mush, and your final slice will collapse into a puddle. We want structure, remember? You can see a great example of technique in this easy Italian tiramisu guide.
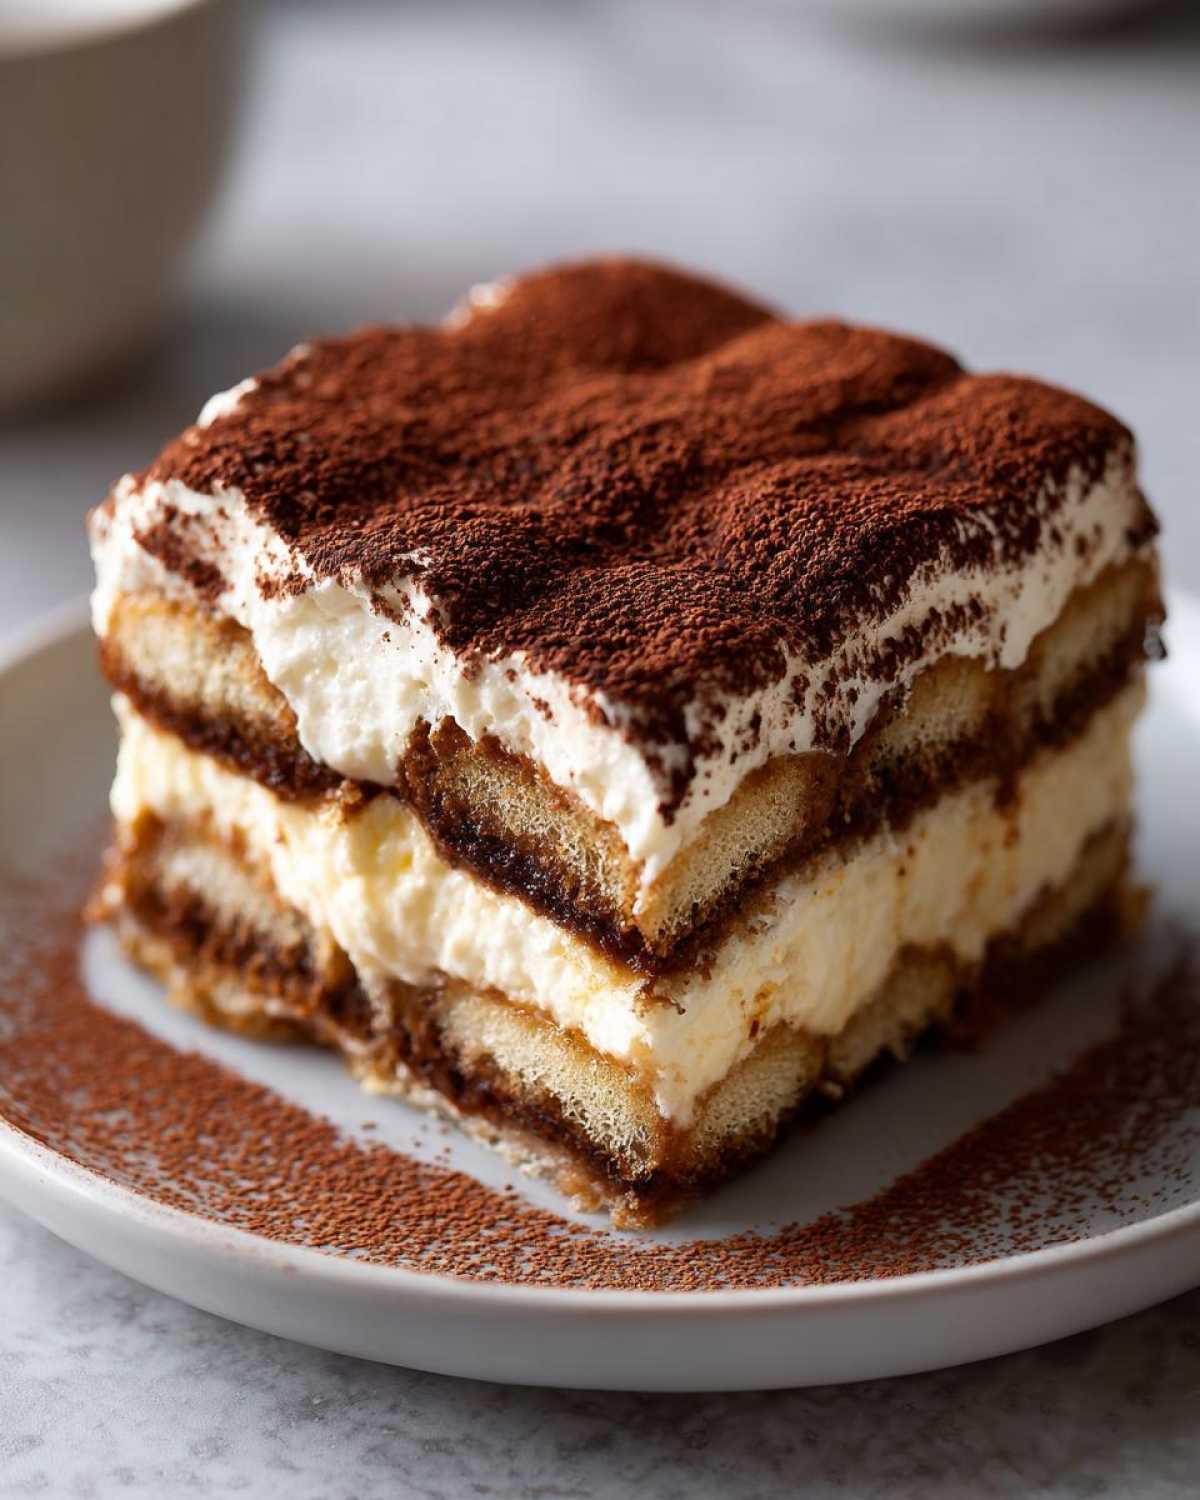
Lay that first layer of dipped biscuits across the bottom of your dish. Don’t leave huge gaps! Next, spread about half of your amazing mascarpone cream mixture evenly over the top. Then, repeat the whole dipping and layering process again with the remaining ladyfingers, and finish with the rest of that glorious cream spread smoothly across the top. Smooth it out; we want the surface looking elegant for the final dusting.
Tips for Success with Your Make Ahead Dessert
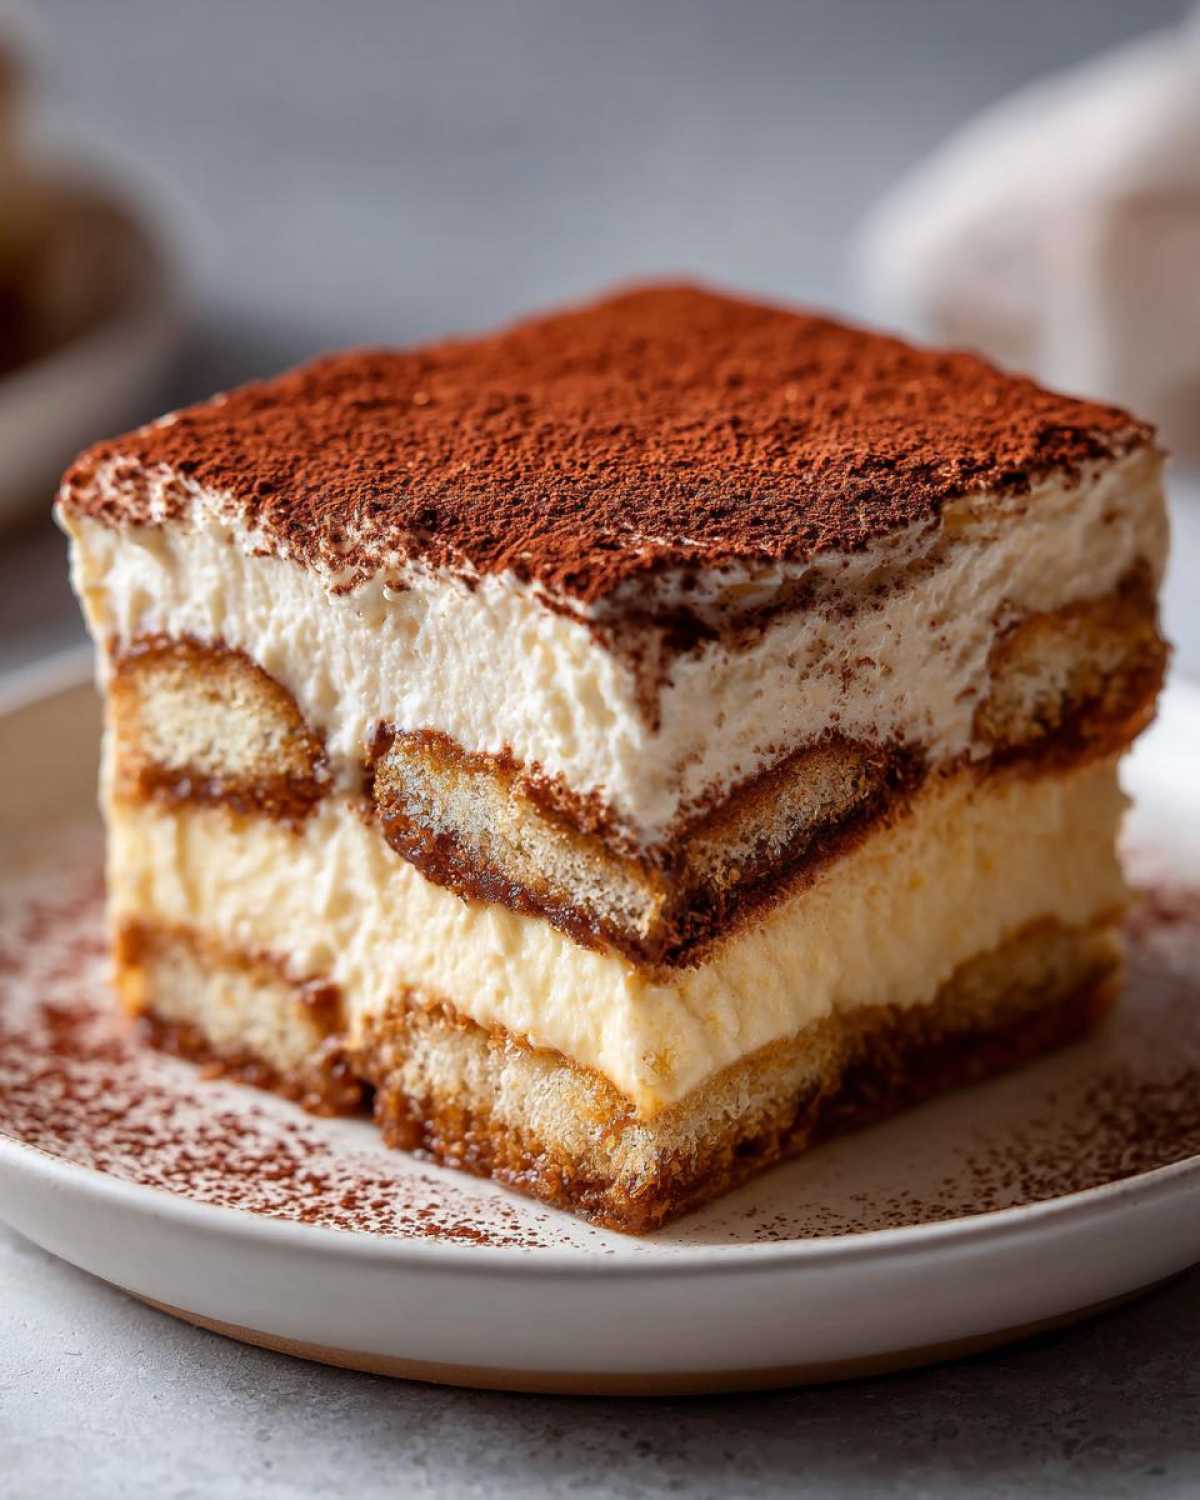
So, you’ve done the hard assembly work! Now comes the part that requires the most patience from us creators: waiting. This really is the ultimate Make Ahead Dessert, and I can’t stress this enough—don’t rush the chill time! When Julian and I first tested this tiramisu recipe, we tried cutting it after just four hours just to see. Big mistake!
My personal editorial note here: You absolutely must let this chill for at least six hours, but if you can hold out until the next morning, the results are exponentially better. Overnight chilling allows the coffee soak to fully integrate with the cream layers, so the mascarpone firms up properly while the ladyfingers soften perfectly. They stop tasting like separate elements and start tasting like one cohesive, rich, elegant dinner party dessert. It’s worth the planning!
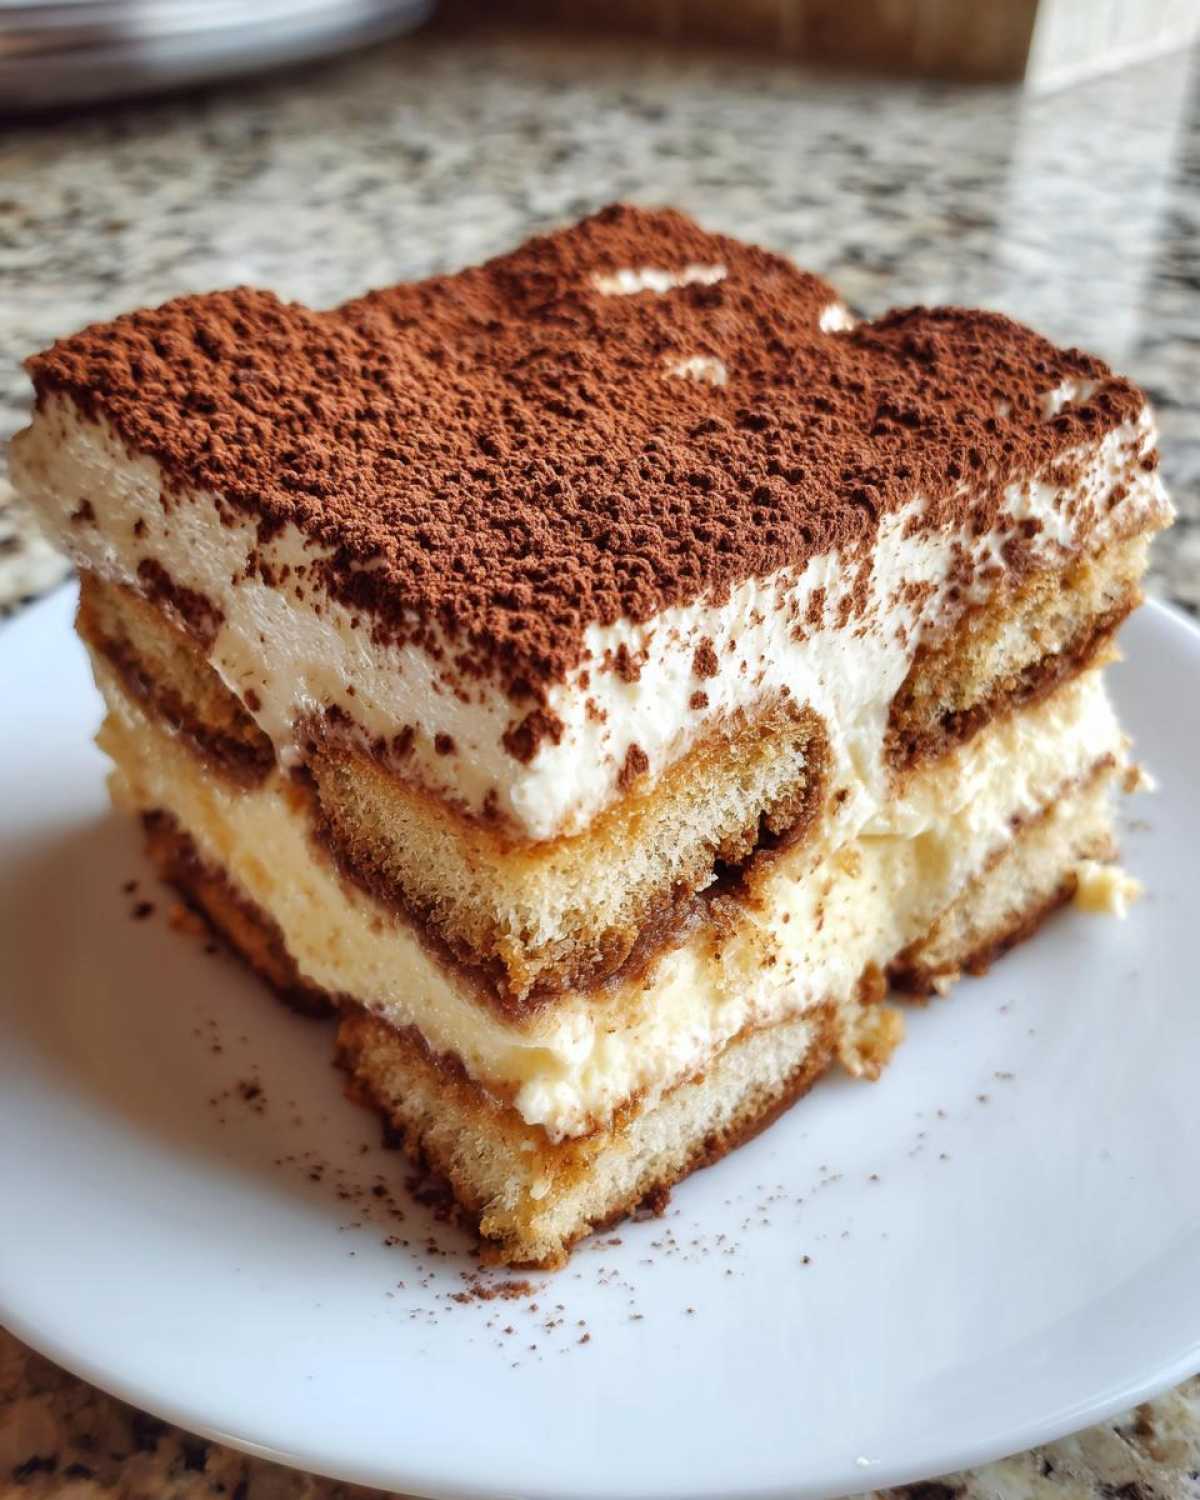
Also, for that final flourish, always wait to dust the cocoa powder until right before serving. If you dust it too early, the moisture from the cream will soak it up, leaving you with a sad, dusty mess instead of that beautiful, matte finish. For more tips on timing and making things ahead, check out how we approach brown butter chocolate chip cookies—planning ahead makes everything taste better!
If you want confirmation on how amazing this creamy confection turns out, take a peek at the structure people are achieving over at I Am Starved; that perfect layering comes from patience!
Storage and Reheating Instructions for This Tiramisu Recipe
Once your beautiful tiramisu recipe has set up perfectly after chilling, putting it away correctly is crucial. Since this is a truly no bake tiramisu, you want to keep it covered tightly. I always use plastic wrap pressed right down onto the surface of the cream layer before putting on the lid. This prevents any stray fridge odors from sneaking in and ruining that delicate coffee flavor.
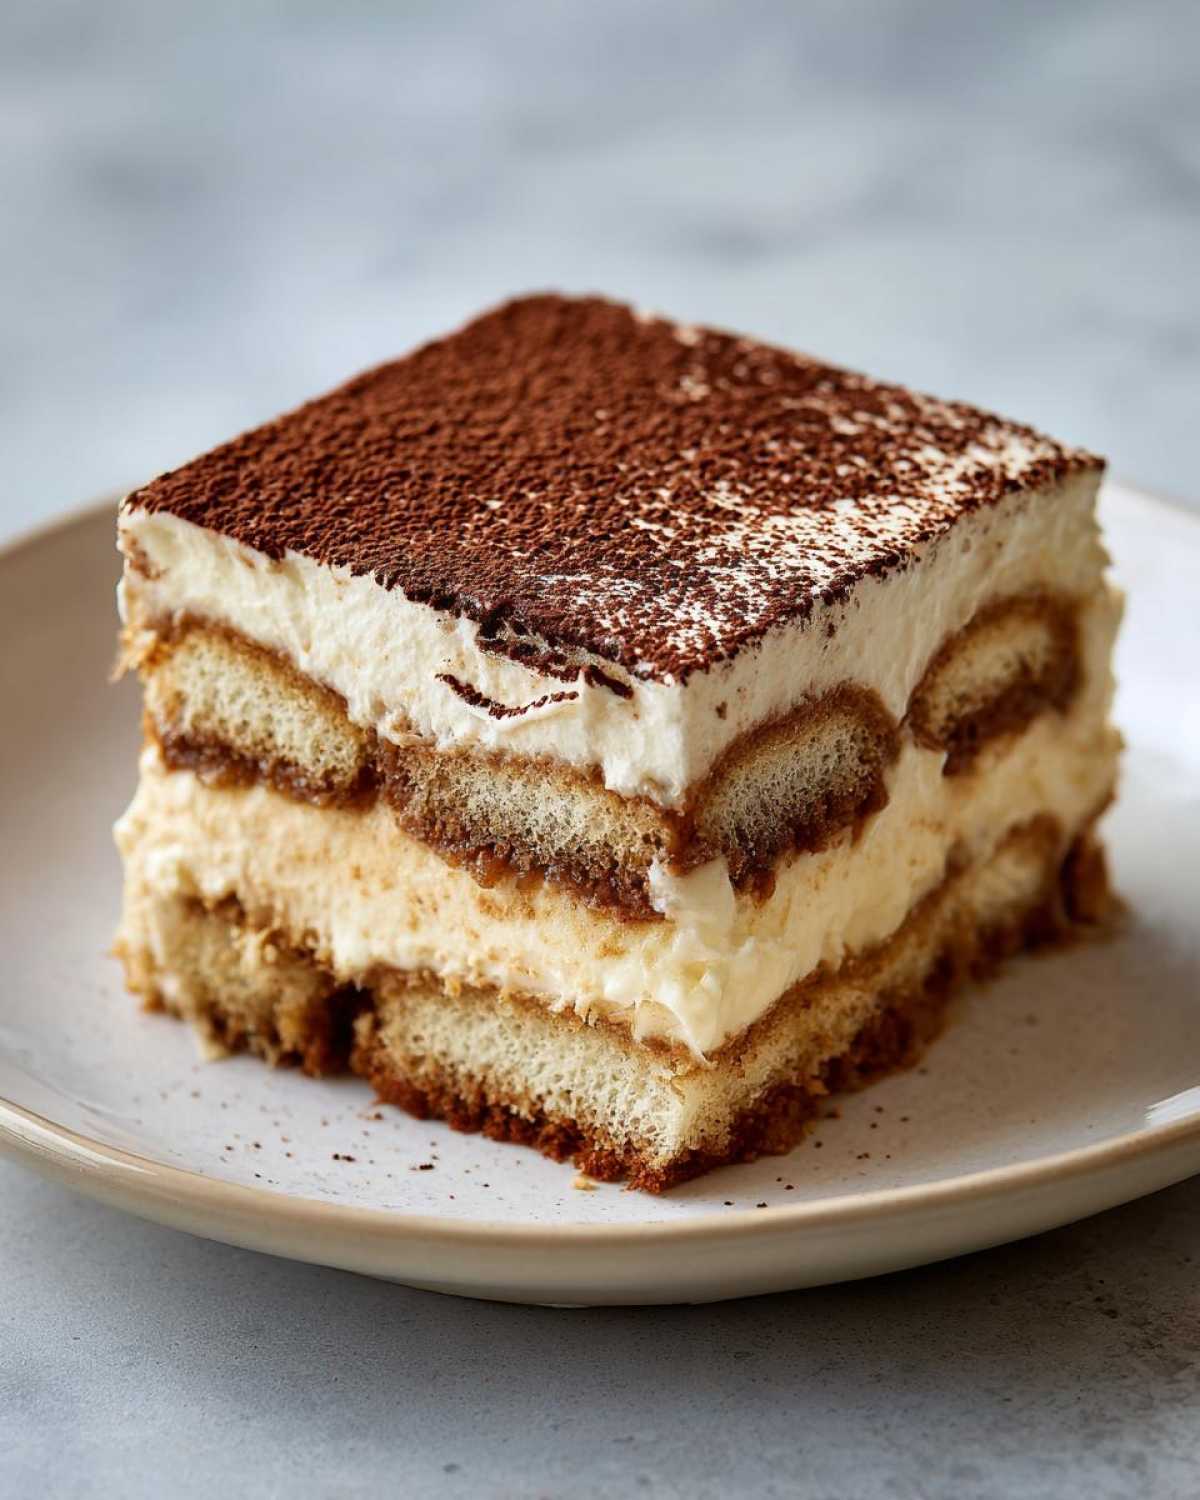
It stays wonderfully fresh this way for about three to four days. But remember what I said? Don’t dust it with cocoa until the absolute second you slice into it. A quick run through a sieve of cocoa right before serving is the final styling touch that makes this Italian layered dessert sing. If you’re worried about preserving other fresh items, peek at my notes on refrigerator pickles; the storage mentality is similar!
Variations on the Classic Tiramisu Recipe
While this tiramisu recipe is pure perfection as is, I love experimenting when I know the base structure is rock solid—especially since this is a no-bake method! Life is too short to eat the same thing every time, right? We want versatility, and this creamy dessert structure is super adaptable. If you’re looking for something slightly different but equally decadent, try these little twists we’ve tested. If you’re interested in swapping ingredients in other baked goods, my notes on the zucchini banana bread show how subtle changes can make a big difference!
The beauty is that you can adjust the dipping liquid or the cream flavoring without undermining the structure of the final assembly. These simple tweaks keep the tradition alive while making it your own unique Italian sweet treat.
- Nutty Twist: If you’re skipping the dark rum or liqueur, try swapping it out for a tablespoon of rich, toasted almond extract mixed into the coffee soak. It gives a warm, almost amaretto-like depth that pairs unbelievably well with the mascarpone.
- Chocolate Lover’s Dream: For a quick switch, dust the middle layer of cream *before* you place the second set of ladyfingers with a thin layer of finely grated dark chocolate (about 1/4 cup). It adds a wonderful textural surprise in the middle of your decadent coffee dessert.
- Lighter Citrus Notes: Add the zest of one small orange to your heavy whipping cream mixture while you’re whipping it with the sugar. It brightens up the whole dessert beautifully and cuts through the richness just enough!
Serving Suggestions for Your Elegant Dinner Party Dessert
This creamy mascarpone dessert deserves the spotlight! When we plan the final spread for an elegant dinner party dessert, we always consider the digestif first. Since this tiramisu recipe is so rich with coffee and cream, you want something light and slightly sharp to cleanse the palate afterward. A chilled glass of limoncello is absolutely perfect—that bright lemon cuts right through the decadent chocolate and mascarpone beautifully.
If you aren’t serving alcohol, skip the heavy syrups! Instead, just a small, strong shot of espresso alongside the plate, maybe dusted with a single raw cacao nib, gives that necessary jolt of coffee flavor that complements the soaked ladyfingers. For plating inspiration that goes beyond the tray, you can check out how we dress up simple sauces using our cowboy butter dipping sauce guide—it’s all about treating every element like a feature!
Frequently Asked Questions About This Tiramisu Recipe
We know you probably have a few lingering questions before you dive into making this tiramisu recipe. It’s totally normal! When you’re aiming for the best tiramisu ever, you want assurance that every step is perfect. We want to make sure this process feels completely achievable for you, whether you’re making a quick tiramisu or planning days ahead. If you’re looking for more general inspiration on our latest work, you can always browse our main blog page!
Can I make this Easy Tiramisu Recipe with different coffee?
That’s a great question about the liquid element that really defines this classic tiramisu recipe. You absolutely can use different coffee, but here is the editorial note: the flavor is only as good as the coffee you brew! We insist on strong espresso—it needs that high concentration to really cut through the richness of the mascarpone. If you can’t get espresso, brew some very strong French press or Moka pot coffee, but make sure it is fully cooled down. Lukewarm liquid will melt your beautiful cream when you start assembling!
How long does the Tiramisu need to chill to set?
I know, waiting is the hardest part when you have something this delicious waiting in the fridge! The absolute minimum time for structural integrity and flavor melding is six hours. That should give you a decent light and creamy dessert. However, if you want that sublime, show-stopping texture where the ladyfingers have completely surrendered their crispness and the flavors are fully developed? You need to aim for overnight. Seriously, chilling for 12 to 16 hours is when this homemade Italian favorite truly shines. It’s worth the planning, I promise!
Can I substitute the mascarpone cheese in this recipe?
Oh, I wish I could say yes, but for a truly authentic Italian dessert experience, mascarpone is non-negotiable. It’s what gives the cream that specific, buttery richness without tasting tangy like cream cheese often does. If you are in a dramatic pinch and absolutely cannot find it—and I mean you’ve checked every store—Julian suggests combining equal parts very cold cream cheese and heavy cream, whipping them separately, and then gently folding. But know this: it will change the final texture and won’t be quite as silky and light as this original tiramisu recipe calls for.
For more amazing dessert guides, check out the details from Recipe by Emma—she always has great breakdowns of traditional ingredients!
Nutritional Estimate for This Homemade Italian Favorite
Now, I know chasing beautiful visuals and incredible flavor usually means we don’t look too closely at the numbers, right? But since we’re treating this like the main feature in our magazine, we should always include the full editorial spread, including the data! Please remember, these figures are just our best guess for this Tiramisu recipe, based on standard store-bought ingredients and using the optional liqueur.
Any time you change the type of sugar, the amount of cream, or skip the alcohol, these numbers shift, so take them as a good general guideline for this incredibly creamy, coffee-soaked delight. We put this estimate together for completeness, much like referencing the plating notes for our easy chicken cobbler recipe—it’s documentation!
Here is the breakdown per slice (assuming 10 generous servings):
- Serving Size: 1 slice
- Calories: 410
- Fat: 28g (Mostly from that necessary, wonderful mascarpone!)
- Saturated Fat: 17g
- Carbohydrates: 32g
- Sugar: 28g
- Protein: 8g
- Cholesterol: 180mg
- Sodium: 85mg
It is definitely a rich, decadent coffee dessert, but when you consider the sheer joy it brings to a gathering, it’s totally worth it. Treat yourself; you’ve earned this homemade Italian favorite!
Share Your Magazine Meal Creation
Wow, we finally made it to the end of this beautiful tiramisu recipe shoot! I hope you feel inspired to put down the camera for a minute and just enjoy the messy, wonderful process of creating this dish. When you make this decadent coffee dessert, please, please let us know how it went!
Julian and I live for seeing your recreations. Tag us in your stories or drop a comment down below with your star rating—we want to know if this became the star feature of your family’s week, too! Knowing that our simple, no-raw-egg method produced that authentic, creamy result for you means everything to us.
If you have any final burning questions about layering or chilling times that we didn’t cover, don’t hesitate to reach out via our contact page. Happy baking, or rather, happy assembling! We can’t wait to see your finished Italian masterpieces!
PrintThe Best Ever Easy No-Bake Classic Tiramisu Recipe (No Raw Eggs)

You can make this authentic Italian Tiramisu Recipe without turning on your oven or using raw eggs. This simple, foolproof method delivers a creamy mascarpone dessert perfect for any dinner party.
- Prep Time: 30 min
- Cook Time: 0 min
- Total Time: 6 hours 30 min
- Yield: 10 servings
- Category: Dessert
- Method: No-Bake
- Cuisine: Italian
- Diet: Vegetarian
Ingredients
- 1 1/2 cups strong brewed espresso or coffee, cooled
- 1/4 cup coffee liqueur or dark rum (optional)
- 1 cup granulated sugar, divided
- 4 large egg yolks
- 16 ounces mascarpone cheese, cold
- 1 1/2 cups heavy whipping cream, cold
- 1 teaspoon vanilla extract
- 2 packages (7 ounces each) crisp ladyfingers (Savoiardi)
- Unsweetened cocoa powder, for dusting
Instructions
- Prepare the coffee soak: In a shallow dish, combine the cooled espresso and coffee liqueur or rum, if using. Set aside.
- Make the custard base: In a heatproof bowl set over a saucepan of simmering water (creating a double boiler), whisk together the egg yolks and 3/4 cup of the sugar. Whisk constantly until the mixture thickens, lightens in color, and reaches 160°F (about 8-10 minutes). This step cooks the yolks safely. Remove from heat and let cool slightly.
- Prepare the mascarpone cream: In a separate large bowl, beat the cold heavy cream, remaining 1/4 cup sugar, and vanilla extract until stiff peaks form.
- Combine the cheese mixture: In another bowl, gently whisk the cold mascarpone cheese until smooth. Fold the cooled egg yolk mixture into the mascarpone until just combined.
- Fold in the whipped cream: Gently fold the whipped cream into the mascarpone mixture in two additions until the cream is uniform and light. Do not overmix.
- Assemble the tiramisu: Quickly dip each ladyfinger into the coffee mixture, turning once. Do not let them soak too long or they will become soggy.
- Arrange a single layer of the dipped ladyfingers in the bottom of a 9×13 inch baking dish.
- Spread half of the mascarpone cream mixture evenly over the ladyfingers.
- Repeat the process: Dip and layer the remaining ladyfingers over the cream, then top with the remaining mascarpone cream, spreading it smoothly.
- Chill: Cover the dish tightly with plastic wrap and refrigerate for at least 6 hours, or preferably overnight, to allow the dessert to set and the flavors to meld. This make-ahead dessert tastes best after chilling.
- Serve: Before serving, dust the top generously with unsweetened cocoa powder using a fine-mesh sieve. Slice and serve your creamy coffee delight.
Notes
- For a richer coffee flavor, use freshly ground, dark roast espresso beans.
- If you skip the alcohol, add 1 teaspoon of almond extract to the coffee soak for depth.
- Use high-quality, cold mascarpone cheese for the best, silkiest texture in your cream.
Nutrition
- Serving Size: 1 slice
- Calories: 410
- Sugar: 28g
- Sodium: 85mg
- Fat: 28g
- Saturated Fat: 17g
- Unsaturated Fat: 11g
- Trans Fat: 0.5g
- Carbohydrates: 32g
- Fiber: 1g
- Protein: 8g
- Cholesterol: 180mg