

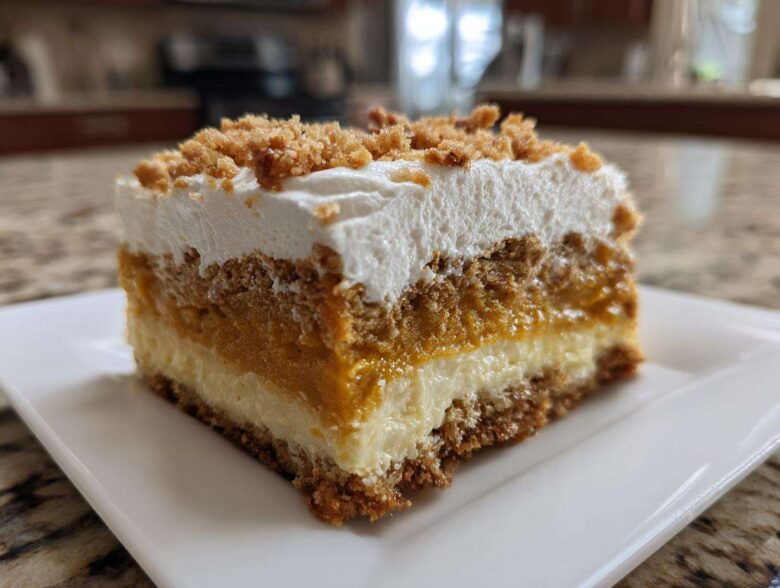
When the air gets crisp and the leaves start turning those amazing shades of gold and red, my heart immediately goes to the oven. Forget the fussy pies, friends, because this year, we are diving headfirst into pure, unadulterated comfort with the easiest, most satisfying dessert you can imagine: the pumpkin crunch cake. Seriously, Julian and I used to stress so much about making everything look magazine-worthy—the glossy final product—but making this dessert is totally different. It’s about intention, not perfection. This easy pumpkin crunch cake recipe is exactly the kind of intentional, delicious chaos we love to create in our kitchen now. If you want to read more about how we shifted from perfectionism to just enjoying the making, check out our About Us page! It truly is the ultimate crowd-pleaser for any fall gathering!
Why This Easy Pumpkin Crunch Cake Recipe is Your New Fall Favorite
Okay, if you are looking for a dessert that screams autumn but doesn’t scream “I spent all day in the kitchen,” this is it. Trust me, this easy pumpkin crunch cake recipe goes straight to the top of the list for simple autumn desserts. Julian and I rely on recipes that are almost guaranteed to succeed, especially when we have guests coming over. This one always disappears first, making it one of our go-to crowd pleasing pumpkin treats!
- It uses basic ingredients—no fancy sourcing needed!
- The prep time is incredibly short; it practically makes itself while baking.
- It holds up beautifully in the fridge, which is perfect for early holiday prep.
- The texture combination is just next level fantastic.
The Perfect Layered Pumpkin Dessert Recipe Structure
What makes this dessert so addictive is the structure. You get three incredible things happening in every single bite. First, you have that sturdy, buttery bottom crust made from the cake mix. Then, you hit the smooth, warmly spiced, creamy pumpkin layer. Finally, you get that glorious, slightly salty, golden crunch topping. It’s texture perfection, honestly. If you love our approach to simple seasonal baking, you should definitely check out the notes for our easy apple cobbler recipe, too!
Gathering Ingredients for Your Pumpkin Crunch
The best part of this recipe? You probably have most of this stuff sitting in your pantry right now! We kept this as straightforward as possible because when the craving for pumpkin crunch hits in November, you don’t want to make a special trip to the store. We are using whole, simple ingredients here to make sure this falls squarely into our ‘must-make-every-year’ category. Here’s what you need to pull together this simple layered dessert recipe.
- 1 box (15.25 oz) yellow cake mix
- 1 cup chopped pecans
- 1 cup (2 sticks) unsalted butter, melted
- 1 can (15 oz) pure pumpkin puree
- 1 can (14 oz) sweetened condensed milk
- 2 large eggs
- 1 teaspoon pumpkin pie spice
- 1 teaspoon vanilla extract
- 1 container (8 oz) frozen whipped topping, thawed (or homemade whipped cream)
Buttery Pecan Crunch Topping Recipe Notes
For the crust and the topping, you are using the same mixture, which I just love—less measuring, less fuss! The dry yellow cake mix is absolutely non-negotiable here; it gives that perfect sandy texture when mixed with the butter. Make sure your butter is melted completely so it coats everything nicely before you press it into the pan. And don’t skimp on those chopped pecans; they bring that necessary heft to the crunch!
Step-by-Step Instructions: How to Make Pumpkin Crunch Dessert
Okay, this is where the magic happens, and honestly, it’s so easy I feel like I should be charging more for this recipe! Since we’re aiming for a no-fail pumpkin dessert, follow these steps exactly, and you’ll have a stunning, perfectly layered dish ready for your table. We’ll assemble the crust first, which gives it that essential stability we love in this pumpkin crunch.
Preparing the Crust and Initial Bake for the pumpkin crunch
First things first, get that oven warmed up to 350°F (175°C). Grease your 9×13 inch baking dish—I sometimes cheat and use a little baking spray, which works wonders. Now, take your combined dry cake mix and pecan mixture. You need to measure out about two-thirds of that crumb mixture and press it gently but firmly into the bottom of your dish. This forms the base layer! Pop that into the oven for a quick 10 minutes. We just need it to set a little before we add the wet filling.
Creating the Creamy Pumpkin Layer and Final Baking
While that crust is getting cozy, jump on the filling! Grab a separate bowl. You’re just whisking together the pumpkin puree, that sweet condensed milk, the eggs, the spice, and the vanilla until everything looks beautifully smooth—no lumps allowed! Pour this lovely orange filling right over that slightly baked crust. Next, take the remaining one-third of your crumb mixture and sprinkle it evenly over the top. Bake this entire situation for about 40 to 50 minutes. You’re looking for the topping to be a rich golden brown and the center to look mostly set when you gently nudge the pan.
Chilling and Finishing the Layered Pumpkin Dessert Recipe
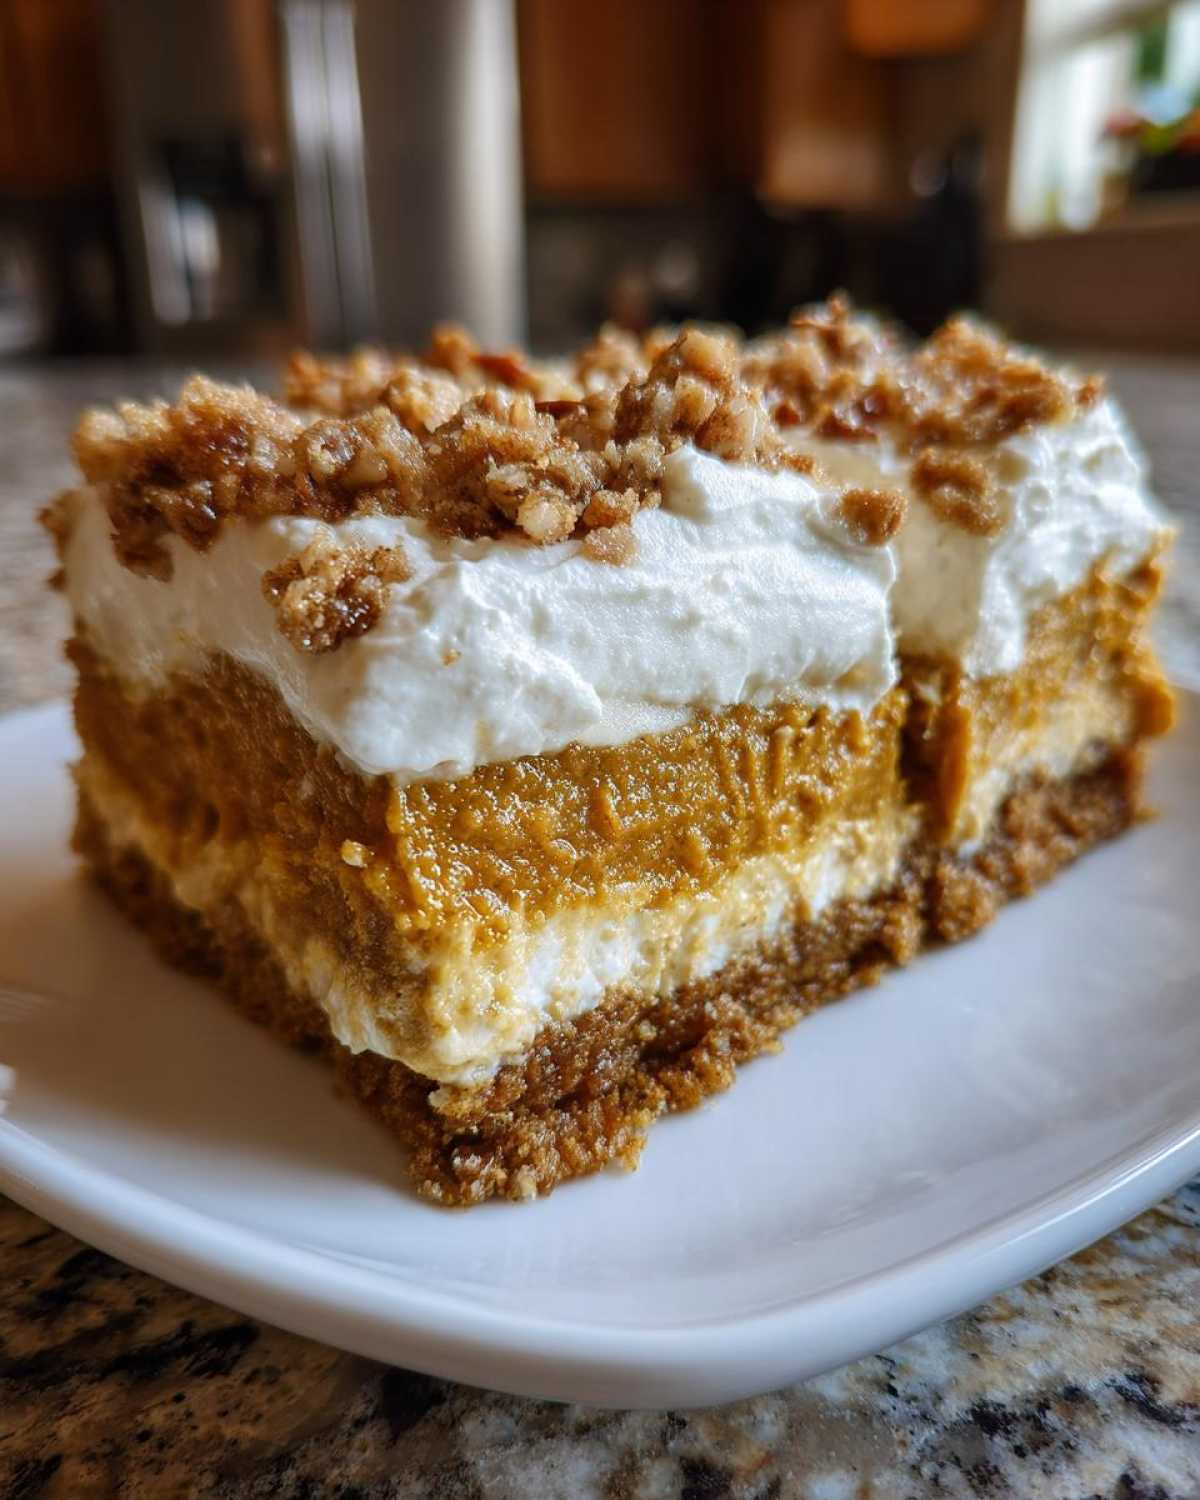
This is the hardest part, I won’t lie—waiting! You MUST let the entire thing cool down on a wire rack for at least an hour, maybe two. We need the layers to completely firm up before we frost it. Once it’s cool, grab your thawed whipped topping and spread it evenly over the top. This is our creamy counterpart to the crunch! Then, cover it loosely and stick it in the fridge for a minimum of 2 hours. This chilling time is crucial, I promise, or your slices will just melt everywhere. Don’t skip it if you want those gorgeous clean slices you see in photos! We have a tip about using parchment paper when baking cookies that helps with clean removal, which you can read about here, but for this layered dish, the chill is the real hero.
Tips for Success with Your Pumpkin Crunch
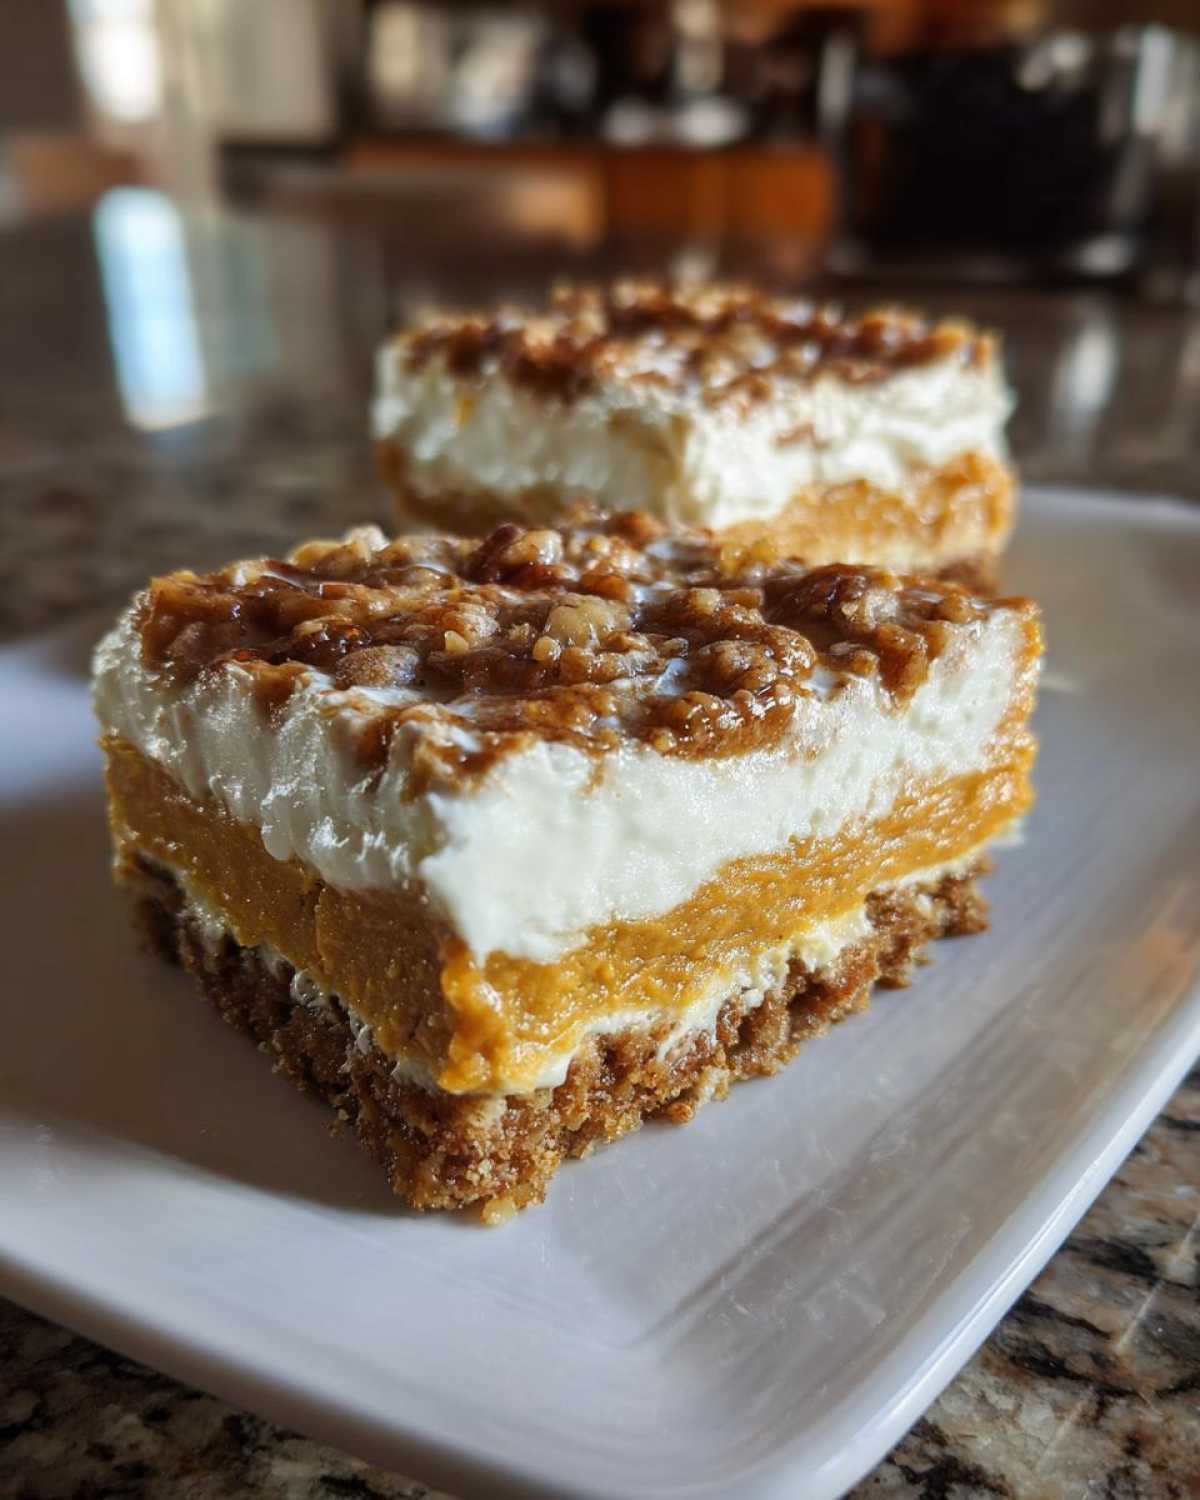
Honestly, even though this is one of the easiest desserts we keep in our regular rotation, a few little tricks turn it from “good” to “oh my gosh, I need that recipe right now.” We want every time you make this to be a total win, especially when you’re planning baking for fall gatherings and need something absolutely reliable. It’s all about temperature and technique, even in a recipe this simple.
Make sure your eggs are at room temperature before you mix them into the pumpkin filling; this helps everything emulsify nicely without breaking the mixture. Also, when you are spreading that whipped topping on top later, do it right before serving or just a few hours before you chill it again. If it sits too long under plastic wrap, sometimes the topping can get a little weepy, and we want those gorgeous, fluffy peaks!
Making the Hawaiian pumpkin crunch recipe Variation
Now, because our readers are everywhere, I have to talk about the famous Hawaiian pumpkin crunch recipe variation! Many folks in Hawaiʻi make this dessert slightly differently, and it’s fascinating. They often skip the initial 10-minute crust bake entirely! In that version, you mix the dry cake mix and pecans, pour the melted butter over it, and spread *all* of it—the entire batch—as the bottom layer. Then, you pour the pumpkin filling on top, followed by the remaining crumb mixture, and bake it all at once. It results in a slightly softer bottom crust. It’s faster, but I personally prefer the initial 10-minute bake—it gives us that sturdy base that holds up when slicing! If you love unique takes on classics, you might enjoy reading about our technique for soft, chewy snickerdoodles, which relies on chilling the dough!
Serving Suggestions for this Crowd Pleasing Pumpkin Treats
Since this pumpkin crunch dessert is wonderfully rich—that creamy pumpkin layer is decadent, even when served chilled—I find pairing it with something bright or bubbly really knocks the whole dessert experience out of the park. You worked hard on that perfect, buttery pecan crunch topping, but now it’s time to keep things simple for serving!
We always serve this straight from the fridge. It’s meant to be cool, which makes that crunchy top layer snap perfectly when you cut into it. If you’re serving it after a massive Thanksgiving meal, a light beverage is the way to go. We adore having it alongside a nice, hot mug of black coffee; the bitterness cuts through the sweetness beautifully.
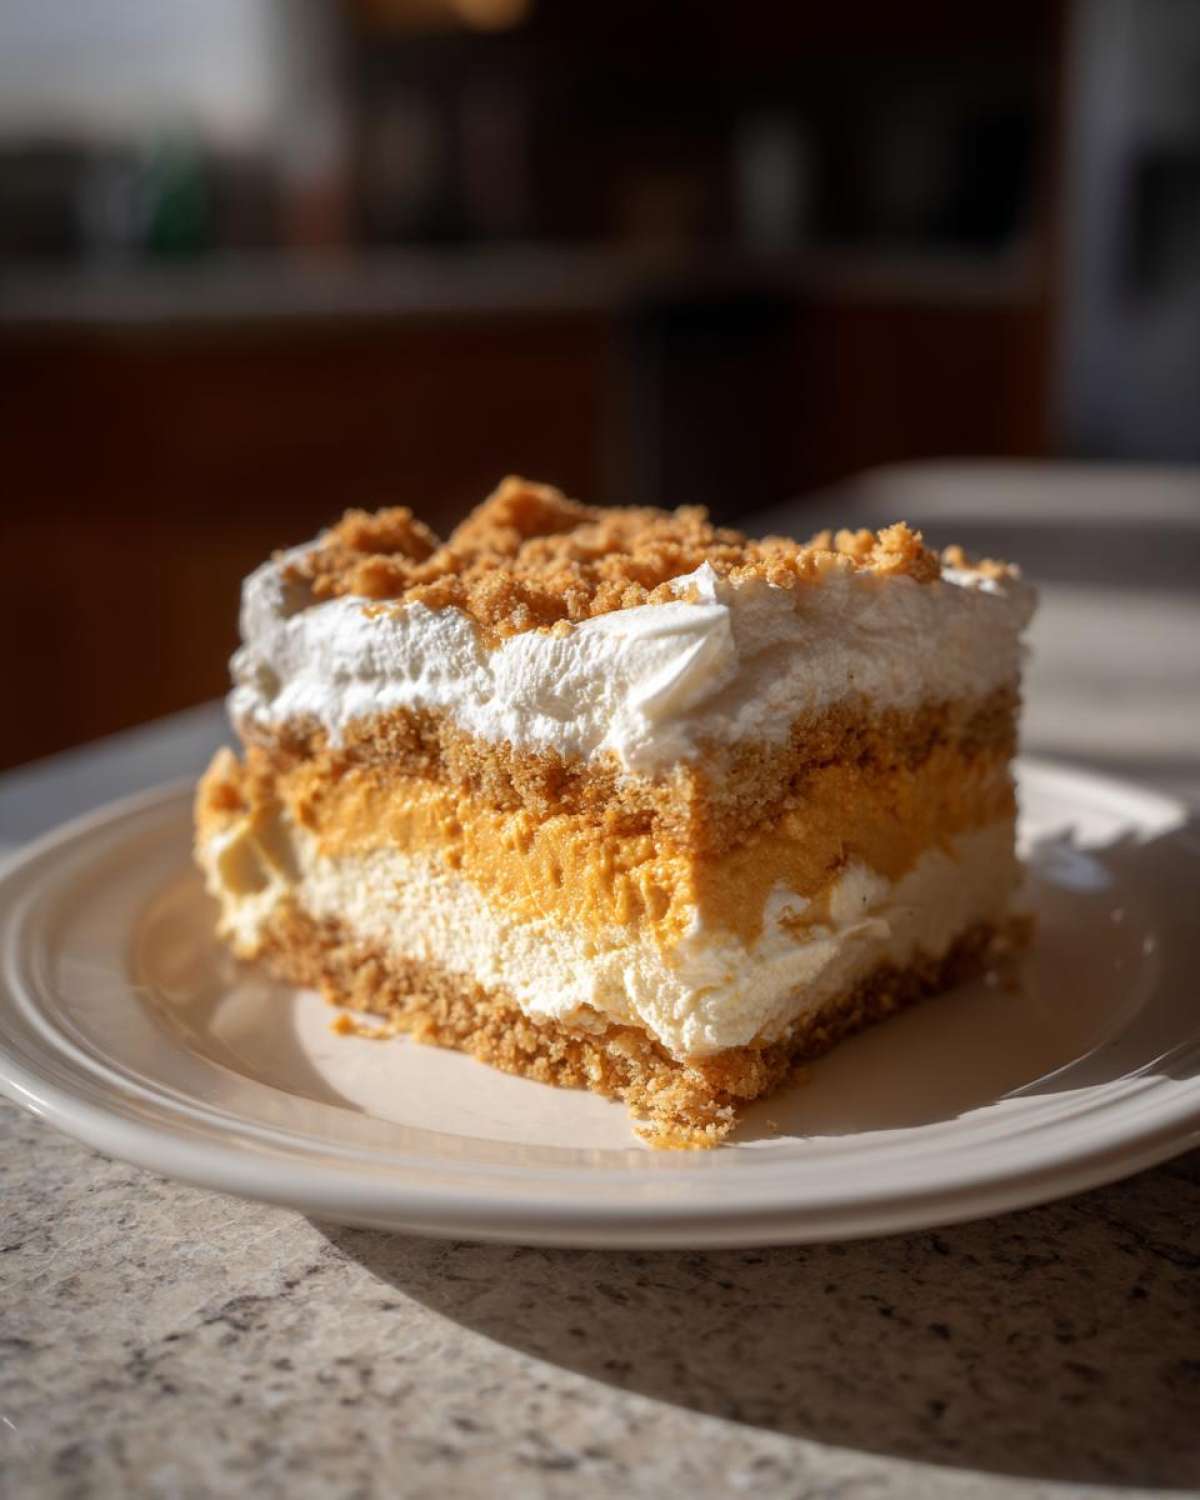
But if you want a showstopper pairing, try serving a small slice with a crisp, lightly sweetened drink. Julian recently mixed up a batch of our sparkling apple cider sangria when we had friends over, and honestly, the slightly tart apple and cinnamon notes just elevated the whole pumpkin vibe. It was an absolute scene-stealer! It’s all about creating a full, intentional experience, even with something as simple as what you drink alongside your favorite layered pumpkin dessert recipe.
Storage & Reheating Instructions for Pumpkin Crunch
Now, let’s talk about the aftermath, because trust me, you will have leftovers—this pumpkin crunch is just that good! The beautiful thing about this layered dessert is that it seriously gets better overnight, which is a huge win when you’re making treats ahead of time for a big gathering.
The key here is keeping it chilled. Since the recipe finishes with that lovely layer of whipped topping, you absolutely must keep this dessert refrigerated. Once it’s completely cooled and the topping is on, cover the 9×13 dish tightly with plastic wrap or transfer individual slices to airtight containers. It should stay fresh and delicious in the fridge for about three to four days. The bottom crust stays wonderfully moist, and that pecan crunch topping retains most of its texture for at least 48 hours.
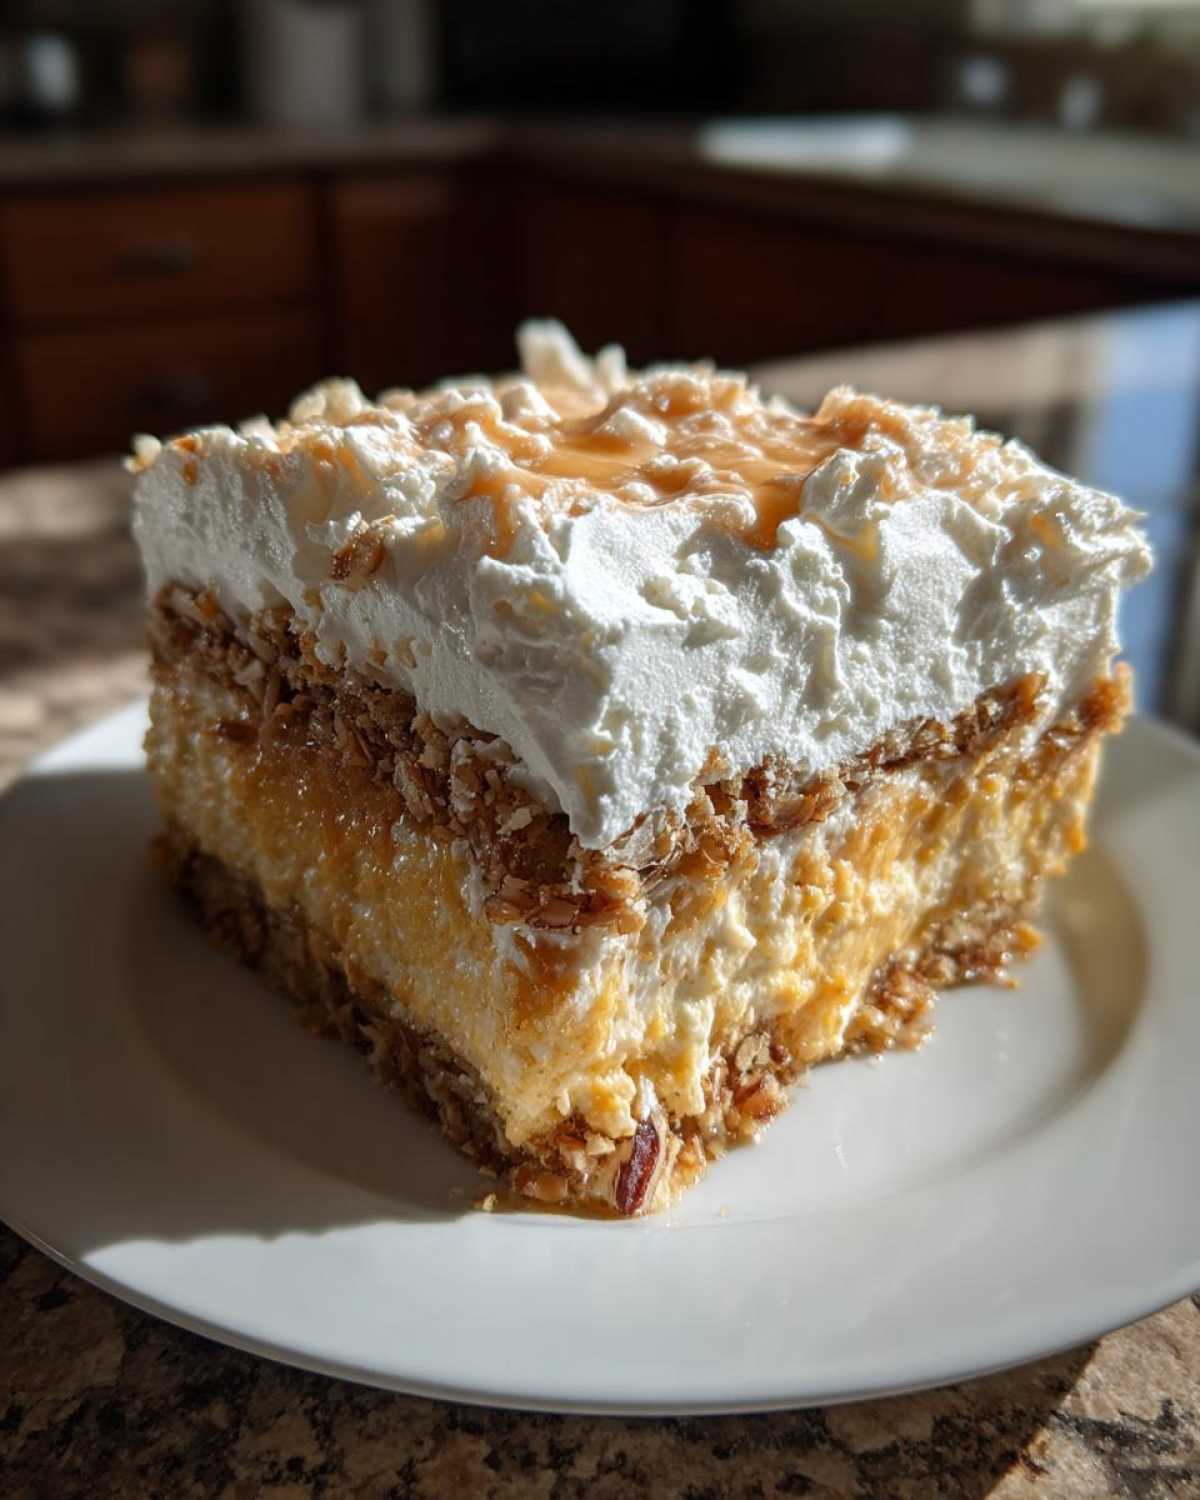
Now, should you reheat it? My answer is generally no, you shouldn’t! This is designed to be a chilled, refreshing dessert, kind of like a firm, spiced custard bar. If you warm it up, that pretty whipped topping layer melts away into soupiness, and you lose that amazing density you worked for during the chilling phase. If, by chance, you absolutely crave a warm pumpkin dessert, maybe skip the topping entirely, warm just a small slice gently in the microwave for about 15 seconds, and serve it with plain ice cream instead. But for the full, intended experience of this easy recipe, keep it cool!
Frequently Asked Questions about the pumpkin crunch recipe
We get so many questions over on the DMs about minor tweaks for this recipe, and I totally get it! When you find a truly reliable crowd pleasing pumpkin treat like this, you want to make sure you get it right every single time. Julian jokes that I should just write an FAQ book for every recipe we publish. Here are some of the most common things people ask about perfecting their pumpkin crunch!
Can I use a different nut instead of pecans in the buttery pecan crunch topping recipe?
Absolutely! While I love the richness pecans bring to that buttery pecan crunch topping recipe, you can definitely substitute them. Walnuts are the second most popular choice, and they work beautifully with the spice profile. If you have the time, throw those walnuts on a cookie sheet and toast them in the oven for about five minutes before you mix them in. Toasting nuts just wakes up all that gorgeous flavor, making your fall baking recipes taste even better!
Is this technically a pumpkin dump cake with crunch topping?
That’s a great question that highlights the genius of using cake mix! It is inspired by that simplicity, for sure. If you look at a true pumpkin dump cake, you usually just dump everything in layers and bake all at once, often meaning the bottom crust stays very soft. Because we take that extra step to press two-thirds of the crumb mixture into the bottom and give it a quick 10-minute head start in the oven, ours sets up a bit sturdier. So, I like to call it a hybrid! It has the ease of a pumpkin dump cake with crunch topping, but the structural integrity of a proper layered pumpkin dessert recipe. It’s the best of both worlds, really!
What is the connection between this dessert and Sam Choy pumpkin crunch cake?
Oh, that’s where the real history comes in! If you’ve ever seen regional recipes, you know that the Hawaiian pumpkin crunch recipe, often linked to Chef Sam Choy’s version, is super famous. Those versions are treasured! Ours is definitely inspired by that beautiful concept of layered pumpkin and crunch. We simplified it down to make it accessible for weeknight baking and for folks who might not be able to source specific local ingredients, but the core idea—that textural contrast—is absolutely the same. It’s our home-style, slightly easier take on that classic!
If you’re looking for more simple, yet impactful recipes that make your everyday cooking feel special, you should take a peek at our guide for the ultimate moist zucchini banana bread. Sometimes the easiest baking yields the most wonderful results!
Estimated Nutritional Data for This Fall Baking Recipe
You know, when Julian and I started Magazine Meal, we made a pact to focus on what tastes amazing, not just counting every single calorie. That said, when you’re bringing something like this incredible pumpkin crunch to a huge family gathering—especially around Thanksgiving—people often ask! So, while we aren’t registered dietitians, we ballparked the numbers for you based on standard ingredients. Remember, these figures are just estimates, and they can change depending on the brand of cake mix or the exact amount of butter you use for that perfect pecan crunch.
We always encourage focusing on the joy of eating, but for anyone tracking things, here’s a good general idea for one slice of this crowd pleasing pumpkin treat. If you want to see some of the inspirations behind regional takes on this dessert, you can check out this article on the Hawaiian pumpkin crunch recipe for a different flavor profile!
- Serving Size: 1 slice
- Calories: 350
- Sugar: 35g
- Sodium: 250mg
- Fat: 20g
- Saturated Fat: 10g
- Unsaturated Fat: 10g
- Trans Fat: 0g
- Carbohydrates: 40g
- Fiber: 2g
- Protein: 5g
- Cholesterol: 45mg
Keep in mind that this deliciousness comes from that rich, buttery crust and the sweetened condensed milk in the creamy layer! It’s worth every bite when you slice into that perfect layer of pumpkin crunch.
Share Your Magazine Meal Moments
Now that you’ve created your own piece of edible art—your spectacular pumpkin crunch—I genuinely want to see it! Julian and I live for seeing your creations. Remember, our philosophy here at Magazine Meal is that the process of making it should be the feature story, and sharing the result is the perfect final layout!
When you’ve successfully mastered this incredibly simple yet stunning layered pumpkin dessert recipe, please take a photo! Snap a picture of that tempting slice with the creamy layer peeking out next to that golden, buttery pecan crunch topping. Tag us on social media so we can cheer you on! We absolutely love seeing how you style your plates and what you pair it with for your autumn gatherings.
And don’t be shy! Drop a comment right here below this post. Let me know if you stuck with the classic presentation or if you tried the Hawaiian pumpkin crunch recipe variation we talked about. Did you think it was worth the chill time? Hearing your feedback helps us keep developing recipes you’ll want to feature on your own table. If you’re looking for more inspiration for your next culinary cover story, browse our main blog archives. Happy baking—I hope this becomes your new favorite fall tradition!
PrintEasy Layered Pumpkin Crunch Cake Recipe
Make this simple, crowd-pleasing Pumpkin Crunch Cake for your next gathering. It features a creamy pumpkin layer beneath a buttery, crunchy pecan topping made easily with yellow cake mix.
- Prep Time: 20 min
- Cook Time: 50 min
- Total Time: 90 min
- Yield: 12 servings
- Category: Dessert
- Method: Baking
- Cuisine: American
- Diet: Vegetarian
Ingredients
- 1 box (15.25 oz) yellow cake mix
- 1 cup chopped pecans
- 1 cup (2 sticks) unsalted butter, melted
- 1 can (15 oz) pure pumpkin puree
- 1 can (14 oz) sweetened condensed milk
- 2 large eggs
- 1 teaspoon pumpkin pie spice
- 1 teaspoon vanilla extract
- 1 container (8 oz) frozen whipped topping, thawed (or homemade whipped cream)
Instructions
- Preheat your oven to 350°F (175°C). Lightly grease a 9×13 inch baking dish.
- In a medium bowl, combine the dry yellow cake mix and the chopped pecans. Pour the melted butter over this mixture and stir until it is crumbly.
- Press about two-thirds of this crumb mixture evenly into the bottom of the prepared baking dish. This forms your bottom crust.
- Bake the crust for 10 minutes until it just begins to set. Remove from the oven.
- While the crust bakes, prepare the pumpkin filling. In a separate bowl, whisk together the pumpkin puree, sweetened condensed milk, eggs, pumpkin pie spice, and vanilla extract until smooth.
- Pour the pumpkin filling evenly over the partially baked crust.
- Sprinkle the remaining one-third of the crumb mixture over the top of the pumpkin layer.
- Return the dish to the oven and bake for 40 to 50 minutes, or until the center is mostly set and the topping is golden brown.
- Let the dessert cool completely on a wire rack, about 1 to 2 hours.
- Once cooled, spread the thawed whipped topping evenly over the top layer.
- Chill the Pumpkin Crunch Cake for at least 2 hours before slicing and serving. This helps the layers set properly.
Notes
- For a Hawaiʻi-Style variation, some recipes skip the initial crust bake and layer the dry mix directly over the pumpkin filling before baking. You can also substitute the pecans with walnuts if you prefer.
- This dessert tastes best when served chilled. Make it ahead of time for easy holiday serving.
- If you want a richer crunch, toast the pecans lightly before mixing them with the cake mix and butter.
Nutrition
- Serving Size: 1 slice
- Calories: 350
- Sugar: 35
- Sodium: 250
- Fat: 20
- Saturated Fat: 10
- Unsaturated Fat: 10
- Trans Fat: 0
- Carbohydrates: 40
- Fiber: 2
- Protein: 5
- Cholesterol: 45