

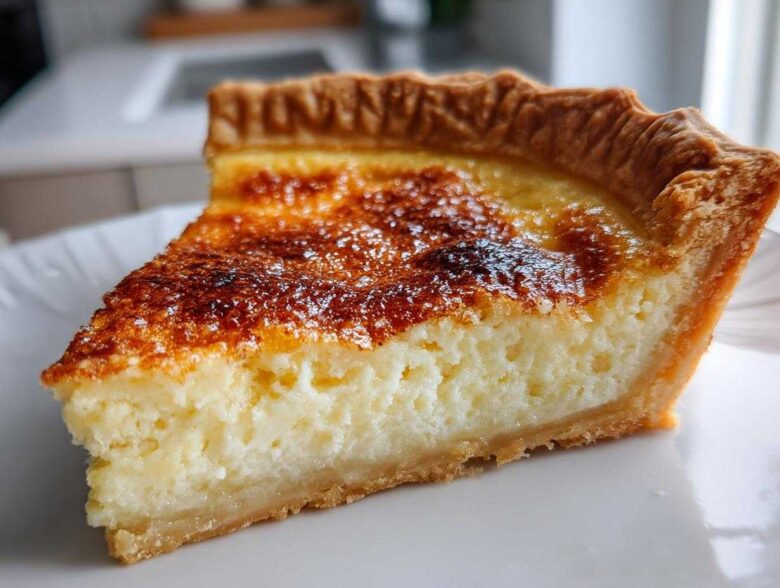
When folks think about true Southern baking, they often picture pecan pies or towering layer cakes, but honestly, nothing whispers sweet nostalgia quite like a perfect buttermilk pie. It’s wonderfully simple, yet it tastes like everything good about family gatherings. Trust me when I tell you, this Classic Buttermilk Pie Recipe is hands-down the easiest, creamiest, melt-in-your-mouth dessert you’ll ever pull from your oven. I’ve baked this for every holiday reunion since I was old enough to wield a whisk. The buttery, slightly tangy custard sets up beautifully inside a crisp crust. It’s pure magic, and you don’t need a lot of fancy equipment or ingredients to make yourself a slice of heaven. If you’re looking for a real, Old Fashioned Dessert experience, this is it! You can learn more about how we approach food and traditions over at our story.
We’re talking about a Southern Custard Pie that requires just pantry staples. Whether you’re new to baking or just need a dependable go-to, this recipe delivers that beautiful, pale yellow interior that jiggles just right. You’re going to love how quickly this comes together—we can get this in the oven in about fifteen minutes, which makes it a fantastic No Fuss Dessert.
Why This Classic Buttermilk Pie Recipe Stands Apart
What makes this Buttermilk Pie different from all those other custard recipes out there? It’s all about that beautiful texture and the simplicity of true Southern Baking Classics. This isn’t some overly complicated recipe; it’s down to earth, just like my Granny always said baking should be. It’s the kind of Old Fashioned Dessert you rely on when you need something special fast.
We get that signature silky smoothness because we nail the ratios. It’s a delicate dance between the acidity of the buttermilk, the richness of the butter, and the sweetness of the sugar, all held together by just enough egg. It truly bakes into that divine, melt-in-your-mouth consistency.
Achieving the Perfect Creamy Tangy Pie Filling
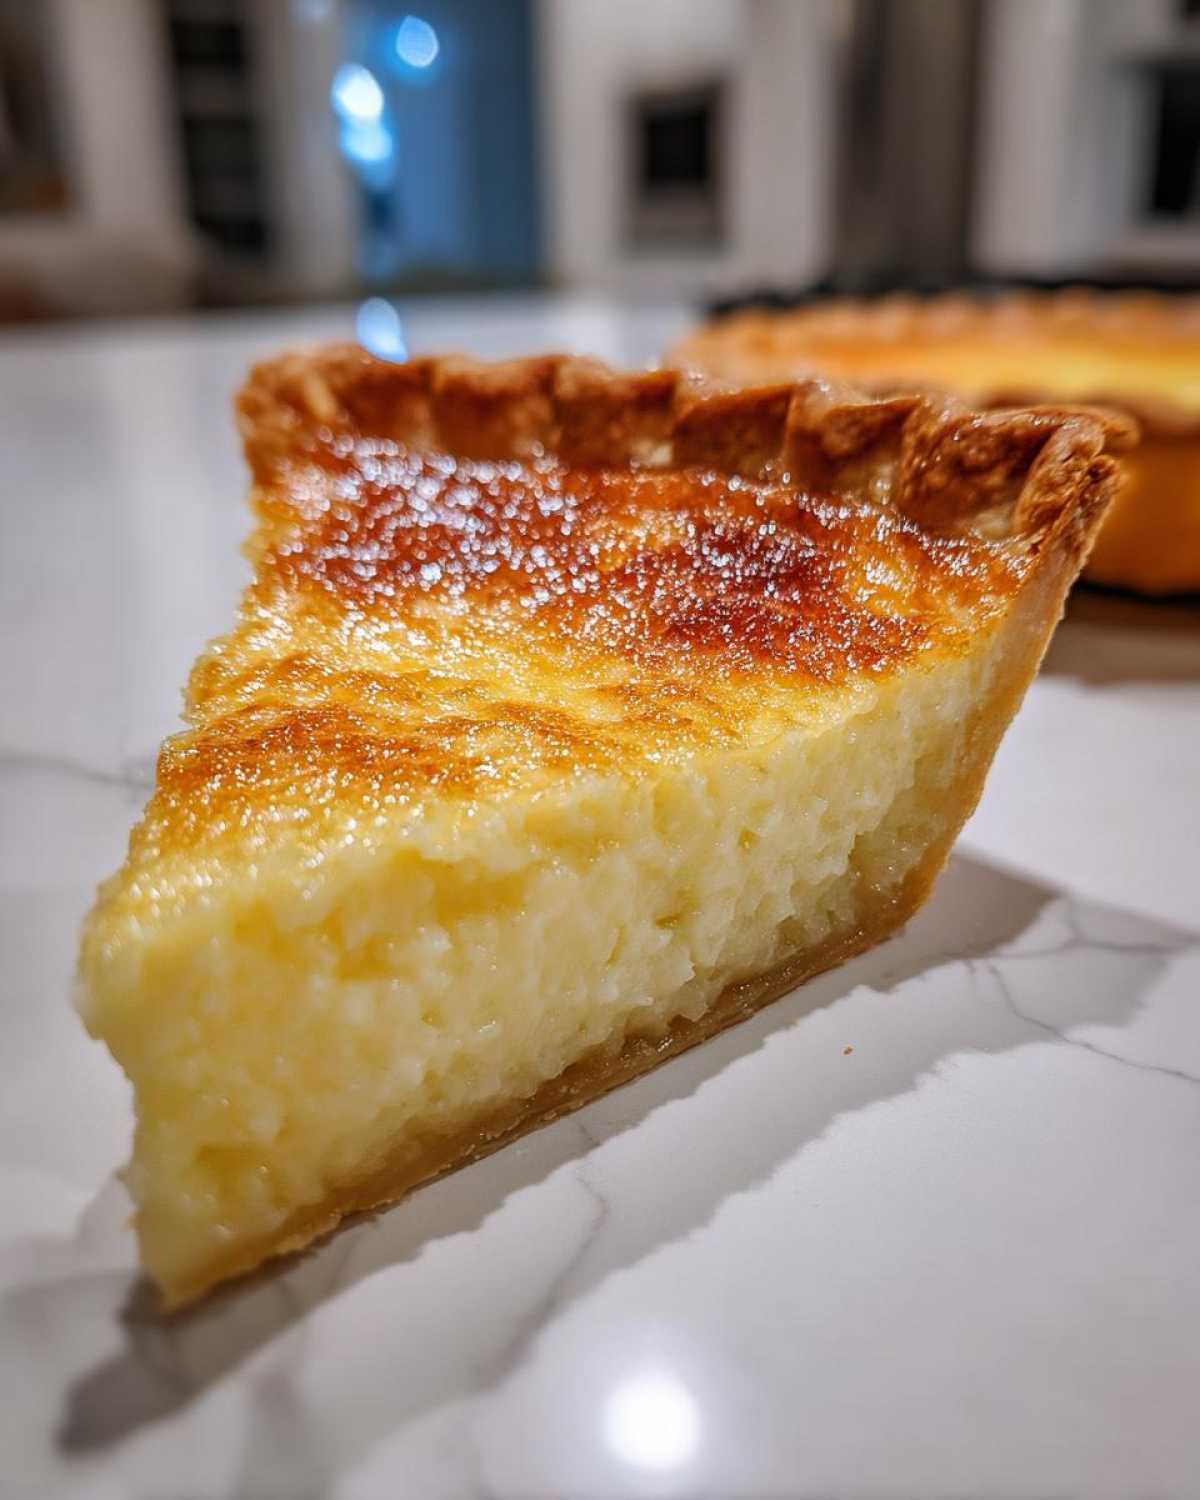
The magic really happens when that tart buttermilk hits the sweet base. It’s the acid reacting with the eggs and flour that prevents it from being heavy or rubbery. You stir it together gently, and when it bakes, you get this incredible, light tanginess that cuts through the sweetness perfectly. That unique flavor profile is what makes it the Best Buttermilk Pie, hands down.
Simple Pie Recipes for Any Baker
Honestly, if you can whisk ingredients together in a bowl, you can master this pie. We’re talking fifteen minutes prep time, tops! It truly qualifies as an Easy Homemade Pie because there’s no fussy layering or chilling required before it goes into the oven. It’s the ultimate No Fuss Dessert for those last-minute gatherings where you want to bring something truly memorable.
Ingredients for Your Best Buttermilk Pie
Gathering your ingredients for this pie is so straightforward, I barely even need to pull out my recipe card anymore! Everything here is standard, which is part of why this Buttermilk Pie has lasted so long through the generations. You’ll need just a few things to create that unbelievably smooth, cool custard filling. We are aiming for perfection here, so make sure your measurements are spot on!
- 1 (9-inch) unbaked pie crust – Gotta start with a great foundation!
- 1 cup granulated sugar
- 3 tablespoons all-purpose flour
- 1/4 teaspoon salt
- 1 cup buttermilk – Please use real buttermilk if you can find it!
- 1/2 cup unsalted butter, melted – Don’t let this get brown, just melted smooth.
- 2 large eggs, lightly beaten – Just enough to hold it together, not enough to make it solid.
- 1 teaspoon vanilla extract
- 1/4 teaspoon freshly grated nutmeg (optional)
The quality of your ingredients really matters here, especially for that tangy flavor. If you’re looking for a great recipe for homemade butter to elevate this pie even further, you should check out my favorite peach butter recipe—it gives you an idea of how much flavor freshness adds!
Ingredient Notes and Substitutions for Buttermilk Pie
Okay, let’s talk about buttermilk, since that’s the star of the show. If you open your fridge and realize you’re out (the panic is real!), don’t fret. You can easily whip up a substitute! Just take a scant cup of regular milk—whole milk works best—and stir in one tablespoon of white vinegar or fresh lemon juice. Let it sit on the counter for about ten minutes until it looks slightly curdled. That acidity gives you what you need for this buttermilk pie!
The nutmeg is totally optional, but I seriously beg you to try it! It’s just a tiny whisper of warmth, but it deepens the overall flavor profile in a way that feels so traditional and cozy. It pairs beautifully with the slight sourness of the buttermilk.
How to Prepare This Old Fashioned Dessert: Step-by-Step Instructions
Okay, getting this perfect buttermilk pie to the table involves just a few easy movements, but the order is everything! We need to treat that crust right and mix that custard gently so it sets up like silk, not rubber. Following these steps ensures you get that beautiful, smooth texture that makes this an iconic Traditional American Pie!
Preheating and Preparing the Crust for Your Buttermilk Pie
First things first, let’s give that oven some time to catch up! Set your temperature to 350 degrees F (175 degrees C). Then, take your 9-inch pie plate and place your unbaked crust right inside. Now, here’s a little trick my Aunt Mavis always used: if that crust is room temperature, pop the whole thing in the freezer for about ten minutes while the oven heats up. This little chill helps keep the edges from shrinking too much and gives you that Buttermilk Pie with Flaky Crust we all dream about!
Mixing the Creamy Tangy Pie Filling
This is where we focus on smooth mixing. Grab a medium bowl before you touch any liquids. We whisk the sugar, flour, and salt together first! Why? Because if you dump the wet stuff right in, you’ll end up with little pockets of dry flour in your finished pie! Once those dry guys are perfectly blended, start adding your buttermilk, the melted butter—be careful not to burn yourself—the eggs, vanilla, and that optional nutmeg. Whisk it just until everything comes together and looks uniform. Seriously, stop mixing as soon as you don’t see streaks anymore. Overmixing develops gluten, and we want a delicate custard, not a chewy one in this buttermilk pie!
Baking Time and Setting the Classic Buttermilk Pie
Gently, gently, pour that liquid gold into your prepared crust. Now, slide it into the preheated oven. You’re looking for a bake time between 40 and 50 minutes. Don’t just trust the timer, though! When it’s ready, the outside edges should look just barely golden brown, but the center needs to look mostly set. If you gently tap the edge of the pan, you want the middle to have a very slight wobble—a shimmer, really. That slight jiggle is the secret to a filling that stays wonderfully creamy, not dry! You can find more baking insights on my latest blog thoughts.
Tips for Success with Grandma’s Buttermilk Pie
Getting this Best Buttermilk Pie right isn’t just about mixing; it’s about patience at the end. My Grandma always insisted that the cooling process is just as important as the baking! If you cut this pie too soon, you’ll end up with a runny mess, and trust me, after all that effort, nobody wants that slump.
The absolute most critical tip is the cooling period: you must let it cool on the counter for at least three hours. That time allows the custard to fully restructure and set up firmly. If you try to rush it into the fridge while it’s hot, you might crack the top or cause condensation issues. Once it’s fully cooled, then you can cover it loosely and pop it in the fridge until serving time. This ensures every slice holds up beautifully.
Also, a little trick for the top—if you notice it browning too quickly before the center is set, just loosely tent a piece of aluminum foil over it halfway through the baking time. That keeps the pretty pale color intact while the middle cooks through. If you need tips on other comforting recipes, take a peek at my double chocolate zucchini bread where I share similar baking confidence boosters!
Storage and Reheating Instructions for Buttermilk Pie
Now that you’ve mastered this gorgeous buttermilk pie, you have to know how to keep it happy until you eat the rest! Since this has that wonderful custard filling made with eggs and buttermilk, food safety is key—we have to keep it cool.
The second your pie is completely cooled down on the counter (remember those three hours we talked about?), cover it carefully. I like to use plastic wrap, but you have to make sure it’s not sticking to the top! If the top surface has started to look a little sticky or the crust is soft, you can carefully lay a paper towel between the pie top and the plastic wrap. Then, straight into the refrigerator it goes.
This Creamy Tangy Pie Filling stays perfectly good in the fridge for about four or five days. Honestly, mine usually never lasts that long! When it comes to serving, this is where you make the *best* decision for your slice. While you *can* eat it slightly chilled, I find that the true flavor of this Southern Comfort Food Dessert comes out when it warms up just a tiny bit.
Don’t even think about microwaving slices—that will just turn the custard tough! Instead, pull your slice out of the fridge about 30 minutes before you plan to eat it. Allowing it to come up to just slightly cool or room temperature really lets that buttery, tangy flavor shine through beautifully. It’s the perfect temperature for a Simple Pie Recipe like this one!
Buttermilk Pie Variations and Serving Suggestions
While I truly believe this Classic Buttermilk Pie Recipe stands perfectly on its own—it’s the gold standard for a reason—I know sometimes we like to mix things up! That’s part of the joy of baking, right? We take this beautiful, simple base and give it a little bit of our own personality. Remember, we want to keep it feeling like a wonderful piece of Southern Comfort Food Desserts, just dressed up a little differently.
One of the easiest flavor boosts you can add is nuts. You can gently fold about a half cup of chopped pecans into the filling right before pouring it into the crust. It gives you a slight textural pop against the smooth custard. If you do that, you’re drifting toward what some folks call a hybrid pie, but it’s delicious! You can also try mixing in some bourbon with your vanilla extract for an adult-friendly twist; just substitute the vanilla completely with one teaspoon of good quality bourbon for a deeper, richer flavor profile.
When it comes to serving, keep it simple! Since the pie itself is rich and tangy, it pairs beautifully with something cool and light on the side. A small dollop of fresh, lightly sweetened whipped cream is my absolute go-to. It just melts into that slightly warmer, room-temperature slice. A tiny sprinkle of cinnamon on the cream, or even a drizzle of homemade caramel sauce right over the top, makes it look fancy without adding any extra work to the baking process!
If you love pies that require zero oven time but still deliver on creamy goodness, you really need to check out my recipe for No-Bake Peanut Butter Pie. It’s another huge crowd-pleaser that is perfect for busy weekends!
Frequently Asked Questions About This Southern Custard Pie
It’s totally normal to have questions when you’re making a classic like this Buttermilk Pie for the first time! These pies are simple, but sometimes the custard can be a little temperamental if you don’t know the little secrets. I’ve gathered a few things folks ask me all the time to make sure you end up with that perfect, wobble-y center and incredible flavor!
Can I make this buttermilk pie without a pre-made crust?
Oh yes, you absolutely can, and if you want that perfect reward, I highly recommend trying to make your own crust! While the store-bought crusts make this the quickest Simple Pie Recipe ever, nothing beats a flaky homemade partner. If you want the ultimate homemade experience and are ready to dive into pastry, you should definitely look up a guide on making a standard shortcrust pastry. A homemade crust gives you that superior Buttermilk Pie with Flaky Crust texture that just screams homemade comfort. Just remember to chill your dough before you fill it!
Why did my creamy tangy pie filling sink or crack?
This is usually down to one of two culprits: either you overbaked it, or you rushed the cooling process. If the center is completely firm when you pull it out of the oven, it’s already overdone, and when it cools, it’s going to have that dry, cracked look instead of that glorious smooth surface. Remember the golden rule: you want a bit of a jiggle in the center even when you think it’s done! That gentle wobble is your signal that the magic is happening. When you cool it slowly on the rack for three hours, you allow the eggs to gently settle and hold everything together until you finally get that beautiful, smooth finish on your buttermilk pie, not a cracked disaster!
Another tiny thing about the creamy tangy pie filling: sometimes, if the oven temperature is too high, the edges set too fast, and the middle doesn’t rise evenly, leading to sinking. Keep that oven steady at 350 degrees so it cooks gently and evenly throughout.
We keep our policies simple here, just like our baking! You can review our privacy policy anytime if you’re curious about site details.
Estimated Nutritional Data for This Traditional American Pie
Now, I’m never one to stress too much about the numbers when I’m whipping up a batch of Southern Comfort Food Desserts—because it’s just too good to worry about! But, for those of you who like to keep track, I pulled together the estimated nutritional information for one standard slice of this glorious Traditional American Pie.
Remember, this is just an estimate based on the ingredients list I provided earlier. If you swap buttermilk for cream or add a pile of pecans on top, those numbers will definitely shift! So, consider this a helpful guide, not a strict guarantee. This is truly a slice of comfort!
- Serving Size: 1 slice
- Calories: 350
- Sugar: 35g
- Sodium: 210mg
- Fat: 19g
- Saturated Fat: 11g
- Carbohydrates: 42g
- Protein: 6g
- Cholesterol: 110mg
See? Not too bad for something this incredibly good! It’s all about balance, and this Buttermilk Pie manages it delightfully. Enjoy it, you deserve it!
Share Your Experience Making This Buttermilk Dessert
Now that you’ve made this incredible, slightly tangy, buttermilk pie, I truly want to know what you think! This recipe has been a steadfast favorite in my family for decades, and hearing how it turns out in your kitchen means the world to me. Did it set up perfectly? Did your family devour it in under five minutes?
Please take a minute to drop a rating below—five stars if you loved that creamy, smooth texture as much as I do! Tell me in the comments: what’s your favorite way to eat this Southern Comfort Food Dessert? Do you like it room temperature, or chilled straight from the fridge? Are you one of those lucky people who somehow managed to sneak a slice while it was still slightly warm?
And if you snapped a picture—because let’s face it, a perfect custard pie is photogenic!—please share it on social media and tag me! I absolutely love seeing my recipes come to life in your homes. Connecting with you all makes this whole baking adventure worthwhile. If you have any lingering questions that I missed today, don’t hesitate to reach out through the contact page!
PrintThe Ultimate Classic Southern Buttermilk Pie: Easy, Creamy, and Nostalgic
Make a rich, creamy, and tangy custard pie using simple ingredients. This old-fashioned buttermilk pie captures the taste of Southern tradition.
- Prep Time: 15 min
- Cook Time: 50 min
- Total Time: 200 min
- Yield: 8 servings
- Category: Dessert
- Method: Baking
- Cuisine: American Southern
- Diet: Vegetarian
Ingredients
- 1 (9-inch) unbaked pie crust
- 1 cup granulated sugar
- 3 tablespoons all-purpose flour
- 1/4 teaspoon salt
- 1 cup buttermilk
- 1/2 cup unsalted butter, melted
- 2 large eggs, lightly beaten
- 1 teaspoon vanilla extract
- 1/4 teaspoon freshly grated nutmeg (optional)
Instructions
- Preheat your oven to 350 degrees F (175 degrees C). Place the unbaked pie crust in a 9-inch pie plate.
- In a medium bowl, whisk together the sugar, flour, and salt until combined.
- Add the buttermilk, melted butter, beaten eggs, vanilla extract, and nutmeg (if using) to the dry ingredients. Whisk until the mixture is smooth and uniform. Do not overmix.
- Pour the filling mixture carefully into the unbaked pie crust.
- Bake for 40 to 50 minutes. The center should be mostly set but still have a slight jiggle when gently shaken. The edges should be lightly golden brown.
- Remove the pie from the oven and let it cool completely on a wire rack for at least 3 hours before slicing. This allows the custard to fully set.
Notes
- For a flakier crust, chill the unbaked pie shell before adding the filling.
- If you prefer a less tangy flavor, substitute 1/4 cup of the buttermilk with heavy cream.
- This pie tastes best when served slightly cool or at room temperature.
Nutrition
- Serving Size: 1 slice
- Calories: 350
- Sugar: 35
- Sodium: 210
- Fat: 19
- Saturated Fat: 11
- Unsaturated Fat: 8
- Trans Fat: 0
- Carbohydrates: 42
- Fiber: 1
- Protein: 6
- Cholesterol: 110