

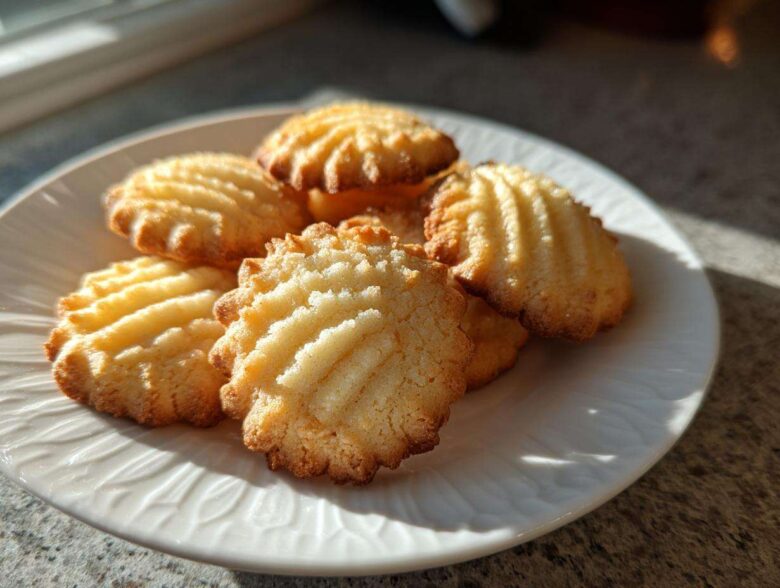
When I tell people I have the best, easiest, most buttery cookie recipe ever, they usually roll their eyes. But honestly, once they try these, they stop rolling them! We are talking about classic butter cookies here—the kind that practically dissolve the second they hit your tongue. Forget complicated steps or a million ingredients. This recipe is my absolute go-to for everything from just needing a quick afternoon treat to needing three dozen perfect cookies for Christmas Eve.
This isn’t just another cookie recipe; it’s the ultimate ‘Melt in Your Mouth’ secret weapon. Seriously, the simplicity is shocking considering how rich and bakery-quality these taste. If you’ve been searching for that perfect tender bite, you’ve found it. We make these every single year for family gatherings, and they’re always the first tray emptied!
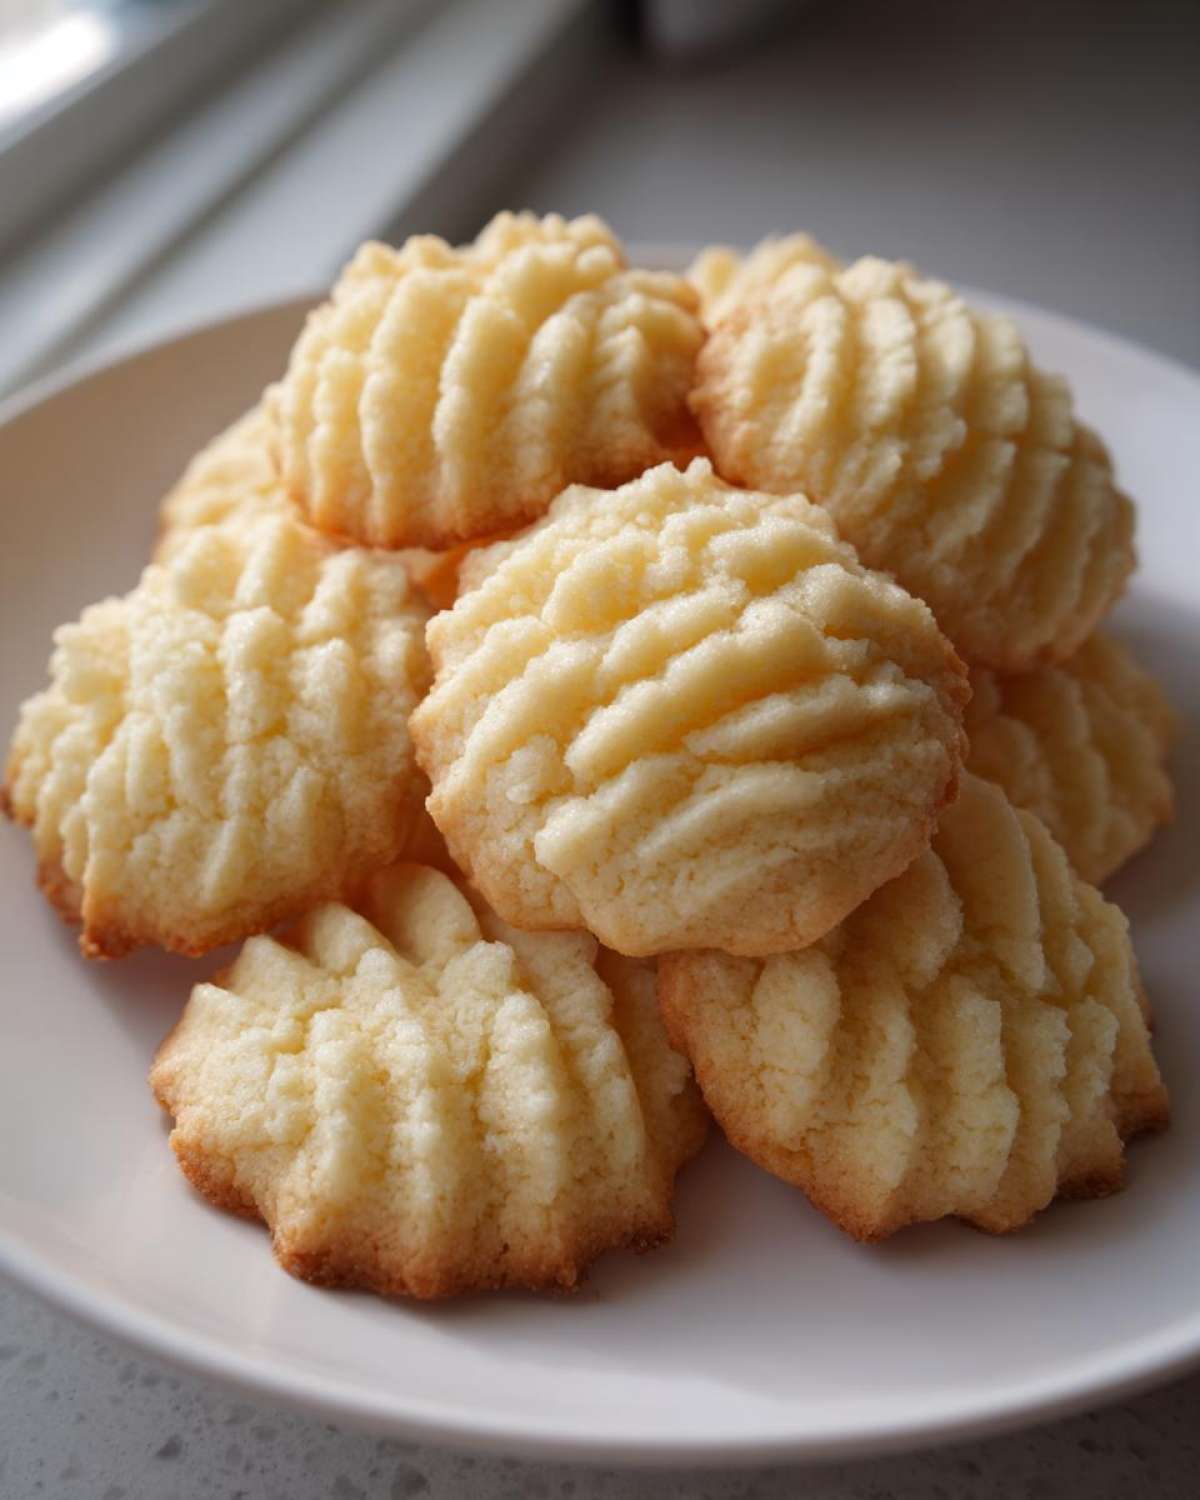
Why This Classic Butter Cookie Recipe Delivers Melt-in-Your-Mouth Perfection
So many recipes promise perfection, but this Classic Butter Cookie Recipe actually delivers that dreamy texture. What makes these cookies truly special is how they manage to be perfectly sturdy for dunking, yet they literally melt away when you eat them. That’s the hallmark of a truly great melt-in-your-mouth cookie, right?
The real secret here is balancing the richness of the butter with just enough structure. Because we use softened butter straight from the fridge (but not melted, don’t ever use melted, okay?), the creaming process traps tons of tiny air bubbles. These air pockets are responsible for that wonderful lightness so you don’t end up with a hard brick. If you want to know more about our standards for sharing recipes like this, you can check out our information page here at Magazinemeal.
It’s such an easy butter cookies recipe, too. You don’t need any fancy techniques, and there’s no tedious chilling—though I sometimes cheat and chill it anyway when the weather is hot! This is why people always save this recipe year after year.
Achieving Bakery Style Butter Cookies Texture
You might wonder why we only use one egg yolk instead of a whole egg, and that’s key to that super rich, Bakery Style Butter Cookies texture. Whole eggs add too much liquid, which makes cookies puff up more and set firmer. The yolk, however, adds fat and richness without adding that excess water. This keeps the cookie tender, dense, and unbelievably buttery, just like the ones you treasure from that fancy European bakery.
It gives the dough a beautiful, almost velvety feel before baking. Trust me on the yolk; it makes all the difference between a good cookie and a great one!
Essential Ingredients for Perfect Homemade Butter Cookies
If you’ve got butter, sugar, flour, an egg, and some vanilla, you can make these incredible Homemade Butter Cookies. That’s the beauty of this recipe! Everything is so basic, but when you treat those basic things right, the result is anything but simple. I keep all these items stocked at all times because you never know when you’ll need them for an emergency cookie run.
Here is what you’ll need to pull these beauties together. Make sure your butter is actually in the right shape before you start, because that’s half the battle!
- 1 cup unsalted butter, softened
- 1/2 cup granulated sugar
- 1 large egg yolk
- 1 teaspoon vanilla extract
- 2 1/2 cups all-purpose flour
- 1/4 teaspoon salt
Ingredient Notes and Substitutions for Your Butter Cookies
Listen up, because ingredient prep here is what keeps these from spreading into flat little puddles on your pan. First and most important: your butter has to be softened, not melted. That means you should leave it out on the counter for about an hour before you want to mix. If you push it with your finger, it should leave an indent, but it shouldn’t look shiny or sweaty.
If you’re fresh out of vanilla—oops!—a half teaspoon of almond extract totally works and gives it a lovely, slightly different flavor profile. When measuring that two and a half cups of flour, please, please do not scoop your measuring cup directly into the bag! That packs it in, and you end up with way too much flour. You need to spoon the flour gently into the cup and then level it off with a knife. That small step prevents dense cookies!
Step-by-Step Instructions for Easy Butter Cookies
You are going to love how fast this comes together. Seriously! Before you even get your butter softened, go ahead and set your oven to 350°F (175°C) so it’s roaring hot when the dough is ready. This Easy Butter Cookies recipe moves quickly, so preparation is everything. We’re sticking to the plan: wet ingredients first, then dry things go in gently. A stand mixer is handy, but honestly, a good sturdy hand mixer or even a wooden spoon and some elbow grease works just fine if you take your time during the creaming.
The whole process from start to finish is so quick, especially since we don’t fuss with chilling the dough! If you need more context on ingredient sourcing or general site information, please check our disclaimer page before you start.
Mixing the Dough: Avoiding Overmixing in Your Butter Cookies
This is the make-or-break moment for that melt-away texture! Beat your softened butter and sugar together first. You need to go until that mixture looks pale yellow, almost white, and fluffy—like very thick whipped cream. That takes a good three minutes, no rushing! Then, mix in the egg yolk and vanilla until they disappear. The moment the flour goes in, switch your mixer to the absolute lowest speed. Stop mixing the second you no longer see dry streaks of flour. Overmixing develops gluten, and gluten makes cookies tough, not tender!
Shaping Your Butter Cookies: Scooping vs. Piped Butter Cookies
Now for the fun part! You get to choose your adventure here for this Simple Cookie Baking project. If you’re going for the drop cookie look, just use two spoons to drop little rounded teaspoonfuls onto your parchment-lined sheets, leaving about two inches between them because they do spread just a tiny bit.
If you are feeling fancy and want those beautiful swirls, you absolutely need to use a piping bag fitted with a large star tip—I usually grab a Wilton 1M tip, which gives those lovely bakery ridges. Pipe little rosettes or spirals directly onto your baking sheets. These Piped Butter Cookies look fancy, but they taste just as heavenly as the scooped ones!
Baking Tips for Golden Edges on Your Butter Cookies
Baking these beauties is all about watching them closely. Keep that oven temperature consistent at 350°F (175°C). Because we used a high butter ratio, these cookies are going to want to spread a little bit in the oven, which is totally normal! They bake quickly—only about 10 to 12 minutes.
You need to look for the visual cue: the edges should just start turning a faint, light gold. If they are pale beige across the whole top, they’re probably not done yet. But if the edges look brown, you’ve gone too far, and they’ll taste crispy instead of tender!
If you feel like your dough looks a little too soft before it even hits the oven—maybe your kitchen is just way too warm—don’t panic! Pop the trays into the fridge for about 15 minutes before baking them. That little bit of chill time helps them hold their shape so much better. Remember that advice about chilling in the ingredient notes? That’s your save-the-cookie moment!
Variations on the Traditional Butter Cookies Recipe
As much as I adore this basic, perfect recipe, sometimes you just need to shake things up a little bit, right? These Vanilla Butter Cookies are wonderful on their own, but they are such a fantastic canvas for small tweaks. The best part is that most variations just involve adding something extra in at the very end, right when the flour mixes in, or dipping them after they cool down.
If you’re looking for that authentic Danish Butter Cookies Recipe texture—the one that seems extra light and airy—I have a simple swap for you! Just pull back on the flour by a whole quarter cup (so use 2 1/4 cups instead of 2 1/2) and add two tablespoons of heavy cream to the wet ingredients. Wow, that makes them incredibly tender!
I also love playing with citrus! Adding the zest of one full lemon into the dough right with the vanilla does magic. Or, if you want a treat that looks extra gorgeous, you can follow the final tip: let them cool completely, and then dip half of each cookie into some good quality melted chocolate. Seriously, visit our main blog page for more fun holiday cookie ideas!
Make Ahead Cookies and Storage for Holiday Butter Cookies
One of the reasons I champion this recipe so much, especially when planning for the holidays, is because they are fantastic Make Ahead Cookies. You absolutely do not have to rush to bake these fresh on Christmas Eve! If your schedule is packed, this dough is your best friend. You can easily wrap the log of dough tightly in plastic wrap and tuck it into the fridge for up to three days.
When you’re ready to bake, just slice it, shape it, and go! If you need them even further ahead, this dough freezes like a dream. I wrap the whole batch tightly in plastic, then in foil, and freeze it for up to three months. When you want cookies, just let the frozen dough sit on the counter for about an hour to soften just enough to pipe or scoop them.
Once they are completely cool—and I mean stone cold—you want to store your finished Holiday Butter Cookies in a crisp, airtight container. If you stack them, use discs of wax or parchment paper between the layers. If you keep them sealed up, they stay soft and maintain that glorious ‘Melt Away Cookies’ quality for solid five to seven days. If you want to see my favorite no-bake option for when you’re really short on time, check out this No-Bake Peanut Butter Pie recipe!
Frequently Asked Questions About Making Butter Cookies
I get so many great questions whenever I post these! It makes sense; even simple recipes have tricky spots. I wanted to answer a few of the most common things people ask me about keeping these Butter Cookies perfect, especially around the holidays when everyone is baking.
It’s all about tiny details that make a huge difference in getting that crackly, buttery exterior without losing that soft center. If you have other questions, never hesitate to reach out via our contact page!
Can I make these butter cookies without a piping bag?
Oh, absolutely! You never need a piping bag for these if you don’t want to use one. That’s why I included the scooping instructions in the main steps. If you scoop the dough onto the sheet trays with a teaspoon, you get what I call a ‘rustic look.’ They aren’t as fancy as the Piped Butter Cookies, but honestly, they taste exactly the same inside—all soft and buttery! Just make sure you leave enough space between drops because they do spread out a little bit while baking.
What is the best way to get ‘No Chill Cookie Dough’ results?
That’s a great question, especially if you are looking for No Chill Cookie Dough recipes! The good news is that this recipe is often fine to bake right away, especially if your kitchen isn’t sweltering hot. Because we use a lot of butter and only one yolk, the dough is naturally quite firm. If you are in a hurry, just whip up the dough and put it straight into the oven; the high fat content does a lot of the shaping work for you.
However, if you notice the dough looking oily or super soft—or if you are making these on a really hot summer day—chill it for just 20 minutes. That tiny rest helps the fat solidify just enough so they don’t spread too thin, giving you a better, thicker cookie!
Can I substitute salted butter for unsalted butter?
For the very best flavor control, I always insist on unsalted butter for my Classic Butter Cookie Recipe. Salted butter varies wildly by brand! If you must substitute, use salted butter, but leave out the 1/4 teaspoon of salt called for in the recipe. Then, taste your dough! You might need to add just a tiny pinch of extra salt if your butter brand isn’t very salty, but usually, leaving it out completely works fine.
Why did my homemade butter cookies spread so much?
This is almost always down to two things! First, did you use melted butter instead of softened butter? Melted butter throws off the whole structure! Second, make sure you are measuring that flour correctly—spoon it in, don’t scoop it! If you use too much flour, the dough can get crumbly, but if you use too little, the cookies lose their substance and melt right onto the pan. Keep things measured correctly, and your Homemade Butter Cookies will hold their shape!
Estimated Nutritional Data for Classic Butter Cookies
Okay, let’s talk briefly about the numbers, though honestly, these cookies aren’t exactly health food, and that’s why we love them, right? We’re aiming for that rich, buttery experience, not counting every tiny carb!
The figures below are just estimates based on the recipe ingredients and are calculated assuming we get about 36 cookies out of the entire batch. Remember, this is just a guideline, and if you make bigger or smaller cookies, your figures will change!
Here are the general stats based on a serving size of just one cookie:
- Calories: 110
- Fat: 7g
- Carbohydrates: 10g
- Protein: 1g
If you’re watching specific macros, you can see we get a nice chunk of that staying power from the fat—that’s the butter doing its job! But hey, every bite is worth it when you get that ‘Melt in Your Mouth’ goodness. These are best enjoyed with a cup of coffee or hot chocolate, where you can quickly forget exactly how much butter went into them!
Share Your Experience with These Butter Cookies
Well, that’s it! We’ve covered everything from creaming that butter just right to deciding whether you’re team piped or team scooped. Now the best part is seeing what you all create in your own kitchens!
I absolutely live for seeing photos of your beautiful butter cookies—whether you dunked them in coffee like my uncle does, or maybe you added that extra lemon zest variation we talked about. Please tag me or share your pictures in the comments below! Knowing that this family classic is traveling to your holiday tables and baking sheets really means the world to me.
If you followed along and this recipe truly gave you those ‘Melt in Your Mouth Cookies’ we promised, don’t be shy—give it a rating! Five stars? Four stars? Let me know how it went. And if you ever want to read up on how we keep all your lovely comments and data safe here on the site, you can review our privacy policy anytime. Happy baking, and I can’t wait to hear what you think!
PrintClassic Melt-in-Your-Mouth Butter Cookies

A simple recipe for rich, traditional butter cookies that are tender and dissolve easily when eaten. This recipe works well for both scooping and piping.
- Prep Time: 15 min
- Cook Time: 12 min
- Total Time: 27 min
- Yield: About 3 dozen
- Category: Dessert
- Method: Baking
- Cuisine: American
- Diet: Vegetarian
Ingredients
- 1 cup unsalted butter, softened
- 1/2 cup granulated sugar
- 1 large egg yolk
- 1 teaspoon vanilla extract
- 2 1/2 cups all-purpose flour
- 1/4 teaspoon salt
Instructions
- Beat the softened butter and sugar together in a large bowl until the mixture is light and fluffy, about 3 minutes.
- Beat in the egg yolk and vanilla extract until just combined.
- In a separate bowl, whisk together the flour and salt.
- Gradually add the dry ingredients to the wet ingredients, mixing on low speed until a soft dough forms. Do not overmix.
- For scooping: Drop rounded teaspoons of dough onto baking sheets lined with parchment paper, spacing them 2 inches apart.
- For piping: Transfer the dough to a pastry bag fitted with a star tip. Pipe desired shapes onto lined baking sheets.
- Bake in a preheated oven at 350°F (175°C) for 10 to 12 minutes, or until the edges are lightly golden.
- Let the cookies cool on the baking sheet for 5 minutes before transferring them to a wire rack to cool completely.
Notes
- For a Danish style cookie, reduce the flour to 2 1/4 cups and add 2 tablespoons of heavy cream to the wet ingredients.
- You can chill the dough for 30 minutes before scooping or piping if your kitchen is warm.
- Dip the cooled cookies halfway into melted chocolate for an added flavor variation.
Nutrition
- Serving Size: 1 cookie
- Calories: 110
- Sugar: 6
- Sodium: 35
- Fat: 7
- Saturated Fat: 4
- Unsaturated Fat: 3
- Trans Fat: 0
- Carbohydrates: 10
- Fiber: 0
- Protein: 1
- Cholesterol: 25