

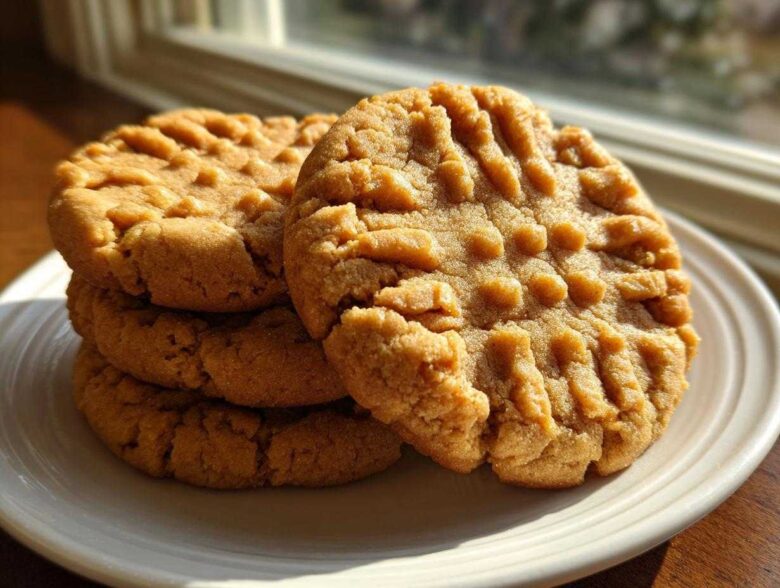
You know those cookies that just scream ‘home’ and make the whole kitchen smell incredible? For me, that’s always been the classic peanut butter cookie. Seriously, nothing else compares! I’ve tried every single variation out there—skipping the eggs, using all white sugar, you name it—but I always come crawling back to the original. After years of fiddling with flour ratios and bake times, I finally nailed it. This isn’t just another recipe; trust me, these are the ultimate soft and chewy peanut butter cookies you’ll ever make. They come out thick, perfectly textured, and begging to be dunked in milk. Forget those dry, crumbly versions; we’re going for bakery-style perfection here!
I remember making a batch last winter when everything felt gloomy, and the smell alone lifted my spirits. Now, I always keep the ingredients on hand for a quick fix. If you’re looking for that perfect sweet and salty treat, you’ve found your winner. We’re going to make sure these turn out exactly how they should—soft, wonderfully chewy, and sporting that famous crisscross mark.
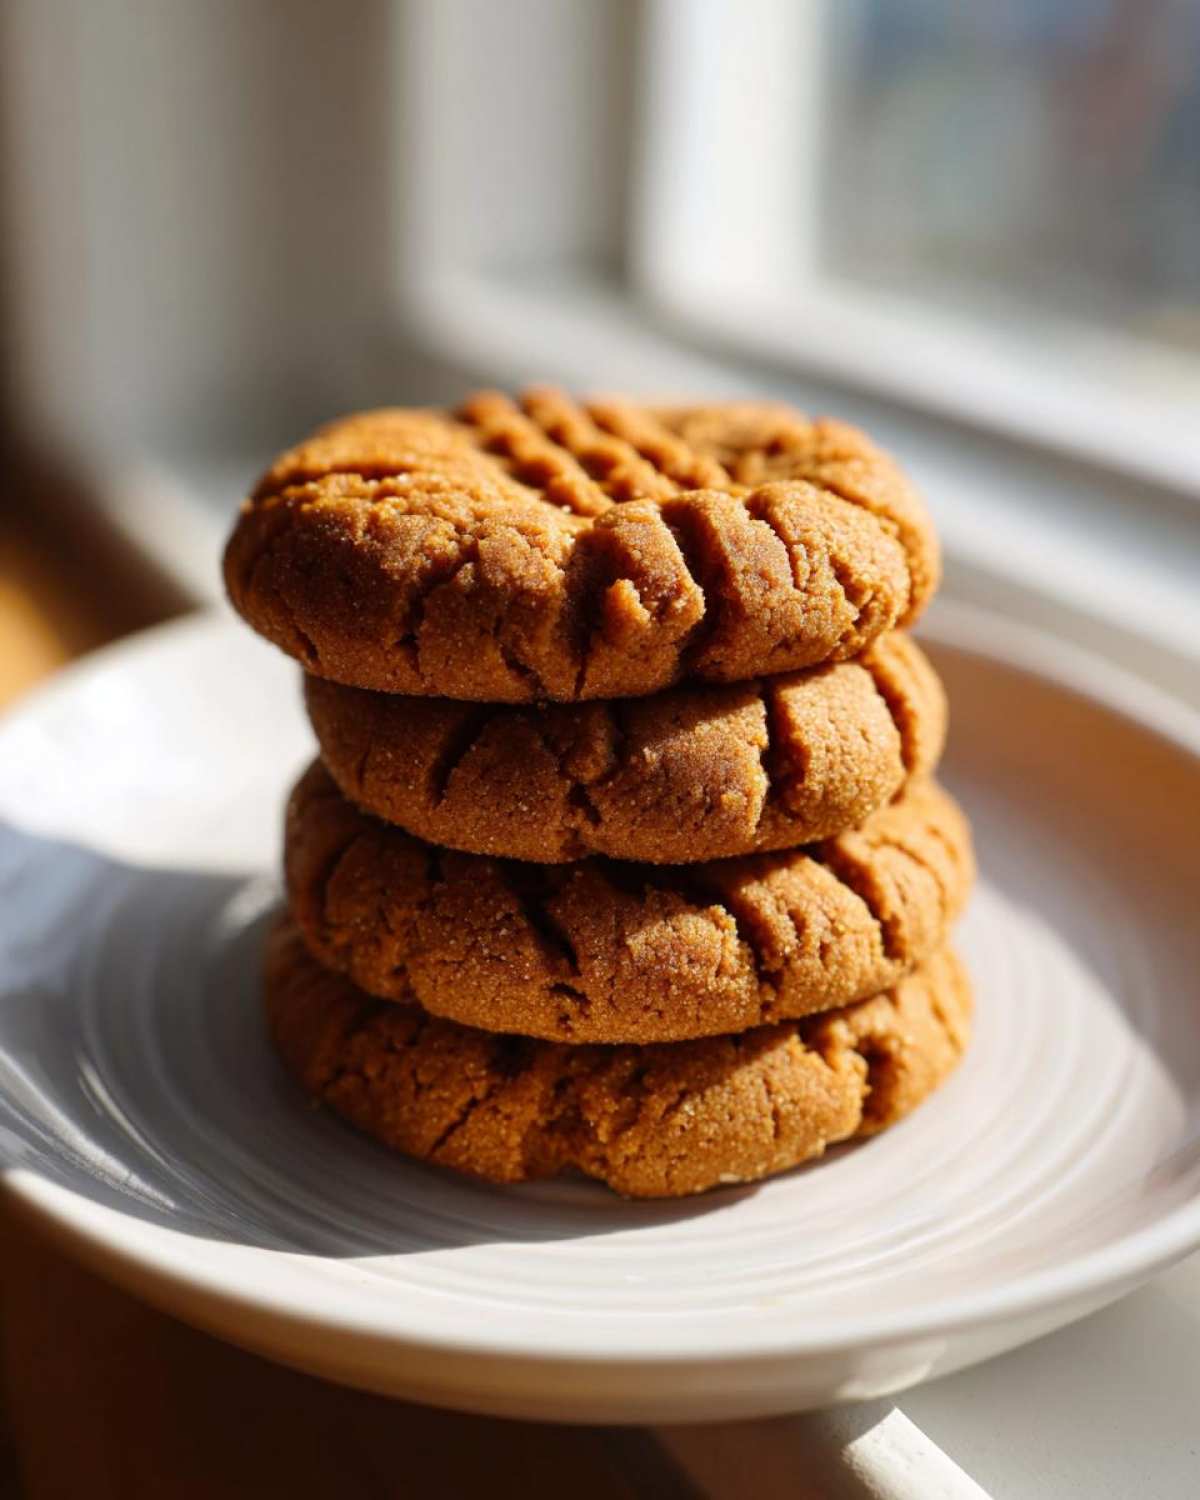
If you’re looking for other ways to use that creamy goodness, sometimes I pivot and whip up a no-bake peanut butter pie when I don’t want to turn the oven on. But when the cookie craving hits, we stick to the basics!
Why This is the Best Peanut Butter Cookie Recipe (Soft and Chewy)
So, why should you trust me on this one specific recipe for peanut butter cookies? It comes down to texture, friend. I’ve refined this down so you get that satisfying, slightly salty flavor without any of the dryness that plagues so many other recipes. When I bite into these babies, I want chewiness, not crunch, and you get that guaranteed here.
- They are incredibly easy—honestly, mixing takes no time at all.
- They come out wonderfully thick, not thin and spread out.
- The centers are soft and melt-in-your-mouth perfect, every single time.
- They have that distinct, traditional crisscross pattern that makes them look so professional.
Achieving the Perfect Soft Peanut Butter Cookies Texture
The secret weapon for softness is definitely a combination of ingredients and when you pull them out of the oven. We use more dark brown sugar than white sugar here, which holds onto moisture like crazy. Then, when you look at them, they might seem slightly underdone—that’s intentional! They firm up beautifully on the pan after they come out, giving you that ultimate chewy texture.
The Secret to Thick Peanut Butter Cookies
If you look at the instructions later, you’ll see a little note about chilling the dough. This step is gold if you want truly thick peanut butter cookies that don’t spread into pancakes! Seriously, taking that extra 30 minutes to chill the dough balls turns them from good cookies into bakery-level ones. It stops the butter from totally running when it hits the heat, holding that shape so nicely.
Ingredients for Ultimate Soft and Chewy Peanut Butter Cookies
Okay, let’s talk about what goes into these amazing peanut butter cookies. You don’t need anything fancy or obscure; that’s what I love about them! It’s all pantry staples, but the quantities are what make the difference between a decent cookie and the best homemade cookies you’ve ever tasted. Having your butter properly softened is crucial here—remember, we aren’t melting it, just making sure it’s easily beatable. This ingredient list is what sets us up for success, ensuring those classic peanut butter cookies turn out soft and chewy, just like we want them. When you see this list, you’ll know why this formula works so well!
Before you start mixing everything, make sure you have your ingredients measured out and ready to go. I highly recommend checking out my philosophy on ingredient quality if you’re curious where my ingredients come from, though for this simple recipe, standard stuff works perfectly!
- 1 cup (2 sticks) unsalted butter, softened
- 1 cup packed light brown sugar
- 1/2 cup granulated sugar
- 2 large eggs
- 1 teaspoon vanilla extract
- 1 cup creamy peanut butter
- 2 1/2 cups all-purpose flour
- 1 teaspoon baking soda
- 1/2 teaspoon baking powder
- 1/2 teaspoon salt
Simple Steps to Make Classic Peanut Butter Cookies
Alright, this is where the magic really happens! This is a classic drop cookie method, which is why it’s perfect for quick cookie recipes. When you follow the order of operations, you make sure the structure is perfect before we even think about baking. Don’t worry about getting everything exactly right—we’re making homemade cookies here, not going to a science lab. But paying attention to these few details is what separates a good batch of peanut butter cookies from one that makes people ask for the recipe right away!
If you’re feeling adventurous or just want to see some other baking inspiration, I always post my latest experiments over on my baking blog!
Mixing the Wet Ingredients for Creamy Peanut Butter Cookies
First thing’s first: we need those wet elements to be happy and well-combined. Take your softened butter and both sugars—make sure that brown sugar is nicely packed into the cup! You need to cream these together first until they look pale and fluffy. Seriously, don’t rush this! I usually use an electric mixer for this part because you need to whip air into that fat. Once it looks light, beat in your eggs one at a time, making sure each one is fully incorporated before adding the next. Then, swirl in the vanilla and that beautiful creamy peanut butter. When you’re done, this mixture should look cohesive and airy, not dense or greasy. That air you just worked in is what helps the final cookie spread just the right amount.
Combining Dry Ingredients and Forming the Peanut Butter Cookies Dough
While the mixer is running on low—and I mean low here—we start adding the dry stuff. Remember that flour, baking soda, powder, and salt that you whisked together in a separate bowl? We add that gradually. Do this in thirds, mixing only until you see the last streak of flour disappear. This is the moment where you decide if your cookies stay soft or get tough! Overmixing develops gluten, and gluten means tough cookies. Stop the second it comes together. You want a soft, slightly sticky dough ball when you’re done. If it seems too sticky to handle, that’s when you put it in the fridge for those 30 minutes we talked about earlier.
Creating the Crisscross Pattern on Your Peanut Butter Cookies
Now for the iconic look! Scooping your dough into balls makes portioning easy. Place them on your parchment-lined sheets, leaving plenty of space because they will spread a bit. Now, grab a fork. This is the key to classic Crisscross Peanut Butter Cookies. Push down on the first cookie slightly, just enough to flatten it a bit—maybe halfway down. Then, rotate your fork 90 degrees and press again. That perfect crisscross pattern not only looks amazing but also helps the cookie bake more evenly since it thins out the center a little more than the edges.
Baking and Cooling Your Homemade Peanut Butter Cookies
This is the most nerve-wracking part, right? You want them golden, but you don’t want them hard! We’re aiming for that sweet spot where the edges look set, but the very center still looks a tad soft, maybe even a little underdone. I set my timer for 10 minutes, but you watch them like a hawk after that. Every oven is different, so keep an eye on the edges turning that beautiful light golden brown color.
Crucial Cooling Time for Chewy Peanut Butter Cookies
Once they hit that perfect moment and come out of the 350-degree heat, DO NOT touch them immediately! This is non-negotiable for chewy peanut butter cookies. They need about five full minutes resting right there on that hot baking sheet. This is called carryover cooking, and it lets the structure settle without falling apart. If you try to move them now, they’ll probably just crumble into a delicious mess. After those five minutes, slide a spatula underneath them gently and move them over to a wire rack to cool completely. They firm up beautifully as they cool down on the rack!
Baking and Cooling Your Homemade Peanut Butter Cookies
This is the most nerve-wracking part, right? You want them golden, but you don’t want them hard! We’re aiming for that sweet spot where the edges look set, but the very center still looks a tad soft, maybe even a little underdone. I set my timer for 10 minutes, but you watch them like a hawk after that because every oven is different, so keep an eye on the edges turning that beautiful light golden brown color. This timing is everything for achieving those amazing, soft and chewy peanut butter cookies!
If you’re planning ahead, I have a whole post about simple cookie baking techniques that might help you manage oven temperatures more reliably!
Crucial Cooling Time for Chewy Peanut Butter Cookies
Once they hit that perfect moment and come out of the 350-degree heat, DO NOT touch them immediately! This is non-negotiable. They need about five full minutes resting right there on that hot baking sheet. This is called carryover cooking, and it lets the structure settle without falling apart. If you try to move them now, they’ll probably just crumble into a delicious mess, and nobody wants that! After those five minutes, slide a spatula underneath them gently and move them over to a wire rack to cool completely. They firm up beautifully as they cool down on the rack, getting that perfect structure we aim for.
Tips for Next-Level Peanut Butter Cookies Success
We’ve made the perfect batch of peanut butter cookies, but let’s be real, once you master the base recipe, you want to start tweaking it, right? I always have little notes scribbled on my recipe card for when I feel like achieving a slight variation. These small adjustments make a massive difference in texture and flavor profile without messing up the core cookie structure we worked so hard to achieve!
If you’re looking for ways to deepen your baking game overall, check out my guide to baking peanut butter treats. It’s full of fun inspiration!
Here are the little secrets I use to elevate these already fantastic peanut butter cookies:
- For Maximum Thickness: I mentioned this earlier, but it bears repeating because it is a game-changer for achieving bakery-style thickness: chill your dough! Roll those balls into uniform spheres, place them on the tray, and pop them in the fridge for at least 30 minutes before you even think about turning on the oven. They won’t spread as much, keeping that beautiful, thick dome shape.
- Playing with Salt: The recipe calls for salt, which balances the sweetness perfectly. But if your peanut butter is already salted, you might want to dial that back just a pinch in the dry mix. If you use unsalted butter, don’t be shy—add just a tiny extra pinch of flaky salt right before baking to really make that peanut flavor pop.
- Crispy Edges vs. Chewy Centers: Since we bake these slightly underdone for chewiness, you can easily control your ending texture. If you want those slightly crisp edges that give a great contrast, just leave them in the oven for one or two extra minutes. Watch them closely, though! The second they look uniformly golden, pull them out, or you’ll lose that soft middle.
It’s all about paying attention to those subtle cues your dough gives you. Enjoy experimenting with these personal tweaks!
Storage and Keeping Peanut Butter Cookies Fresh
Keeping these beauties fresh is the final hurdle, but it’s easy! You want to maintain that just-baked, chewy texture, right? Don’t leave them out exposed to the air, or they’ll dry out fast. Store the completely cooled cookies in an airtight container at room temperature. I like to put a small slice of sandwich bread in the container with them—it sounds silly, but the bread releases moisture and keeps the cookies delightfully soft for days! They are best enjoyed within four days, though honestly, they never last that long around here.
Frequently Asked Questions About Perfect Peanut Butter Cookies
Look, I know everyone is looking for a speedy solution, and while there are definitely quick cookie recipes out there, I want you to get the absolute best results possible when you bake my recipe for peanut butter cookies! So, I’ve rounded up the questions I get asked the most about achieving that perfect soft and chewy texture.
If you’ve got other pressing questions, feel free to poke around my other easy peanut butter cookies post, or just drop a comment below!
Can I make these 3 Ingredient Peanut Butter Cookies?
Ah, the famous three-ingredient wonders! Those are great in a pinch, sure. But honestly, those usually rely on just peanut butter, sugar, and egg, and they tend to be a lot cakier or sometimes overly dense and crumbly. What’s great about making these classic peanut butter cookies is that the combination of butter, both sugars, and the leavening agents (baking soda and powder) gives you that superior structure. You need that richness from the butter for a melt-in-your-mouth experience, which the simple versions just can’t deliver reliably. Stick with this recipe for the best payoff!
How do I get No Chill Peanut Butter Cookies quickly?
I totally get if you need homemade cookies *right now*! If you absolutely can’t wait the 30 minutes for the dough to chill to get those extra-thick peanut butter cookies, you can totally bake them straight away. Just know this: you will sacrifice some of that thickness. The dough will spread a little more in the oven. To compensate slightly, make sure your scoops are nice and tight, and maybe flatten them a tiny bit less aggressively with the fork. You might end up with a slightly thinner, maybe just a tad crispier-edged cookie, but it will still be delicious! It’s a great trade-off if time is your main concern.
Estimated Nutrition Facts for These Peanut Butter Cookies
Because sometimes you just need to know what you’re diving into! When I bake these, I’m not really worried about counting calories—it’s comfort food, after all—but I do like to keep track of the major items just for balance. These homemade cookies are rich, sweet, and they certainly pack a punch because we use real butter and a good amount of peanut butter, which is where most of that flavor and fat comes from!
I used a standard nutritional calculator based on the ingredients list above to figure out the averages. Please remember, these are just good estimates! If you use a different brand of peanut butter or swap out the sugars, these numbers will shift a bit. This information is based on a serving size of one standard cookie (Yield: 24 cookies).
- Serving Size: 1 cookie
- Calories: 195
- Sugar: 14g
- Fat: 11g (Includes 5g saturated fat)
- Carbohydrates: 23g
- Protein: 4g
- Sodium: 110mg
- Cholesterol: 30mg
See? A nice little burst of energy without being overly heavy! That protein from the peanut butter helps keep you satisfied longer. These are definitely meant to be enjoyed with a big glass of cold milk, so factor that liquid in, okay?
Share Your Favorite Peanut Butter Cookie Creations
Well, that’s it! You’ve got the recipe, and now you have the power to make the best, softest, most comforting batch of peanut butter cookies on the block. I truly hope you love these as much as my own family does. They are my go-to for bake sales, school events, and just general Tuesday afternoon happiness.
When you get them out of the oven, I really want to know how they turned out! Did you try chilling the dough for maximum thickness? Did you add a pinch of extra salt? Tell me everything in the comments below! Leave your star rating so other folks know how amazing these are going to be when they try them.
If you snap a picture of your beautiful crisscross creations, please tag me on social media—I love seeing everyone’s successful bakes! Seriously, sharing baking joy is the best part of this whole process. If you have any final questions or need help troubleshooting, you can always reach out through my contact page.
Happy Baking, friend! Enjoy every single scrumptious, chewy bite!
PrintThe Ultimate Soft and Chewy Peanut Butter Cookies

Make classic, thick peanut butter cookies with a soft, chewy center and the traditional crisscross pattern. This recipe is simple and yields bakery-style results.
- Prep Time: 15 min
- Cook Time: 12 min
- Total Time: 27 min
- Yield: 24 cookies
- Category: Dessert
- Method: Baking
- Cuisine: American
- Diet: Vegetarian
Ingredients
- 1 cup (2 sticks) unsalted butter, softened
- 1 cup packed light brown sugar
- 1/2 cup granulated sugar
- 2 large eggs
- 1 teaspoon vanilla extract
- 1 cup creamy peanut butter
- 2 1/2 cups all-purpose flour
- 1 teaspoon baking soda
- 1/2 teaspoon baking powder
- 1/2 teaspoon salt
Instructions
- Preheat your oven to 350 degrees F (175 degrees C). Line baking sheets with parchment paper.
- In a large bowl, cream together the softened butter, brown sugar, and granulated sugar until the mixture is light and fluffy.
- Beat in the eggs one at a time, then mix in the vanilla extract and peanut butter until fully combined.
- In a separate medium bowl, whisk together the flour, baking soda, baking powder, and salt.
- Gradually add the dry ingredients to the wet ingredients, mixing on low speed until just combined. Do not overmix.
- Scoop rounded tablespoons of dough and roll them into balls. Place them 2 inches apart on the prepared baking sheets.
- Use a fork to press down on each cookie ball, creating a crisscross pattern. Press once in one direction, then rotate the fork 90 degrees and press again.
- Bake for 10 to 12 minutes, or until the edges are lightly golden but the centers still look slightly soft.
- Let the cookies cool on the baking sheet for 5 minutes before transferring them to a wire rack to cool completely.
Notes
- For thicker cookies, chill the dough for 30 minutes before rolling and baking.
- For a saltier flavor, use salted butter or add an extra pinch of salt to the dry ingredients.
- If you prefer a crispier edge, bake for 1 to 2 minutes longer.
Nutrition
- Serving Size: 1 cookie
- Calories: 195
- Sugar: 14
- Sodium: 110
- Fat: 11
- Saturated Fat: 5
- Unsaturated Fat: 6
- Trans Fat: 0
- Carbohydrates: 23
- Fiber: 1
- Protein: 4
- Cholesterol: 30