

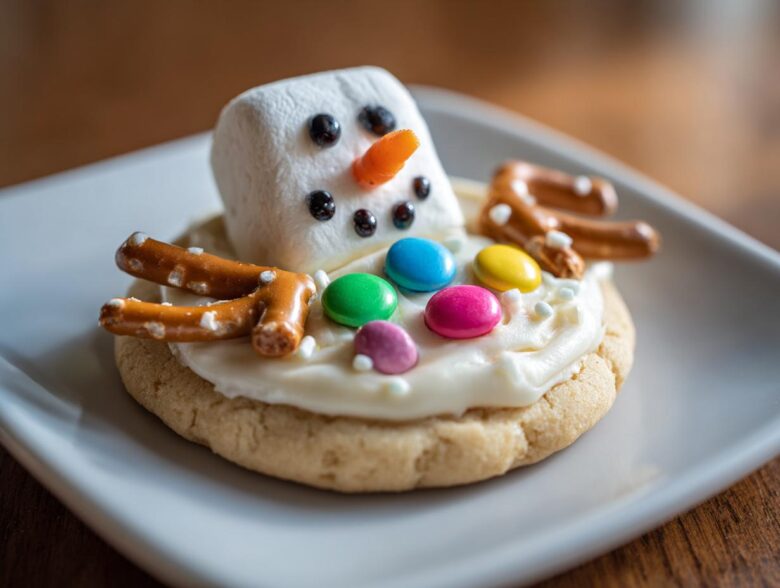
Oh my goodness, you know how much joy the holidays bring, and for me, that always means finding the easiest, cutest treats to make with the kids! We skip the complicated stuff most years because honestly, who has time for 15 steps when there are lights to hang? The absolute best discovery I made last winter was how simple it is to pull off these adorable melted snowman cookies. Seriously, they look like you spent hours fussing over them, but they are pure magic that comes together fast. If you need a fun holiday baking adventure that guarantees giggles and minimal mess, this sugar cookie base recipe is your new best friend. Trust me on this one—let’s get baking!
If you’re new around here, you can read a little bit more about what we get up to behind the scenes in our kitchen. But right now, let’s focus on turning simple dough into these whimsical holiday cookies!
Why You Will Love These Melted Snowman Cookies
Honestly, why wouldn’t you love these? They hit that sweet spot between festive and totally simple. I swear, every time I make these, people ask if I spent hours on them, and I just smile because the secret is how easy they are!
- They are fantastic for kid friendly christmas treats because the decorating is so forgiving—no perfect circles needed here!
- The entire process, from dough to assembled cookie (before chilling), is super quick, making them perfect for last-minute holiday baking ideas.
- We use a simple sugar cookie base, meaning you probably have everything on hand already. No obscure ingredients required!
- The visual payoff is huge! They are genuinely the cutest, most whimsical holiday cookies you’ll bring to any party.
- This recipe is prime fun holiday baking; the kids get to really take ownership of dressing up their little marshmallow heads.
- Since the base dough chills quickly, you can bake these even on the busiest of winter afternoons.
These little guys are just pure, uncomplicated holiday cheer baked onto a cookie. You can’t beat that!
Essential Ingredients for Your Melted Snowman Cookies
Okay, now for the fun part—gathering our supplies! The beauty of these easy winter cookies is that we aren’t reaching for specialty items. It’s all pantry staples, plus the key decorative bits that make the snowman come to life. I’ve broken it down so you can do a quick inventory before you start mixing. Remember, these are meant to be simple, so don’t stress if you need to swap out one sprinkle color for another!
For the Sugar Cookie Base
We need a dough that holds its round shape nicely when baked, so grabbing the right dairy is important here. We aren’t relying on a special no chill sugar cookie recipe because a little rest in the fridge makes these cutouts perfect, but the actual mixing is super fast!
- 1 cup unsalted butter, softened (Make sure it’s actually soft, not melty!)
- 1 cup granulated sugar
- 1 large egg
- 1 teaspoon vanilla extract
- 2 3/4 cups all-purpose flour
- 1 teaspoon baking powder
- 1/2 teaspoon salt
For the Simple Icing and Decorations
This is where the ‘melted’ magic happens! You want these decorative items handy on your counter while the cookies cool down. You are going to need specific items to build your snowman’s little body shape.
- 1/2 cup powdered sugar (for that thin icing layer)
- 2 tablespoons milk or water (enough to make a drizzle consistency)
- Assorted small candies (for buttons and that fun scarf look)
- 12 large marshmallows (these are the snowman heads, don’t skimp!)
- 12 small pretzel twists (our perfect little stick arms)
- Black decorating gel or tiny black candies (for the eyes, gotta give him a gaze!)
Step-by-Step Guide to Making Melted Snowman Cookies
Don’t let the steps scare you; this is mostly hands-off time once the dough is mixed! We want to make sure the base bakes up flat enough to look like a delicious puddle of melted snow. When you see the total time, remember that chilling time isn’t active, so you can sip cocoa while you wait. This recipe is faster than trying to find the perfect no chill sugar cookie recipe that actually tastes good!
Preparing and Baking the Cookie Base
First up, we creaming! In your biggest bowl, beat that softened butter with the granulated sugar until it looks fluffy—like pale cloud fluff. Then, add your egg and vanilla and mix just until they disappear. In a separate bowl, quickly whisk your flour, baking powder, and salt together. Now, add those dry ingredients slowly to your wet mixture until you just barely have a dough. Stop mixing the second it looks combined! Wrap that dough up tight and pop it in the fridge for at least 30 minutes. It needs that chill to hold its shape. Preheat your oven to 350°F (175°C) and line a couple of baking sheets.
When it’s chilled, roll the dough out on a floured surface until it’s about 1/4 inch thick—not too thin, not too thick! Use a 3-inch circle cutter and set them on parchment-lined sheets. Bake these beauties for 8 to 10 minutes. The edges should just be turning a faint gold. Let them hang out on the hot pan for five minutes before you move them to a cooling rack. They have to be completely cool before we decorate, otherwise, we’ll have a total mess!
Assembling Your Melted Snowman Cookie Decoration
While those cookies are cooling down, take your powdered sugar and milk and whisk up a quick, simple icing. It should be thin enough to spread easily like glaze, but thick enough that it stays put. Once the cookies are chilly, spread a thin layer of icing over the whole top surface—this is your puddle! Don’t worry about being perfect; remember, it’s melted!
Now for the fun! Place one large marshmallow right near the top center of the icing to be the head. Then, take two pretzel twists and stick them into the sides of the cookie dough, letting them poke out like floppy arms. Use your tiny candies or black gel to give the marshmallow a face—two little eyes—and then decorate the icing ‘puddle’ area with sprinkles or small candies to look like a scarf and buttons. That’s it! Just let that icing set up for about 20 minutes, and you’re done!
Tips for Perfect Melted Snowman Cookies Decoration
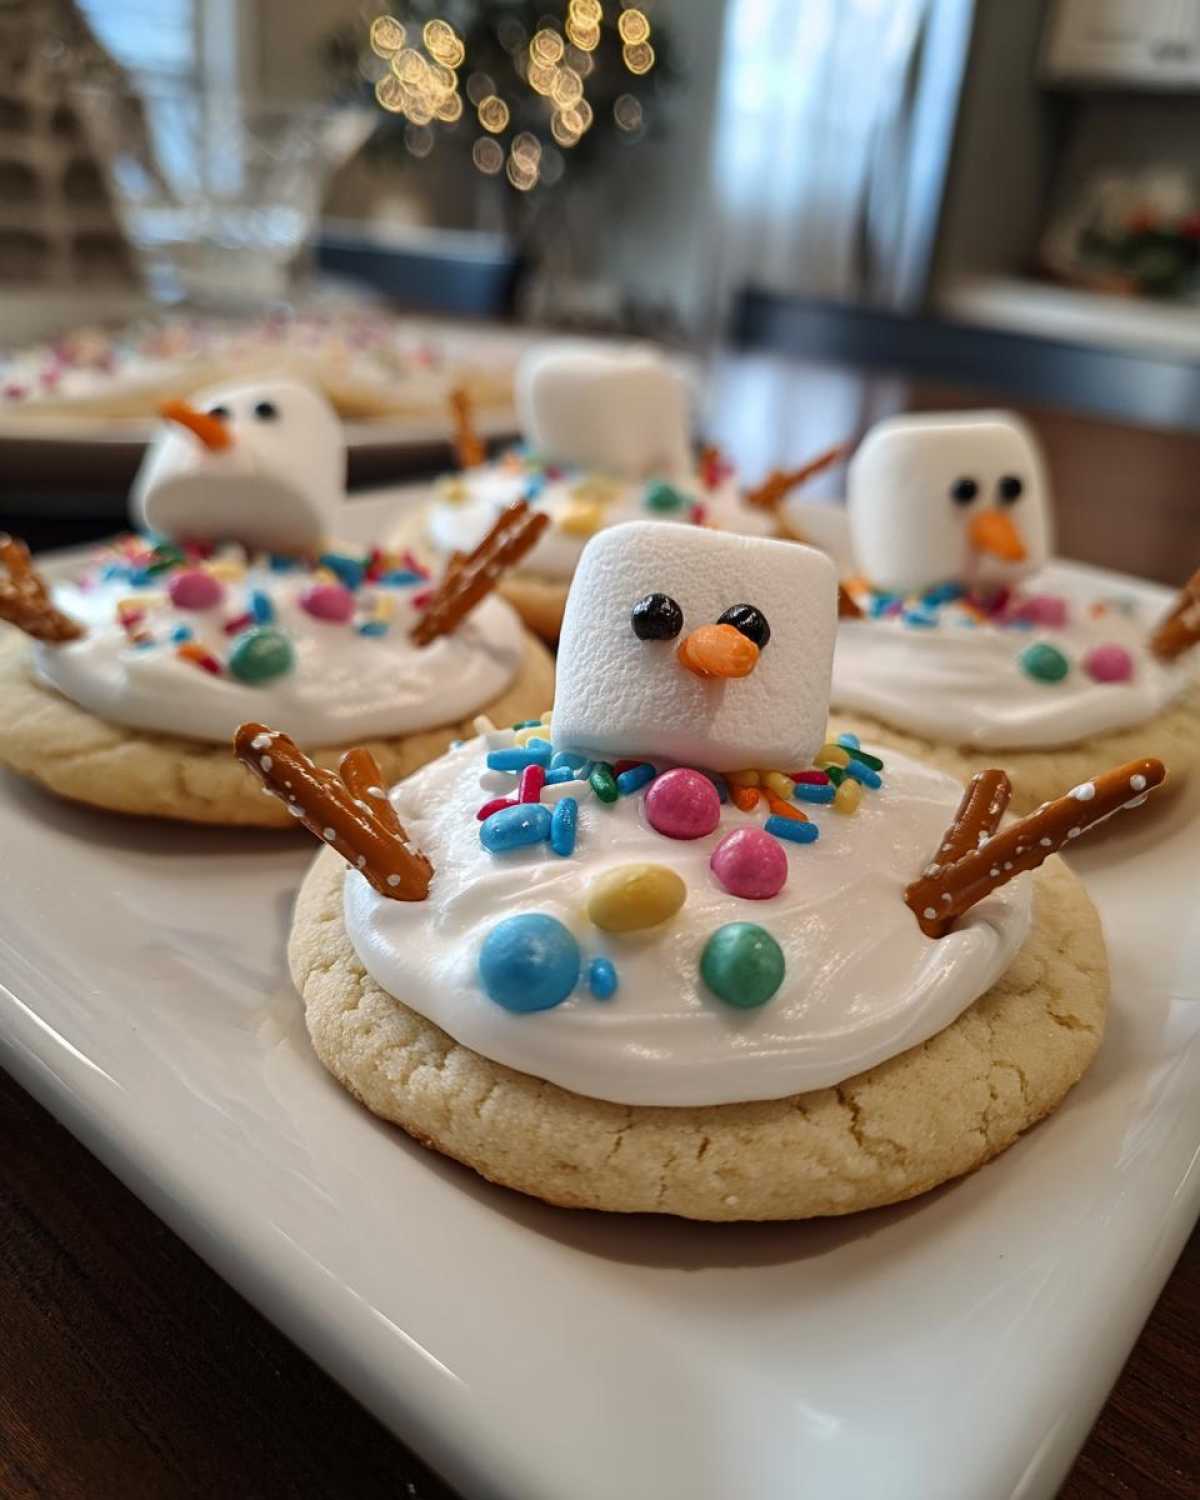
The baking is done, but the real artistry comes now! Achieving that perfectly adorable, slightly sad-looking melted snowman look is all in the details of your snowman cookie decorating. Since these are meant to be cute Christmas cookies, a little intentional messiness actually helps sell the whole melted vibe, but you still want them to look intentional, right?
The first thing to watch is your icing consistency. If it’s too thick, it won’t flow nicely to look like it’s spreading out on the counter. If it’s too thin, those tiny candies will sink right to the bottom before it sets. You want that sweet spot where it spreads easily when you tip the cookie, but it still holds the shape of the marshmallow head up high. I like to add just the milk or water one drop at a time until I can drizzle a ribbon across the top that sinks back into itself in about 10 seconds.
When you place your marshmallow head—which is essential for the look—make sure you press it gently into the *wet* icing layer. If you wait until the icing is tacky, it won’t stick well, and that poor snowman head will slide off in transit to the party!
For the pretzel arms, think about giving them a slight curve or angle rather than sticking them straight out. It makes them look more natural, like they’re sinking into the dough. And here’s a great little trick I always use, which I pulled right from my list of helpful notes: If you are worried your marshmallow heads might pop off when you stack them or carry them around, grab a tiny bit of leftover melted chocolate chips—even just a dot on the bottom of the marshmallow before you place it on the icing—will act like permanent glue. This little extra step ensures your cute Christmas cookies arrive looking perfect!
Finally, scatter your sprinkles for the scarf and buttons before the icing fully sets. If you wait too long, they just sit right on top and look loose. Pressing them in just a little bit makes them look like they are settling into the melting pile!
Ingredient Notes and Substitution Options for Melted Snowman Cookies
I always get asked about substitutions, and honestly, that’s the best part of making simple holiday baking for kids—you use what you have! If you are out of something, don’t throw in the towel; we can save these cute Christmas cookies.
Let’s talk about the base first. The recipe calls for a quick chill, but I know sometimes you need these done *now*. If you’re desperate and skip the thirty minutes in the fridge, you *might* get a slightly puffier cookie, but it usually still works out okay for this design since we are covering the whole thing with icing anyway! It certainly won’t be as crisp as a true no chill sugar cookie recipe, but it’s okay for a cute food craft.
What about those pretzel arms? They provide such a great salty contrast to all the sugar, but if you have a pretzel allergy or just don’t have any on hand, try cutting thin strips of licorice lace or even using small, slightly curved slivers of brown frosting piped on before it dries. They won’t look as much like sticks, but they’ll serve the same purpose structurally.
And for the cookie base itself? While this recipe is perfect, you absolutely could adapt this design for a best peanut butter snowman cookies base if that’s what your family loves! The trick is just making sure you use a dough that doesn’t spread wildly when it bakes. Too much spread, and your round cookie turns into a flat oval, which isn’t a great ‘puddle’ when you go to decorate.
Instead of white icing, some folks like to use a thinned-out batch of royal icing; it dries rock-hard. But honestly, for simple holiday baking, powdered sugar icing dries just tacky enough to hold those marshmallow heads on, and it’s much easier for little hands to manage. If you’re using chocolate icing for the puddle, you’ll need to make sure you go lighter on any dark sprinkle accents so the colors don’t get muddy. It’s all about what looks fun to you!
Storage and Reheating Instructions for Your Festive Dessert Ideas
So, you’ve made these incredible, goofy, adorable melted snowman cookies, and now you need to keep them safe until the big party! The good news is, since these aren’t overly ornate, they are actually pretty easy to store. The biggest enemy here is sticky air and the marshmallow head getting dried out or falling off.
First thing: You absolutely must let the icing cure! Don’t stack your cookies until that final layer of powdered sugar icing is completely dry to the touch. If you try to stack them while the icing is even slightly tacky, you’ll end up with ugly smudges all over the faces of your snowmen, and nobody wants a half-melted, smudged friend.
The best way to store the fully decorated cookies is in an airtight container, but here’s the crucial trick: Layer them with wax paper or parchment between each cookie. This stops the decorations from rubbing off and keeps the pretzels from getting soft if any humidity gets in. You can usually keep these perfectly fine at room temperature for about three to four days. Keep them away from direct sunlight or heat sources, just to be safe!
Now, can you freeze them? Yes, you totally can, but I only recommend freezing the plain, baked, undecorated cookie base. They freeze beautifully! Once the cookie circles are cooled completely, stack them with parchment in between and pop them into a freezer bag. They’ll be good for up to three months that way.
If you choose to freeze the already decorated ones (like that decadent pile of fun holiday baking perfection you just made), just use the parchment paper layering like I mentioned, but know that the pretzels might soften slightly once they thaw back to room temperature. If you freeze them decorated, thaw them very slowly overnight in the refrigerator before bringing them out to room temp for an hour to finish setting up. Reheating isn’t really a thing with cookies like this, we just want them room temperature and stable!
Frequently Asked Questions About Melted Snowman Cookies
When I share these melted snowman cookies with friends, I always get the same few questions! It’s completely normal; everyone wants to make sure their batch of festive dessert ideas comes out just right. Here are a few things I hear most often when people are trying this recipe for the first time. Don’t hesitate to drop your own questions in the comments down below; I love chatting about fun holiday baking!
Can I use store-bought dough for these melted snowman cookies?
Absolutely! Seriously, if you are short on time or just feeling less patient, pre-made sugar cookie dough works perfectly well here. The only thing you need to watch for is the thickness when you roll it out. Since we need a nice sturdy base for the marshmallow head and pretzel arms, make sure you roll that store-bought dough to at least 1/4 inch thick. If it’s too thin, the cookie might bake up too crisp, and it won’t look as naturally ‘melted’ when you go to decorate it.
What makes these great easy winter cookies?
These really shine as easy winter cookies because the decoration element is so forgiving! You don’t have to spend time piping fine details onto faces or careful lines of snow. You are literally taking a cookie, melting a ‘puddle’ of icing on top, and plopping a marshmallow head down. The messier the icing, the better it looks like it truly melted! Plus, the ingredients are simple pantry staples, cutting down on your shopping list drama. They are designed for maximum fun with minimal fuss, which is usually my motto for holiday baking!
Another reason they are great for little helpers is that you can separate the tasks. Kids can focus solely on pressing the pretzel arms into the icing (a fantastic sensory exercise!) while adults handle the initial dough rolling. This makes them perfect for large batches where everyone wants to pitch in.
Estimated Nutritional Data for Melted Snowman Cookies
Now, listen, I know that when you are looking at these adorable, whimsical holiday cookies, you probably aren’t thinking about the macros, right? Me neither! We make these for the smiles, not the skinny jeans. But because I like to be thorough—and you deserve to know what glorious treat you are making—here is the estimated nutritional breakdown for one single cookie based on my recipe.
Keep in mind that these figures are just estimates, truly! If you use a lighter store-bought dough or decide to swap out the pretzel arms for something else, these numbers will shift a little bit. We’re baking for love here, not for a science lab, but it gives you a good idea!
- Serving Size: 1 cookie
- Calories: 180
- Sugar: 18g (Yep, that’s the fun part!)
- Sodium: 110mg
- Fat: 9g
- Saturated Fat: 5g
- Carbohydrates: 24g
- Protein: 2g
See? Totally manageable for a holiday indulgence! These are certainly much nicer than grabbing those highly processed store-bought cookies, and you know exactly what went into the dough. Enjoy them guilt-free! If you are looking for other treats that sneak in some goodness while still being fun, check out my tips for double chocolate zucchini bread another time!
Share Your Whimsical Holiday Cookies Creations
Okay, my friend, now it’s your turn! I’ve given you all my secrets for pulling off the easiest, cutest melted snowman cookies, and I am dying to see what you come up with. Honestly, decorating these is half the fun, and I get inspired every time I see how differently everyone makes their snowmen ‘melt’!
If you loved this recipe and you think it deserves a spot on your rotation for Christmas cookie recipes this year, please do me a huge favor and click those five stars right below this section! It really helps other bakers find these fun, simple holiday baking ideas.
And seriously, if you make a batch, take a photo! Snap a picture of your perfectly melted puddle and the little marshmallow heads, and tag me on social media. I want to see your pretzel arm styles and the sprinkles you used for their scarves! You can always share your successes (and funny mishaps!) over on the main blog page right here. Let’s spread some whimsical holiday cheer together!
PrintEasy Melted Snowman Sugar Cookies

Make these cute and simple melted snowman sugar cookies for a fun holiday baking activity. They use basic ingredients and are easy for kids to decorate.
- Prep Time: 25 min
- Cook Time: 10 min
- Total Time: 65 min
- Yield: 24 cookies
- Category: Dessert
- Method: Baking
- Cuisine: American
- Diet: Vegetarian
Ingredients
- 1 cup unsalted butter, softened
- 1 cup granulated sugar
- 1 large egg
- 1 teaspoon vanilla extract
- 2 3/4 cups all-purpose flour
- 1 teaspoon baking powder
- 1/2 teaspoon salt
- 1/2 cup powdered sugar (for icing)
- 2 tablespoons milk or water (for icing)
- Assorted small candies (e.g., mini M&Ms, sprinkles for scarf/buttons)
- 12 large marshmallows (for snowman heads)
- 12 small pretzel twists (for arms)
- Black decorating gel or small black candies (for eyes)
Instructions
- In a large bowl, cream together the softened butter and granulated sugar until light and fluffy.
- Beat in the egg and vanilla extract until combined.
- In a separate bowl, whisk together the flour, baking powder, and salt.
- Gradually add the dry ingredients to the wet ingredients, mixing until just combined to form a dough. Do not overmix.
- Wrap the dough in plastic wrap and chill in the refrigerator for at least 30 minutes.
- Preheat your oven to 350°F (175°C). Line baking sheets with parchment paper.
- Roll the chilled dough out on a lightly floured surface to about 1/4 inch thickness.
- Use a round cookie cutter (about 3 inches) to cut out circles. Place them on the prepared baking sheets.
- Bake for 8 to 10 minutes, or until the edges are lightly golden. Let the cookies cool on the baking sheet for 5 minutes before transferring them to a wire rack to cool completely.
- While cookies cool, prepare the simple icing by whisking the powdered sugar and milk/water until smooth.
- To assemble, spread a thin layer of icing over the top of each cooled cookie, creating the ‘melted puddle.’
- Place one large marshmallow near the top center of the icing to serve as the head.
- Use the pretzel twists to create two ‘arms’ sticking out from the sides of the melted body.
- Decorate the marshmallow head with eyes using black gel or small candies.
- Use small candies or sprinkles to create a scarf and buttons on the melted body area. Let the icing set before serving.
Notes
- For a quicker version, you can use store-bought sugar cookie dough instead of making it from scratch.
- If you want a firmer ‘melted’ look, use royal icing instead of simple powdered sugar icing.
- You can use melted chocolate chips to attach the marshmallow head if you need extra hold.
Nutrition
- Serving Size: 1 cookie
- Calories: 180
- Sugar: 18g
- Sodium: 110mg
- Fat: 9g
- Saturated Fat: 5g
- Unsaturated Fat: 4g
- Trans Fat: 0g
- Carbohydrates: 24g
- Fiber: 0g
- Protein: 2g
- Cholesterol: 30mg