

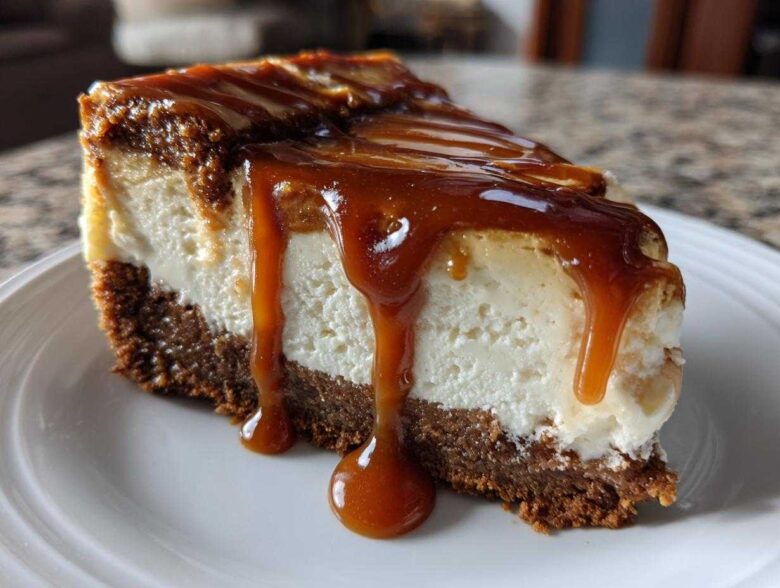
When I want a truly decadent dessert, something that makes people stop talking when the plate hits the table, I always go for cheesecake. But forget those fussy, temperamental recipes that crack the second they see daylight! I’m here to share my absolute favorite: the salted caramel cheesecake that actually works, even for beginners. If you love rich textures, you should also check out my amazing brownie bottom cheesecake recipe for another showstopper!
This isn’t just any cheesecake; we’re pairing that rich, tangy filling with a buttery, crunchy Biscoff cookie crust. It’s the perfect sweet and salty combination, wrapped up in one beautiful baked package. Seriously, the Biscoff crust changes everything. I spent way too many holidays accidentally turning my cheesecake tops into cracked, sad landscapes, but I finally mastered the water bath technique. Trust me, learning how to set that pan correctly is the secret charm for keeping this top perfectly smooth. You won’t believe how easy this impressive dessert is!
Why This is the Best Salted Caramel Cheesecake Recipe
I know, I know, baked cheesecakes sound intimidating. But this recipe truly delivers on its promise of being delightfully easy while still looking like you spent days fussing over it. When you’re looking for that amazing, rich dessert that just sings with flavor, this is the one to choose. It’s just pure magic!
Here is exactly why I keep making this over and over again:
- Seriously Creamy Texture: We use the classic combination of full-fat cream cheese and a touch of sour cream. It bakes up incredibly smooth, giving you that melt-in-your-mouth finish every single time.
- That Incredible Crust: Forget boring graham crackers! The buttery crunch of the Biscoff crust is the perfect counterpoint to the sweet filling. It’s a total flavor upgrade you didn’t know you needed.
- The Caramel Center: We fold half of our amazing homemade salted caramel topping recipe right into the batter. This builds deep pools of flavor throughout the entire slice.
- It’s Surprisingly Forgiving: Even though it’s baked, the water bath technique I share later locks in moisture, meaning you get a crack-free, beautiful top without all the stress.
If you’ve ever wanted to nail that perfect sweet and salty treat, this recipe is your ticket. It’s my go-to for parties!
Ingredients for Your Creamy Baked Salted Caramel Cheesecake
Alright, let’s talk about what makes this salted caramel cheesecake so unbelievably rich and delicious! The trick here isn’t complicated ingredients; it’s about making sure everything is treated right before it hits the mixer. We are using a lot of cream cheese, naturally, to get that signature dreamy texture for our creamy baked cheesecake. You certainly need the best ingredients for the best result, especially when it comes to that luxurious caramel!
Remember that one cup of homemade salted caramel sauce we’re making? I made sure to portion it out for you. About half goes into the filling to swirl that salty-sweet goodness throughout, and the rest is saved for the glorious drizzle right before serving. If you want to check out how I make my go-to sauce, make sure you see my caramel topping recipe notes later on! Oh, and a super important point before you start: your cream cheese and your eggs absolutely must be at room temperature. If they are straight from the fridge, you’re going to end up with lumps, and nobody wants a lumpy salted caramel cheesecake!
For the Biscoff Crust
- 1 1/2 cups Biscoff cookie crumbs
- 1/4 cup granulated sugar
- 6 tablespoons unsalted butter, melted
For the Salted Caramel Cheesecake Filling
- 3 (8 ounce) packages cream cheese, softened (make sure they are super soft!)
- 1 1/2 cups granulated sugar
- 1 teaspoon vanilla extract
- 1/4 teaspoon salt
- 3 large eggs, room temperature is crucial here!
- 1/2 cup sour cream
- 1 cup homemade salted caramel sauce (you will use 1/2 cup here, and save the other 1/2 cup for topping)
Mastering the Homemade Salted Caramel Sauce (Caramel Topping Recipe)
Okay, this part is non-negotiable for a truly show-stopping salted caramel cheesecake: you simply must try making your own salted caramel sauce. Store-bought is fine in a pinch, but that homemade version? It adds such a depth of flavor that takes this whole dessert into the stratosphere. It turns this from just a good cheesecake into a truly decadent caramel dessert!
For this recipe, we’re splitting that cup of homemade goodness—half goes into the filling to protect against a plain cheesecake flavor, and the rest becomes our glorious drizzle. When I first started making this, my sauce would always turn grainy right before it was done, which is the absolute worst for a smooth topping. I finally learned the most critical trick for achieving that silky smooth caramel topping recipe consistency.
Here’s the secret I learned from watching my aunt struggle with this for years: if you see those sugar crystals starting to climb the sides of your saucepan, don’t panic and don’t stir aggressively! It means the sugar is starting to seize up. Take a clean pastry brush, dip it in plain water, and gently brush down the sides of the pan. That little bit of water dissolves the crystals clinging to the edge, pulling them back into the melted caramel mixture and saving your batch from crystallization. It sounds too simple, but trust me, it’s a game-changer for a perfect, pourable sauce!
You can find a few different ways to approach the base recipe, but I like keeping mine simple—just sugar, butter, cream, and a healthy sprinkle of flaky sea salt at the end. I bet you’ll love this version so much you’ll want to check out my peach butter recipe next, just for spreading on toast! Once you have that beautiful, thick, salty caramel ready, just be sure you let it cool down a bit before folding it into your cheesecake batter; we don’t want scrambled eggs!
Step-by-Step Instructions for the Easy Caramel Cheesecake
I know the word “baked” makes people nervous, but I promise you, once you see how straightforward this process is, you’re going to be making this creamy baked cheesecake every chance you get. We have a few important steps, especially that famous water bath, but I’ll walk you through it just like my mom taught me for making sure we get that perfect, even bake.
First things first: get your oven ready! Preheat it to 325°F (160°C). Then, grab that 9-inch springform pan. This is key for the water bath later, so listen up! You need heavy-duty aluminum foil—not the thin stuff! Wrap the outside of the pan very snugly, going all the way up the sides. This foil is our insurance policy against any rogue water seeping in while the cheesecake bakes with its little hot tub bath. If you need ideas on other fall spices, check out my pumpkin spice pancakes!
Preparing the Biscoff Crust and Pan
Time to make the Biscoff magic happen! Just combine your Biscoff crumbs, that tiny bit of extra sugar, and the melted butter right in your bowl. Mix it until it looks like wet sand. Then, press it firmly and evenly into the bottom of your foil-wrapped springform pan. You want a nice, solid base that won’t crumble when you cut into it later.
Pop that crust into the oven for just 10 minutes. This pre-bake sets the butter and keeps the crust crunchy. When it comes out, just let it cool down a touch while you assemble that gorgeous filling.
Mixing the Filling for a Smooth Salted Caramel Cheesecake
Okay, this is where the smoothness is made or broken, so pay attention! Start by beating your softened cream cheese until it’s fluffy and lump-free—just the cheese and the granulated sugar, vanilla, and salt. Scrape those sides down often. When that’s perfectly smooth, add those three eggs, but you must add them ONE AT A TIME, mixing only until the yolk disappears before adding the next one. Overmixing after the eggs go in is how you introduce too much air, which leads to cracks!
Finally, gently mix in the sour cream and that half-cup of prepared salted caramel sauce until it’s *just* blended. Pour that beautiful batter over your slightly cooled crust. Make sure that foil wrap is watertight before you move it!
Baking the Salted Caramel Cheesecake with a Water Bath
Now for the water bath, or *bain-marie*. Find a roasting pan that’s large enough to comfortably hold your springform pan inside it. Carefully set the cheesecake pan into the roasting pan. Now, slowly pour hot, boiling water into the roasting pan. You want the water to come about halfway up the sides of the cheesecake pan. This steam is what keeps the edges from setting too fast while the middle cooks gently.
Bake this beauty for 60 to 75 minutes. You know it’s done when the edges look set but the very center still wobbles slightly when you give the pan a gentle shake. Don’t wait until the center is firm, or it will be dry when it cools! The absolute hardest part comes next: turn off the oven, but DO NOT take the cheesecake out. Crack the oven door open just a tiny bit and let it sit in that gradually cooling environment for a full hour. Seriously, resist the urge to open the door! This slow cool-down prevents the dramatic temperature shock that causes cracking.
Tips for Achieving the Ultimate Creamy Baked Cheesecake Texture
Listen, I can give you the best salted caramel cheesecake recipe in the world, but if you skip the handshake rules of cheesecake baking, you might end up with a cracked mess. Trust me, I’ve been there! Getting that unbelievable, luxurious, almost pudding-like texture in a creamy baked cheesecake takes just a couple of extra minutes of mindfulness before you even turn on the mixer. It’s all about gentle handling.
If you want that perfect slice that holds together beautifully but melts on your tongue, you need to focus on temperature and mixing speed. Don’t run to open those oven doors early, and definitely don’t skimp on letting it cool slowly. These small actions make the difference between a good dessert and the best one you’ve ever made!
Here are my non-negotiable tips for guaranteed creaminess:
- Room Temperature is King: I mentioned it before, but I’ll yell it from the rooftops! Your cream cheese *must* be soft, and your eggs need to be brought out at least an hour beforehand. Cold cream cheese causes lumps, plain and simple. Lumps mean you overmix trying to beat them out, and overmixing adds air, which leads to cracks later. It’s a slippery slope!
- Eggs Last and Slow: When adding the eggs, mix extremely gently. When the yolks break, start the mixer on the lowest possible speed. You are mixing them in just enough so that they are incorporated—that’s it. You don’t want volume, you want density. And once you add the sour cream and the half-cup of caramel sauce, mix only until you stop seeing streaks. That’s the sign to stop!
- Respect the Water Bath: Seriously, don’t skip the hot water bath (the *bain-marie*). That steam creates a humid environment around the cheesecake, acting like a gentle slow cooker for the filling. This prevents the edges from drying out and cooking faster than the center, which is the #1 cause of sinking and cracking. It keeps everything evenly set and gorgeous.
- The Slow Cool-Down is Not Optional: I know waiting an hour with the oven door cracked open is torturous—it feels like forever when you want to eat! But removing that heat too quickly is a major shock to the delicate protein structure of the cheesecake. It causes immediate shrinkage and a massive crack right down the middle. That hour of inside-oven cooling is the necessary decompression time for your beautiful salted caramel cheesecake.
Follow these steps, and you’ll get that flawless top every time, making this recipe perfect for your next gathering. If you are looking for other rich recipes to try once you master this, you should definitely take a peek at my double chocolate zucchini bread for something wonderfully moist!
Chilling and Serving Your Salted Caramel Cheesecake
Okay, we’re almost there! You’ve baked it perfectly, you’ve let it cool slowly in the oven—pat yourself on the back! But here’s a hard truth: you absolutely cannot serve this salted caramel cheesecake straight out of the oven. I know the smell is intoxicating, and maybe you just want one tiny slice right now, but patience is the final secret ingredient here.
Cheesecake needs time to firm up properly. If you try to cut it warm, it turns into a puddle. We need that structure to hold up those gorgeous Biscoff crumbs and that thick filling. My rule of thumb? At least six hours chilling time in the refrigerator. Honestly, though, if you can manage it, leave it overnight. That extra time allows the flavors to truly meld together—the tang of the cream cheese softens just a bit, and the salted caramel permeates everything beautifully.
When you are ready to finally serve this masterpiece—maybe for some holiday cheesecake ideas or a dinner party—this is when we use that reserved caramel. You should have about a half-cup left over. Don’t put the sauce on hours before serving! If you do that, the moisture from the caramel will start to soften the top layer of the cheese, and you lose that lovely texture contrast.
Wait until the very last minute. Take the entire, chilled cheesecake out, carefully remove the springform ring, and then drizzle that remaining caramel sauce—the one you worked so hard on! I like to do pretty, messy abstract swirls all over the top. This gives you that incredible final pop of salty-sweetness right against the cool, creamy filling. It looks so professional, and nobody will guess how easy it was!
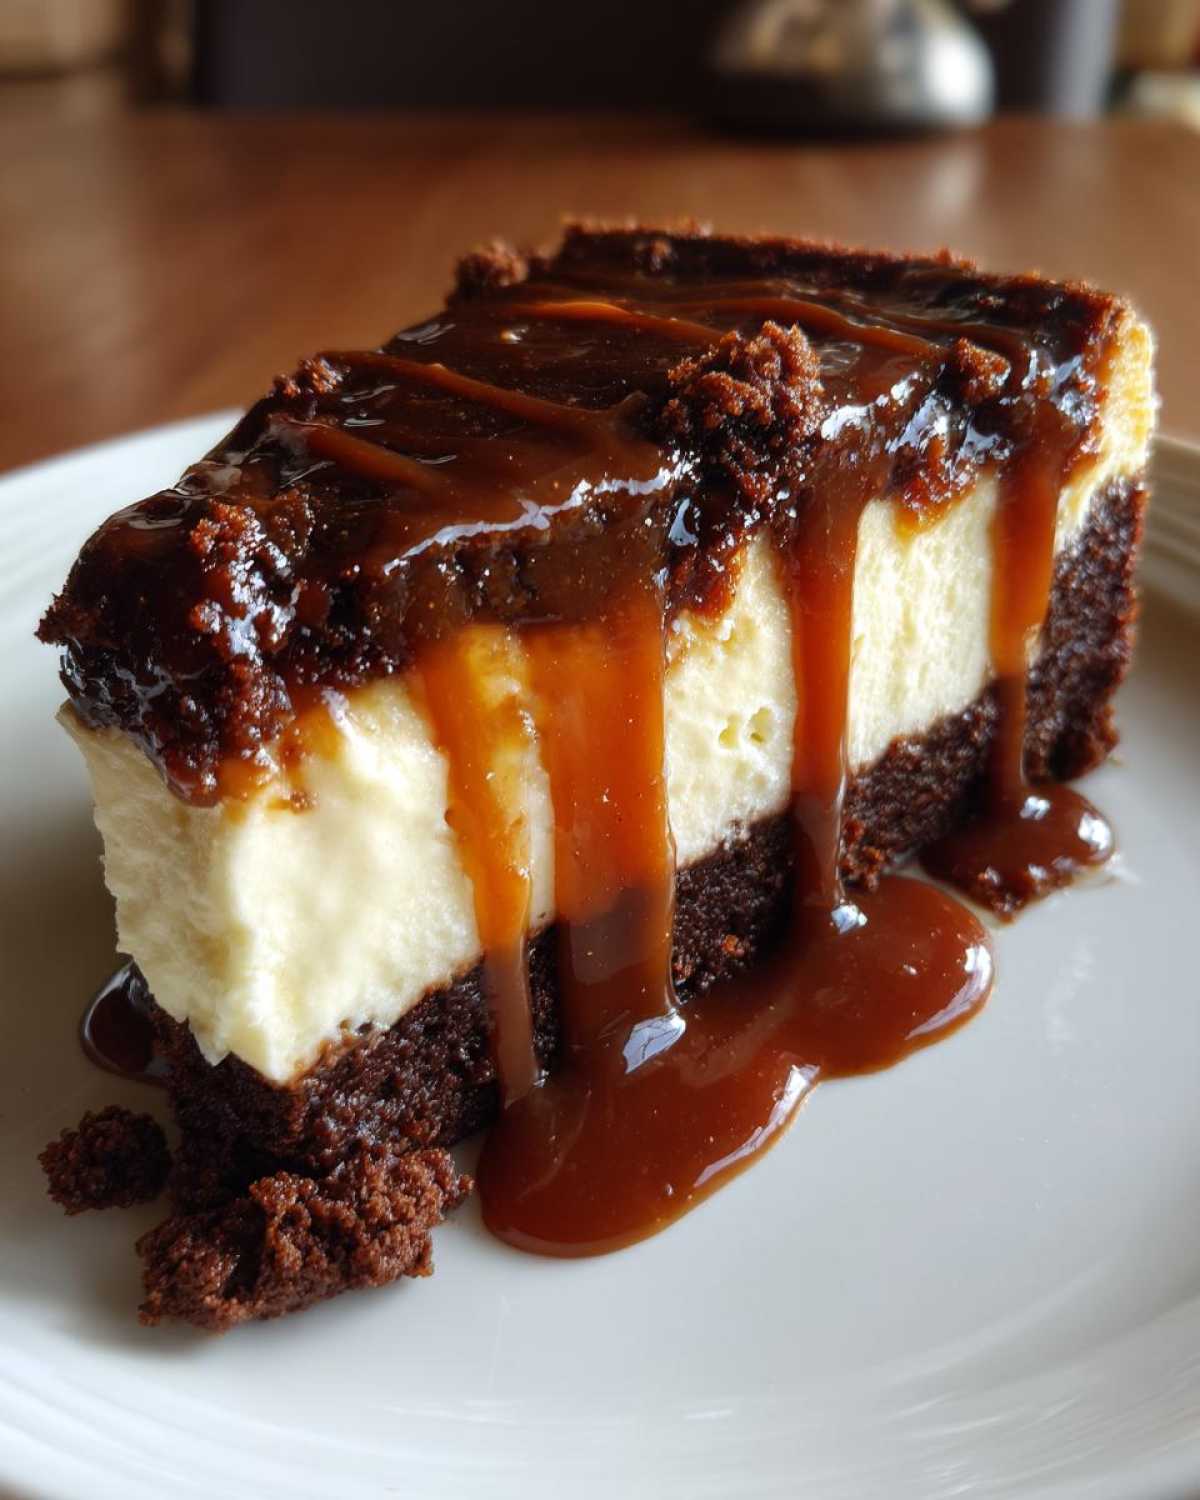
If you’re looking ahead for other desserts for a cooler evening, you absolutely have to try my apple cider donut muffins later this week. But for now, enjoy this perfect slice of cool, rich, salty-sweet bliss. You earned it!
Storage and Make-Ahead for Your Decadent Caramel Dessert
The best thing about this salted caramel cheesecake? It’s even better the next day! This makes it a dream come true when you’re planning for big events or trying out new holiday cheesecake ideas. You can absolutely make the entire thing the day before you plan to serve it. Just keep it chilled, covered tightly with plastic wrap (make sure the wrap doesn’t touch the caramel topping if you added it already!), and it will hold up like a champion.
If you’ve already drizzled that gorgeous, sticky caramel on top, just make sure the plastic wrap is tented loosely so it doesn’t mess up your beautiful swirl. Do not, I repeat, do not try to reheat this dessert! Cheesecake is meant to be served cold, straight from that long chill. If you have leftovers that you haven’t drizzled yet, they’ll stay perfect in the fridge for about four days. If you’re prepping way ahead, you can even freeze the plain, unfrosted cheesecake for up to a month! Just thaw it overnight in the fridge before bringing it to room temperature for a quick drizzle of that pumpkin spice tiramisu no-bake topping you might have made instead!
Frequently Asked Questions About Salted Caramel Cheesecake
I always get so many questions once people see this recipe pop up, especially when they’re planning for large gatherings or trying to figure out make-ahead options for their holiday cheesecake ideas. Cheesecake baking can feel tricky, so I’m happy to clear up any confusion about making this perfect salted caramel cheesecake!
Can I use a graham cracker crust instead of Biscoff?
Oh, absolutely! If you can’t find those glorious Biscoff cookies, or if you just prefer a more classic flavor, graham crackers work wonderfully. Just swap them out cup-for-cup! You’ll use the exact same measurements of sugar and melted butter. The texture will be slightly less spicy and crunchy, leaning more toward a classic texture, but it still results in a fantastic base for this creamy baked cheesecake. You might need to press the graham cracker mixture down just a tiny bit harder, but that’s the only real difference. It’s a great way to adapt this into one of your favorite classic cheesecake variations!
Can this be made as a no-bake salted caramel cheesecake?
That’s a great question, and while I adore a good no bake salted caramel cheesecake for speed, trying to convert this specific baked recipe usually doesn’t yield the exact same dreamy texture. Baked cheesecake relies on the eggs and slow cooking to set that dense, creamy body. If you skip the baking, you’d need to rely heavily on gelatin or stabilizers common in no-bake recipes, and honestly, it just changes the whole experience into something completely different. If you’re dead set on a no-bake version, I highly recommend looking up a dedicated recipe for that, because this particular one shines because it’s baked!
How do I store leftovers?
Storing leftovers is easy, provided you didn’t drown the entire thing in sauce before storing! If you’ve already drizzled that beautiful, sticky caramel on top, cover the entire chilled cheesecake lightly with plastic wrap—tent it so the wrap doesn’t stick to the topping. It keeps well in the fridge for about four days. If you haven’t topped it yet, cover it tightly, and it will last easily five days. This makes it an amazing choice when planning for the holidays!
What if my caramel topping is too thin or runny?
This happens sometimes, especially if you added the cream too quickly when making your base caramel topping recipe! Don’t worry—we can fix it! The best quick fix is to return the sauce to low heat with a tablespoon of extra granulated sugar mixed with a tiny pinch of cornstarch (mixed together first to prevent lumps). Let it simmer gently for just a minute or two, whisking constantly, until it thickens up. If it’s still too thin after that, just let it cool down on the counter for 20 minutes; it thickens significantly as it cools, which is perfect for drizzling over that cold cheesecake. It’s still going to be delicious, even if it flows a little faster! If you want a really savory angle, you could even try mixing in a dash of flakes from my copycat Panera broccoli cheddar soup seasoning next time for a wild salty kick!
Estimated Nutritional Value for This Salted Caramel Cheesecake Recipe
It’s important to know what you’re eating when you make something this incredibly rich, right? Because this is definitely one of those truly decadent caramel desserts we reserve for special occasions! I snapped up the numbers from my testing process, but please remember that my kitchen is rarely as scientifically precise as a lab!
My measurements come straight from using standard supermarket ingredients, so these figures might shift a bit depending on the exact brand of cream cheese or the amount of sea salt you sprinkle on your topping. For a full breakdown, you can always check out my main disclaimer page regarding nutritional estimations. But for a single, hefty slice of this glorious, sweet and salty treat, here’s what you can generally expect from this salted caramel cheesecake:
- Serving Size: 1 slice
- Calories: Roughly 450 (Wow, but worth it!)
- Fat: About 28g (That’s where all that wonderful creaminess comes from!)
- Saturated Fat: Around 17g
- Carbohydrates: Mostly 48g
- Sugar: You’re looking at about 45g of sugar combined from the rich filling and the caramel drizzle.
- Protein: Around 7g
- Sodium: Approximately 300mg (That’s the *salted* part balancing everything out!)
I try not to look too closely at the fat count because honestly, a slice of perfect, creamy baked cheesecake isn’t something you eat every day. It’s a celebration! Just aim to share this recipe with friends so you don’t have to eat the whole thing yourself!
Share Your Experience Making This Rich Dessert Recipe
Now that you have the secrets to my absolute favorite salted caramel cheesecake—the crack-free baking, the perfect Biscoff crust, and that luscious homemade caramel—I really, really want to hear from you!
Seriously, food is meant to be shared, and I learn so much from seeing how all of you adapt things in your own kitchens. Are you planning on serving this incredible rich dessert recipe for Thanksgiving or Christmas? I love seeing photos of this cheesecake featured in your photos of amazing holiday cheesecake ideas!
Tell me what you thought! If you made this easy caramel cheesecake, please take a moment below to leave a rating out of five stars. Be honest; if something confused you, let me know so I can clarify it for the next person!
Did you make any substitutions? Maybe you tried a different cookie crust instead of Biscoff? Or perhaps you went crazy mixing in some chocolate chips? Tell me about it! Using these recipes for your fall cheesecake recipes traditions?
I always check the comments, and I love connecting with you all. Don’t forget to bookmark this page or pin it somewhere safe so this amazing recipe for the best salted caramel dessert is always handy when that craving hits. If you enjoyed these tips and tricks, make sure you check out the About Us page while you’re here!
Happy baking, and I can’t wait to see your stunning, creamy results!
PrintCreamy Baked Salted Caramel Cheesecake with Biscoff Crust
A recipe for a rich, creamy baked cheesecake featuring a homemade salted caramel sauce and a simple Biscoff cookie crust.
- Prep Time: 25 min
- Cook Time: 75 min
- Total Time: 8 hours 40 min
- Yield: 12 servings
- Category: Dessert
- Method: Baking
- Cuisine: American
- Diet: Vegetarian
Ingredients
- 1 1/2 cups Biscoff cookie crumbs
- 1/4 cup granulated sugar
- 6 tablespoons unsalted butter, melted
- 3 (8 ounce) packages cream cheese, softened
- 1 1/2 cups granulated sugar
- 1 teaspoon vanilla extract
- 1/4 teaspoon salt
- 3 large eggs
- 1/2 cup sour cream
- 1 cup homemade salted caramel sauce (for filling and topping)
Instructions
- Preheat your oven to 325°F (160°C). Wrap the outside of a 9-inch springform pan tightly with heavy-duty aluminum foil.
- Prepare the crust: Mix the Biscoff crumbs, 1/4 cup sugar, and melted butter until combined. Press the mixture firmly into the bottom of the prepared springform pan. Bake for 10 minutes. Let cool slightly.
- Prepare the filling: Beat the softened cream cheese with 1 1/2 cups sugar, vanilla extract, and salt until smooth. Scrape down the sides of the bowl.
- Beat in the eggs one at a time, mixing just until combined after each addition. Mix in the sour cream and 1/2 cup of the salted caramel sauce until just blended. Do not overmix.
- Pour the filling over the cooled crust. Place the springform pan into a larger roasting pan. Carefully pour hot water into the roasting pan until it reaches halfway up the sides of the springform pan (this is a water bath).
- Bake for 60 to 75 minutes, or until the edges are set and the center jiggles slightly when gently shaken.
- Turn off the oven, crack the oven door open, and let the cheesecake cool inside the oven for 1 hour.
- Remove the cheesecake from the water bath and foil. Cool completely on a wire rack, then chill in the refrigerator for at least 6 hours, preferably overnight.
- Before serving, drizzle the remaining 1/2 cup of salted caramel sauce over the top.
Notes
- For the best texture, ensure your cream cheese and eggs are at room temperature before mixing.
- If you do not have Biscoff cookies, you can substitute with graham crackers for the crust.
- To make the water bath easier, place the foil around the pan before assembling the crust.
Nutrition
- Serving Size: 1 slice
- Calories: 450
- Sugar: 45g
- Sodium: 300mg
- Fat: 28g
- Saturated Fat: 17g
- Unsaturated Fat: 11g
- Trans Fat: 0.5g
- Carbohydrates: 48g
- Fiber: 1g
- Protein: 7g
- Cholesterol: 110mg