

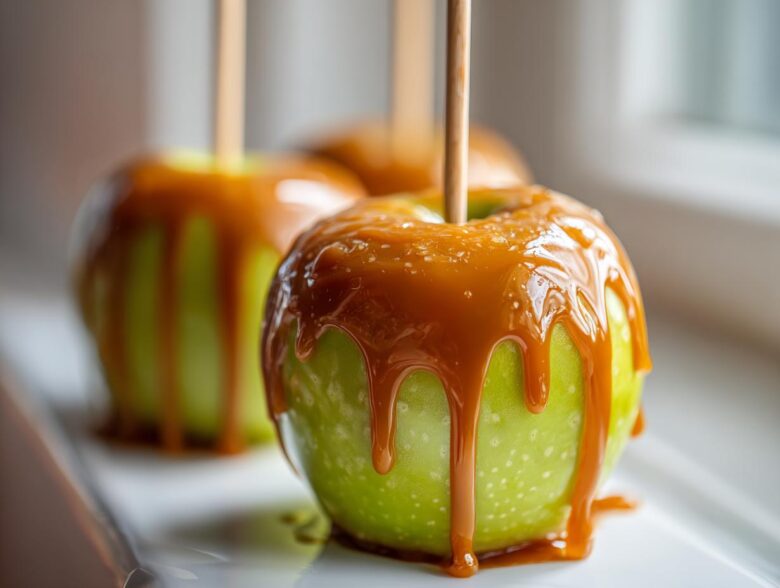
Oh my gosh, let me tell you, fall just isn’t real until you smell that sweet, buttery aroma filling your kitchen. There’s just something magical about taking a crisp apple and drowning it in gooey goodness, right? I’ve been making homemade caramel apples for every Halloween party since I was old enough to hold a saucepan, and folks, I’ve learned a thing or two about what goes wrong—and what goes perfectly right!
We’ve all been there: you pull that beautiful apple out of the pot, and an hour later, the caramel is weeping down the side, pooling sadly on the parchment paper. It’s the absolute worst! But you don’t need to buy those sad, waxy store-bought ones anymore. My quest for the BEST Foolproof Homemade Caramel Apples recipe is over, and I nailed it. This guide gives you a simple recipe where the caramel actually *sticks* and sets up beautifully firm. Trust me when I say this is the sticky caramel sauce recipe you’re going to want to keep forever.
We are making classic caramel apples today, the kind that tastes like autumn memories. If you’ve ever wanted to elevate your fall baking game, or if you’re looking for something amazing to bring to Thanksgiving, you’ve come to the right spot. And hey, if you love this combo, you absolutely have to check out my recipe for Salted Caramel Apple Pie Bars later—it uses the same core caramel flavor!
Why You’ll Love This Easy Caramel Apple Recipe (No Fail Caramel Apples)
If you are tired of soft, sliding caramel, then this is the recipe for you. We are saying goodbye to the weeping mess and hello to beautifully set, gooey treats that are perfect for any occasion. This isn’t just some flimsy coating; this is serious, classic candy making that holds up!
- The biggest win here is predictability. We use exact measurements and a critical temperature point so you know exactly when to stop cooking for that Perfect Caramel Coating.
- These are robust! They are truly the ultimate Fall Dessert Recipe because they firm up nicely and transport like a dream.
Foolproof Caramel Consistency
The secret sauce for stopping the slide? It’s all about the candy thermometer! I know it sounds fancy, but trust me, hitting that 245 degrees Fahrenheit mark tells you the sugar has reached the exact structure it needs to hold against that crisp apple skin. No thermometer, no stickiness guarantee!
Perfect for Halloween Treats Homemade
Because the caramel sets so well, these make amazing Halloween Treats Homemade. You can actually stack them slightly or put them in cute little bags for Caramel Apple Gift Ideas without worrying about them sticking to everything. They hold their shape beautifully on a buffet table, too!
Selecting the Best Apples for Caramel Apples
Okay, listen up—you can have the best caramel recipe in the world, but if you use the wrong apple, you’ve lost! This is where so many people mess up their Homemade Caramel Apples. You need structure! You need acid! Anything too soft, like a Red Delicious, will just turn to mush under that rich caramel coating.
For the most reliably perfect result, I always, always reach for Granny Smith apples. They are firm and they have that incredible, sharp tartness that cuts right through the sweetness of the homemade caramel. If you have some Apple Cider Donut Muffins on the menu, you know I love tart apples!
Now, here’s a super important step that makes your caramel stick like glue. Before you even think about washing the apples, make sure you remove all that waxy coating they get at the grocery store. I dip mine quickly in hot water for just a second, then wipe the skin down gently with a cloth dampened with plain white vinegar. This one extra little step ensures zero slippage!
The Importance of Firmness and Tartness
Why do we focus so much on firm and tart? Simple! The best caramel coating requires resistance. A tart apple, like the Granny Smith we love, balances the heavy sweetness of the candy component so it tastes like a treat, not just sugar overload. These are fantastic for any Granny Smith Apple Desserts you might be making, but especially for dipping!
Ingredients for the Perfect Caramel Apples
The beauty of this Easy Caramel Apple Recipe is that everything goes into one pot for the caramel. Seriously, pull out your largest, heaviest saucepan because we are making a big batch of delicious, sticky caramel sauce that needs room to bubble happily! Don’t skimp on quality here—using the right ingredients is non-negotiable for that perfect set.
You’ll need 12 firm apples, but the real star is the candy mixture. Make sure your heavy cream is full-fat and cold, and grab that light corn syrup because it’s crucial for preventing crystallization. Sugar is sugar, but measuring it precisely helps us hit that magic temperature mark later on!
- 12 medium firm apples (Granny Smith recommended, obviously!)
- 2 cups granulated sugar
- 1 cup light corn syrup
- 1 cup heavy cream
- 1 cup (2 sticks) unsalted butter
- 1 teaspoon vanilla extract
- 1/2 teaspoon salt
- 12 wooden or paper lollipop sticks
See? It’s so simple! Once you have these laid out, we can move on to the slightly technical, but totally worth-it, cooking stage to guarantee you end up with those show-stopping Caramel Apples.
How to Make Caramel Apples Firm: Step-by-Step Instructions
This is where the magic happens, and honestly, it’s way less scary than it seems! If you follow these steps exactly—especially that temperature milestone—you are going to have incredible, solid, No Fail Caramel Apples that don’t slide off the second you look at them. Ready to get dipping?
Preparing the Apples for Dipping
First things first: we need the canvas ready. Before you even mix the caramel, take your 12 firm apples. Wash them really well to get off any lingering dirt, and then you MUST dry them completely. I mean bone dry! Any speck of water or wax is the enemy of good adhesion.
Once they are dry, pull those stems right out and firmly push your lollipop sticks straight into the core. Don’t be shy; you want them seated securely. Remember that trick I mentioned about the vinegar? Go ahead and give the outside of each apple a quick wipe with that vinegar-dampened cloth now. This cleans off any protective wax, giving our caramel something real to grab onto. Set them aside on your parchment-lined baking sheet.
Cooking the Sticky Caramel Sauce Recipe
Now, move to the saucepan. Dump in your sugar, corn syrup, heavy cream, and butter. Heat this over medium heat, stirring constantly until the butter melts and the sugar dissolves—that part is important for smoothness! But listen to me closely: as soon as it hits a full boil, STOP STIRRING! Seriously, walk away from the spoon.
This is where your new best friend, the candy thermometer, comes in. You need to cook this mixture until it hits exactly 245 degrees Fahrenheit. That temperature signals we’ve reached the “Firm Ball Stage,” which is the key to success. Once that thermometer hits 245, yank that pot off the heat right away before it keeps climbing!
Caramel Apple Dipping Tips for Even Coating
After the caramel comes off the heat, stir in your vanilla and salt, and then let it cool for about five minutes. It needs to thicken just a bit so it doesn’t just run right off the apple. You want that nice, thick drape.
Now, for the fun part! Tilt your cooling pot slightly so the caramel pools nicely. Dip one apple at a time, swirling it gently around until it’s coated all the way up. Lift the apple out and gently rotate it over the pot, letting the thick excess drip back down. Don’t be afraid to let it drip a *little*—that’s what builds up a nice, solid layer on the bottom that helps anchor the whole thing! Then, just set it back on the prepared sheet. We’ll let these amazing Maple Apple Cider Fizz-worthy treats set up completely.
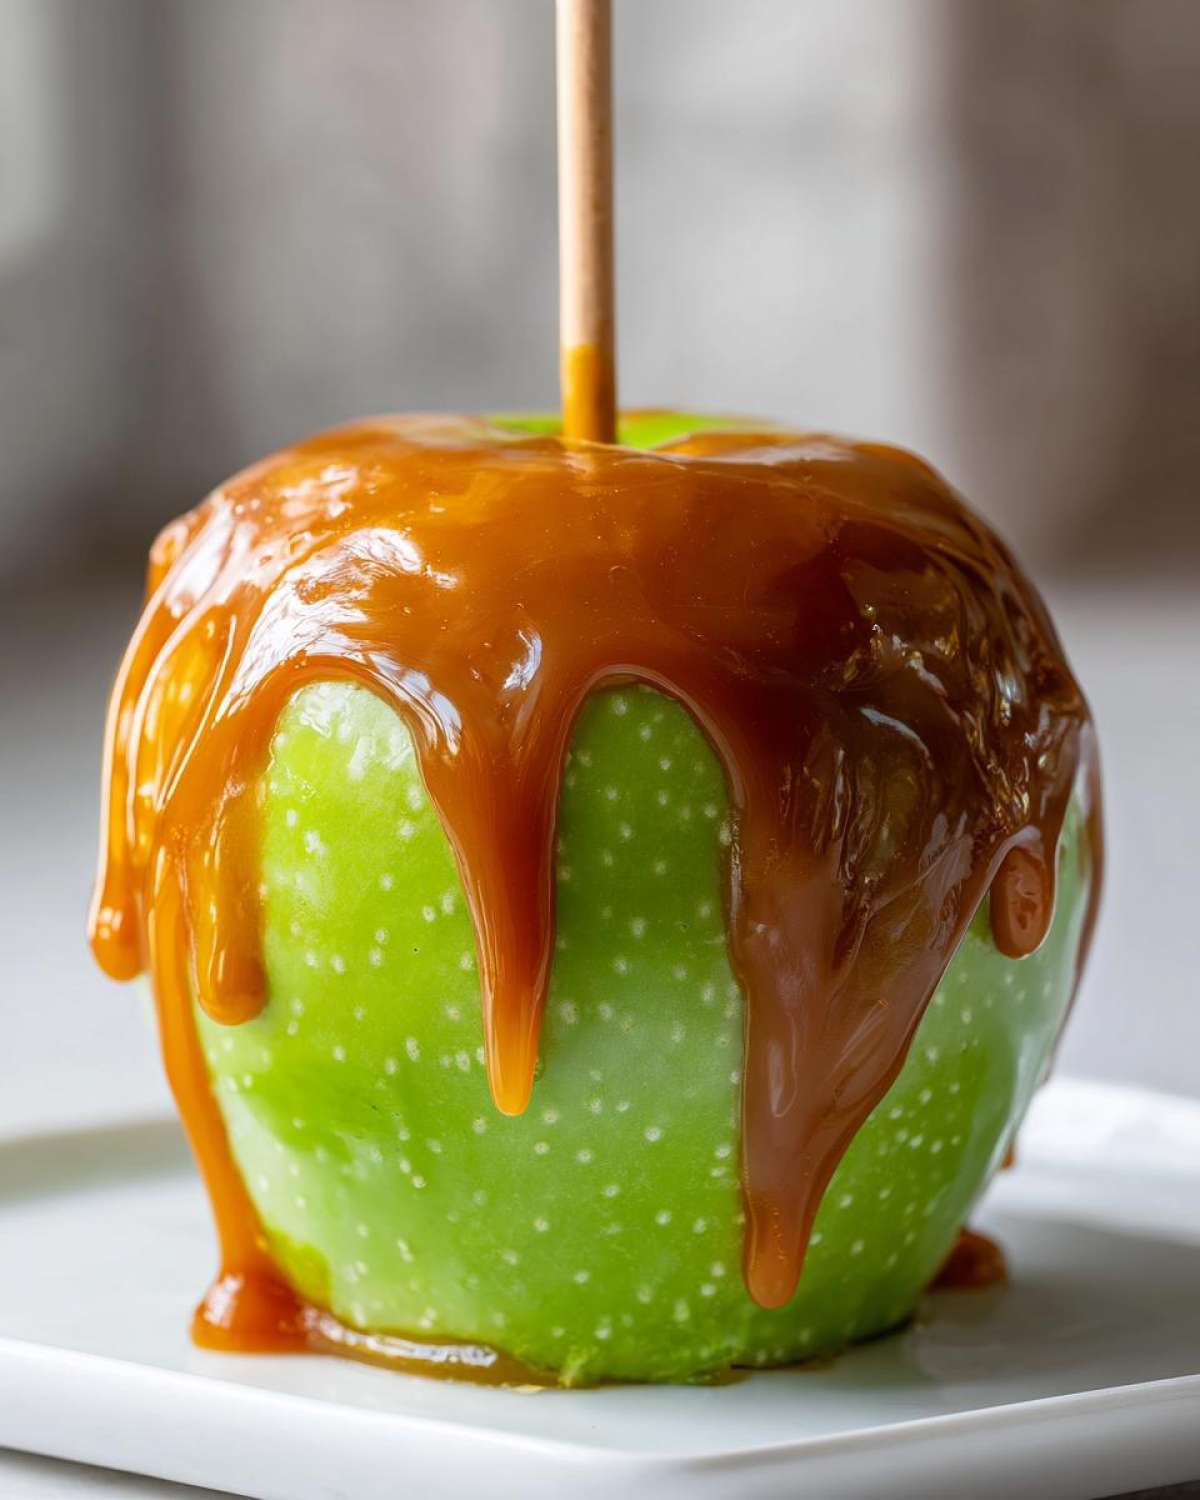
Gourmet Caramel Apples: Caramel Apple Toppings Ideas
Okay, now that you have succeeded in making the perfect sticky caramel that actually stays put—it’s time to get fancy! Why stop at plain caramel when you can create incredible Gourmet Caramel Apples? This is where you can really let your creativity shine. The key, though, is speed!
Since you let the caramel cool slightly (but before it gets rock hard), you need to work quickly right after you pull the apple out of the dip. Have a small plate set up next to your dipping station containing whatever topping you choose. You essentially just roll or lightly press the freshly dipped apple into your topping!
For really stunning presentation or to make great Caramel Apple Gift Ideas, think about these additions:
- The Classic Nut Roll: Finely chopped pecans, walnuts, or even crunchy peanuts work great. Make sure they are chopped small so they stick evenly.
- Sprinkles Galore: For holidays or parties, use bright sprinkles, mini chocolate chips, or crushed pretzels right after dipping. They look amazing against the deep caramel color.
- Chocolate Drizzle Drama: Wait for your initial caramel coat to set completely (maybe 30 minutes). Then, use melted dark or white chocolate in a piping bag (or just a Ziploc bag with the corner snipped off) to drizzle elegant zigzags across the top. This is how you create Double Dipped Caramel Apples!
If you’re making a huge batch for a party, consider setting up a full Caramel Apple Bar Ideas station where people can dip and top their own creations. It’s always a huge hit! After you’ve finished decorating, make sure they sit undisturbed to finalize that set. If you love these seasonal flavor combinations, you absolutely must try my Apple Cinnamon Pull-Apart Bread next weekend!
Storage & Reheating Instructions for Homemade Caramel Apples
Once you’ve conquered the dipping stage and your gorgeous Homemade Caramel Apples are cooling, you might wonder where to keep them until it’s time to serve. This is super important because if you store them wrong, that beautiful caramel can start to get soft or sweat.
The main rule here is patience right after dipping. Don’t touch them! You absolutely must let them set completely for at least one full hour at room temperature before you even think about moving them. If you chill them too quickly, the rapid temperature change sometimes makes the caramel seize up weirdly or separate from the apple skin.
After that initial set, keeping them is pretty straightforward, but remember, these are best when fresh! They are a Classic Autumn Candy, not something meant to live in your fridge for weeks.
- Room Temperature Storage: If you plan on eating these within 24 hours, keeping them covered lightly at cool room temperature (under 70°F) is perfect. The caramel stays softer and much easier to bite into.
- Refrigeration: If you need them to last longer—say, two or three days—popping them in the fridge is the safer bet to prevent spoilage, especially if it’s a very warm fall day. Just make sure they are wrapped tightly, maybe even individually in plastic wrap after they are fully firm.
- The Hardening Factor: Be warned: storing them in the fridge makes the caramel much, much harder when you pull it out. If you refrigerate them, take the caramel apples out about one to two hours before you want to serve them so the coating warms up just enough to be chewy again rather than rock solid.
Honestly, the best advice I can give you as a person who always over-bakes for the holidays is to make these the day before your event, let them set on the counter overnight, and then serve them out on the morning of. They are simply unbeatable the first day!
Troubleshooting Common Caramel Apple Issues
Making candy can feel a little intimidating, I get it! When you see people talking about candy thermometers and firm ball stages, it’s easy to panic that you’re going to mess up and end up with a sad, soupy mess. That’s why I keep notes on how to rescue things when they don’t go exactly to plan, so you can still have perfect Homemade Caramel Apples!
The biggest fears are usually: the caramel is too thin, it got too hard before I finished dipping, or heaven forbid, it’s sliding right off the apple! Don’t worry—we can fix all of these issues without starting over. These tips are what pulled me out of trouble many times when I was first learning the ropes and trying out different Maple Pecan Blondies side treats!
What if my caramel is too runny when I start dipping?
If you pulled the pot off the heat at 245°F and it seems much thinner than molasses, chances are you pulled it off slightly too early, or maybe your kitchen is just warmer than mine! Resistance is key here. The very best thing to do, if it’s still pourable but thin, is to just let it sit off the heat for another 5 to 10 minutes. It will thicken up as it cools down internally. Do not be tempted to put it back on the burner unless it is totally cold and hard—otherwise, you risk overheating the sugar!
My caramel got too thick while I was dipping!
This happens constantly, especially if you are making a large batch. As the caramel sits, it keeps cooling and stops being easily dippable. Remember that note about heating? If your caramel develops a thick skin or becomes too firm to coat the apple evenly, just put the entire saucepan back onto the stove over the lowest possible heat setting. Seriously, low and slow! Stir gently for just a minute until it loosens up enough to coat nicely again. You are just warming it back up, not cooking it further. It takes seconds!
Help! My caramel won’t stick to the apples!
If you followed the prep instructions about washing and wiping the apples down with vinegar, this should almost never happen! But if it does, it means there is still wax or too much moisture on the skin. You can try using a paper towel to quickly blot the apple surface once more for a dry spot, or you can gently pass the base of the apple through a flame (like a quick pass over a gas burner, be super careful!) just for a split second to burn off surface residue. That little bit of heat opens the pores of the apple skin, letting the caramel grab hold. After that little heat blast, dip it immediately before the apple cools down too much!
Frequently Asked Questions About Caramel Apples
I always get so many questions after people try making their first batch of these treats! It’s totally normal; candy making always has a few little quirks. Here are the things folks ask me most often about turning their Classic Autumn Candy dreams into reality. Keep reading, and you’ll be a pro in no time!
Can I make Caramel Apple Slices instead of whole apples?
Oh, absolutely! This is a fantastic idea if you’re making a platter of goodies or if you have a lot of little kids coming to your party—it makes them so much easier to eat! If you want to make Caramel Apple Slices, prep the apples by cutting them into uniform wedges right after washing and drying. Skip the stick insertion, obviously!
Because the slices are smaller, you need to dip them very quickly, and you definitely want to make sure your caramel has cooled down a bit more than usual so it doesn’t just melt the apple tissue. Dip quickly, then immediately set the slices on parchment paper and pop them in the fridge for 15 minutes to set fast. They are gorgeous when rolled in toppings this way too!
What is the ideal temperature for dipping caramel?
This is the make-or-break moment! Remember when we cooked the caramel? We stopped at 245°F, which is the Firm Ball Stage. That’s what guarantees your caramel will be chewy but firm enough to hold its shape. However, when you start dipping, you absolutely want to pull the pot off the heat and let it cool for about five minutes.
If you dip when it’s scalding hot right off the boil, it will glide right off the waxy apple skin. Those five minutes allow the caramel to thicken just enough so that lovely coating has structure. A thicker coating means less dripping and a much higher chance of achieving a professional look! Then, if it gets too thick while you’re working, just warm it back up gently, like I mentioned before!
I also often get asked if they can skip the corn syrup. Honestly, don’t risk it if you want that perfect set. Corn syrup is what keeps the sugar crystals from forming, which is why dipping works so well! For more great flavor ideas, check out my recipe for a spicy Cinnamon Maple Whiskey Sour when you need a grown-up treat!
Estimated Nutritional Data for Caramel Apples
Okay, let’s talk turkey—or should I say, let’s talk sugar and butter! Because these are classic candies made with real cream and sugar, they are definitely a treat, not an everyday snack. I always like to be upfront about what goes into these indulgent beauties so you know exactly what you’re munching on when you grab one of these beauties!
This nutritional breakdown is just an estimate, mind you. It’s based on the recipe above using standard ingredients, one apple, and is calculated per serving. If you load yours up with extra nuts or a thick chocolate drizzle, those numbers are going to jump higher, but this gives you a really solid baseline for these delightful Homemade Caramel Apples.
Here’s what you can generally expect from one perfectly coated apple:
- Calories: Around 550
- Sugar: About 85 grams (Yep, it’s a candy!)
- Fat: Roughly 22 grams, most of that rich butter and cream flavor!
- Carbohydrates: About 90 grams
- Protein: A modest 2 grams
- Sodium: Approximately 150 mg
Enjoy them responsibly! They are best kept out of the fridge until they are fully set, and remembering that these are a special occasion dessert makes enjoying every single bite that much sweeter.
Share Your Homemade Caramel Apples
I truly hope you had as much fun making these as I do every single autumn. Seriously, if you followed along, you should have a beautiful, stable batch of the best Caramel Apples sitting on your counter right now! And I really, really want to see them!
Don’t be shy! Snap a quick photo of your finished masterpiece—maybe show off those gourmet toppings or next to your spooky decorations—and tag me on social media! Tagging helps me know what recipes you enjoy the most so I can keep bringing you the kind of foolproof instructions you need.
When you have a moment, please leave a quick rating for this recipe right here on the page. Knowing how this Easy Caramel Apple Recipe performed in your kitchen helps so many other home cooks decide to give it a try. I love reading your feedback, whether it’s about the perfect stickiness or your favorite apple type. Happy treating, and thanks for baking along with me!
If you’re curious to know more about the kitchen shenanigans happening over here, feel free to check out my About Us page—it’s where I talk all about why I love sharing these family-tested favorites!
PrintFoolproof Homemade Caramel Apples: Gooey Caramel That Sticks

Follow these steps to make classic, sticky caramel apples using firm apples and a simple caramel sauce recipe that sets correctly.
- Prep Time: 20 min
- Cook Time: 20 min
- Total Time: 140 min
- Yield: 12 servings
- Category: Dessert
- Method: Stovetop Candy Making
- Cuisine: American
- Diet: Vegetarian
Ingredients
- 12 medium firm apples (Granny Smith recommended)
- 2 cups granulated sugar
- 1 cup light corn syrup
- 1 cup heavy cream
- 1 cup (2 sticks) unsalted butter
- 1 teaspoon vanilla extract
- 1/2 teaspoon salt
- 12 wooden or paper lollipop sticks
Instructions
- Wash and thoroughly dry the apples. Remove the stems and insert a stick firmly into the core of each apple. Set aside.
- In a heavy-bottomed saucepan, combine the sugar, corn syrup, heavy cream, and butter.
- Heat the mixture over medium heat, stirring constantly until the butter melts and the sugar dissolves.
- Stop stirring once the mixture boils. Insert a candy thermometer.
- Cook the caramel without stirring until the temperature reaches 245 degrees Fahrenheit (Firm Ball Stage). This usually takes 15 to 20 minutes.
- Remove the pan from the heat immediately. Carefully stir in the vanilla extract and salt. Let the caramel cool for about 5 minutes until it thickens slightly.
- Tilt the pan and dip each apple into the caramel, rotating to coat evenly. Lift the apple and let excess caramel drip off.
- Place the coated apples on a baking sheet lined with parchment paper or a silicone mat.
- Allow the caramel apples to set completely at room temperature for at least 1 hour before serving or packaging.
Notes
- For the best adhesion, wipe the apples with a small amount of white vinegar before dipping to remove any wax residue.
- If the caramel becomes too thick while dipping, return the pan to low heat briefly to thin it out. Do not overheat.
- For gourmet apples, roll the dipped apples in chopped nuts, sprinkles, or mini chocolate chips immediately after dipping.
Nutrition
- Serving Size: 1 apple
- Calories: 550
- Sugar: 85
- Sodium: 150
- Fat: 22
- Saturated Fat: 14
- Unsaturated Fat: 8
- Trans Fat: 0.5
- Carbohydrates: 90
- Fiber: 1
- Protein: 2
- Cholesterol: 75