

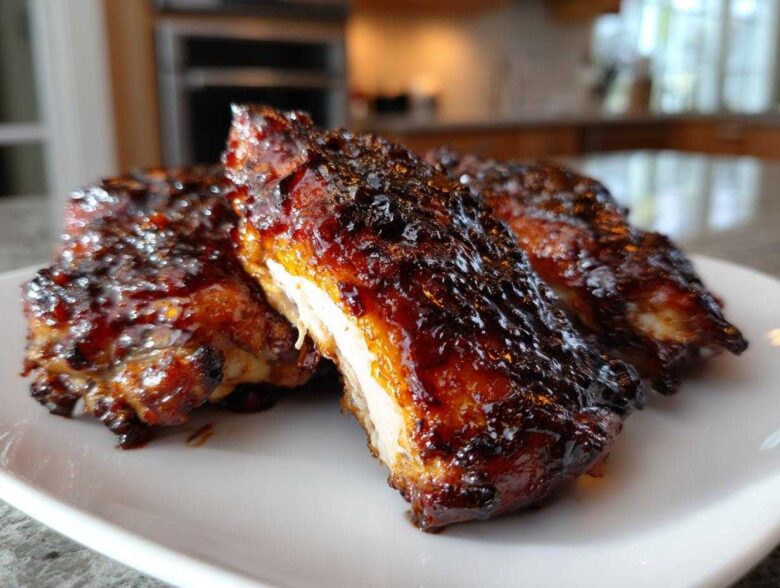
Look, I’ve made so many sauces over the years—some were flops, some were perfect—but if there’s one thing I’ve truly mastered, it’s how to get chicken meat that actually *clings* to the coating. We aren’t messing around with watery drizzles here! This recipe for Sticky BBQ Chicken Thighs with Honey Glaze is my personal holy grail. We use simple oven techniques and, honestly, the secret weapon is the final blast under the broiler. That high heat turns that sugary honey glaze into something deeply caramelized and unbelievably sticky. Forget the grill battles; this easy baked method guarantees perfection every single time. If you want a deep dive into sauce-making later, check out my thoughts on the best easy homemade BBQ sauce recipe!
Why You Will Make These Sticky BBQ Chicken Thighs with Honey Glaze Again
Honestly, once you nail this texture, you’ll never go back to those thin, sad sauces. This recipe isn’t just ‘good,’ it’s exactly what you crave when you want that perfect messy, finger-licking dinner.
- Ultimate Cling Factor: The low simmer time followed by the broiler creates a thick, heavy glaze that absolutely sticks to the skin. No more runny chicken!
- Deep Caramelization: We cook it slow first, then hit it high heat. This builds flavor without burning the honey right away.
- Crispy Skin Guaranteed: Using a wire rack means the skin crisps up while the meat stays juicy underneath.
- One-Pan Simplicity: Everything happens in the oven. Cleanup is a breeze compared to messing with charcoal or stovetop splatter.
- Perfect Flavor Balance: That smoky BBQ tang meets the rich sweetness of the honey, making it incredibly flavorful.
Essential Ingredients for Perfect Sticky BBQ Chicken Thighs with Honey Glaze
Okay, let’s talk about what goes into this magic. My go-to for these is always bone-in, skin-on thighs. Why? Because that skin gets wonderfully crispy and holds onto the glaze better than anything else. Don’t sweat it if you only have boneless, but the skin really makes the finished product sing!
The glaze ingredients are simple hero items you probably already have, but the star, naturally, is the honey. Please use a nice, flavorful honey here—it does the heavy lifting for the sweetness and the stickiness. If your honey is rock solid, just microwave it for 15 seconds so it pours easily.
- 8 bone-in, skin-on chicken thighs
- 1 tablespoon olive oil
- 1 teaspoon salt
- 1/2 teaspoon black pepper
- 1/2 teaspoon garlic powder
- For the Glaze:
- 1/2 cup ketchup (your base tang!)
- 1/4 cup honey (the sticky binder!)
- 3 tablespoons apple cider vinegar
- 2 tablespoons brown sugar, packed
- 1 tablespoon Worcestershire sauce
- 1 teaspoon smoked paprika
- 1/2 teaspoon onion powder
Step-by-Step Guide to Oven Baked Sticky Thighs
This is where the magic happens, and trust me, timing is everything to get that perfect sticky texture without burning the sugars! We’re going to use the oven to cook the chicken through first, then rely on the glaze and the broiler to get us that show-stopping caramel crust. If you wanted to try these out in another appliance sometime, I have a great post on air fryer chicken techniques, but for the true glaze texture, the oven method wins.
Preparing the Chicken and Oven Setup for Sticky BBQ Chicken Thighs with Honey Glaze
First thing: crank that oven up to 400°F. Now, this is important: Line a baking sheet with foil—it saves you cleanup time later! Then, put a wire rack right on top of that foil. Why the rack? That airflow is critical; it lets heat circulate all around the thigh, making sure the bottom skin gets crispy instead of steaming in its own juices. Once the oven is warm, grab your thighs and pat them down. And I mean *pat*. You want them bone dry! Moisture is the enemy of crispy skin. Rub them with oil, then hit them with your salt, pepper, and garlic powder. Place them on that rack and get them in for 25 minutes. That initial bake renders some fat and starts cooking the meat evenly.
Making the Thick Homemade Sticky BBQ Glaze
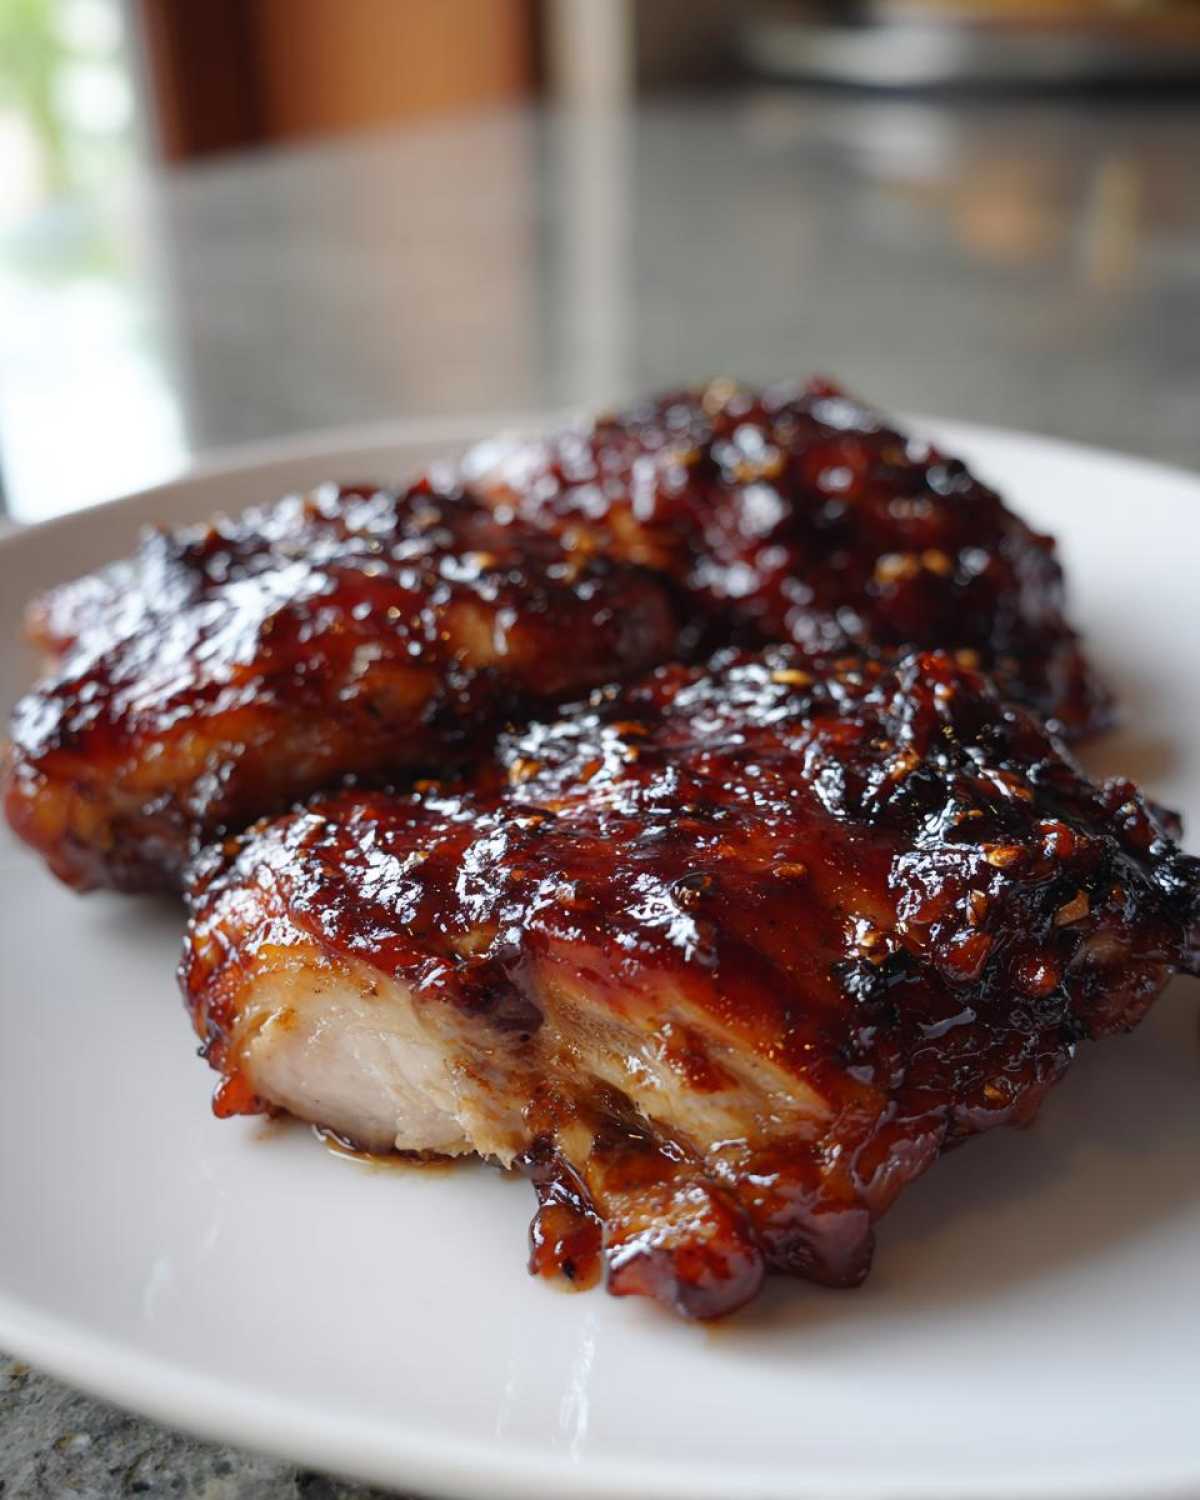
While those thighs are getting happy in the oven, we mix up the sauce. This is crucial for solving that runny sauce problem everyone deals with. In a saucepan, throw in the ketchup, honey, vinegar, brown sugar, Worcestershire, paprika, and onion powder. Put it over medium heat and bring it just to a simmer. You need to let this bubble gently for about 5 to 7 minutes. Don’t walk away! You’re cooking off excess water so the remaining glaze is super concentrated and thick. The test? When you pull your spoon out, the sauce should coat the back—if it runs off immediately, it needs another minute or two. Remove it from the heat so it doesn’t get too dense while the chicken finishes.
Baking, Glazing, and Caramelizing for the Ultimate Sticky Chicken Thighs Recipe
When the thighs come out after the first 25 minutes, they should look mostly cooked. Now, take half of that wonderful, thick honey BBQ glaze and brush it all over the tops and sides. Get it on there good! Back in the oven they go for another 10 minutes. This sets that first layer of flavor. Once that’s done, it’s time for the grand finale! Switch your oven to the broiler, high setting. Brush on the remaining glaze—be generous! Pop the tray under the broiler, but you have to watch it like a hawk. Seriously, broilers work fast. Two to four minutes is all it takes for that honey to caramelize into that gorgeous, sticky, dark crust. Pull them out immediately when they look beautifully charred and sticky. Then, just let them rest for five minutes before digging in. If you’re looking for pairing inspiration for marinades in the future, you might want to check out this guide on juicy flavor from chicken marinades!
Tips for Achieving Perfectly Caramelized Chicken Thighs
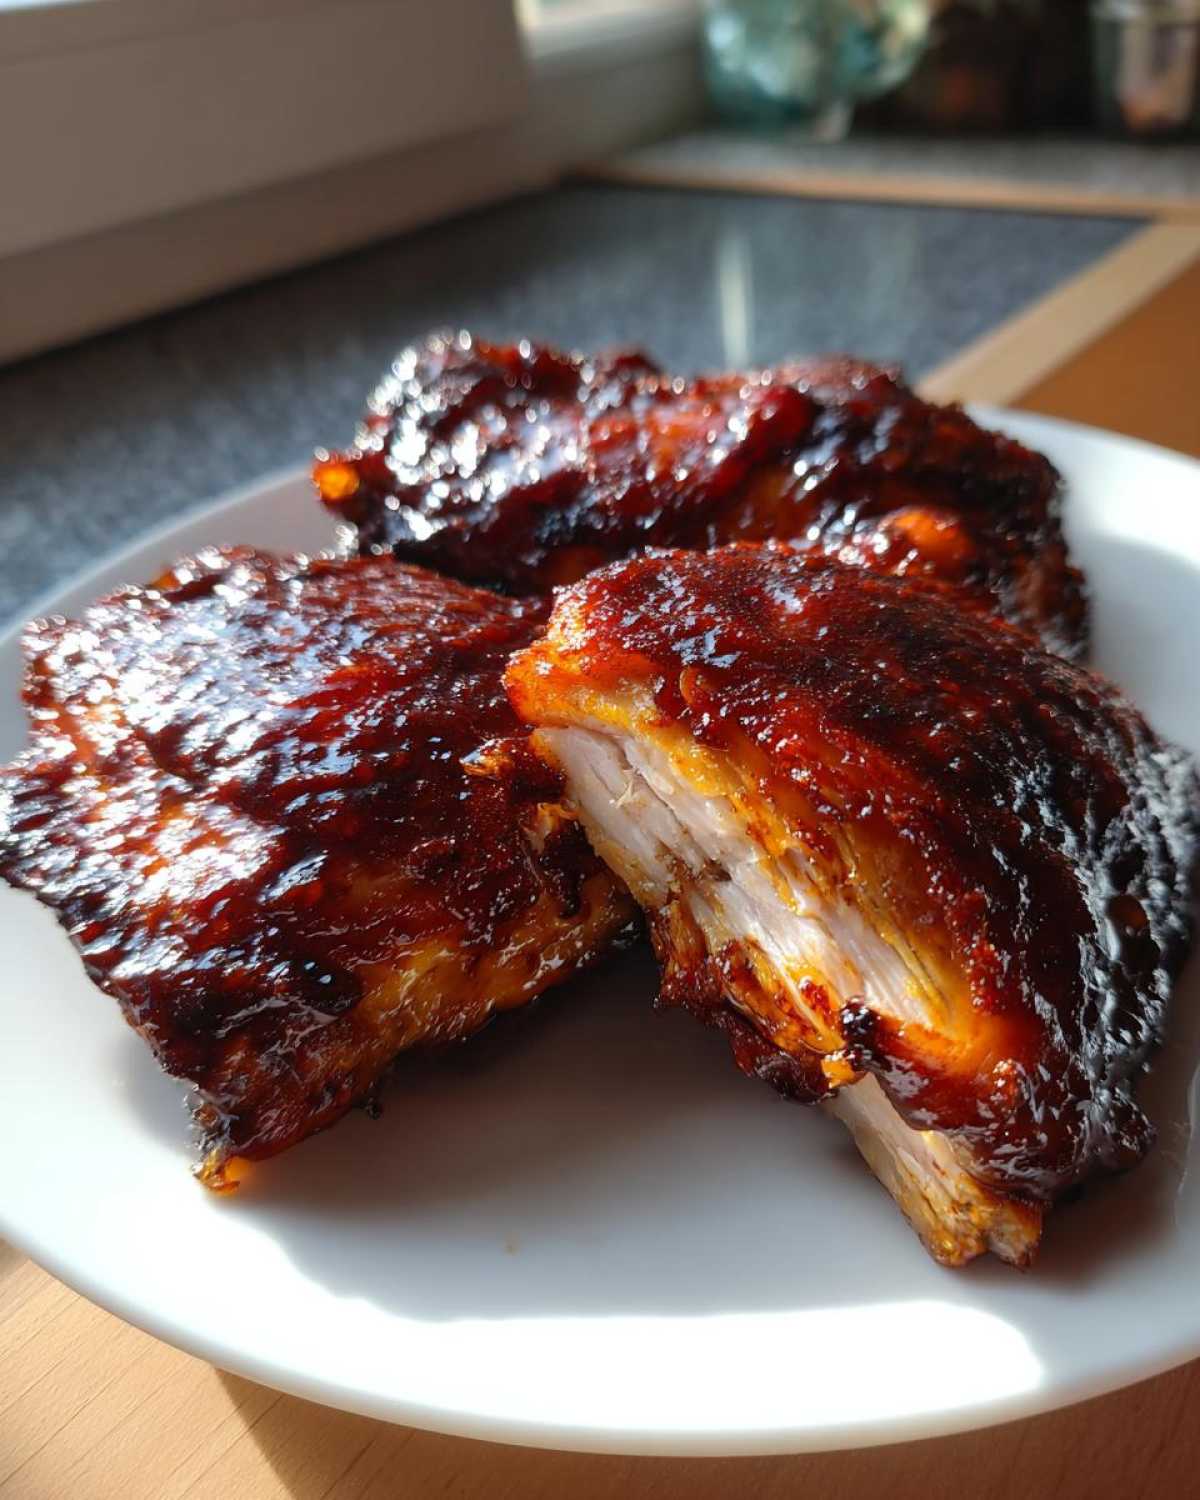
The biggest fear when making Sticky BBQ Chicken Thighs with Honey Glaze is burning that beautiful sugar! I learned this the hard way years ago. I was so excited about the deep-brown color of my caramelized chicken thighs that I walked away for just two minutes too long. When I came back, the edges looked like charcoal! Don’t panic if it happens, though. If the sauce burns slightly, quickly take the pan out, gently scrape off the truly blackened bits with a spatula, and brush on a very thin layer of reserved *uncooked* glaze (if you saved any) just before the final broil. That fresh sugar layer melts before it has time to scorch.
Here are the things I absolutely swear by to get that sticky, never-burnt finish:
- Low and Slow First: Never glaze until that first 25-minute bake is done. The chicken needs time to cook through and render fat *before* you introduce the sugars from the honey glaze. If you glaze too early, you’re just drowning raw chicken in sugar that will burn before the meat is safe to eat.
- The Two-Step Glaze Application: This is key for thickness! Applying half the sauce before the final baking time allows that layer to bake *into* the skin slightly. The second application during the broil sets the final super-sticky coat.
- Know Your Broiler: Broilers vary wildly in intensity. Mine is a monster. Start checking at the 2-minute mark. If you’re worried, you can always use the convection roast setting instead of the direct broil to get amazing color without the risk of immediate burning.
- Fat Helps It Stick: Don’t skip the initial light coating of olive oil before seasoning. That tiny bit of fat helps the dry rub adhere, and it also helps transmit heat evenly so the skin browns nicely, setting up the ideal surface for the thick glaze to cling to. If you are looking for other ways to boost rich, savory flavor, you absolutely must try my cowboy butter dipping sauce on the side!
Ingredient Notes and Substitutions for Your Honey Glaze Chicken Thighs
Now, I know not everyone has the exact 8 bone-in, skin-on thighs lying around, and that’s totally fine! This recipe is super flexible, which is why I love it for busy weeknights. You just need to adjust your timing a little bit depending on what you use.
Dealing with Boneless or Skinless Chicken Thighs
If you’re reaching for boneless pieces, you’ll need to adjust that initial baking time down quite a bit. Since there’s no skin to crisp and no bone to insulate the meat, they cook way faster. I’d cut that first bake time from 25 minutes down to about 15 minutes. Then, when you apply the glaze, be extra careful during the second bake and especially the broil. Boneless thighs dry out quicker, and too much time under the broiler will make them tough and the glaze might burn before the meat is even warmed through. They won’t get that beautiful crispy skin finish, but they will still soak up all that sticky honey flavor!
What to Use Instead of Apple Cider Vinegar
The apple cider vinegar is what gives the BBQ sauce that necessary sharp tang to cut through all the sweetness from the honey and brown sugar. If you don’t have ACV, you have a couple of options, but you need to replace that acid!
- White Vinegar: This is the closest swap, tablespoon for tablespoon. It’s a bit harsher, so maybe start with 2.5 tablespoons instead of 3, and taste your sauce before you simmer it.
- Lemon Juice: Freshly squeezed lemon juice works wonders too! It adds a brighter, slightly fruitier acidity that pairs really nicely with honey. Use the same 3-tablespoon amount.
Whatever you choose, just make sure you get that acid in there. Without it, the glaze tastes flat and way too sweet, remember?
Boosting the Smokiness if You Don’t Have Smoked Paprika
Smoked paprika is my favorite for that deep, Southern-style BBQ background note. If your spice rack is looking sad and all you have is regular sweet paprika, don’t worry! You can save the flavor by using a tiny splash of liquid smoke in the sauce as it simmers. Seriously, use just a couple of drops—liquid smoke is potent stuff! If you skip both, you’ll still have a delicious honey-tang glaze, it just won’t have that signature ‘grilled’ complexity.
Serving Suggestions for Your Sweet and Sticky Chicken Dinner
Now that you have perfected the stickiest chicken known to man—the kind that makes you want to lick the plate clean—you need sides that can stand up to that intense flavor! Because these Sticky BBQ Chicken Thighs with Honey Glaze are so rich and perfectly caramelized, you want your sides to be simple, creamy, or fresh to cut through the richness.
You’ve earned this delicious meal, so keep the sides easy. Here are my top three go-to accompaniments for a complete sweet and sticky chicken dinner:
- Creamy Comfort: You absolutely need something soft to soak up any extra glaze that might fall off the plate. My roasted garlic mashed potatoes are perfect because the savory garlic balances the honey beautifully.
- Crunchy Freshness: A simple vinegar-based coleslaw is mandatory. The sharp acidity is the perfect counterpoint to the deep BBQ sweetness.
- Simple Green: If you need something green, don’t overthink it. Steamed green beans tossed with just a squeeze of lemon juice and some salt are all you need. They provide a nice, clean bite between the sticky layers.
Storage and Reheating Instructions for Sticky BBQ Chicken Thighs
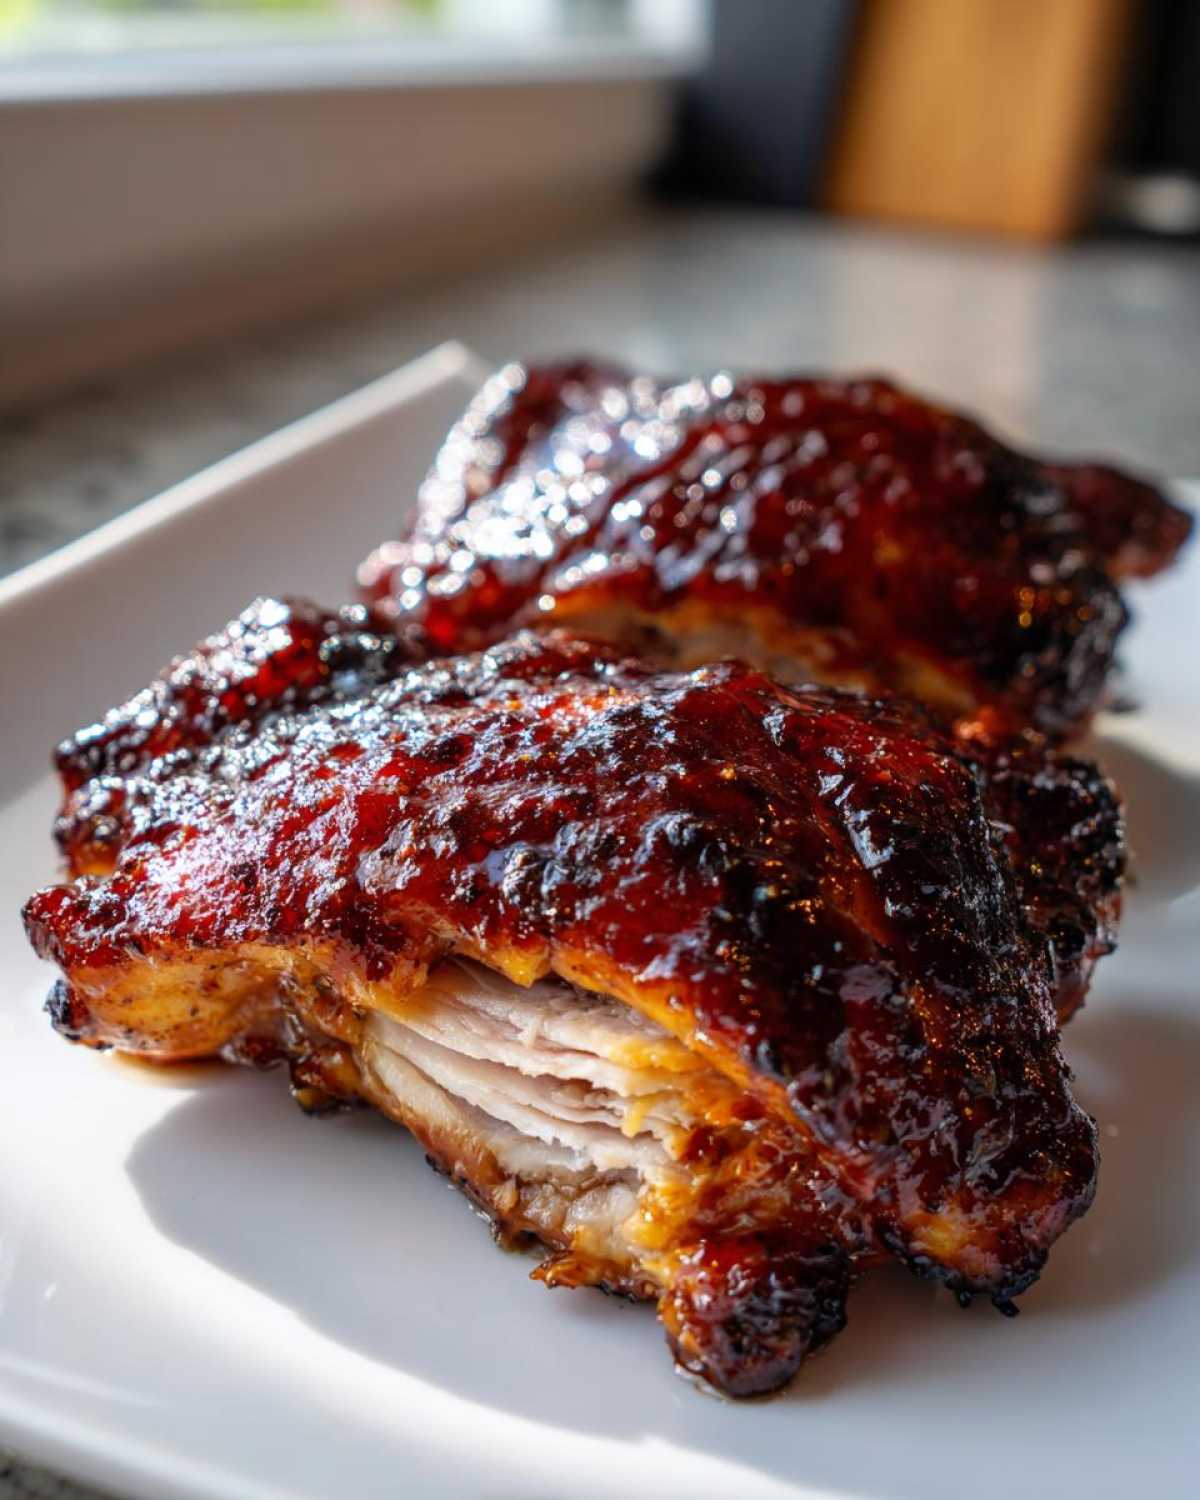
Nothing lasts longer than these thighs, not because they usually survive, but because they’re just *that* good! But let’s say you’re a disciplined person and you manage to stash a couple away. Storing leftovers correctly is extra important here because that beautiful honey glaze can get weird in the fridge if you aren’t careful.
You want to keep them totally airtight. I wrap mine tightly in plastic wrap first, then pop them into a sealed container. This keeps the skin from getting soggy from any ambient moisture in the fridge. You can safely keep these delicious **sticky chicken thighs** for about three to four days. Any longer than that, and you risk losing some of that amazing texture we worked so hard to build!
The Best Way to Revive Sticky Chicken Thighs
Here’s the little trick I use, because microwaving sticky chicken? It turns into a rubbery, chewy mess real fast, and we certainly don’t want that for our phenomenal **honey glaze chicken thighs**!
The absolute best method is going low and slow in the oven again. It gently warms the meat and allows that beautiful sugary coating to loosen up just enough without charring.
- Preheat your oven to a very gentle 300°F. We are basically just warming them through, not cooking them again.
- Place your leftover thighs on a foil-lined baking sheet. If you happen to have a rack, use it for even better results!
- Here’s a pro-tip if they look a little dry: add just a teaspoon of water or chicken broth to the foil *around* the chicken pieces, not on them. This creates a steamy environment to keep the meat moist while the oven warms the glaze slightly.
- Bake them for about 12 to 15 minutes. You’ll notice the glaze looks wet and glossy again, not hardened or dull.
If you are really in a rush and only have one or two thighs, the microwave will work, but it’s a compromise. Zap them for about 45 seconds, but listen closely: place a small damp paper towel right on top of the chicken. That steam helps prevent the honey glaze from seizing up and turning hard when the microwave hits it!
Frequently Asked Questions About Sticky Chicken Thighs Recipe
I get so many questions whenever I post these beauties online! Honestly, these are the questions I had when I first started perfecting my sticky chicken thighs recipe, so I figured I’d tackle the big ones right here for you!
Can I cook these Sticky BBQ Chicken Thighs with Honey Glaze on the Grill instead of the oven?
Oh, you absolutely can, but you have to approach it differently than the oven method, or you’ll end up with burnt stickiness! If you grill them, cook the chicken almost entirely over indirect heat first. Put the coals on one side and the chicken on the other. Once the chicken is about 90% done, then you move it over direct heat and brush on that thick sauce, turning constantly until it’s perfectly charred. If you put the sauce on too early while grilling, that honey will turn black before the meat cooks through!
How do I make sure my Homemade Sticky BBQ Sauce isn’t runny?
This is the make-or-break moment for any great honey glaze chicken thighs recipe! The secret is simple reduction. You must simmer the sauce uncovered for at least five minutes after it starts bubbling. You are literally boiling off the watery ingredients. Stir it frequently and look for that visual cue: when you drag a spoon through the sauce, it should leave a clear trail that takes a second or two to fill back in. If it’s still thin, just keep simmering!
If I use boneless thighs, how do I adapt the cooking time?
If you swap to boneless thighs for an even quicker weeknight honey chicken thighs dinner, you need to be much gentler with your heat! They cook in about half the time, usually. Skip the initial 25-minute bake. Instead, go for about 15 minutes at 400°F, *then* apply the first layer of glaze, and bake for another 5 to 7 minutes before you hit the broiler for only 1 to 2 minutes max. Keep a close eye on them so they don’t overcook!
What happens if I don’t have brown sugar? Can I just use white sugar?
I strongly recommend against swapping the brown sugar if you can help it! Brown sugar provides that deep, molasses flavor which gives our best BBQ chicken thighs that rich, complex taste that white sugar just can’t replicate. White sugar just adds pure sweetness without the depth. If you absolutely have no other choice, use white sugar but consider adding a half teaspoon of molasses on its own to try and mimic that dark, complex flavor profile!
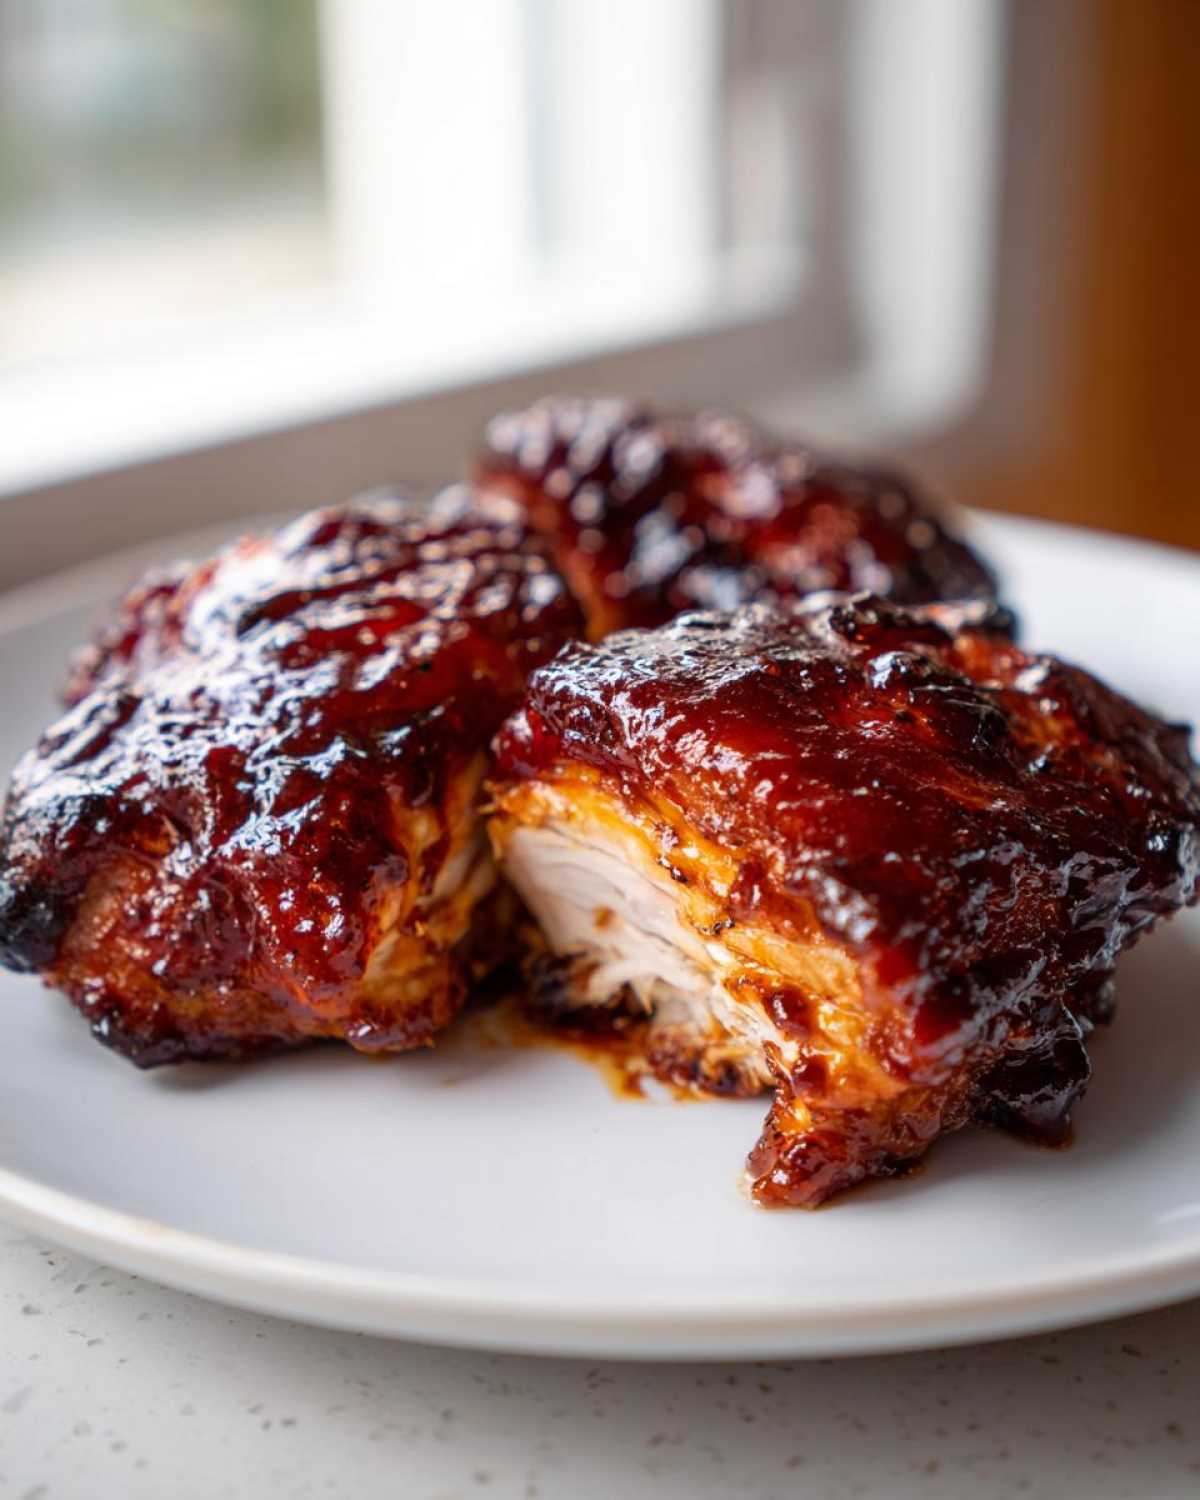
For more sauce deep dives, check out my tricks on how to make sticky BBQ glaze!
Share Your Sticky Honey BBQ Chicken Thighs Success
Alright, that’s it! You’ve got the recipe, you know the secrets to that unbelievably thick, clinging, sticky BBQ chicken coating, and now it’s your turn to shine in the kitchen. I put my heart and soul into perfecting this method, especially nailing that final broil that locks in the flavor and shine.
I really, truly want to know how these turned out for you! Did you manage to get that perfect caramelized exterior? Was the stickiness everything you dreamed of? Don’t be shy—let me hear all about your creation!
Please, jump down into the comments below and give this recipe a rating. Your feedback actually helps me figure out which recipes to perfect next. And if you snapped a picture of your beautiful, messy, glazed chicken dinner—I want to see it! Tag me on social media so I can celebrate your sticky success with you. For any questions about future recipes or just to say hi, you can always reach out through my contact page!
PrintSticky Honey BBQ Chicken Thighs
Make flavorful, sticky BBQ chicken thighs using a simple honey glaze baked in the oven for a caramelized finish.
- Prep Time: 10 min
- Cook Time: 40 min
- Total Time: 50 min
- Yield: 4 servings
- Category: Dinner
- Method: Baking and Broiling
- Cuisine: American
- Diet: Low Fat
Ingredients
- 8 bone-in, skin-on chicken thighs
- 1 tablespoon olive oil
- 1 teaspoon salt
- 1/2 teaspoon black pepper
- 1/2 teaspoon garlic powder
- 1/2 cup ketchup
- 1/4 cup honey
- 3 tablespoons apple cider vinegar
- 2 tablespoons brown sugar, packed
- 1 tablespoon Worcestershire sauce
- 1 teaspoon smoked paprika
- 1/2 teaspoon onion powder
Instructions
- Preheat your oven to 400 degrees Fahrenheit (200 degrees Celsius). Line a baking sheet with aluminum foil and place a wire rack on top of the foil.
- Pat the chicken thighs dry with paper towels. Rub the thighs all over with olive oil, then season evenly with salt, pepper, and garlic powder. Place the seasoned thighs on the wire rack.
- Bake the chicken thighs for 25 minutes.
- While the chicken bakes, prepare the glaze. In a small saucepan, combine the ketchup, honey, apple cider vinegar, brown sugar, Worcestershire sauce, smoked paprika, and onion powder.
- Bring the sauce mixture to a simmer over medium heat, stirring occasionally. Reduce the heat to low and cook for 5 to 7 minutes, or until the sauce thickens enough to coat the back of a spoon. Remove from heat.
- After the initial 25-minute bake, remove the chicken from the oven. Brush half of the prepared honey BBQ glaze generously over the tops and sides of the chicken thighs.
- Return the chicken to the oven and bake for another 10 minutes.
- Switch your oven setting to broil (high). Brush the remaining glaze over the chicken. Broil for 2 to 4 minutes, watching closely to prevent burning, until the glaze is deeply caramelized and sticky.
- Remove the chicken from the oven and let it rest for 5 minutes before serving.
Notes
- For extra crispy skin, ensure the chicken is very dry before seasoning and use the wire rack to allow air circulation around the thighs.
- If the sauce seems too thin after simmering, continue to cook it for a few more minutes until it reduces further.
- You can baste the chicken once more during the final 10 minutes of baking if you prefer a very thick coating.
Nutrition
- Serving Size: 2 thighs
- Calories: 450
- Sugar: 25
- Sodium: 550
- Fat: 22
- Saturated Fat: 7
- Unsaturated Fat: 15
- Trans Fat: 0
- Carbohydrates: 30
- Fiber: 1
- Protein: 35
- Cholesterol: 130