

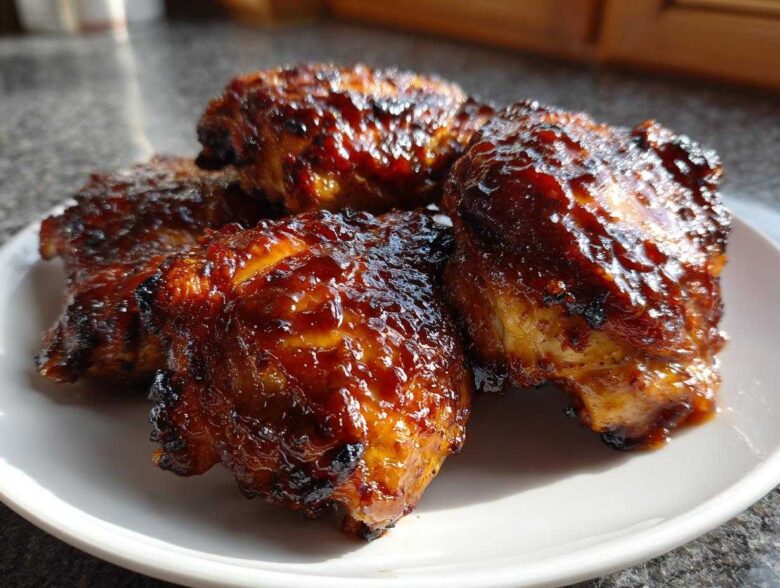
Listen, I get it. You want BBQ chicken thighs, but you’re tired of the sad, soggy topping that just slides right off when you try to pick it up. We all deserve that perfect bite where the glaze is thick, almost chewy, and those edges of the skin are perfectly charred and crisp, right? It’s a textural unicorn, but I promise you, I’ve cracked the code.
Forget wrestling with a grill in the rain! I spent way too many weeknights fiddling until I perfected this exact oven technique for Sticky BBQ Chicken Thighs with Crispy Edges. We bake them low and slow to keep them juicy, and then we hit them with the broiler at the end. It’s the easiest way to get that intense, caramelized flavor and serious crisp factor. If you want to start from scratch with your sauce, check out my guide for the best easy homemade BBQ sauce recipe, but even using store-bought works great! Trust me, once you try this method, you won’t look back!
Why You Will Make These Sticky BBQ Chicken Thighs with Crispy Edges Again and Again
You absolutely have to try these because they solve all the usual BBQ problems! They’re not just good; they are texturally perfect every single time. I’ve developed this recipe specifically to hit that sweet spot that everyone craves.
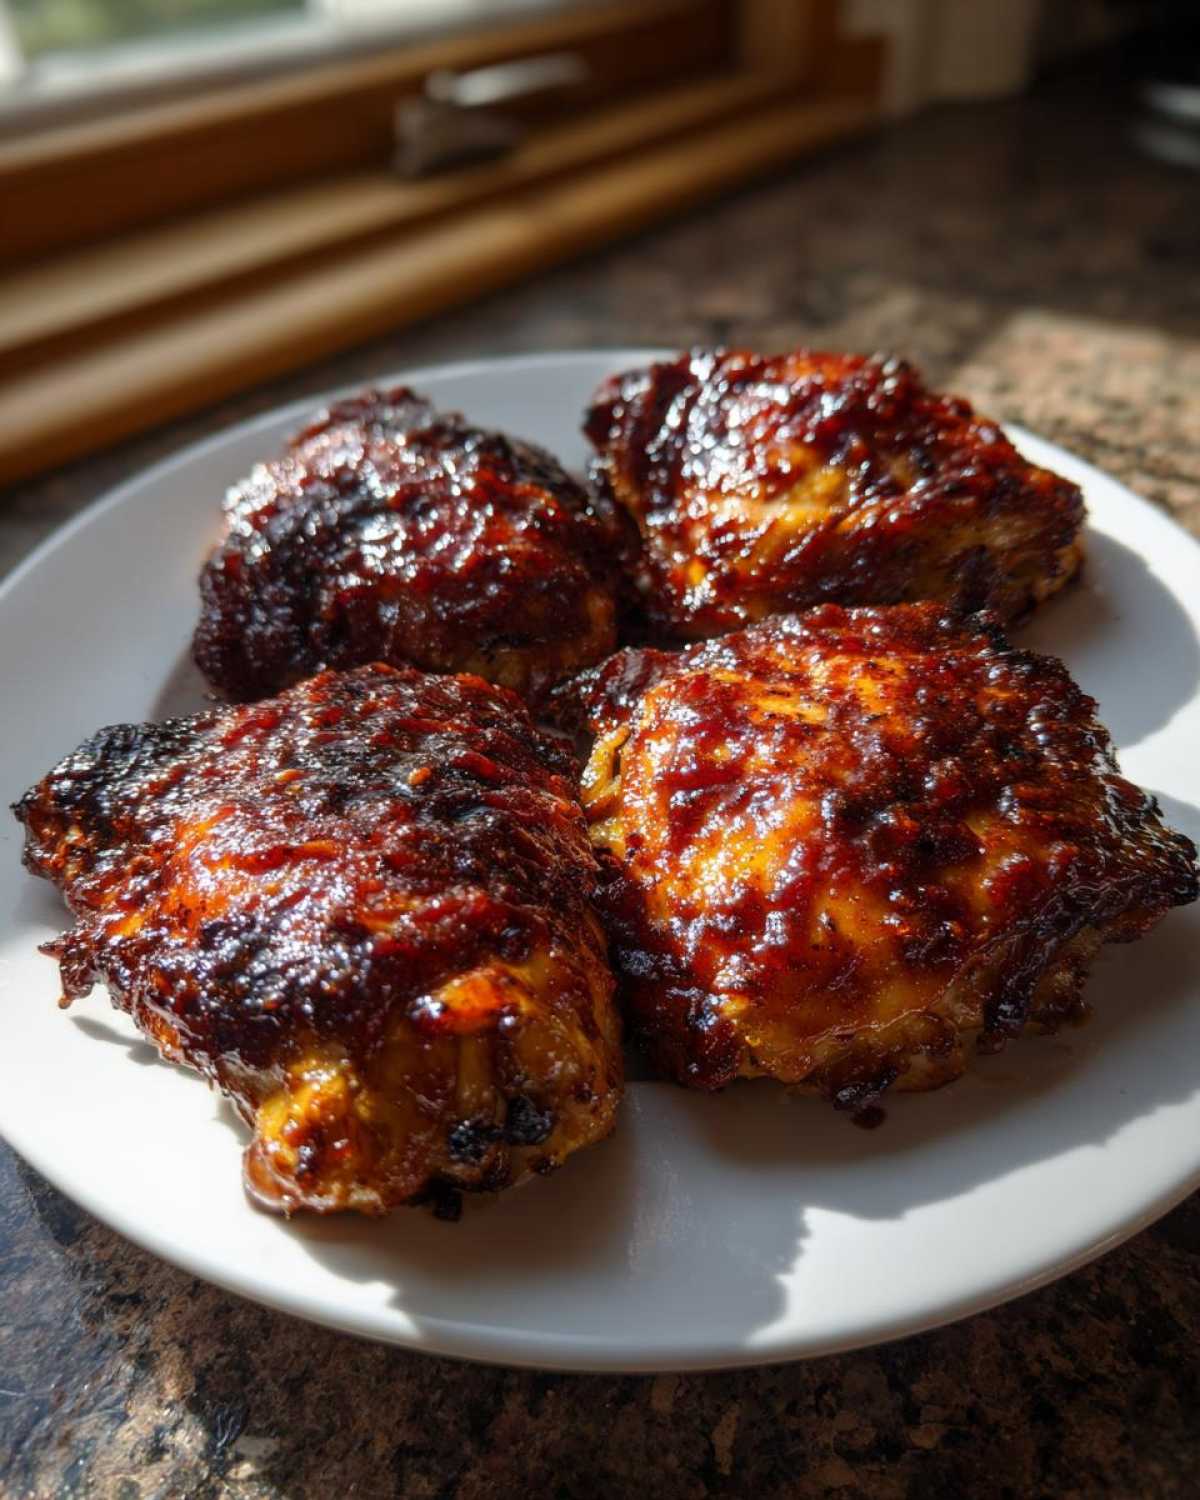
- You get that legendary, thick, sticky glaze that clings perfectly to every piece.
- The skin turns wonderfully golden and renders out fat, giving you true crispy edges.
- It’s entirely hands-off while baking—mostly oven time, which means less hovering for you!
- We use super simple seasoning blends that let the barbecue flavor really shine through.
- The thighs stay incredibly juicy inside because we use the right temperature control.
Essential Ingredients for the Best Sticky BBQ Chicken Thighs with Crispy Edges
Okay, you know I preach simplicity, but the ingredients are where we set ourselves up for success here. When we’re aiming for that perfect balance of super-sticky sugar and crispy texture, we can’t skimp on the core components. Don’t grab just any watery BBQ sauce, and pay attention to what gives us that deep, almost black caramelization!
The secret to max sticking power? It’s usually the combination of honey or molasses. Molasses, especially, gives you that deep, slightly bitter undertone that keeps the sweetness from tasting flat. If you’re looking to build that sauce totally from scratch, you should definitely look at my tips for making your own homemade BBQ sauce!
For the Chicken Thighs
We have to start with bone-in, skin-on thighs here. That skin is absolutely necessary for the crispy finish we’re chasing!
- 8 bone-in, skin-on chicken thighs (Make sure they’re patted bone dry!)
- 1 tablespoon olive oil (Just enough to help the seasoning stick)
- 1 teaspoon salt
- 1/2 teaspoon black pepper
- 1/2 teaspoon garlic powder
- 1/4 teaspoon paprika
For the Thickening Sticky BBQ Glaze
This is where the magic happens when we reduce the moisture content. The thicker the starting sauce, the quicker we get that gorgeous, thick coating.
- 1 cup your favorite thick BBQ sauce (If it pours like water, you need to reduce it more later!)
- 1/4 cup honey or molasses (Molasses is my go-to for that deep color)
- 1 tablespoon apple cider vinegar (This helps cut the intense sweetness)
The Step-by-Step Guide to Oven Baked Sticky Chicken Thighs with Crispy Edges
This is where we turn those seasoned thighs into something truly amazing. The key to nailing this is making sure every stage works together: we set up the environment for crispness first, then we build the sticky, sweet barbecue layer on top.
If you’ve ever wondered how restaurants get that amazing texture, the secret is usually using a rack to let the fat drip away—no resting in its own juices! Also, never underestimate the power of a little advance planning for the sauce. If you want more deep flavor in your chicken overall, you might want to try marinating it first (without the sugar!). Check out my notes on best chicken marinade recipe for juicy flavor if you have extra time.
Preparation and Initial Seasoning for Crispy Edge Chicken Thigh Dinner
First things first: preheat that oven to 400°F (200°C). You want it hot! The next step is non-negotiable for crispiness: Line a baking sheet with foil (that’s for easy cleanup, thank goodness), and then put a wire rack on top of that foil. We are going to pat those chicken thighs *aggressively* dry with paper towels. Seriously, absorb every bit of surface moisture. That moisture steams when it hits heat, and steaming is the enemy of crisp skin! Rub them lightly with oil, hit them hard with your salt, pepper, garlic, and paprika mix, and nestle them skin-side-up on the rack. Bake them for 30 minutes to start rendering that fat and getting them cooked through.
Creating the Thick Glaze for Sweet and Sticky Barbecue Chicken
While the chicken is chilling in the oven, we make our star topping. Grab a small saucepan and mix together your thick BBQ sauce, honey or molasses, and that splash of apple cider vinegar. Over medium-low heat, bring it just to a gentle simmer. You must let it gently bubble for about 5 to 7 minutes, stirring often. Why? Because we are cooking off all that extra water! Reducing the liquid concentrates the sugars, which is exactly what makes the glaze wonderfully sticky instead of runny.
Baking, Glazing, and Achieving Perfectly Caramelized Chicken Thighs
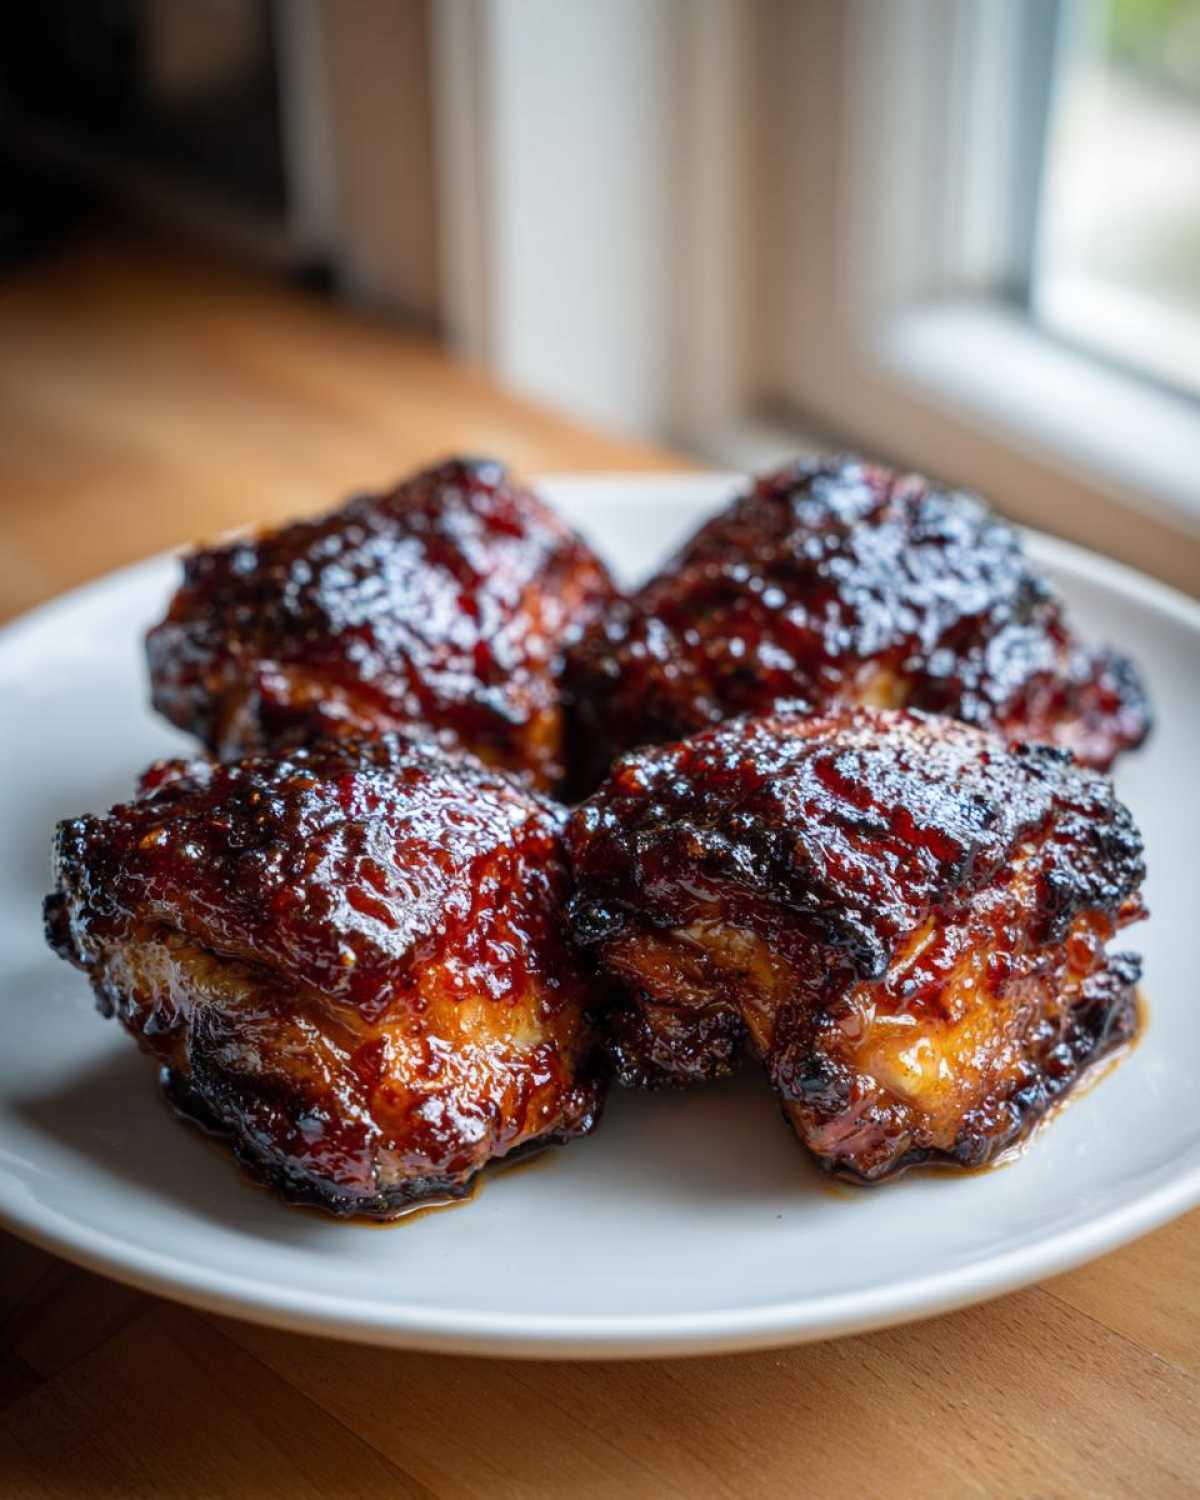
After the initial 30 minutes, pull the chicken out—they should look pale but mostly cooked. Now, brush that gorgeous, thick glaze all over the tops and sides of every piece. Get a generous coat on there! Put them back in the oven for another 10 minutes to let the glaze set up a little bit. Now for the grand finale! Switch your oven to the broiler setting, turn it up high, and slide that tray onto the upper-middle rack, about 6 to 8 inches from the heat. Broil for just 2 to 4 minutes. You have to watch it like a hawk here! This intense, direct heat blasts the surface sugars until they bubble up and char slightly, giving you those incredible perfectly caramelized chicken thighs and crispy edges. Pull them out the second you see dark, bubbly spots!
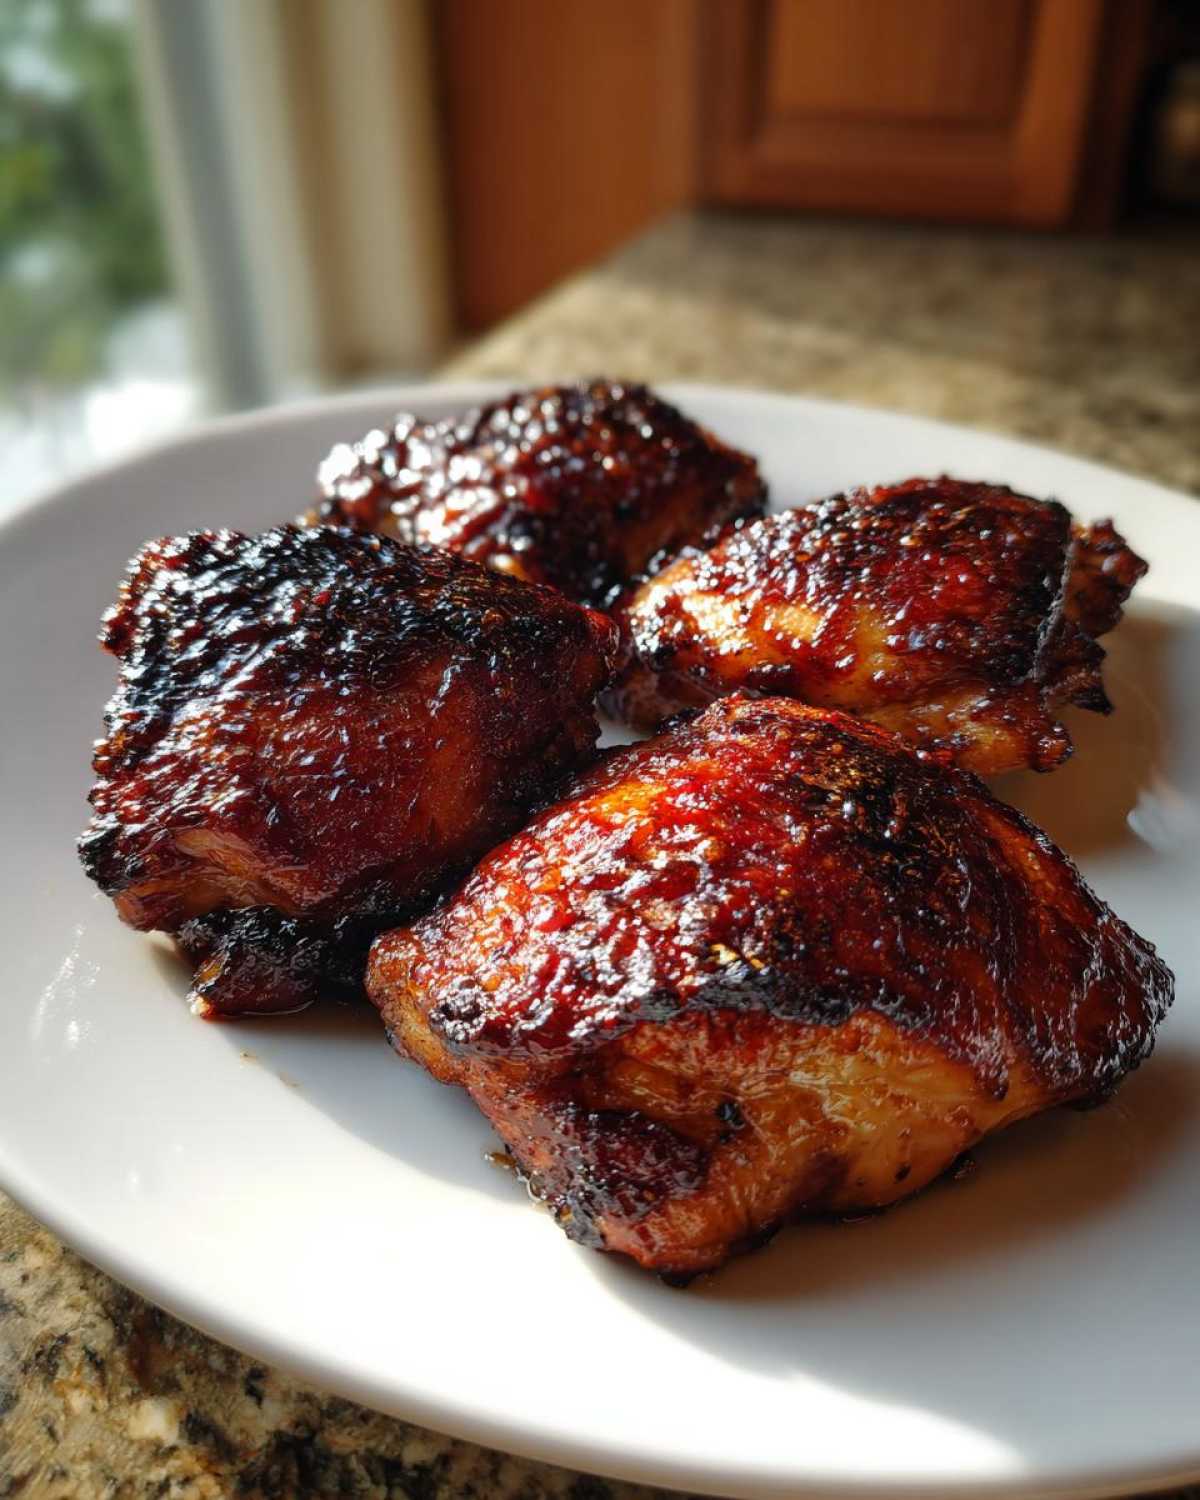
Expert Tips for Perfect Sticky BBQ Chicken Thighs with Crispy Edges
Look, even I mess up sometimes, especially when that broiler is involved! Sugar burns fast, my friends, really fast. But these aren’t just little tips; these are the things I learned after destroying about six batches trying to get that ultimate sweet-and-crisp texture we’re after in our oven baked sticky chicken thighs. Don’t sweat it if your first batch is a little dark; just learn from my mistakes!
If you’ve got an air fryer, you can skip the oven/broiler combo entirely for a similar result, though I still think the broiler gives you the best *char*. If you want to check out that method, I have a whole guide on air fryer chicken that gives a beautiful skin finish, too.
Troubleshooting: Preventing Burnt Glaze While Maximizing Stickiness
Remember how we simmered that sauce down? That’s Step One for success! If you skip that reduction, you end up with a watery glaze that just steams the skin instead of caramelizing. Once you apply the glaze for the final bake, keep an eye on it, but the real danger is under the broiler.
When you switch to broil, your chicken needs to be closer to the top element than your regular baking rack usually places it. But here’s the trick: If you see any spot getting dark brown too quickly—like, under 90 seconds—slide the whole pan down one notch closer to the bottom of the oven. You want that dark, bubbly finish, not charcoal! If your oven runs extra hot, you might only need 2 minutes under the broiler. Constant watching is key for that thick BBQ sauce chicken recipe finish.
Choosing the Right Cut for a Juicy Chicken Thighs with Crispy Finish
If you’re asking me—and you should be, because I’m obsessed with crispness—you HAVE to use bone-in, skin-on chicken thighs for this. The bone acts like an internal temperature regulator, keeping the meat from drying out while the skin gets exposed to the high heat needed for crisping. It’s the perfect marriage for a juicy chicken thigh with crispy finish.
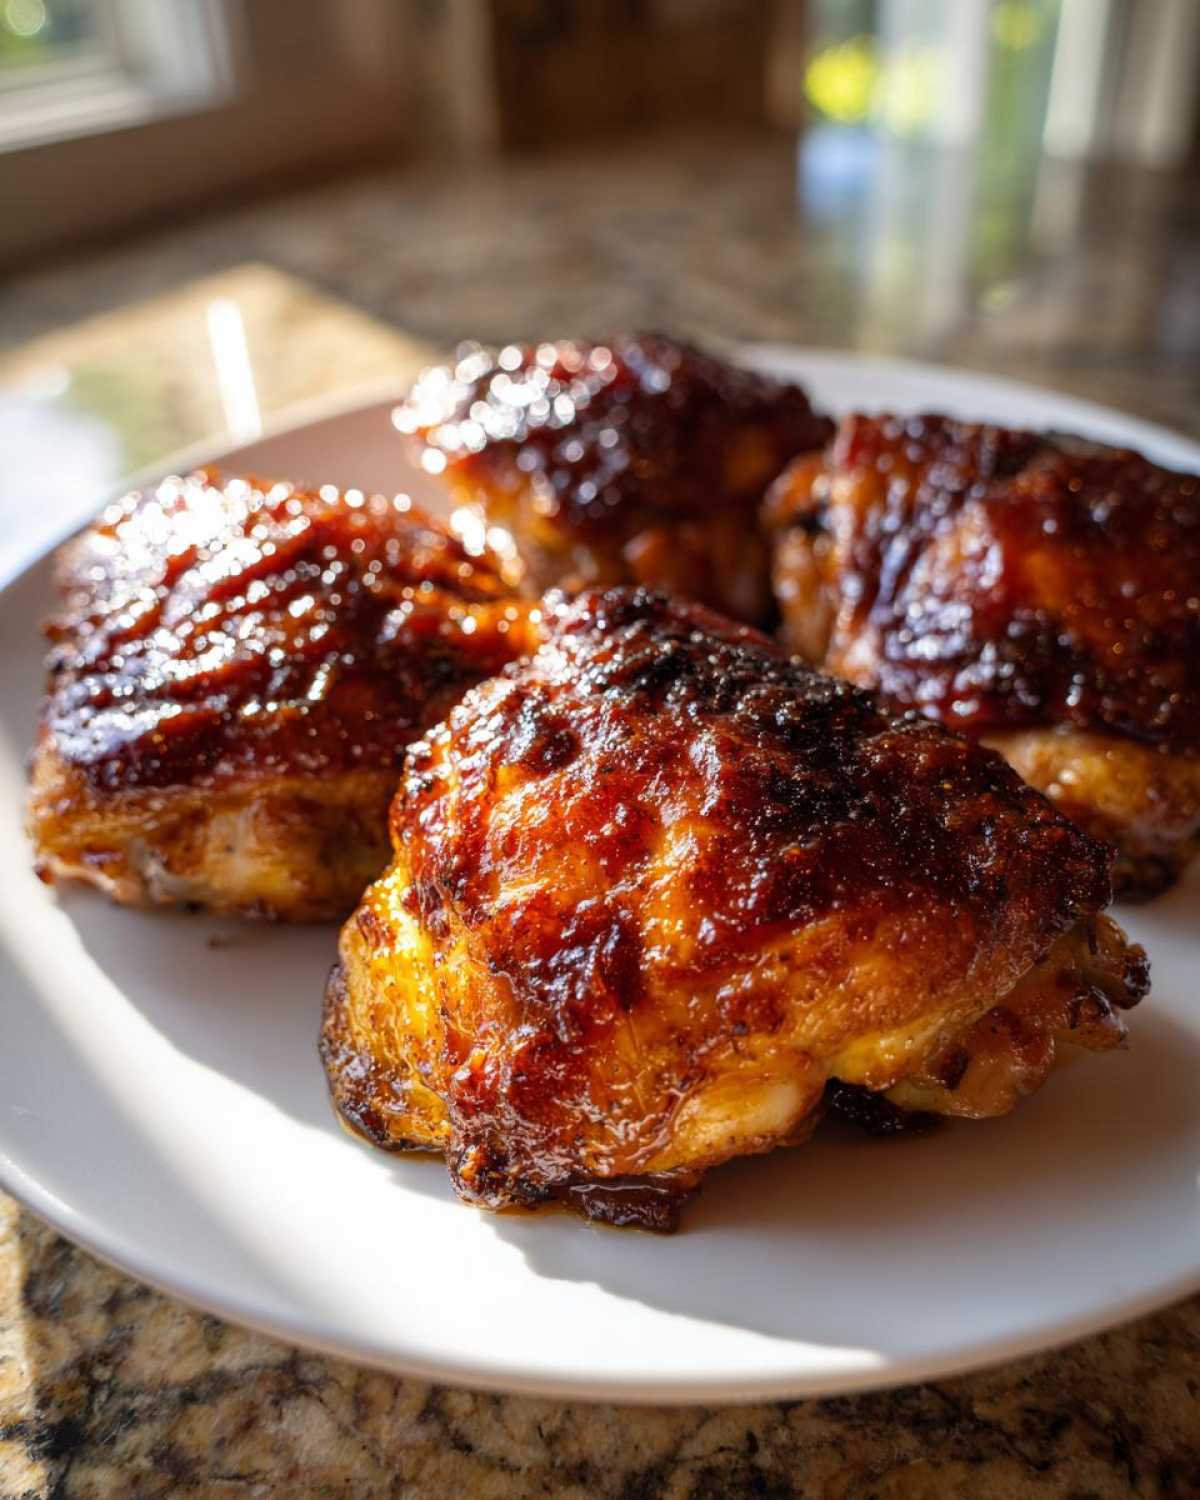
Can you do it with boneless? Sure, you can certainly make the sauce sticky! But boneless thighs are much flatter and cook quicker, meaning the sugar has less time to caramelize before the meat is overdone. Honestly, you won’t get that dramatic, bubbly crust you see in the pictures without the skin and bone structure supporting it during that final blast of heat.
Serving Suggestions for Your Crispy Edge Chicken Thigh Dinner
Now that you have this spectacular, sticky, crispy chicken, you certainly can’t just eat it standing over the sink, right? (Though I’ve totally done it.) You need some great sides to go alongside this big flavor, but nothing too fussy. We want easy weeknight BBQ sides that soak up some of that extra glaze!
My top recommendation is always something creamy to balance out the tang and char of the barbecue. My recipe for creamy mashed potatoes is a dream for scraping up all those little sticky bits left on your plate!
Classic Pairings for Sweet and Sticky Barbecue Chicken
Stick to the classics for these bold flavors, or try something bright and fresh to cut through the richness.
- Creamy Coleslaw: You need that cold, crunchy vinegar element to contrast the warm, sweet chicken. Don’t load it up with too much mayo; a light tang works best.
- Simple Baked Beans: If you’re already using the oven, why not throw a can of good baked beans in there for the last 20 minutes? That smoky sweetness pairs perfectly.
- Grilled Corn on the Cob: Even if you’re cooking the chicken inside, the grill (or a grill pan) gives the corn that smoky char that just screams summer BBQ.
- Buttery Green Beans: Something green and simple, steamed quickly and tossed with butter and salt. It brings a fresh, clean note to the plate.
Storage and Reheating Instructions for Sticky BBQ Chicken Thighs
So, you actually managed to have leftovers? Wowzers! That tells me these sticky BBQ chicken thighs were a huge hit. Good for you! Dealing with leftovers of something that relies so heavily on a crispy finish can be tricky, but don’t worry, I have a system that brings back most of that glorious texture.
When storing them, the biggest thing to remember is that the moisture in the glaze will soften the skin—that’s just chemistry, we can’t stop it! But we can handle it smartly.
Refrigerating Your Glazed Chicken Thighs
First, you need to cool them down completely. Don’t put hot chicken in plastic containers; that just creates steam and makes everything soggier faster. Once they are fully cool (I usually let them sit on the counter for an hour), store them in a shallow, airtight container. I like to place a small piece of paper towel underneath them to wick away any condensation that forms overnight. They keep beautifully like this for about 3 or 4 days in the fridge. Any longer, and I honestly start feeling nervous about eating them, you know?
Restoring the Crispness on Reheated Chicken Thighs
The microwave is the absolute enemy of crispy skin. It heats the water molecules, turning that nice crust into chewy rubber. So, do yourself a favor and skip that button entirely for these babies!
We want to use dry, high heat to shock the skin back into crispness while gently warming the meat. The oven is fantastic for this if you’re doing a bigger batch, but the air fryer is my secret weapon for single servings.
- Oven Method: Place the cooled thighs on a wire rack set over a foil-lined baking sheet (just like we cooked them!). Bake at 375°F (190°C) for about 10 to 12 minutes. That rack lets the air circulate so the bottom doesn’t steam, and it re-crisps the skin.
- Air Fryer Method: If you have an air fryer, use it! Place the thighs in a single layer and cook at about 360°F (180°C) for 6 to 8 minutes. This wakes up the skin texture wonderfully. If you need a side idea to go with your reheated leftovers, try my recipe for a simple air fryer baked potato—it’s fast!
If you want to keep the moisture locked in while you crisp the skin, you can brush a tiny dab of extra BBQ sauce (not too much, or it will burn!) onto the meat side before reheating. Enjoy those second-day beauties!
Frequently Asked Questions About This Barbecue Chicken Thighs Recipe for Crispness
I know you have questions! When you’re trying to walk the line between super-sweet and super-crispy, it takes a minute to trust the process. I’ve gathered the questions I always get about this barbecue chicken thigh recipe for crispness. Hopefully, this helps you feel totally confident!
Can I use boneless chicken thighs in this recipe?
Yes, you certainly can use boneless chicken thighs if that’s what you prefer, but I need to give you a heads-up! For the best results in achieving those *crispy edges*, bone-in, skin-on is what I always recommend. Boneless thighs cook much faster, and you might find the glaze burns before the meat is done, or you just won’t get that deep, rendered skin crispness. If you stick with boneless, reduce the initial baking time by about 10 minutes and watch that broiler like a hawk! You can still get a wonderfully sweet and sticky barbecue chicken result though.
Is skipping the broiler going to ruin the crispy finish?
Honestly, yes, it’s going to make a big difference for the “crispy edges” part of the title. The broiler is what takes that set, sticky glaze and blasts the top surface with dry, intense heat to caramelize it beautifully and crisp up the exposed skin. If you absolutely cannot use the broiler, you have two options: 1) Bake for the full time, apply the glaze, and then bake for an extra 15-20 minutes at 425°F (220°C) hoping the edges crisp up, or 2) You can try turning the heat up to 450°F (230°C) for the last 10 minutes, but you must use a thermometer to ensure the internal temp doesn’t climb past 170°F. The broiler is still the superior method for a true perfectly caramelized chicken thigh.
What if I don’t have a wire rack? Can I still make these oven baked sticky chicken thighs?
Oh, the missing equipment struggle! Don’t panic. The wire rack is there so the chicken skin isn’t sitting directly in rendering fat and moisture on the baking sheet—that’s what makes the bottom soggy. If you don’t have one, you can create a make-shift rack using scrunched-up balls of aluminum foil placed on the baking sheet, spaced about 2 inches apart. Place the seasoned thighs right on top of those foil “legs.” It elevates the chicken just enough to let air circulate underneath. It’s not as good as a proper rack, but it definitely works better than just laying them flat on the foil.
How can I make sure my glaze stays thick and doesn’t burn easily?
This comes back to Step 6 in the instructions! The most important thing for a thick glaze baked chicken thigh is reducing the sauce beforehand. That simmering step evaporates the water, leaving behind concentrated sugars. If your sauce is already super thick (like a paste), you might only need 2 or 3 minutes under the broiler. If you’re worried it’s going to burn fast, try opening the oven door slightly (just a crack, use a wooden spoon handle to wedge it open carefully) to let some of that intense heat escape while you broil. This keeps the ambient oven temp slightly lower while the direct heat still hits the top.
I love flavor variance—can I add garlic and onion powder to the glaze?
Absolutely! That’s a great way to boost flavor without adding sugar or moisture. Since you are cooking the glaze down anyway, adding your dry seasonings like onion powder, a little smoked paprika, or even a pinch of cayenne pepper to the sauce mixture while it simmers won’t affect the texture at all. It just deepens the overall profile of your easy weeknight BBQ chicken thighs. If you ever want to venture into lighter cooking, I have a fun, veggie-filled chicken zucchini stir-fry recipe that uses similar aromatics!
Estimated Nutritional Data for Glazed Chicken Thigh Cooking Guide
Okay, let’s talk numbers for a second. I always like to give people a ballpark idea of what they’re digging into, especially when we’re using sugary glazes like this, which is why this is such a popular Glazed chicken thigh cooking guide!
Remember, this is based on the exact measurements and ingredients listed above for two average-sized bone-in thighs, and I used a standard, thick-style store-bought sauce. If you use a super sugary brand or add extra honey, those sugar and calorie counts are definitely going to jump up on you. Think of this as the best baseline for your easy weeknight BBQ chicken thighs!
Here’s the breakdown per serving (which we set at 2 thighs):
- Calories: About 550
- Fat: 30 grams (Roughly 10g Saturated, 20g Unsaturated)
- Carbohydrates: 38 grams (This is mostly sugar from the glaze!)
- Protein: A solid 35 grams
- Sugar: 35 grams
See that sugar number? That’s why we ate them with a side of green beans earlier—you need something light and fresh to balance out all that incredible sticky sweetness! It’s worth every single gram for that crispy finish, though, isn’t it?
Share Your Sticky BBQ Chicken Thighs with Crispy Edges Results
Okay, friends, I am dying to know how they turned out for you! This method for achieving those perfectly caramelized, sticky BBQ chicken thighs with crispy edges is my absolute pride and joy, and honestly, seeing your photos and hearing about your successes really makes my day in the kitchen.
Did you manage that crazy crispness? Did you use the molasses or the honey? Did you have to pull them out faster under the broiler than I did? Drop all the details in the comments below! We’re all in this together, learning the best ways to get that perfect dinner on the table.
Leave a Rating and Tell Me Everything!
Seriously, a rating—even just five stars, or maybe four stars with a note about adjusting the broiler time—helps other cooks know what to expect. It’s how we build confidence in these heirloom methods!
- Click the star rating right below this section to let me know how this recipe did for you!
- Did you serve it with mashed potatoes or coleslaw? I always love new side dish ideas.
- Do you have a question about oven temperatures or sauce thickness? Pop it in the comments, and I’ll get back to you right away.
If you want to send me photos of your beautiful, glossy, charred chicken, you can always reach out through my contact page—I love seeing your kitchen results! Happy cooking, everyone!
PrintSticky BBQ Chicken Thighs with Crispy Edges

Follow this method to bake chicken thighs until juicy, then finish them under the broiler to create a thick, sticky glaze and crispy edges.
- Prep Time: 10 min
- Cook Time: 45 min
- Total Time: 55 min
- Yield: 4 servings
- Category: Dinner
- Method: Baking and Broiling
- Cuisine: American
- Diet: Low Lactose
Ingredients
- 8 bone-in, skin-on chicken thighs
- 1 tablespoon olive oil
- 1 teaspoon salt
- 1/2 teaspoon black pepper
- 1/2 teaspoon garlic powder
- 1/4 teaspoon paprika
- 1 cup your favorite thick BBQ sauce
- 1/4 cup honey or molasses
- 1 tablespoon apple cider vinegar
Instructions
- Preheat your oven to 400 degrees Fahrenheit (200 degrees Celsius). Line a baking sheet with foil and place a wire rack on top of the sheet.
- Pat the chicken thighs very dry using paper towels. This step helps achieve crispiness.
- Rub the chicken thighs all over with olive oil, then season evenly with salt, pepper, garlic powder, and paprika.
- Place the seasoned thighs skin-side up on the wire rack.
- Bake for 30 minutes.
- While the chicken bakes, prepare the sticky glaze: In a small saucepan, combine the BBQ sauce, honey or molasses, and apple cider vinegar. Heat over medium-low heat, stirring until just simmering. Reduce the heat to low and let it simmer gently for 5 to 7 minutes, stirring often, until the sauce thickens slightly. Remove from heat.
- After 30 minutes of baking, remove the chicken from the oven. Brush a generous layer of the thickened glaze over the top and sides of each thigh.
- Return the chicken to the oven and bake for another 10 minutes.
- Switch your oven setting to broil (high). Move the baking sheet to the upper-middle rack, about 6 to 8 inches from the heat source. Broil for 2 to 4 minutes, watching constantly, until the glaze is dark, bubbly, and the edges of the skin are crisp.
- Remove from the oven and let the chicken rest for 5 minutes before serving. Brush with any remaining glaze if desired.
Notes
- For the stickiest glaze, do not skip simmering the sauce; this reduces water content and concentrates the sugars.
- If your sauce starts to burn under the broiler, immediately move the rack lower or reduce the broiler setting.
- Use bone-in, skin-on thighs for the best texture and flavor results.
Nutrition
- Serving Size: 2 thighs
- Calories: 550
- Sugar: 35
- Sodium: 750
- Fat: 30
- Saturated Fat: 10
- Unsaturated Fat: 20
- Trans Fat: 0
- Carbohydrates: 38
- Fiber: 1
- Protein: 35
- Cholesterol: 140