

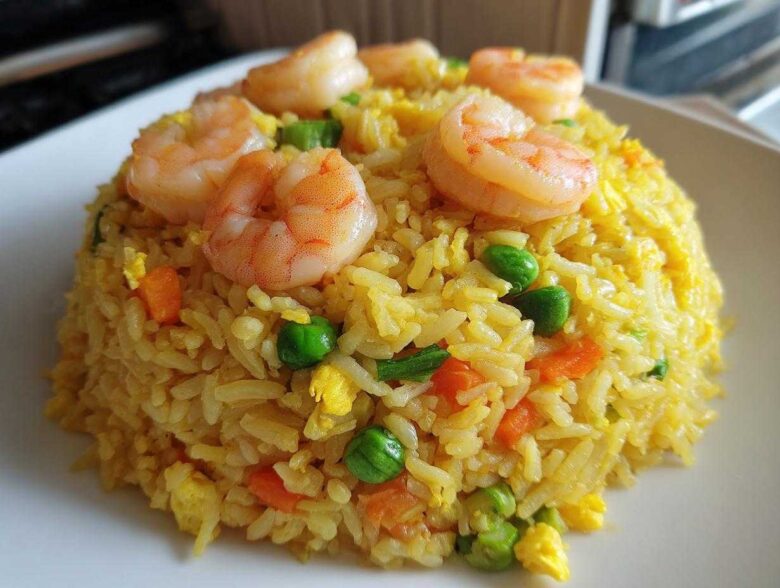
Listen, I’m not going to lie—I used to think ordering takeout was the only way to get proper fried rice. Theirs always seemed to have that certain *wok hei*, that smoky flavor, and their rice never clumped into sticky little balls like mine did at home. But friends, I cracked the code! This **shrimp fried rice recipe** is my go-to for those nights when I need a real, savory dinner on the table in under 30 minutes. Seriously, forget calling the delivery place; this version is faster, tastes ten times better, and I can control exactly how much garlic goes in!
The absolute key, the hill I will die on for this savory seafood meal, is the rice. Most people fail here. If you use freshly cooked rice, you end up with mushy disappointment. I learned the hard way that you must use cold, day-old rice—that stuff dries out just enough to absorb all the amazing sauce without turning gummy. Once you master that simple rule, this becomes the easiest, most satisfying Better Than Takeout Chinese Food experience you can have right in your own kitchen. I’ve made this so many times I could probably do it with my eyes closed!
Why This shrimp fried rice recipe is Better Than Takeout Chinese Food
Look, restaurant fried rice is good, but it’s often swimming in too much oil, and honestly, sometimes you just don’t trust where they sourced their shrimp! My homemade version is hands-down superior because I control every single flavor bomb. This is truly one of my favorite Quick Dinner Recipes because you end up with something way more flavorful and savory than what you get delivered.
Here’s what makes this **Better Than Takeout Chinese Food** experience worth the five minutes of active cooking time:
- Speed: We’re talking 15 minutes start to finish if your rice is ready to go. Hello, 30 Minute Meals!
- Flavor Depth: We use fresh ginger and garlic that you just don’t get in huge pre-made batches.
- Perfect Shrimp: We cook the shrimp quickly first and pull it out so it stays plump and tender, not rubbery.
- Texture: This is the big one! No sad, clumpy rice here.
Achieving Perfect Texture with Leftover Rice Recipes
The science is really simple, even though it feels like a major expert tip. When rice cools in the fridge overnight, the starches firm up. This process, aging, stops the grains from releasing too much moisture when they hit the hot pan. That firm structure means the grains separate perfectly when you stir fry, absorbing flavor instead of getting mushy. It’s the whole secret to any great **Savory Fried Rice**.
Essential Ingredients for Your shrimp fried rice recipe
Okay, let’s talk about what goes into making this incredibly satisfying **Garlic Fried Rice with Shrimp**. Getting takeout taste at home means you can’t skimp on quality, but thankfully, the ingredient list is pretty short! The trick here isn’t complexity; it’s using fresh items and measuring your sauces correctly. Trust me, if you measure the soy sauce and sesame oil exactly as written, you won’t need to guess if it tastes ‘right’—it’ll be perfect.
You are going to need the full lineup below. Make sure you have everything ready to go before you turn the heat on, because once that wok gets hot, things move *fast*! I always lay everything out on my counter first. Don’t eyeball the rice measurement either, or you’ll end up with barely any tasty shrimp mixed in!
- 1 tablespoon vegetable oil (Just plain oil, nothing fancy here!)
- 8 ounces raw shrimp, peeled and deveined
- 2 cloves garlic, minced
- 1 teaspoon fresh ginger, grated
- 2 large eggs, lightly beaten
- 3 cups cold, cooked white rice (Seriously, day-old is king!)
- 1 cup frozen mixed vegetables (peas, carrots, corn)
- 2 tablespoons soy sauce
- 1 tablespoon oyster sauce (This is optional, but it really thickens up the flavor!)
- 1 teaspoon sesame oil
- 2 green onions, sliced
Ingredient Clarity and Preparation Notes
This is where we build trust, right? Let’s make sure every component is ready for its close-up:
- For the shrimp, make sure they are completely peeled and deveined. Nobody wants that unexpected texture in their rice! They should be ready to go straight into the hot pan.
- The eggs should just be lightly beaten—we aren’t making an omelet here, just scrambling them quickly in the pan later. Don’t worry about adding salt to them.
- When it comes to veggies, if you are using the frozen mixed bag, keep them frozen! Adding them straight from the freezer helps them stay crisp instead of turning soggy when they hit the heat.
- If you’re new to this, I highly recommend checking out my tips for handling shrimp—it guarantees a great sear!
Step-by-Step Instructions for Easy Shrimp Fried Rice
Now for the fun part! This entire process happens so fast that you absolutely must follow these steps in order, or you’ll end up with overcooked shrimp sitting next to raw garlic. That’s why I love that this turns into a fantastic **One Pan Shrimp Recipes** situation—less cleanup means more time enjoying the meal! You can find lots of other great One Pan Shrimp Recipes ideas on the blog, too!
First thing’s first: high heat! Get a very large skillet or a wok heating up over medium-high heat. Once it’s nice and hot, toss in about a tablespoon of vegetable oil. We want that oil shimmering slightly before anything hits the pan. This ensures everything gets a nice quick sear instead of just steaming.
Cooking the Shrimp and Eggs Separately
This technique is crucial for quality control, people. Throw your peeled and deveined shrimp right into the hot pan. You only need two or three minutes, tops, stirring them around until they turn beautifully pink and opaque. Don’t wait for them to look browned; they’ll keep cooking later! As soon as they’re done tasting raw, use a slotted spoon to scoop them right out and set them aside in a clean bowl. They need a vacation while the rest of the magic happens.
Did your pan look dry after scooping out the shrimp? Add just half a teaspoon more oil if you need to. Now, pour in those lightly beaten eggs. You want to cook these fast. As soon as they puff up slightly and look mostly set—maybe 45 seconds—use your spatula to break them into small pieces and scoop them out to join the shrimp. We are stacking our cooked components neatly!
Building the Flavor Base for Your Weeknight Fried Rice
The pan should still have some residual heat and probably a little flavor residue from the shrimp—that’s good stuff! Now we add our serious flavor boosters: the minced garlic and grated ginger. This part is intense; you only need about 30 seconds of stir-frying time right here. Seriously, if you walk away for a full minute, you will burn the garlic, and burnt garlic tastes bitter. Keep it moving until you smell that amazing, pungent aroma wafting up! This quick step is vital for your **Weeknight Fried Rice** success.
Next up are the frozen mixed vegetables. Toss in your peas, carrots, and corn. We want them heated through but still retaining some bite—about two minutes stirring constantly should do the trick. Then, the star arrives: the cold, day-old rice. You have to break up those clumps immediately with your spatula. Work it around the pan for about three to four minutes until the rice grains are hot all the way through and look separated.
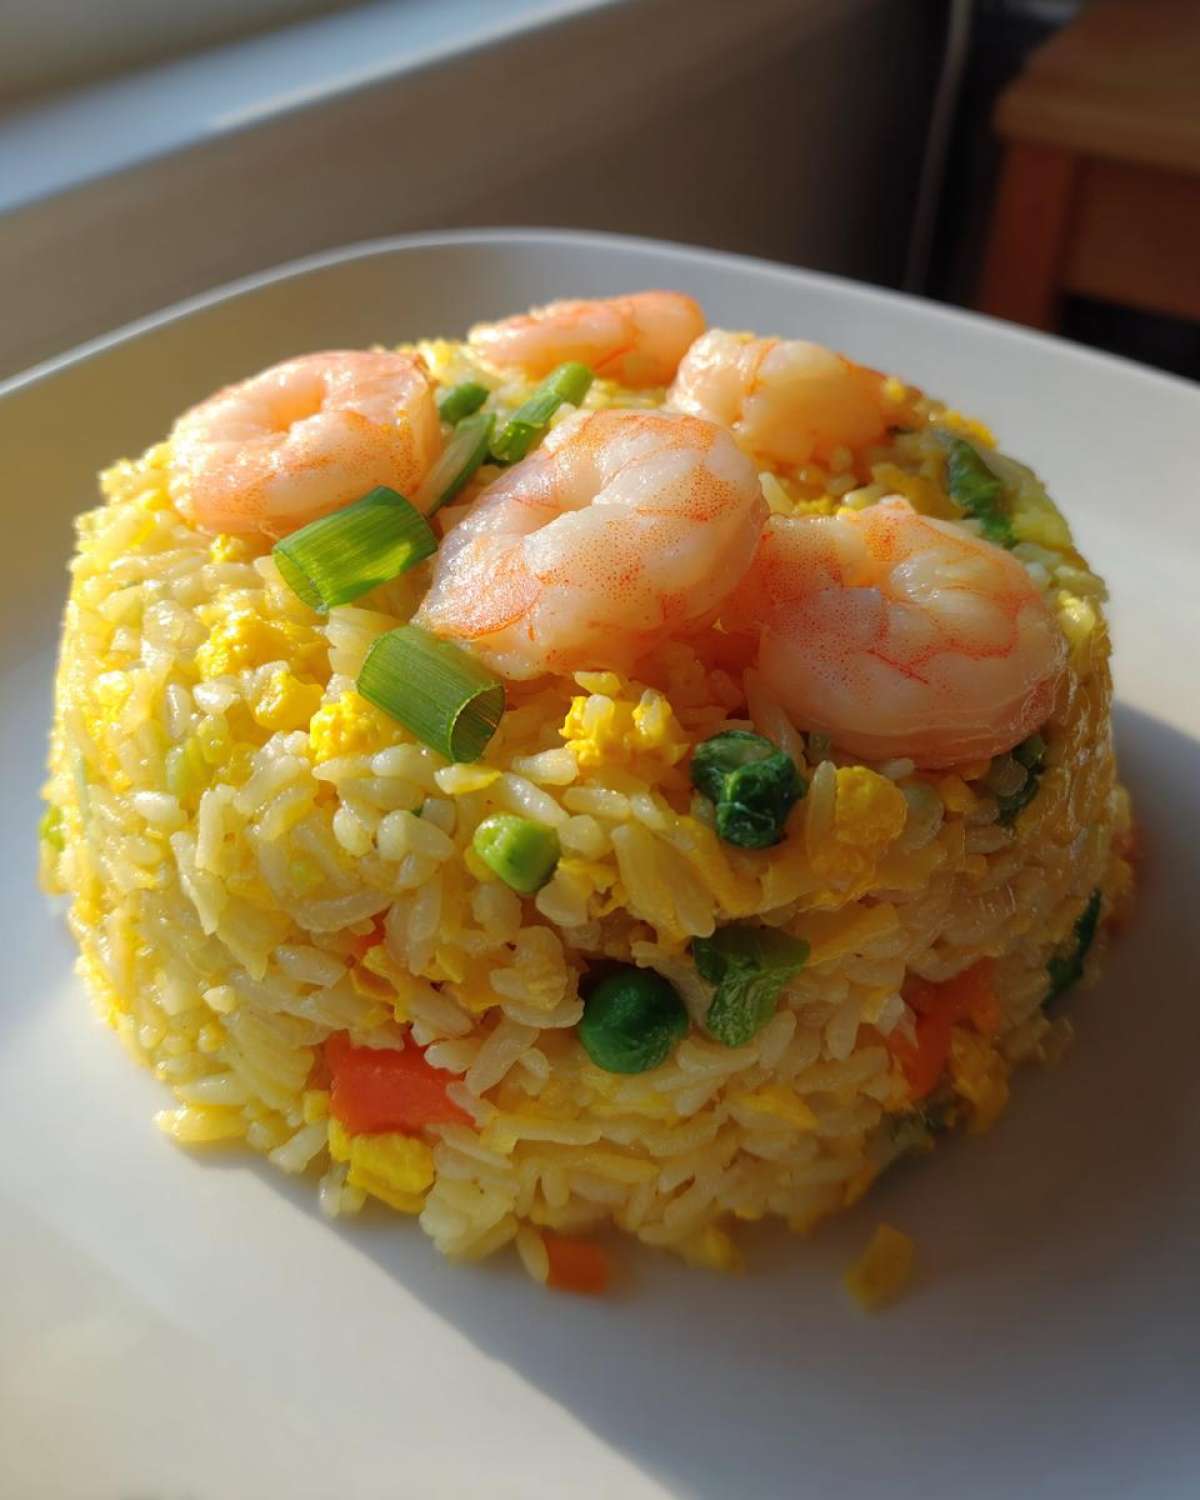
Once the rice is singing, return your cooked shrimp and eggs back into the skillet. Now for the flavor boost: pour the soy sauce and that optional oyster sauce straight over the mixture. Stir like crazy! You need to coat every single grain evenly. Once everything looks nicely browned and coated, drizzle on that teaspoon of sesame oil and toss for one final minute. Kill the heat, stir in your sliced green onions, and serve immediately. You just made **Homemade Asian Takeout** that beats the delivery guy!
Tips for Success with Your shrimp fried rice recipe
I’ve burned rice, I’ve undercooked shrimp, and I’ve definitely made the skillet way too crowded before—we all start somewhere! But over the years of making this **shrimp fried rice recipe**, I’ve picked up a few little secrets that guarantee a restaurant-quality finish every time you make this **Flavorful Seafood Meal**.
The biggest piece of advice I can give you, besides the day-old rice rule we already talked about, is to treat your pan right. You cannot rush this process if you want that perfect texture. High heat is your friend!
- Crank the Heat (But Don’t Burn!): You need medium-high to high heat for proper stir-frying. If your pan isn’t hot enough, the moisture from the veggies and rice will steam everything instead of quickly evaporating, which leads to that gummy texture we hate. Don’t be shy about turning that dial up, but keep stirring constantly, especially once the rice and sauces go in!
- Don’t Overcrowd the Pan: This is a huge one, especially if you’re doubling the recipe. If you heap too much food in there, the temperature drops instantly, and things start steaming. If you’re making more than three servings, please, cook it in two separate batches. It takes an extra five minutes but ensures everything gets that beautiful sear.
- Sauce Placement Matters: When you pour the soy sauce and oyster sauce in, try not to dump it all directly onto the cold rice clumps. Try to pour it slightly around the edges of the active cooking area or directly onto an area of the rice that is already separated. This allows the sauces to heat up and caramelize slightly before mixing completely, adding another layer of depth to your **Homemade Asian Takeout** flavor.
- Thinking Healthier? Go Brown Rice: If you’re looking to slip in some extra fiber, using brown rice is a great option! It still needs to be cooked ahead of time and thoroughly chilled, just like white rice. It gives the final dish a slightly nuttier profile, which pairs wonderfully with the shrimp. You can always find my notes on other healthy swaps over here if you’re meal prepping!
Making This shrimp fried rice recipe a 30 Minute Meal
I know what you’re thinking: is this *actually* quick? Because sometimes these recipes look simple, but then you spend 45 minutes peeling shrimp and chopping ten different vegetables. Not here! Getting this **shrimp fried rice recipe** onto the table in under half an hour is totally achievable, which is why it’s my absolute favorite way to feed the family on a busy Tuesday.
If you look at the details, we only budget 10 minutes for prep time, and that’s only if you’re moving at a steady pace chopping those green onions and measuring out your sauces. The actual cooking time barely clocks in at 15 minutes because everything happens so fast in that hot skillet! Seriously, you’re looking at a full **30 Minute Meal** when you factor in plating time.
This ease of execution is what makes it such a fantastic **Family Friendly Dinner Idea**. I can get the rice going while the kids are doing homework, and by the time they sit down, piping hot, fresh, savory fried rice is waiting for them! Forget soggy microwave leftovers; this is fresh stir-fry magic happening under the wire. If you ever need more inspiration for quick family eats, check out some of my other speedy ideas over here!
The secret to keeping it so fast is that we don’t wander away from the stove. Once you start cooking the shrimp, you are committed until the sesame oil goes in. Trust me, once you get used to the speed, you’ll rely on this technique anytime you need delicious **Quick Dinner Recipes** without the delivery wait time!
Storage and Reheating Instructions for Classic Fried Rice with Veggies
You are not going to want to let any of this amazing **Classic Fried Rice with Veggies** go to waste, right? Even though this recipe comes together so fast, it tastes fantastic as leftovers the next day—provided you store it correctly! I always make a little extra on purpose just so I can have it for lunch the next morning. It’s one of those few meals that actually tastes better when the flavors have had time to really mingle overnight.
The texture we worked so hard to achieve (remember, cold rice is king!) is also the thing we need to protect when storing it.
For storage, get it into an airtight container as soon as it cools down a bit. Don’t leave it sitting out on the counter for hours; food safety is important, even when dealing with delicious leftovers! Once sealed up tight, it will keep perfectly fine in the refrigerator for up to three days. Any longer than that, and the quality definitely starts to drop off.
Reheating? Oh, please don’t ruin this masterpiece by nuking it in the microwave for two minutes! Yes, the microwave is fast, but it heats the moisture trapped inside the rice unevenly, and you’ll end up with hot spots next to chewy, rubbery spots. That’s a tragedy!
If you want that fresh-off-the-wok taste again, you *must* reheat it in a skillet. Pull out a clean small skillet, add just a tiny drizzle of vegetable oil or maybe even a few drops of sesame oil for flavor, and set it over medium heat. Throw in the amount of **Classic Fried Rice with Veggies** you want to eat and stir it constantly until it’s steaming hot all the way through. This low and slow reheating process dries out any small amount of excess moisture that built up during refrigeration and brings back the fantastic texture we’re aiming for. It takes maybe four minutes, and I promise you, it is worth those extra few minutes!
Frequently Asked Questions About Your shrimp fried rice recipe
Can I use fresh rice instead of cold rice for this shrimp fried rice recipe?
Gosh, I really hope you don’t! And I say this with love from years of trial and error. Using fresh, warm rice is the number one way to get sticky, mushy fried rice, which defeats the whole point of making this **Better Than Takeout Chinese Food** at home. The moisture level in fresh rice is just too high; the grains essentially steam instead of stir-fry. You absolutely must use cold, day-old rice if you want that perfect, separated texture that makes an excellent **Garlic Fried Rice with Shrimp**.
What protein can I substitute for shrimp in this easy fried rice?
That’s a great question if you’re not feeling seafood tonight! This recipe is super flexible, which is why it’s one of my favorite **Quick Dinner Recipes**. You can easily swap the shrimp for diced chicken breast, pork tenderloin, or even firm tofu! The key thing to remember, regardless of what protein you pick, is to cook it first, remove it from the pan, and set it aside. You want to add that protein back in at the very end, right before you add the final sauces, just to bring it back up to temperature. That keeps everything from getting tough!
How do I make this shrimp fried rice recipe spicy?
Oh, I love a little kick! There are a couple of easy ways to turn this into a spicy dish, which helps it become an even better **Flavorful Seafood Meal**. My favorite way is to add a teaspoon or two of chili garlic sauce (like Huy Fong brand) right when you add the soy sauce and oyster sauce. That gives you flecks of red chili and a nice garlicky heat that blends beautifully into the whole dish.
Alternatively, if you like a sharper heat, you can chop up one small jalapeño or Thai chili and stir-fry it right after the garlic and ginger. If you want something super easy, just drizzle some Sriracha over your final plate. For something totally different, I have a recipe for Buffalo Cauliflower Bites which uses a great spicy vinegar base; you could adapt that concept for a spicy sauce drizzle here if you’re feeling experimental!
Can I make this a healthier option using shrimp and brown rice?
Yes, absolutely! As I mentioned in the tips section, using brown rice works wonderfully for any **Leftover Rice Recipes** situation. Brown rice has a little more structure and nuttiness, which is delicious here. If you’re opting for brown rice, just make sure it’s fully cooked and chilled for at least 12 hours. Also, the brown rice soaks up sauces a tiny bit slower, so you might need to stir-fry the rice slightly longer (maybe an extra minute) before adding the shrimp and sauces back in to make sure it really heats through. It makes a perfect **Family Friendly Dinner Idea** that sneaks in more fiber!
Estimated Nutritional Data for This Flavorful Seafood Meal
Hey, I know some of you are tracking portions and macros, which is smart! Because this **shrimp fried rice recipe** is so light and flavorful, it’s easy to think it might be carb-heavy, but we’ve packed in a ton of protein from that shrimp and egg.
I always stress that these numbers are just estimates, okay? They are based on the standard ingredients listed above—using white rice and 8 ounces of shrimp split across three servings. If you swap white rice for brown rice, or use less oyster sauce, the numbers shift a little bit! But this gives you a really great baseline for this lovely **Flavorful Seafood Meal**.
Here’s a quick look at what you can expect from one generous serving:
- Calories: Approximately 450
- Protein: About 35 grams (That’s excellent!)
- Fat: Roughly 15 grams total
- Carbohydrates: Around 45 grams
- Sodium: This one is higher, around 950 mg, because of the soy sauce—you can definitely cut that down by using low-sodium soy sauce if that’s a concern for you!
We tried to keep the saturated fat low, and you get a decent little hit of fiber from those mixed vegetables. Honestly, for a dinner that comes together in minutes and tastes like you spent hours making **Homemade Asian Takeout**, I think those numbers are fantastic!
Share Your Experience Making This shrimp fried rice recipe
So, that’s it! You’ve mastered the **Easy Shrimp Fried Rice** that tastes better than anything you can get delivered. Now, I really, truly want to know what you thought!
Did this finally solve your mushy-rice problem? Did you manage to get it on the table in under 30 minutes? Jump down to the comments section below and let me know how it went. If you rated it, please give it a star rating! Hearing from you really helps the whole community learn!
I’m particularly curious about your favorite flavor notes. Did you add extra ginger? Maybe you bumped up the heat with chili flakes? Tell me about your absolute favorite addition that you might try next time you make this **Weeknight Fried Rice**. Maybe I’ll totally steal your idea for my next batch!
And if you snapped a picture while you were busy plating this amazing **shrimp fried rice recipe**, please tag me on social media! I love seeing your beautiful home cooking come to life. You can find all my latest recipe experiments over on the main blog page. Happy cooking, friends!
PrintEasy Better-Than-Takeout Shrimp Fried Rice
Make flavorful shrimp fried rice quickly in one pan. This recipe uses simple ingredients to achieve a taste superior to restaurant versions.
- Prep Time: 10 min
- Cook Time: 15 min
- Total Time: 25 min
- Yield: 3 servings
- Category: Dinner
- Method: Stir Fry
- Cuisine: Asian
- Diet: Low Lactose
Ingredients
- 1 tablespoon vegetable oil
- 8 ounces raw shrimp, peeled and deveined
- 2 cloves garlic, minced
- 1 teaspoon fresh ginger, grated
- 2 large eggs, lightly beaten
- 3 cups cold, cooked white rice (day-old is best)
- 1 cup frozen mixed vegetables (peas, carrots, corn)
- 2 tablespoons soy sauce
- 1 tablespoon oyster sauce (optional)
- 1 teaspoon sesame oil
- 2 green onions, sliced
Instructions
- Heat the vegetable oil in a large skillet or wok over medium-high heat.
- Add the shrimp and cook for 2 to 3 minutes until pink and cooked through. Remove the shrimp from the skillet and set aside.
- Add a little more oil if the pan is dry. Pour in the beaten eggs and scramble them quickly until just set. Remove the eggs and set them aside with the shrimp.
- Add the minced garlic and grated ginger to the skillet. Stir fry for 30 seconds until fragrant.
- Add the frozen mixed vegetables and cook for 2 minutes until they are heated through.
- Add the cold rice to the skillet. Break up any clumps with your spatula and stir fry for 3 to 4 minutes until the rice is hot.
- Return the cooked shrimp and eggs to the skillet.
- Pour the soy sauce and oyster sauce (if using) over the rice mixture. Stir well to coat everything evenly.
- Drizzle with sesame oil and toss everything together for one final minute.
- Stir in the sliced green onions just before serving.
Notes
- Use cold, day-old rice for the best texture; fresh rice will become mushy.
- If you do not have oyster sauce, substitute with an extra teaspoon of soy sauce.
- For a healthier option, use brown rice instead of white rice.
Nutrition
- Serving Size: 1 serving
- Calories: 450
- Sugar: 4
- Sodium: 950
- Fat: 15
- Saturated Fat: 3
- Unsaturated Fat: 12
- Trans Fat: 0
- Carbohydrates: 45
- Fiber: 2
- Protein: 35
- Cholesterol: 250