

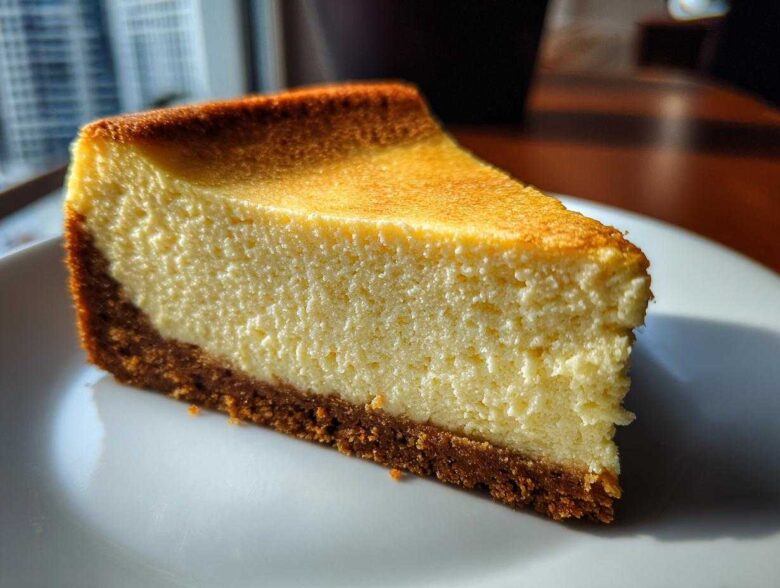
If you’ve ever been afraid to make cheesecake, trust me, I completely get it. That beautiful, creamy surface seems like something only professional bakers can accomplish. You see those gorgeous, towering New York Style cheesecakes, and you just assume they’re impossible, right? Wrong!
After too many sinking centers and ugly cracks marred my early attempts, I finally dialed in the absolute perfect method. This isn’t just another recipe; it’s the ultimate crack-free cheesecake recipe that proves you can make an easy homemade masterpiece right in your own kitchen. Seriously, this ensures deeply satisfying, velvety results every single time. I’m so excited to share this foolproof technique with you all—let’s banish those sunken centers forever! Before we dive in, if you want to know more about where our recipes come from, you can check out our story over at our ‘About Us’ page.
I spent years chasing that elusive, perfect texture, and it took a lot of failed bakes to figure out the secrets. I promise you, what I’m sharing here isn’t complicated, but it requires following a few specific rules, especially around temperature and cooling. Once you master this process, you’ll wonder why you ever bought a slice from a store. Get ready for what I truly believe is the best cheesecake recipe out there, capturing that rich New York density we all crave!
Why This is the Best Cheesecake Recipe for Beginners
I know what you’re thinking: Cheesecake is scary! It’s fussy, and it cracks at the slightest glance. Listen, that’s why I’m guaranteeing you success with this specific method. We’re focusing on foolproof techniques so you can confidently say you made the best cheesecake recipe yourself! This version is so approachable, even if you’re trying this classic dessert for the very first time, you’ll end up with a gorgeous final product. It really is the perfect starting point for any cheesecake for beginners.
Achieving a Velvety Smooth Cheesecake Texture
The secret weapon for that gorgeous, velvety smooth cheesecake isn’t some fancy stabilizer; it’s room temperature ingredients! When your cream cheese, eggs, and sour cream are all warmed up just slightly, they blend seamlessly. If they’re cold, you’ll end up whipping air into lumps instead of creating that perfect, creamy batter. Trust me on this: patience during the warm-up phase pays off tenfold in the final texture!
Ingredients for Your Ultimate Crack-Free Cheesecake Recipe
Okay, friend, let’s talk about what actually goes into this beauty. When we make a cheesecake recipe this rich, ingredient setup is key! I really, really need you to pay attention to one thing before you even touch your mixer: everything—I mean *everything*—must be at room temperature. Full stop. This is non-negotiable magic for a smooth result.
You’ll see the list broken down below into two parts: the crust and the filling. Making sure your cream cheese has fully softened and your eggs are warm means we avoid lumps and over-mixing later. Grab your measuring cups; it’s time to assemble our gorgeous list!
For the Graham Cracker Crust:
- 1 1/2 cups graham cracker crumbs
- 1/4 cup granulated sugar (for crust)
- 6 tablespoons unsalted butter, melted
For the Creamy Filling:
- 3 (8 ounce) packages full-fat cream cheese, softened
- 1 1/2 cups granulated sugar (for filling)
- 1 teaspoon vanilla extract
- 1/4 teaspoon salt
- 3 large eggs, room temperature
- 1/2 cup sour cream, room temperature
Step-by-Step Instructions for the Classic Baked Cheesecake
Alright, buckle up! This is where the magic happens, and where we put in the two absolute non-negotiables that guarantee you a stunning, classic baked cheesecake. We’re talking about that foil wrapping for the water bath and, most importantly, the ultra-slow cooling process—that’s the secret handshake for locking in that smooth surface. Don’t rush these steps, and you’ll have a dessert that looks like it came straight from a fancy bakery window! If you happen to have extra time after this, you might want to try adapting this technique for a decadent chocolate version, like our brownie bottom cheesecake recipe!
Preparing the Cheesecake with Graham Cracker Crust
First things first, let’s get the oven warmed up to 325°F (160°C). Now, for the springform pan—this is our defense against dreaded water leakage! Take some heavy-duty aluminum foil, the thick stuff, and wrap the entire outside bottom and sides of your 9-inch pan really well. I usually do three tight layers; you don’t want any sneak attacks by water during the bake. Set that aside.
Next, the crust: combine all those graham cracker crumbs, the 1/4 cup sugar, and the melted butter right in the empty pan. Use the bottom of a flat glass or measuring cup to press it down firmly and pack it tight against the bottom. We want a solid base! Pop that in the oven for about 10 minutes just to set it up. Once that’s done, pull it out and let it cool down while you get to the fun part: the filling.
Mixing the Creamy Cheesecake Recipe Filling
Time to use that softened cream cheese! Put it in your big mixing bowl and beat it on medium speed until it’s impossibly smooth. I mean, scrape the sides down, make sure there are zero tiny lumps left. This is critical for our creamy cheesecake recipe result.
Once it looks like silken frosting, slowly start adding the big pile of 1 1/2 cups of sugar, the vanilla, and the salt. Mix them in gently—just until they disappear. But here is the second big tip: once those eggs come out, you must be nice! Beat them in one at a time, making sure the first one is just combined before you even think about adding the next. Then, stir in that room-temperature sour cream right at the end until the batter looks perfectly uniform. Stop mixing the second it’s blended. Remember, we want smooth, not airy!
The Essential Water Bath and Baking for a No Crack Cheesecake
Now you’re going to pour that beautiful batter right over your cooled crust. Place your foil-wrapped springform pan inside a larger roasting pan. This is where the water bath comes in—the absolute MVP for a guaranteed no crack cheesecake. Carefully pour *hot* water into the roasting pan until it comes about halfway up the sides of your cheesecake pan.
It goes into the 325°F oven for about 60 to 75 minutes. How do you know it’s done? Don’t just rely on the clock! The edges should look set, but if you gently nudge the pan, the very center—maybe a two-inch circle—should still have a slight, gentle jiggle, like firm gelatin. If it’s totally solid, it’s already overbaked! Trust the jiggle.
Crucial Cooling Protocol for Your Cheesecake Recipe
This step is probably the single strongest defense against surface cracks in any crack-free cheesecake recipe. We have to let it acclimate slowly! Turn the oven off completely, but DO NOT take the cheesecake out. Just prop the oven door open about two inches—I use a wooden spoon handle for this. Let that cheesecake cool slowly inside the turned-off oven for a full hour. It sounds crazy, but this gradual temperature drop prevents the shocking contraction that causes stress cracks.
After that hour, take the pan out of the water bath and ditch the foil. Let it finish cooling completely on a wire rack at room temperature—no peeking allowed! Once it’s fully cool, cover it gently and put it in the fridge for at least six hours, but seriously, overnight is where the texture totally locks in. You’ve earned that perfectly rich slice!
Tips for the Perfect New York Style Cheesecake Recipe
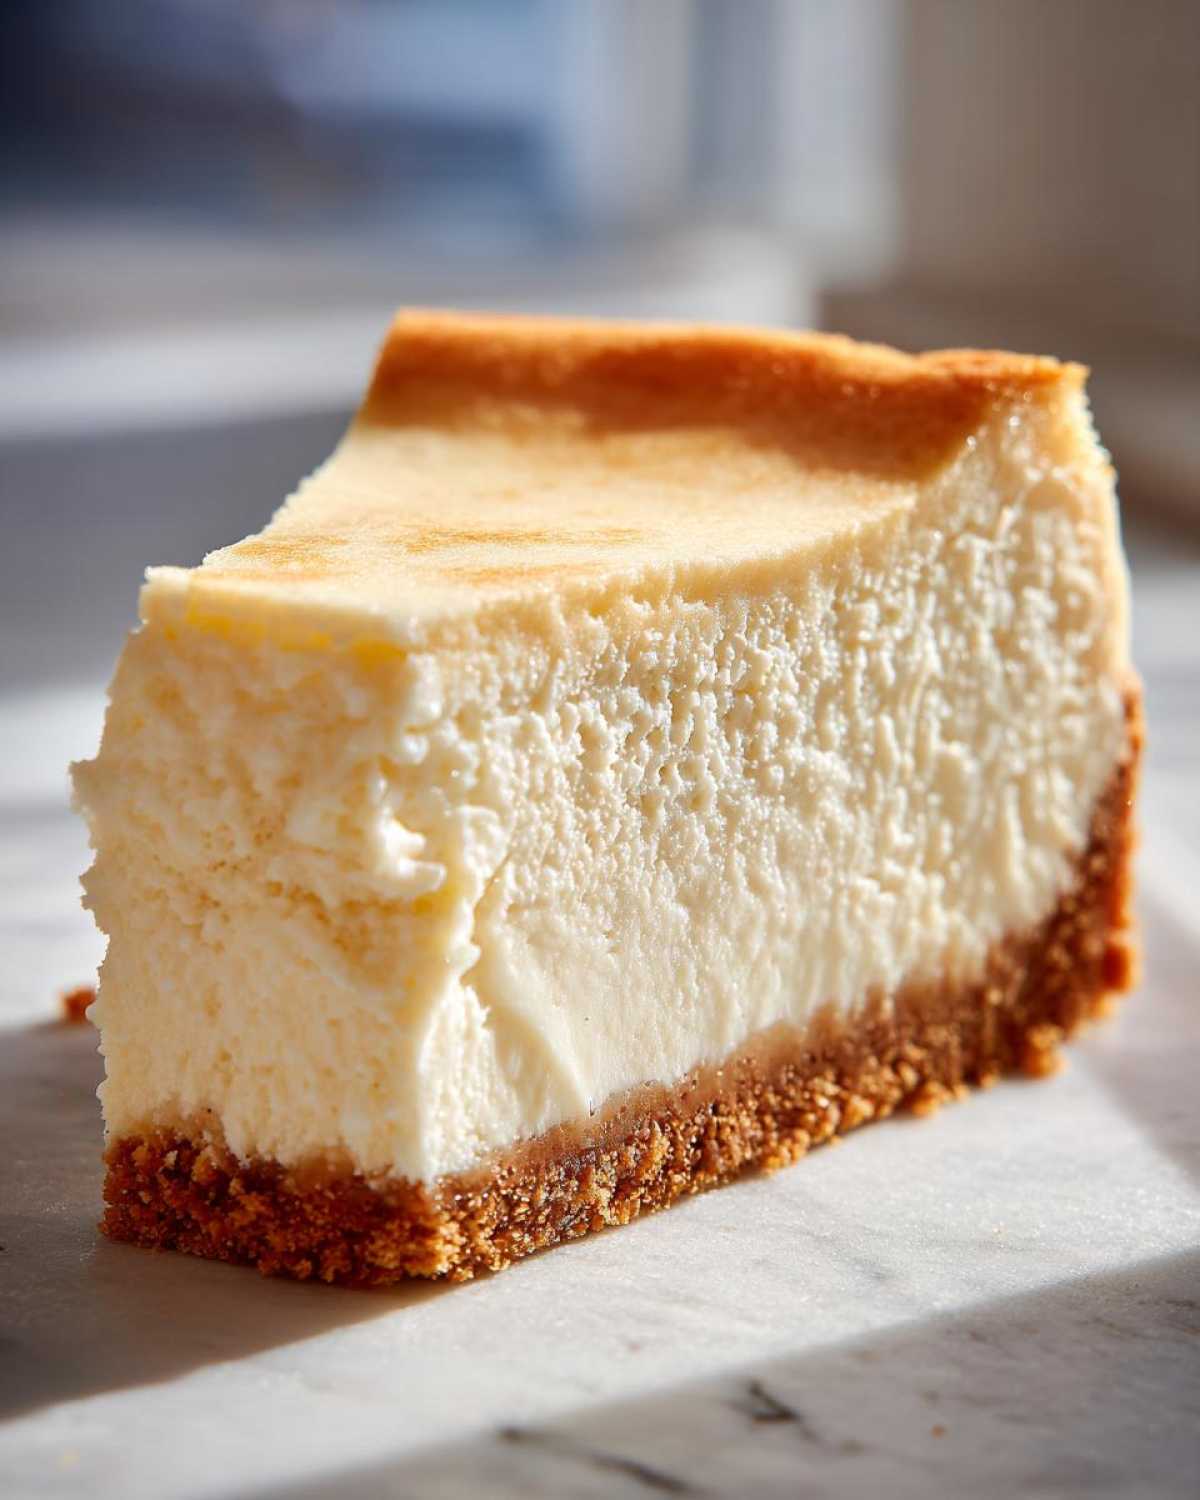
Mastering this New York style cheesecake is all about respecting the process, even after you think you’re done baking. The structure relies so much on temperature control, which is why those notes I left you are actually the most important steps in the whole guide!
Remember how I went on and on about room temperature ingredients? That’s tip number one, because it’s how you get that truly satiny batter without having to overbeat. If you try to rush softening your cream cheese, you end up mixing longer to break up the lumps, and that means you’re whipping in air. Too much air turns into steam pockets, leading straight to the dreaded crack. Don’t do it!
Tip two, and this goes hand-in-hand with the cooling protocol: leave it alone! Once it’s done baking, it needs that full hour inside the slightly opened oven. Think of it like a spa day for your cheesecake—it needs a gentle transition back to the real world temperature. If you shock it by moving it across the room immediately, it shrinks too fast.
Finally, when it comes to slicing, this is key for presentation, especially if you’re serving this rich dessert at a party. Don’t try to cut it straight from the fridge when it’s stone cold! Let it sit on the counter for about 30 minutes first. A warm knife slices beautifully through the cold, set filling. Dip your knife in hot water between every single cut; wipe it dry, then slice. That keeps your edges incredibly neat and preserves that gorgeous, unbroken surface we worked so hard to achieve. You can check out how we keep our casseroles melty over here on our casserole page, but these cheesecake rules are the ones you can never break!
Variations on the Simple Cheesecake Dessert
Just because this is the ultimate New York style cheesecake recipe doesn’t mean we can’t have fun playing with it! Since we’ve nailed that perfectly creamy base, most additions integrate beautifully without messing up the texture, as long as you don’t add huge volumes of liquid or thick chunks.
Want to make individual servings? It’s so easy to adapt this for a mini cheesecakes recipe! Just pour the batter into lined muffin tins—you’ll likely get 18 to 20 tiny ones—and you’ll need to drastically reduce the baking time, probably checking them around 20 minutes. They cook faster but still need that water bath!
For a beautiful swirl, save back about 1/4 of your filling batter (maybe 1/3 if you want a bold pattern). Mix a spoonful of thick fruit preserve—raspberry or cherry is amazing—into that reserve portion. Pour the main batter in, dollop the swirled mixture on top, and then gently run a knife through it just once or twice. If you want to see how we tackle quick holiday baking, check out our mini pumpkin cheesecakes post for ideas!
Storing and Serving Your Rich Dessert Recipes
We’ve gone through all that hard work perfecting the water bath and the slow cool-down; don’t let poor storage ruin your gorgeous dessert! Since this is such a rich dessert recipe, storage is super important to maintain that freshness and texture we worked for.
Once your cheesecake is fully chilled—and remember, that’s at least six hours, preferably overnight—you need to keep it airtight in the fridge. If you have the springform pan collar still on, that works great! If not, carefully cover the top directly with plastic wrap, making sure that wrap doesn’t actually touch the surface of the cheesecake. If it sticks, it’ll mess up your beautiful top, even if it is crack-free!
Generally, this classic baked cheesecake stays wonderfully fresh in the refrigerator for about five to seven days. Never store it near strongly scented foods, either; cream cheese is notorious for absorbing nearby odors, and nobody wants their dessert tasting like last night’s onions!
Now, the best part: serving! You absolutely, positively cannot slice this straight out of a very cold fridge. If the cheesecake is too cold, it gets firm and loses that lovely, creamy mouthfeel. Take it out onto the counter about 45 minutes to an hour before you plan to serve it. That little bit of warming time brings back all the smooth, velvety flavor profile we baked into it. And remember that sharp, clean slicing trick? Dip a long, thin knife in hot water, wipe it dry, slice one piece, and repeat for every slice. It keeps those edges looking bakery-perfect!
Frequently Asked Questions About This Cheesecake Recipe
I compiled these common questions because I know when you’re diving into your first big bake, you want certainty! Don’t worry if you have a question; that just means you care about making this the best dessert possible. We want this to be the easiest, most successful easy homemade cheesecake for you!
Can I make this cheesecake recipe without a water bath?
Oh, I wish I could say yes and still guarantee perfection, but that water bath is truly the backbone of this entire operation! Can you technically skip it? Sure, you *can*, but you are drastically increasing your chances of a cracked top. The water bath creates this gentle, steamy environment that insulates the edges and bakes the cheese filling evenly, which is the entire reason we get that gorgeous, no crack cheesecake top. It’s worth the extra five minutes just for peace of mind!
What happens if I overmix the batter in this creamy cheesecake recipe?
This is a common mistake, and it’s directly related to cracking! If you beat that batter too long after the eggs go in, you’re essentially adding too much air into the mix. That air loves to expand in the hot oven, causing the cheesecake to puff up like a balloon. What goes up must come down, right? When it cools, that over-expanded air escapes rapidly, and SNAP—you get a huge crack right down the middle. For that creamy cheesecake recipe feel, mix only until combined!
Can I substitute the sour cream in this cheesecake recipe?
That sour cream does add a necessary touch of tang and moisture, giving our classic baked cheesecake that signature depth. If you are completely out of it, here’s a quick cheat: whisk together 1/2 cup of heavy cream with about a half teaspoon of fresh lemon juice. Let it sit for five minutes until it thickens up slightly—voilà, makeshift sour cream! Just know that the flavor profile might lean a tiny bit brighter than the original recipe.
If you’re looking for other fantastic dessert ideas that aren’t quite so fussy, you might want to peek at our recipe for a no-bake peanut butter pie for a quicker fix!
Estimated Nutritional Data for This Cheesecake Recipe
I know some of you are bakers planning out every detail, and others are just here for the indulgence! Either way, it’s good to have a rough idea of what’s in a slice of this rich dessert. This is a decadent, full-fat New York style cheesecake, so it definitely packs a punch, but wow, is it worth it!
Please remember, this breakdown is just an estimate based on standard measurements for a single slice. If you adjust your sugar or use a totally different crust, things will shift around a bit! But for reference, here’s the general nutritional snapshot:
- Serving Size: 1 slice
- Calories: 450
- Total Fat: 30g (including 18g Saturated Fat)
- Cholesterol: 110mg
- Sodium: 280mg
- Total Carbohydrates: 38g (with 1g Fiber)
- Total Sugar: 35g
- Protein: 8g
See? It’s definitely a treat! We’re using full-fat ingredients specifically to guarantee that creamy texture, so yes, the fat content is high, but the flavor payoff is unmatched when you’re craving a true, classic baked cheesecake!
Share Your Perfect Cheesecake Recipe Experience
Whew! You did it! You went through the whole process, mastered the water bath, and showed incredible patience during the cooling phase. Now I really, really want to hear from you! Making a perfect cheesecake recipe like this is a huge accomplishment, and sharing your success stories helps the whole community!
When you finish chilling your gorgeous dessert and finally get to slice into that smooth, crack-free surface, snap a picture! I absolutely love seeing your creations, whether you stuck to the classic graham cracker crust or decided to try one of those fun swirls we talked about earlier.
Please leave a comment below rating this recipe and telling me one thing you learned or one thing you loved about the final texture. Did you finally conquer the water bath? Was the slow cooling method the game-changer for you? Your feedback is what keeps this site going and helps every other reader feel confident tackling this amazing dessert next time.
We truly want this to be the most trusted source for an easy homemade cheesecake guide, and every comment and rating adds incredible value. If you have any lingering questions or want to share a success story privately, you can always reach out through our Contact page, too. Happy baking, and enjoy every single, velvety bite!
PrintUltimate Crack-Free New York Style Cheesecake Recipe
Follow this guide to make a rich, creamy, and perfectly smooth New York style cheesecake with a classic graham cracker crust. This recipe helps you avoid cracks.
- Prep Time: 25 min
- Cook Time: 75 min
- Total Time: 90 min
- Yield: 12 servings
- Category: Dessert
- Method: Baking
- Cuisine: American
- Diet: Vegetarian
Ingredients
- 1 1/2 cups graham cracker crumbs
- 1/4 cup granulated sugar (for crust)
- 6 tablespoons unsalted butter, melted
- 3 (8 ounce) packages full-fat cream cheese, softened
- 1 1/2 cups granulated sugar (for filling)
- 1 teaspoon vanilla extract
- 1/4 teaspoon salt
- 3 large eggs, room temperature
- 1/2 cup sour cream, room temperature
Instructions
- Preheat your oven to 325°F (160°C). Wrap the outside of a 9-inch springform pan tightly with heavy-duty aluminum foil to prevent water entry during the water bath.
- Prepare the crust: Mix graham cracker crumbs, 1/4 cup sugar, and melted butter. Press the mixture firmly into the bottom of the prepared springform pan. Bake for 10 minutes. Let cool slightly.
- Prepare the filling: In a large bowl, beat the softened cream cheese with an electric mixer until completely smooth. Scrape down the sides.
- Gradually beat in 1 1/2 cups sugar, vanilla extract, and salt until just combined. Do not overmix.
- Beat in the eggs one at a time, mixing only until each egg is incorporated. Mix in the sour cream until the batter is smooth.
- Pour the filling over the cooled crust.
- Create a water bath: Place the foil-wrapped springform pan inside a larger roasting pan. Carefully pour hot water into the roasting pan until it reaches halfway up the sides of the springform pan.
- Bake for 60 to 75 minutes. The edges should look set, but the center 2 inches should still jiggle slightly when gently nudged.
- Turn off the oven, prop the door open slightly (about 2 inches), and let the cheesecake cool inside the oven for 1 hour. This slow cooling prevents cracking.
- Remove the cheesecake from the water bath and foil. Cool completely on a wire rack at room temperature.
- Chill the cheesecake in the refrigerator for at least 6 hours, or preferably overnight, before serving.
Notes
- Use room temperature ingredients for the cream cheese, eggs, and sour cream to ensure a smooth, lump-free batter.
- Do not overbeat the batter once the eggs are added; excess air causes cracking during cooling.
- For the best texture, chill the cheesecake completely before slicing.
Nutrition
- Serving Size: 1 slice
- Calories: 450
- Sugar: 35g
- Sodium: 280mg
- Fat: 30g
- Saturated Fat: 18g
- Unsaturated Fat: 12g
- Trans Fat: 0.5g
- Carbohydrates: 38g
- Fiber: 1g
- Protein: 8g
- Cholesterol: 110mg