

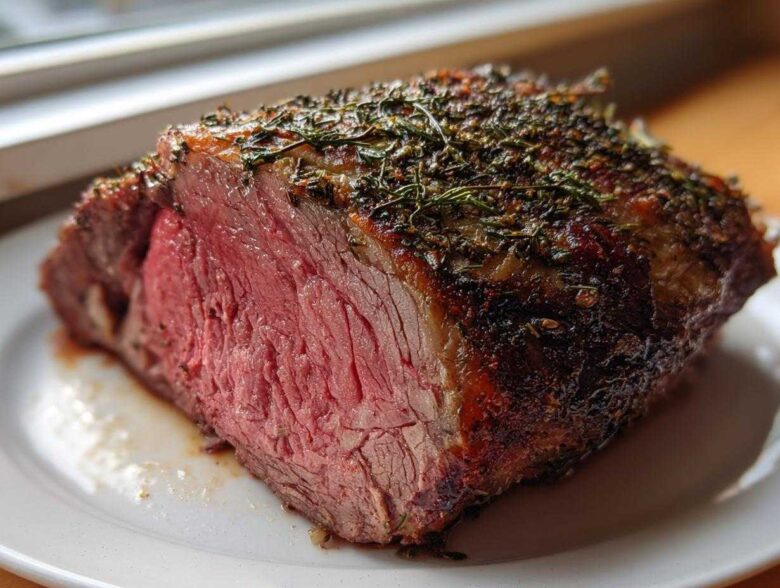
Oh my goodness, if you are hosting a big holiday meal—Christmas, Easter, or just a Sunday where you want everyone staring admiringly at the table—you absolutely have to master the **rib roast**. Seriously, forget those dry, sad roasts we all remember. After tackling enough massive cuts of beef to fill my freezer twice over, I cracked the code on making an unbelievably juicy, tender roast beef every single time. This isn’t just any recipe; this is THE **Oven Roasted Rib Roast** that uses a high-heat sear method to lock in all those glorious juices while building a crunchy, deeply flavorful herb crust. Trust me, once you nail this technique, you’ll volunteer to host every year!
Why do I feel so confident telling you this? Because I’ve learned the hard way what happens when you rush meat this beautiful! We’re going to focus purely on temperature discipline. If you follow my steps exactly, especially the part about letting the meat warm up first, you will achieve that restaurant-quality pink center. You can read more about my commitment to quality home cooking here.
Why This Herb Crusted Rib Roast is Your New Holiday Beef Centerpiece
I know what you’re thinking: a huge roast looks complicated, right? Wrong! This is honestly one of the most straightforward, show-stopping recipes I have, and it promises a Juicy Tender Roast Beef that practically melts in your mouth. You get the professional look without needing to be a professional chef.
Why should you trust this recipe for your big event? Well, the results speak for themselves. We focus on flavor layering and temperature control, not complicated steps.
- You get that incredible Herb Crusted Rib Roast exterior that crackles perfectly.
- The inside is guaranteed to be evenly cooked, from edge to edge—no grey bands here!
- It really is the ultimate Holiday Beef Centerpiece that impresses everyone.
Key Benefits of Our Oven Roasted Rib Roast Technique
The true magic happens between the two oven temperatures. We blast it hot at 500 degrees to immediately seal in the juices and crisp up that amazing rub. Then, we drop the temperature dramatically to 325 degrees to cook everything gently to perfection. That high-low method is the secret weapon! It’s a fool-proof plan for guaranteed success every time you make this Oven Roasted Rib Roast.
Gathering Ingredients for the Perfect Rib Roast
Okay, let’s talk supplies. You can’t make a five-star meal with bargain ingredients, especially when dealing with a big beautiful cut like this. For this masterpiece, I usually go for a bone-in rib roast (about 3 ribs), aiming for that 5 to 7-pound sweet spot. Having those bones attached really helps insulate the meat and keeps it juicier—that’s just science! The quality of the beef matters more than almost anything else here, so try to get the best you can find. We want that marbleization for flavor!
Here’s what you’ll need ready to go before you start rubbing:
- One (5-7 pound) bone-in rib roast, aiming for about 3 ribs total.
- Two tablespoons of coarse kosher salt—and I mean coarse!
- One tablespoon each of fresh black pepper, dried thyme, and dried rosemary.
- Four cloves of garlic, minced super fine.
- Three tablespoons of olive oil.
- One tablespoon of Dijon mustard.
- One cup of beef broth to keep the drippings from scorching.
Ingredient Notes and Substitution Tips
First things first: Bone-in versus boneless. While a boneless roast cooks a bit faster, I swear by the bone-in cut for flavor depth. If you absolutely have to go boneless, just know you’ll probably shave about 15 minutes off the total cooking time, so keep that thermometer handy. Don’t skimp on the salt! We need that coarse kosher salt to create that crunchy barrier; table salt is too fine and will just dissolve.
For the wet binder, the Dijon mustard really helps the herbs stick and adds a little tang. If you can’t stand mustard for some reason, you can actually use a bit more olive oil mixed with a dab of Worcestershire sauce instead. It won’t have the same binding power, but it’ll work in a pinch! Just promise me you’ll use those fresh herbs—dried is okay, but fresh is always superior for a roast this special.
Essential Equipment for Your Standing Rib Roast Instructions
Before you even think about pulling that gorgeous rib roast out of the fridge, you need to make sure your tools are ready to go. A big piece of beef needs reliable equipment to give you that perfect, edge-to-edge pink interior! You definitely need a sturdy roasting pan, and please, make sure it comes with a wire rack. That rack is non-negotiable; it lets the hot air circulate all around our Standing Rib Roast Instructions, preventing the bottom from steaming instead of roasting.
But here’s the real MVP of this entire recipe: the meat thermometer. Listen, you can guess, you can poke, and you can rely on magic, but to guarantee a Perfectly Roasted Beef, you need to measure. I’m talking about a reliable instant-read thermometer. If you don’t have one, go get one immediately! Guessing the final temp on something this large is a recipe for disaster, not for your Christmas Roast Ideas.
How to Cook Rib Roast: Step-by-Step Oven Roasted Rib Roast Guide
This is where the magic of the Oven Roasted Rib Roast truly happens! We’re moving from preparation to execution now, so take a deep breath. This process—often called the 500-degree method—is brilliant because it gives you that amazing sear and ensures you nail that perfect internal temperature. If you’re ready to learn exactly How to Cook Rib Roast like a pro, let’s dive in! We concentrate on temperature discipline, just like I use when making my famous roasted chicken recipe found right here.
Prepping the Rib Roast and Creating the Garlic Prime Rib Rub
The absolute first thing you must do, even before you preheat the oven, is let that gorgeous hunk of beef relax. Take your rib roast out of the fridge a solid two to three hours before you plan to cook it. Chilly meat hitting a hot oven means an uneven cook, and we are aiming for pink perfection! While it’s warming up, we make the rub. Mix that coarse salt, pepper, thyme, rosemary, and minced garlic together really well. You want that aromatic mixture uniform.
Next, grab your mustard and oil—whisk those together and brush it all over the roast. This is our glue! Then, get your hands in there and pack that herb mixture onto every exposed surface. Don’t be shy; press it in firmly. My tip for E-E-A-T success here is when you stick your thermometer probe in (if you are using a leave-in one), make sure it’s pointed toward the center of the *thickest* part of the meat, avoiding direct contact with the bone. The bone heats differently, and we only care about the muscle temp!
Mastering the Bone In Rib Roast Cooking Time and Temperature
Time to roast! Preheat that oven to a roaring 500 degrees Fahrenheit. Once it hits temp, pop your roast (fat side up on the rack, broth underneath!) in the oven. We sear it hard for exactly 15 minutes. Do not open the door during this blast! This is how we start building that incredible crust for our Standing Rib Roast Instructions.
After those 15 minutes are up, immediately drop the temperature down to 325 degrees, still without opening the door if you can help it. From here on out, it’s all about the thermometer. For a rare finish, pull it at 125 degrees Fahrenheit. For my preferred medium-rare, you’re looking for 130 to 135 degrees. Generally, this second phase takes about 13 to 15 minutes per pound, but the temperature is your actual guide for Bone In Rib Roast Cooking Time. That little bit of extra time ensures you get that Perfectly Roasted Beef.
The Non-Negotiable Resting Period for Your Perfectly Roasted Beef
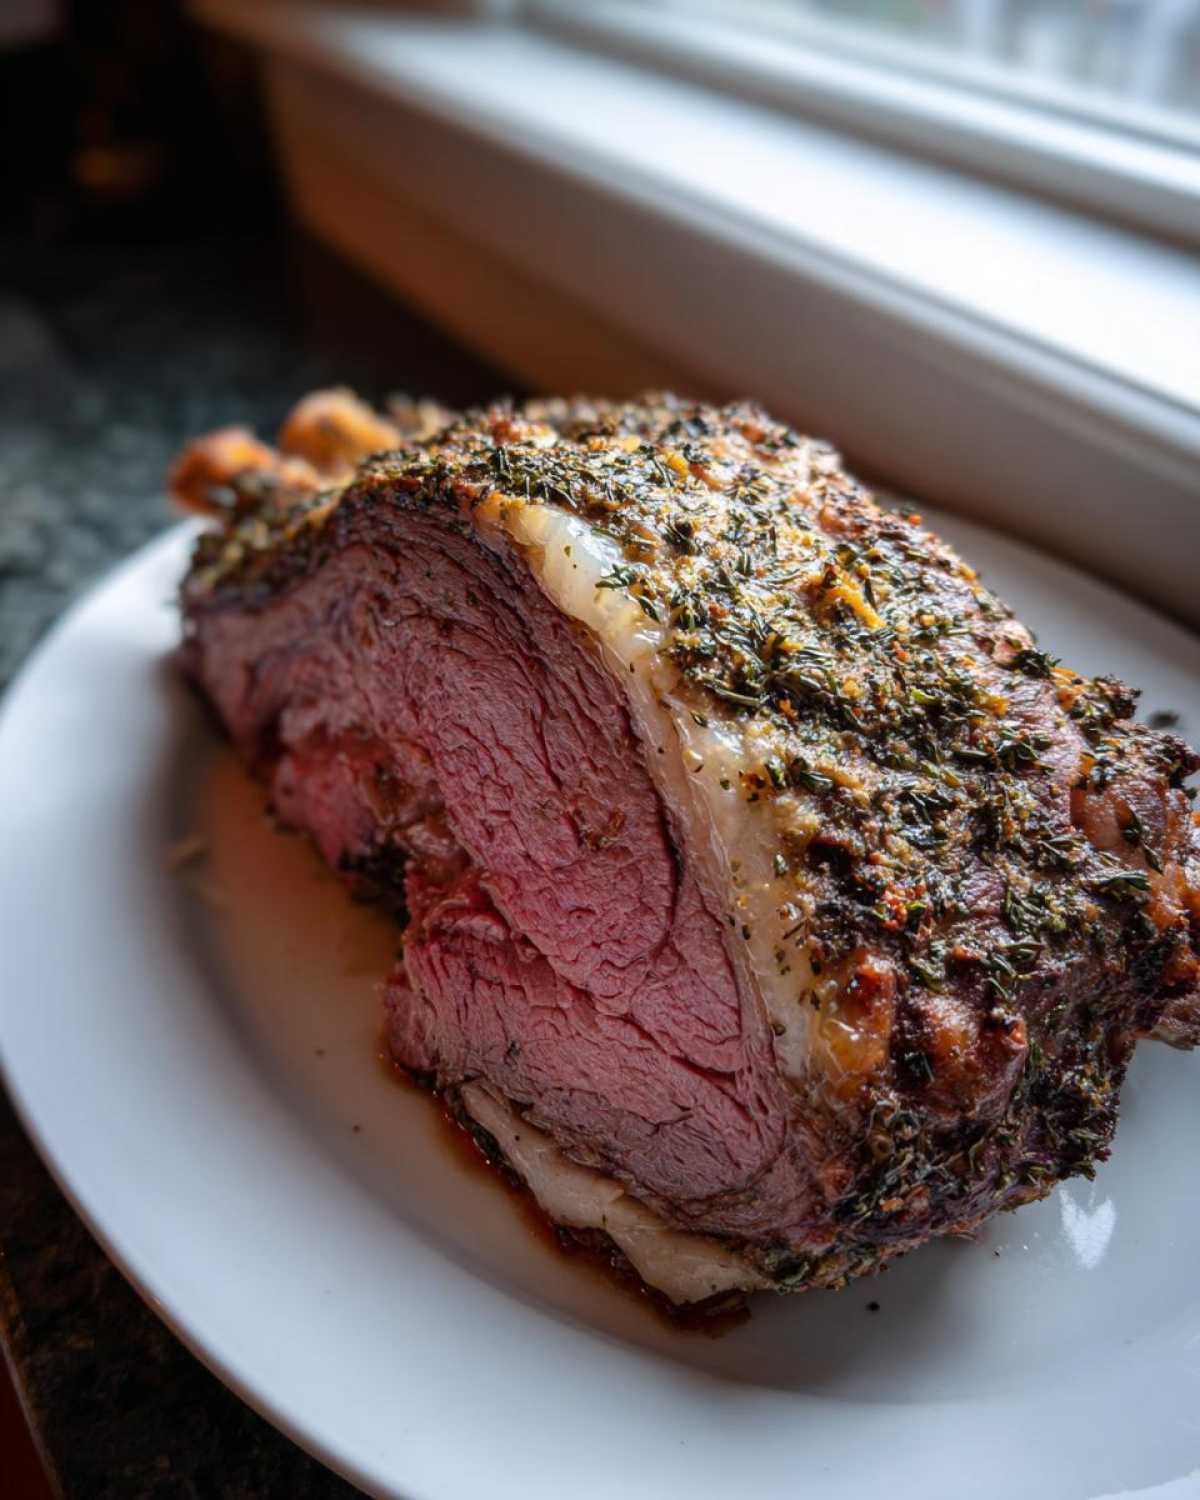
Look, I know it’s tempting to carve right away, especially when that incredible aroma of roast beef hits you. Resist! This waiting game is crucial for a Perfectly Roasted Beef. If you cut it immediately, all those beautiful internal juices that have been pushed to the center by the heat will run right out onto your cutting board. We need those juices to redistribute back through the muscle fibers, making every slice tender.
Tent the roast loosely with foil—we don’t want the crust getting soggy—and let it rest for a minimum of 20 minutes. Honestly, 30 minutes is even better for a big piece like this large rib roast. Remember, the temperature keeps climbing as it rests—that’s called carryover cooking! It’ll rise another 5 to 10 degrees in that foil tent, bringing you right to that ideal medium-rare finish. This resting step is the absolute key to success; don’t skip it!
Making Roast Beef with Pan Gravy from the Drippings
Wow, now that you’ve carved that gorgeous roast, don’t you dare let those little bits stuck in the bottom of your roasting pan go to waste! That golden-brown goodness is pure flavor gold—it’s the base for the easiest, most incredible Roast Beef with Pan Gravy you’ll ever make. Seriously, bottled gravy tastes like sadness compared to this.
All you need to do is carefully pour those pan drippings right into a saucepan. Make sure to leave burnt crispy bits behind. If you see pools of bright red fat floating on top, use a spoon to skim as much of that off as you can before heating. I use a little beef broth from the bottom of the pan to help get everything moving. Bring it to a gentle simmer on the stovetop. If you want it just a touch thicker, whisk in about a tablespoon of flour, but honestly, I usually skip it!
Here’s my expert tip: Taste it before you add any salt or pepper. Those drippings are already concentrated, so they might be seasoned perfectly as is! Just simmer it for a minute or two until it’s piping hot, and boom—you have homemade gravy ready to drizzle over your perfectly sliced rib roast.
Tips for Achieving the Best Prime Rib Method Results
You followed the 500-degree blast, you rested it until you thought you couldn’t stand it anymore, and you still want to make sure you hit that **Best Prime Rib Method** standard next time? I totally get it! Achieving truly *perfect* results with a huge piece of beef is all about those little details you don’t always read about in the main instructions. These are the tricks that turn a great roast into the legendary centerpiece everyone talks about for months.
My biggest lesson learned over the years with a big rib roast is that you cannot over-season something this large. You need to season aggressively—and I mean aggressively! The flavor of the herbs and salt has to fight through all that beautiful, thick beef fat and meat. Don’t be shy when you’re pressing that garlic rub in there; pretend you are trying to coat every single square inch equally. It seems like a lot of salt when you apply it, but most of it melts away or falls off during the cook, leaving you with a beautifully seasoned crust.
Here are a couple more things that always elevate my **Oven Roasted Rib Roast**:
- Check Your Thermometer Placement Twice: Seriously, I can’t stress this enough. If you are using an instant-read thermometer, check the temperature when you think it’s “almost done,” then check it again 10 minutes later in a slightly different spot. Sometimes the meat next to the bone reads cooler, and you need that central reading to be accurate. That’s the secret to that perfect medium-rare center!
- The Broth is Essential: I mentioned adding beef broth to the bottom of the pan, and let me elaborate why this is a pro move for a juicy tender roast beef. As the fat renders out, it mixes with that broth. This not only prevents the drippings from smoking violently in the oven but also, if you want to make those pan drippings into a sauce later, you have liquid right there to work with—already flavored!
- Use a Rack, Always: I know I mentioned this equipment-wise, but it’s worth repeating as a ‘method tip.’ If you try to cook the roast directly in the pan drippings without a rack, the bottom half cooks via steaming, not dry heat roasting. That steamy bottom prevents that lovely brown crust from forming, and you end up with pale, slightly weird-textured meat on the resting side. We want crust all the way around!
If you follow these advanced tips alongside the main instructions, I promise your next Standing Rib Roast will be flawless. You’re stacking the odds in your favor for the Best Prime Rib Method!
Serving Suggestions for Your Holiday Roast Beef Centerpiece
So, you’ve pulled that glorious rib roast out, rested it perfectly, and now you’re ready to carve into your masterpiece! The meat is the star, absolutely, but presentation still counts when you’re serving a Holiday Beef Centerpiece. You can’t just serve slices of beef on a plate, right? That feels too sad!
For me, two things are mandatory alongside this feast. First, a simple white horseradish sauce—mix prepared horseradish with some good quality sour cream or crème fraîche. It gives a fantastic, clean bite that cuts straight through the richness of the beef. Second, you need something earthy to soak up those juices.
I almost always serve this with a massive platter of roasted root vegetables, like carrots and parsnips. They don’t need complicated seasoning; they just need to absorb the flavor from the pan drippings! You can find some inspiration for keeping your veggies simple and delicious in my side dish guide here. Seeing those bright colors next to the pink beef? Perfection!
Storage and Reheating Instructions for Leftover Rib Roast
Oh, the noble struggle: dealing with leftovers from a giant rib roast! If you’ve done everything right, that beef should still be tender and juicy the next day, but you have to treat it with respect. You can’t just microwave a steak or roast slice—that’s a fast track to tough, dry meat, and we had such a good cook this time, we aren’t ruining it now!
For storage, the critical thing is getting it into airtight containers quickly. Put your leftover slices in a container, making sure to pack the slices somewhat tightly together. You want the meat touching itself, not sitting exposed to the air. Properly stored, your leftover roast beef is good in the fridge for about three to four days. Make sure your fridge temperature isn’t too high, just to be safe!
The Best Way to Reheat Slices Without Drying Out the Meat
This is the golden rule for reheating ANY roasted meat, especially something as premium as this oven roasted rib roast: use liquid moisture and low heat. You are trying to gently warm the meat, not cook it again and tighten up those precious muscle fibers.
Here’s what I do for the best results. Take your slices, place them in a shallow baking dish—just enough to hold them in one layer, maybe two if you press carefully. Now, instead of just putting them in the oven dry, pour just a little bit of liquid into the bottom of that dish. You can use leftover pan gravy, some beef broth, or even just water, but broth gives the best flavor back. You just want about a quarter-inch of liquid covering the bottom of the pan, not submerging the meat!
Cover that baking dish tightly with foil—again, we are trapping every bit of steam inside. Pop it into a low oven, like 275 degrees Fahrenheit. Heat it just until the meat feels warm all the way through. This might take 15 to 20 minutes, depending on how thick your slices are. When it’s just warm, pull it out. The broth creates steam, and that steam keeps every bite of your leftover prime rib tasting almost as good as the day you made it!
Frequently Asked Questions About Cooking a Rib Roast
When you’re making a big investment like a beautiful rib roast, it’s totally normal to have questions bubbling up, even after reading my detailed guide. I’ve gathered the ones I get asked most often around the holidays. Don’t worry if you’re feeling nervous; that’s why I’m here to ease your mind about this Holiday Beef Centerpiece!
Let’s tackle those last few concerns so you feel totally confident pulling that roast out of the oven. And remember, for any official legal stuff about recipes, you can always check out my disclaimer page.
What is the difference between a rib roast and prime rib?
This is the question that stumps everyone! Technically speaking, ‘prime rib’ isn’t a quality grade; it’s just the common name we all use for a cut of beef taken from the primal rib section of the steer. So, when you buy a **Standing Rib Roast**, you are buying a **Prime Rib Roast**. If you look at USDA grading, only a small percentage of that cut gets the ‘Prime’ grade, but if you see ‘Prime Rib’ on the butcher paper, it just means you’re getting the right piece of meat, which is what we care about here for our Oven Roasted Rib Roast!
How do I know when my rib roast is done?
Honestly, you don’t know until you check the temperature! Forget the clock, forget the sight of the juices running clear—it’s all about the thermometer reading inside the meat. This is the essential part of my Easy Prime Roast Recipe. You need to check the temperature in the absolute center of the roast, avoiding the bone. Pull the roast when the thermometer reads 5 degrees below your target temperature—that’s because of carryover cooking while it rests. It’s the only way to guarantee that Juicy Tender Roast Beef we’re after!
Why do I have to rest the roast for so long?
This is the most common mistake people make when they try the **Best Prime Rib Method**! When beef roasts, the muscle fibers contract and push all the internal moisture toward the center of the roast. If you cut it now, all that hot liquid gold flows out onto your beautiful cutting board, leaving you with dry meat slices on the edge where the heat was highest. Resting loosely tented under foil allows those fibers to relax and reabsorb those juices evenly throughout the entire cut. That’s how you get that incredible, consistent tenderness!
What if I only have a boneless roast?
You can absolutely use a boneless roast, and it actually makes the time calculations a little easier because the bone isn’t there insulating one side! However, you won’t get that deep, protective flavor from the bone during cooking. If you use a boneless roast, just remember to watch the internal temperature closely because it will cook slightly faster than the bone-in version—maybe shave off about 10 minutes total cooking time at the lower temperature, but always trust the thermometer over the clock!
What if I can’t get coarse kosher salt?
If you can’t find coarse kosher salt, you can use sea salt, but you need to be careful! Because sea salt crystals are often denser than kosher flakes, you might want to use about 20% less by volume to avoid over-salting your crust. If you only have fine table salt, you really need to reduce that amount by half, otherwise, your beautiful crust will just taste salty. The coarse grains provide a better textural crunch against the soft meat for that amazing Herb Crusted Rib Roast exterior.
What is the correct Beef Rib Roast Temperature Guide for Medium?
Temperature is everything for hitting specific doneness levels, so here is the guide you should stick to for getting the Best Prime Rib Method results. Keep in mind, these temperatures are what you aim for *before* resting. During that resting period, the meat temperature will rise another 5 degrees!
- For Rare: Pull the roast from the oven when the thermometer reads 120°F to 122°F.
- For Medium-Rare (My Sweet Spot!): Pull it at 125°F. This will climb to a perfect 130°F–132°F after resting.
- For Medium: Pull the roast when the probe hits 130°F. It will finish around 135°F. If you go much past this point, you risk losing some of that wonderful tenderness we worked so hard to achieve!
Share Your Perfectly Cooked Rib Roast Experience
Alright, now that you know all the secrets to getting that beautifully crusted, impossibly **Juicy Tender Roast Beef**, I really, truly want to hear how it goes!
Making a fantastic rib roast for your family is one of the most rewarding things you can do in the kitchen. It feels grand, but we know now it’s just about good prep and steady heat control. I hope this Easy Prime Roast Recipe has demystified the whole process for you!
If you followed along and your holiday table looked amazing, please, please take a moment and leave a rating! Five stars helps other home cooks feel brave enough to try this showstopper. If you snap a picture of that perfect pink center, tag me on social media! I absolutely love seeing your results and hearing how well this **Oven Roasted Rib Roast** turned out for your gathering.
Don’t be shy—questions or successes, drop them in the comments below. Happy roasting!
PrintHerb-Crusted Oven Roasted Prime Rib Roast
Follow these steps to cook a juicy and tender bone-in rib roast using a high-heat initial sear method for a perfect herb crust.
- Prep Time: 20 min
- Cook Time: 150 min
- Total Time: 170 min
- Yield: 6 servings
- Category: Main Course
- Method: Oven Roasting
- Cuisine: American
- Diet: Low Calorie
Ingredients
- 1 (5-7 pound) bone-in rib roast (about 3 ribs)
- 2 tablespoons coarse kosher salt
- 1 tablespoon black pepper
- 1 tablespoon dried thyme
- 1 tablespoon dried rosemary
- 4 cloves garlic, minced
- 3 tablespoons olive oil
- 1 tablespoon Dijon mustard
- 1 cup beef broth (for pan drippings)
Instructions
- Remove the rib roast from the refrigerator 2 to 3 hours before cooking to allow it to come to room temperature.
- Preheat your oven to 500 degrees Fahrenheit.
- In a small bowl, combine the kosher salt, pepper, thyme, rosemary, and minced garlic to create the herb rub.
- In a separate small bowl, mix the olive oil and Dijon mustard.
- Brush the entire surface of the roast with the mustard-oil mixture.
- Generously press the herb rub mixture onto all sides of the roast.
- Place the roast, fat-side up, on a rack in a sturdy roasting pan. Place the beef broth in the bottom of the pan to prevent drippings from burning.
- Roast at 500 degrees Fahrenheit for 15 minutes.
- Reduce the oven temperature to 325 degrees Fahrenheit without opening the oven door.
- Continue roasting until the internal temperature reaches 125 degrees Fahrenheit for rare, or 130-135 degrees Fahrenheit for medium-rare. Use a meat thermometer inserted into the thickest part of the meat, avoiding the bone. This usually takes about 13-15 minutes per pound after the initial high-heat blast.
- Remove the roast from the oven, tent loosely with foil, and let it rest for at least 20 minutes before carving. The internal temperature will rise another 5 to 10 degrees during resting.
- To make a simple gravy, pour the pan drippings into a saucepan, skimming off excess fat. Bring to a simmer and whisk in a tablespoon of flour if you prefer a thicker sauce. Serve hot with the carved roast.
Notes
- For a standing rib roast, cooking time is often based on temperature, not just time. Use a reliable meat thermometer.
- If you prefer a horseradish sauce instead of gravy, mix prepared horseradish with sour cream or crème fraîche.
- Resting the roast is crucial for juices to redistribute, resulting in a more tender and moist final product.
Nutrition
- Serving Size: 6 ounces cooked
- Calories: 450
- Sugar: 0
- Sodium: 450
- Fat: 30
- Saturated Fat: 12
- Unsaturated Fat: 18
- Trans Fat: 0
- Carbohydrates: 1
- Fiber: 0
- Protein: 40
- Cholesterol: 140