

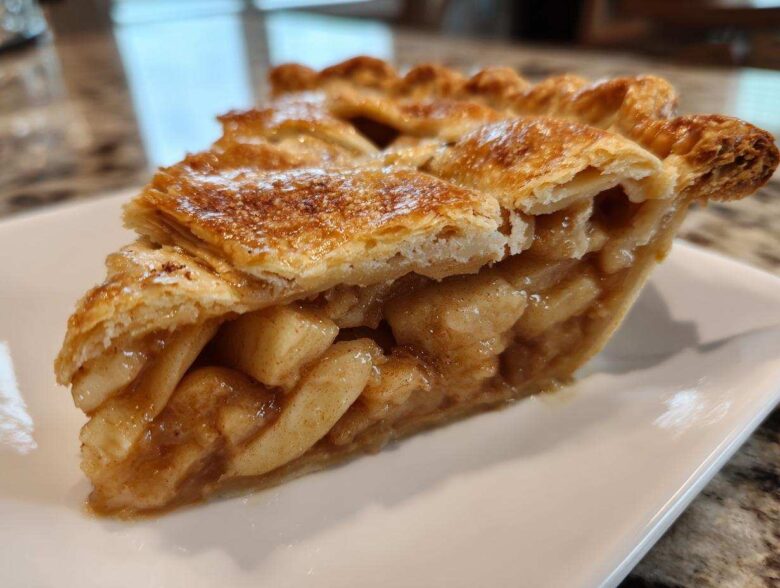
There’s just nothing that signals true comfort and cozy intention quite like pulling a gorgeous, golden-brown **apple pie** out of the oven. When Julian and I unplug from client work and the design files, this is often the first thing we turn to. It’s messy, it’s aromatic, and it forces you to slow down. Forget those stiff, overly perfect magazine covers for a second—we’re talking about that ultimate slice with a shatteringly flaky crust and a filling just bursting with warmly spiced apples. This isn’t just a dessert; it’s the headline of our evening, making our life together the feature story. For a peek at something else we love making when we’re kicking back, check out my guide to the best easy homemade BBQ sauce recipe while you wait for your pie to set! I promise you, this recipe delivers that kind of cozy moment.
Why This is the Best Apple Pie Recipe You Will Ever Make
We’ve baked dozens of dessert recipes, but this one always jumps to the top of the pile. It’s the definitive, classic apple pie recipe you need for true comfort. There are absolutely specific techniques here that elevate it way past the standard—it’s all about building flavor depth and incredible texture.
- We use a dual-apple approach—firm Granny Smiths for tang and structure, paired with sweeter Honeycrisps so the filling doesn’t turn to mush.
- The crust is built purely on technique; we swear by keeping that butter ice-cold for maximum flakiness. Trust me, that cold butter is half the battle! If you love perfectly textured bakes, you have to read through how we nail the best chocolate chip cookies recipe too.
- My little secret, which others are catching onto, is that tiny pinch of black pepper. It wakes up the cinnamon and nutmeg, making the whole apple pie sing!
For another spot where we obsess over technique to get a flawless outcome, check out my guide on the best sugar cookie recipe cutouts. We apply the same precision there!
Achieving the Perfect Pie Aesthetic
When Julian designs a photo shoot, he always talks about the ‘visual narrative,’ and your pie needs one too! This recipe is designed for that gorgeous, golden look you see in magazines. That coarse sugar sprinkled on top isn’t just for crunch; it catches the light and gives the crust that signature, sparkling finish. Looking at how others achieve beautiful desserts, this classic apple pie recipe holds its own!
Gathering Ingredients for Your Homemade Apple Pie
Okay, the story is set, the concept is clear—now we get down to the essential props! Baking an amazing **homemade apple pie** starts right here, standing in front of our pantry, making sure every ingredient is ready to follow the plan. Don’t skimp here; quality counts when you’re making something this traditional. I always lay everything out first so I can see exactly what I’m working with. If you love seeing ingredient organization like this, you should see how I prep for my fluffy buttermilk biscuits!
For the crust, remember this: the butter must be rock hard and cold, cut up into little cubes. Seriously, if your butter is too soft, you’ll end up with pastry that’s tough, not flaky. For the filling, you need that brilliant apple mash-up: Granny Smiths bring the necessary tartness, and the Honeycrisps just melt beautifully while maintaining a little texture. We need both powerhouses in there!
Ingredient Notes and Substitutions for Apple Pie
Let’s talk apple synergy for a second. Granny Smith apples are the backbone here; they hold their shape wonderfully under the heat and give you that lovely pucker to balance the sugar. Pairing them with Honeycrisp brings in that sweet, fragrant lift. If you can only find one type, go for Granny for structure first! Now, about that butter for the crust: Julian and I always use unsalted, and it has to come straight from the fridge, cut into those pea-sized pieces. Don’t try to cube it when it’s warm; that’s when you start creating glue instead of layers.
If you run out of light brown sugar, you can bump up the granulated sugar a bit, but you lose that little bit of molasses depth, so I highly recommend trying to find it. And that black pepper? If you absolutely refuse, swap it for an extra teensy pinch of cinnamon, but you’ll miss that bright finish it gives the apples!
Flaky Pie Crust Tutorial: Making the Foundation of Your Apple Pie
Okay, deep breath. This is the part that intimidates everyone, but I promise, if you follow our lead on the temperature notes, you’ll have the flakiest crust ever. This crust is what makes or breaks a truly iconic **apple pie**, so listen up! The key word here is COLD. Everything—the butter, the water, even your mixing bowl if you can manage it—needs to be frosty.
First, whisk your dry stuff together. Then, we cut in the butter. This is where Julian steps in with his professional eye. Use a pastry blender or your fingertips quickly—you are not mixing dough; you are creating little pockets of butter surrounded by flour. You want things to look like coarse cornmeal, but with some visible pea-sized shards of butter scattered throughout. Those butter pieces are trapped steam waiting to happen, exploding into layers of flakiness!
Next, the water. Add the ice water spoon by spoon—seriously, don’t dump it all in! You only want enough liquid for the dough to just barely cling together when you squeeze it. Too much water, and you activate all that gluten, leading straight to tough pastry instead of a tender crust for your delicious classic apple pie.
Divide the mixture into two disks, wrap them tight, and forget them in the fridge for at least an hour. That chilling time is crucial; it relaxes the gluten we just worked (gently!) and solidifies the butter so it doesn’t melt prematurely when rolling. If you’re looking for more wonderful old-fashioned recipes to practice your pastry skills on, you simply have to see our best bread pudding old-fashioned recipe!
Mastering the Apple Pie Filling Secrets
Now that our crust is chilling and getting suitably frosty, we move on to the heart of the matter: the apples! We aren’t just tossing fruit in a dish here; we are building a complex, balanced flavor profile for our apple pie. Get a really big bowl—you need room to toss this around without bruising your beautiful apple slices.
First, coat those apples in both the white and brown sugars. The brown sugar brings that lovely, deep caramel tone that white sugar just can’t touch. Then come the spices: cinnamon and nutmeg are your core friends, but here’s where we lean into trust. That tiny whisper of black pepper? It doesn’t make the pie spicy, I promise! It actually acts like a tiny flavor translator, making the cinnamon and apple taste brighter and more intense. It’s one of those apple pie filling secrets that truly transforms the final result.
Finally, we toss in the flour and lemon juice. The flour is essential; it absorbs the liquid released by the apples as they bake, ensuring your filling thickens into a beautiful, glorious sauce instead of a runny soup at the bottom of your pie dish. If you love learning about blending flavor enhancers like this, you should check out my notes on making persimmon cookies, classic soft spiced recipe, where we use a similar trick with cloves!
Assembling Your Traditional Apple Pie
Alright, the chill time is over and the filling is perfectly spiced and ready to go! This is where the vision for your **apple pie** starts coming together on your counter. First, gently ease that chilled bottom crust into your pie plate. Don’t stretch it; just let it settle in. Now, pour in all those gorgeous cinnamon-spiced apples. Heap them up slightly in the center—they cook down, so give them some room to settle!
Next, take that top disk of dough. This is the fun part where you get artistic! You can cut some simple vents right into the top, or if you’re feeling brave, weave a beautiful lattice pattern. Whatever you choose, make sure you trim the edges of both crusts so they overlap with about an inch of overhang. Crimp those edges hard—you want them sealed tight so the beautiful juices from our easy apple cobbler recipe don’t escape onto your oven floor!
Finishing Touches for a Golden Apple Pie
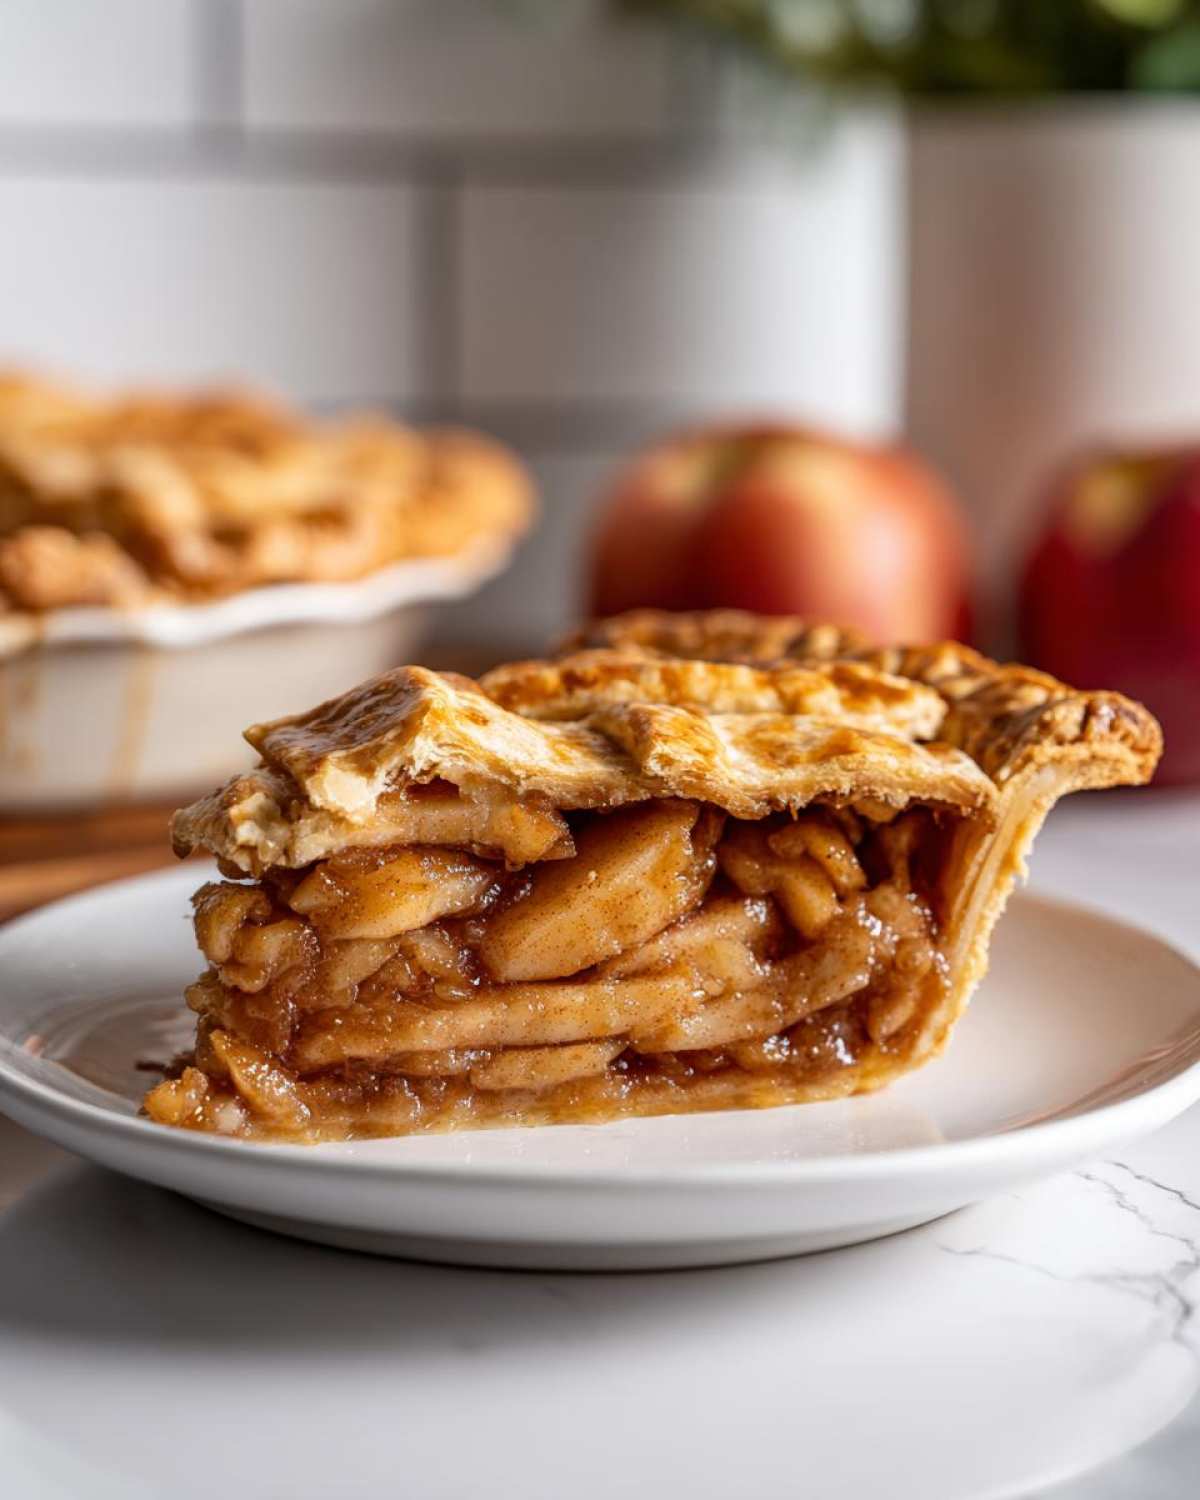
We’re almost ready for the heat! Before the pie goes into the oven, we need that beautiful, glossy exterior. Whisk your egg lightly—this is your glaze. Brush it lightly and evenly over the entire top surface of the pastry. Then, for that extra crunchy sparkle that pulls the whole “pie aesthetic” together, grab a handful of coarse sugar and sprinkle it everywhere. It melts just slightly and caramelizes while baking, giving you that lovely texture contrast against the tender apples underneath. If you need inspiration for other gorgeous bakes, I always look at what they are doing over at The Food Charlatan!
Baking Tips and Tricks for Perfect Apple Pie
The moment of truth! We’ve done all the hard work designing the perfect crust and mixing the filling, so this last stage, the baking, needs precision. We start hot, which is key for setting that flaky bottom crust quickly and preventing sogginess. Preheat your oven to a blistering 425 degrees F. Get that apple pie sitting on a sturdy baking sheet—this catches any sneaky filling drips, saving you from a truly stressful oven cleanup later. After just 15 minutes at that high heat, we pull the temperature back down to 375 degrees F.
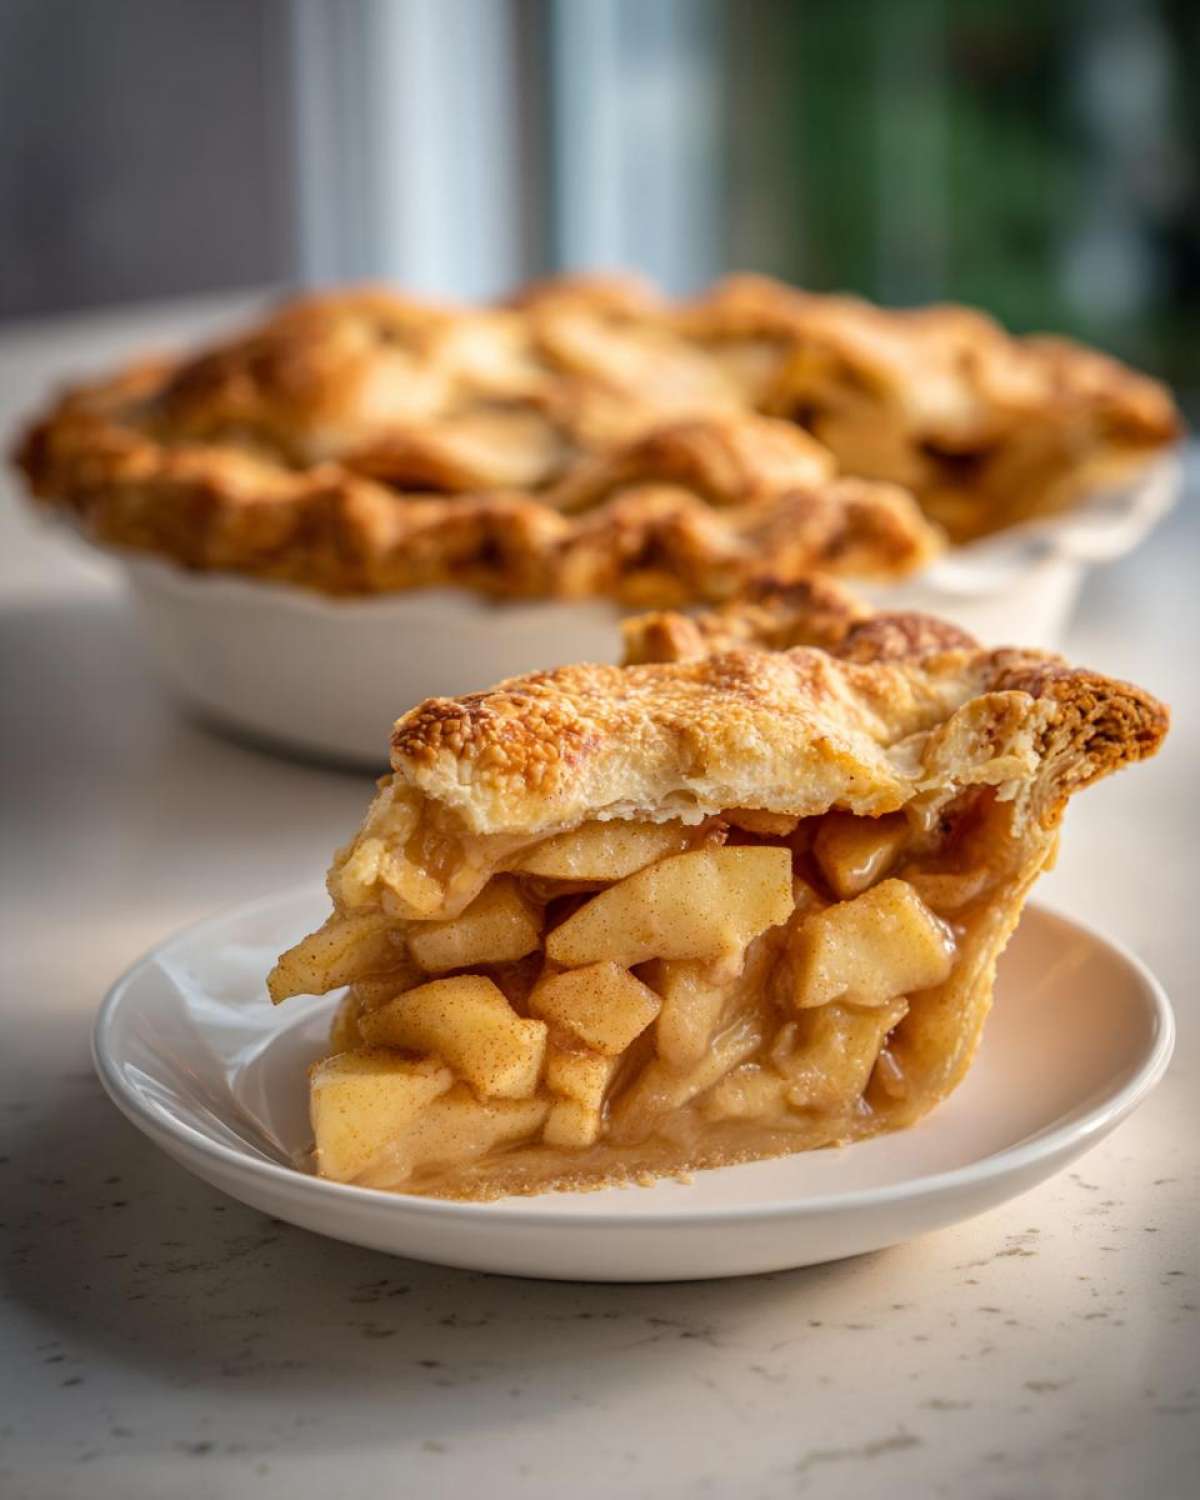
Reducing the heat allows the apples inside to steam and soften without burning the crust. You’re looking for about 40 to 50 more minutes. Here’s the expert trick Julian insists on: watch those edges! If the gorgeous gold rim of your crust starts getting too dark before the center is bubbling thickly, grab a small strip of aluminum foil and loosely tent it over the edges. It’s like putting sunglasses on the crust. If you want more tips on working with oven heat successfully, my recipe for Morning Glory Muffins recipe has some great accompanying advice!
We want thick, heavy bubbling—that’s the sign the flour in the filling has activated and thickened everything properly. Trust me on this two-stage temperature approach for the absolute best apple pie finish. For proof that simple steps yield amazing results, definitely peek at the tips provided for this easy apple pie recipe online!
The Crucial Cooling Period for Your Apple Pie
Okay, I know this is the hardest part. You’ve got this steaming, fragrant, golden masterpiece sitting on the counter, and the urge to slice it open *right now* is almost unbearable. You’ll be tempted, believe me, I’ve been there! We have to treat this step with the seriousness it deserves, though. Cooling isn’t just about waiting until the pie isn’t scorching hot; it’s structurally necessary for your final presentation.
If you cut into the pie when it’s fresh out of the oven—or even just 30 minutes later—everything inside is still too liquid. The flour and starches in the filling need time and cool air to bind the apple juices together. If you rush this, your beautiful, careful filling will immediately weep out onto your plate, turning into a soupy puddle instead of those lovely, thick slices you worked so hard to create. We need that glorious, thick sauce consistency!
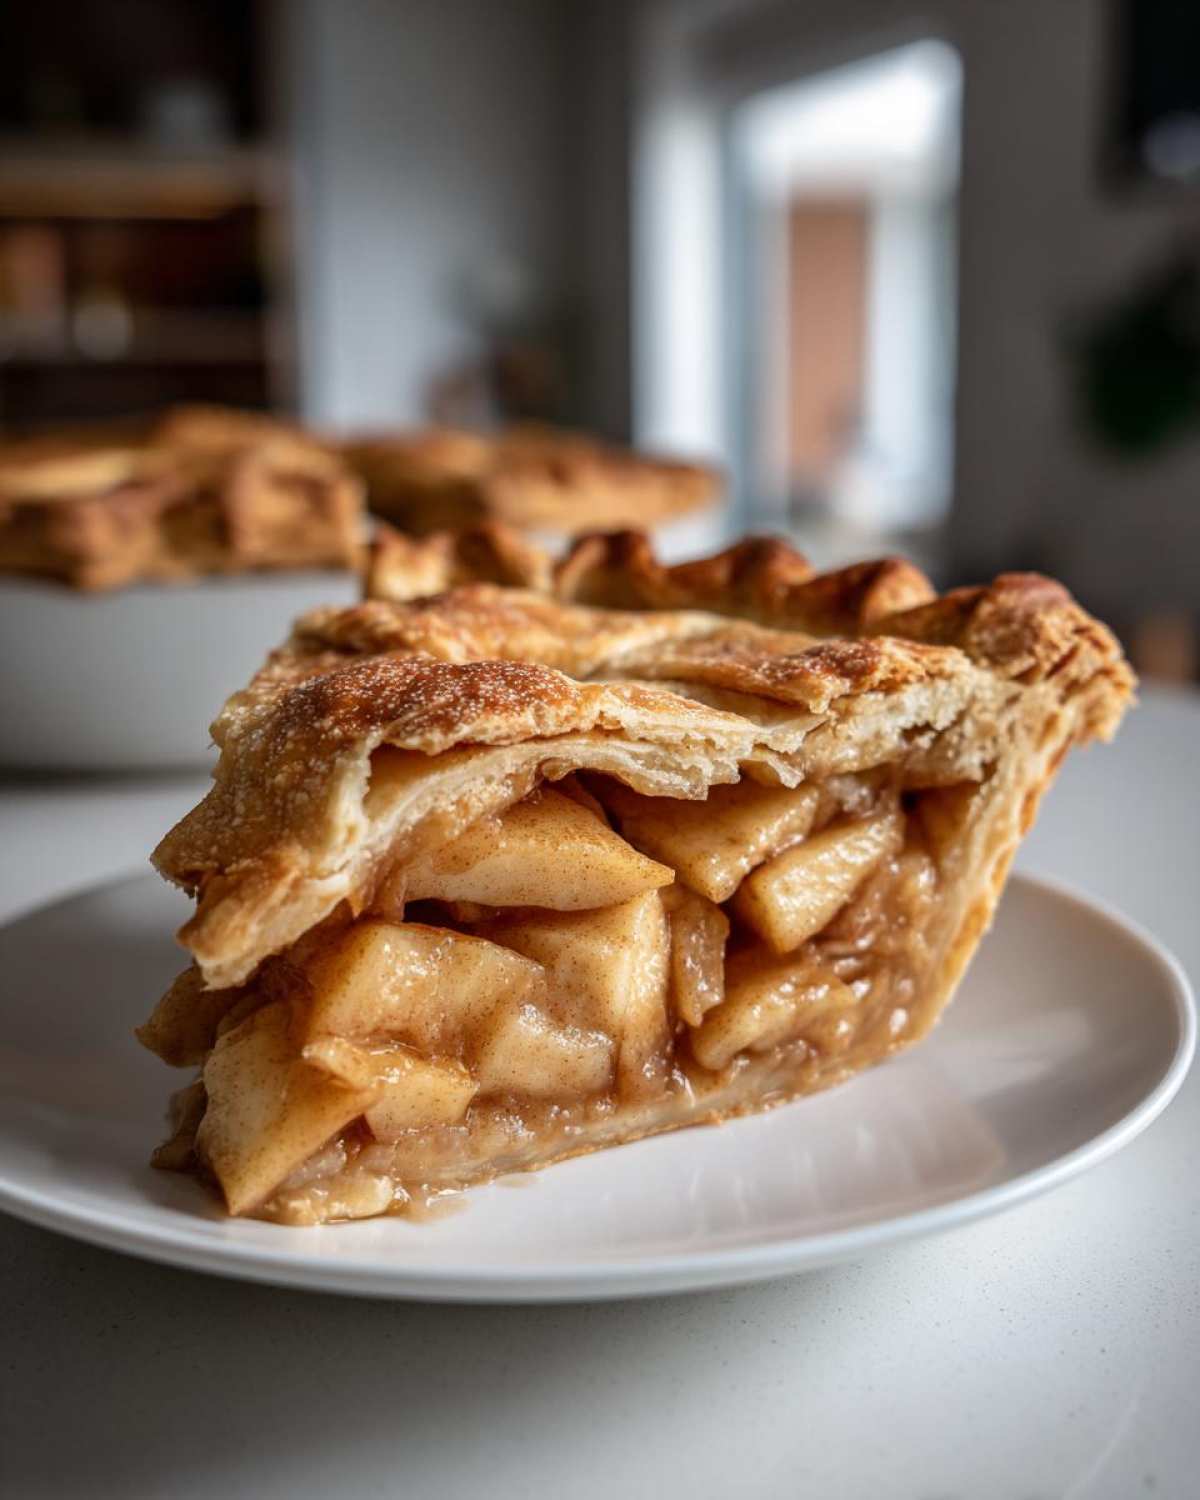
Julian and I insist on a minimum of three to four hours. Yes, that’s a long time when the house smells like heaven! Set it on a wire rack. This allows air to circulate around both the top and bottom crusts, which keeps the bottom from getting soggy as residual heat escapes. If you can wait that long, those slices will hold their shape perfectly, and you’ll nail that perfect slice aesthetic every single time!
If you’re looking for a less stressful bake next time—maybe something that doesn’t require quite so much cooling patience—you should totally check out how we manage moisture in our zucchini banana bread ultimate moist recipe. It’s a totally different kind of comfort baking!
Serving Suggestions for Your Classic Apple Pie
The masterpiece is cooled, the slices are holding their shape—now, how do we present this incredible creation? Serving an amazing dessert isn’t just about the flavor; it’s about setting the stage for that enjoyment, making the whole experience feel like the cover story of our evening. This rich, cinnamon-spiced confection begs for a perfect pairing to complement its rustic charm.
First up, the eternal question: A la mode? Absolutely! We usually go for a rich vanilla bean ice cream because that molten ice cream dripping down the warm spiced apples is pure magic. Julian, being the visionary he is, often suggests something sharper for contrast. Trust me on this one: a thin slice of very sharp cheddar cheese placed right on top of a warm slice of pie is an old-school move that cuts through the sweetness beautifully. It sounds wild, but give it a try!
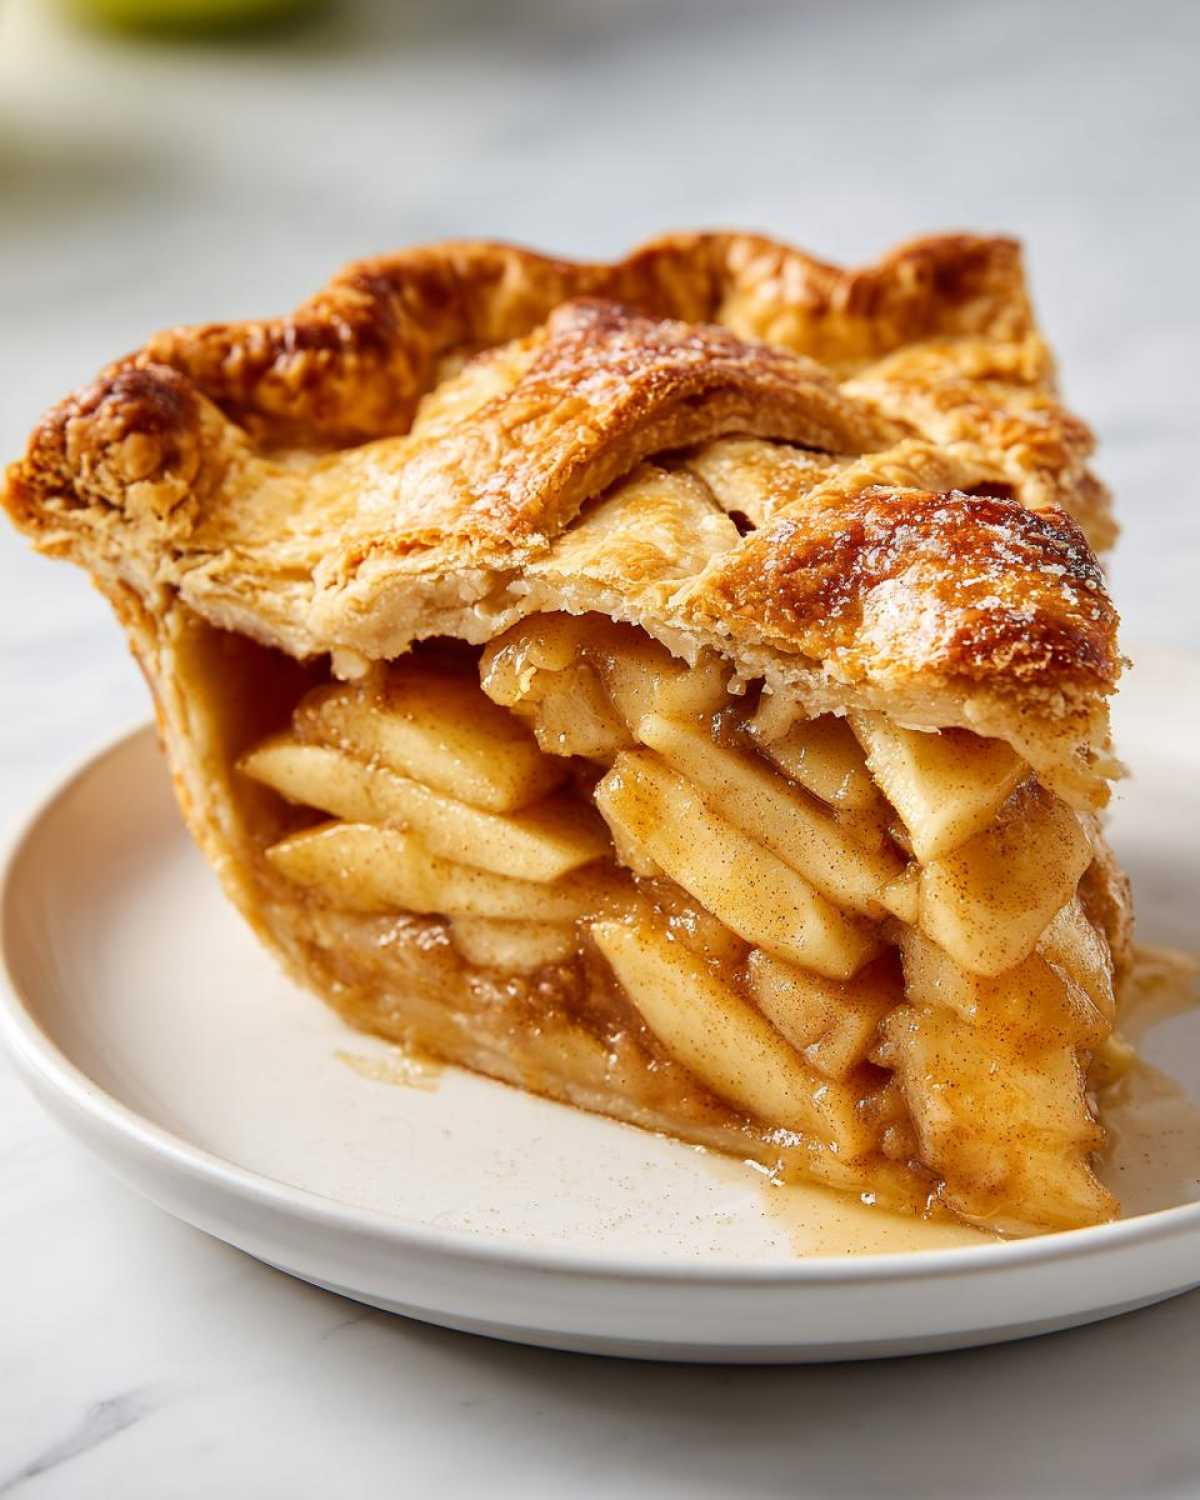
If you’re serving this after a big holiday meal, sometimes you don’t need much fuss at all. A light dusting of powdered sugar is deceptively elegant, and you can even add a curl of fresh orange zest over the top for a pop of color and brightness. And for those who like a little texture variety, I highly recommend checking out my notes on making banana ice cream, or nice cream—it offers a lighter, fresher partner than traditional heavy cream ice cream.
Honestly, any way you serve it, this pie deserves your full attention. It’s a Magazine Meal, after all! If you’re looking for other ways to end a great evening meal, see what they’ve got going on over at Fraîche Living for more sophisticated presentation ideas!
Frequently Asked Questions About Making Apple Pie
Whenever Julian and I host, these are the questions that always come up! Baking is all about troubleshooting, right? We’re here to make sure your apple pie experience is flawless, especially if you’re trying to achieve that perfect homemade look for the first time. Don’t sweat it if you have questions—that’s why we document every tiny detail!
Can I use store-bought crust for this apple pie?
Look, I get it. Sometimes you just need an easy apple pie recipe for a weeknight dessert. Yes, you absolutely can use store-bought crust! If you’re short on time, go for it, and save your energy for focusing on that incredible filling. But—and this is me being honest as your editor—the reward for using our flaky pie crust tutorial is incomparable. The homemade crust practically shatters when you slice it, which really elevates the entire experience beyond just a simple dessert.
How do I prevent a soggy bottom crust?
Oh, the dreaded soggy bottom! That’s the enemy of a beautiful slice. This is one of those essential baking tips and tricks we learned the hard way. If you want to avoid it, use a glass or metal pie dish rather than ceramic; those materials conduct heat better, drying out the bottom crust faster. Also, when you start baking, make sure your pie is on the lowest rack in the oven for the first 15 minutes while the heat is high. This blast of heat directly hitting the bottom helps set the dough firmly before the filling has time to release all its liquid. For completely different baking concerns, check out how we handle moisture in the air fryer baked potato!
Another huge helper, which we touched on in the assembly section, is making sure your bottom crust is well-chilled before the apples even go in. A cold crust hitting a hot oven equals flakiness, not sogginess!
What about freezing? Yes, you can freeze the assembled, unbaked pie! Wrap it tightly in plastic and then foil. When ready to bake, let it thaw slightly on the counter, remove the plastic, brush with egg wash, and bake right away—you might need to add 10-15 minutes to the total bake time, though.
Storage and Reheating Instructions for Leftover Apple Pie
We know how devastating it is when only one slice is left, but if you happen to have some amazing **apple pie** remaining, you need to treat it right! No one wants a soggy crust ruining the memory of that perfect bake the next day. Julian and I have a very strict rule about leftovers: they should taste as close to fresh-baked as humanly possible when you enjoy them next.
First, the storage location. If you baked this pie using the standard recipe and it’s just sitting there with no whipped cream or ice cream melting onto it, it can safely sit out on the counter, well-covered, for about a day. Remember what we talked about? The high sugar content acts as a preservative! However, for longevity—say, more than 24 hours—you really need to get it into the refrigerator. Tightly cover the entire pie dish with plastic wrap or put your slices in an airtight container.
When it comes to reheating, skip the microwave unless you enjoy that rubbery texture. The microwave cheats the crust! To bring back that glorious flakiness and warmth, the oven is your only friend. Set your oven to 350 degrees F. Place your individual slice (or the remaining half-pie!) directly on a baking sheet—no need to cover it. Let it warm through for about 10 to 15 minutes for a slice, or closer to 20 for a large piece. You want to feel that warmth radiating off the filling and hear the crust crisping up just slightly again.
If you’re ready to share your beautiful work with the world, or if you just have questions about flavor balancing in general, don’t hesitate to get in touch with us over at our contact page. We love sharing notes on making every meal feel like our next magazine feature!
PrintThe Best Homemade Apple Pie Recipe with Flaky Double Crust
This is the classic homemade apple pie recipe you need. It features a tender, flaky double crust and a perfectly spiced cinnamon-sugar apple filling. This traditional apple pie is ideal for holidays or any cozy fall dessert night.
- Prep Time: 45 min
- Cook Time: 65 min
- Total Time: 110 min
- Yield: 8 servings
- Category: Dessert
- Method: Baking
- Cuisine: American
- Diet: Vegetarian
Ingredients
- 2 1/2 cups all-purpose flour
- 1 teaspoon salt
- 1 cup (2 sticks) cold unsalted butter, cut into cubes
- 1/2 cup ice water, plus more if needed
- 6 large Granny Smith apples, peeled, cored, and sliced 1/4-inch thick
- 2 large Honeycrisp apples, peeled, cored, and sliced 1/4-inch thick
- 3/4 cup granulated sugar
- 1/4 cup packed light brown sugar
- 1 teaspoon ground cinnamon
- 1/4 teaspoon ground nutmeg
- 1/8 teaspoon ground black pepper (secret ingredient for flavor depth)
- 2 tablespoons all-purpose flour
- 1 tablespoon lemon juice
- 1 large egg, beaten (for egg wash)
- 1 tablespoon coarse sugar (for sprinkling)
Instructions
- Prepare the Flaky Pie Crust: In a large bowl, whisk together the 2 1/2 cups flour and 1 teaspoon salt. Cut in the cold butter using a pastry blender or your fingers until the mixture resembles coarse crumbs with some pea-sized pieces of butter remaining. Gradually add the ice water, 1 tablespoon at a time, mixing until the dough just comes together. Divide the dough in half, form each half into a disk, wrap in plastic, and chill for at least 1 hour.
- Prepare the Apple Pie Filling: In a large bowl, gently toss the sliced Granny Smith and Honeycrisp apples with the granulated sugar, brown sugar, cinnamon, nutmeg, pepper, 2 tablespoons of flour, and lemon juice. Mix until the apples are evenly coated.
- Assemble the Bottom Crust: On a lightly floured surface, roll out one disk of dough into a 12-inch circle. Carefully transfer the dough to a 9-inch pie plate. Trim the edges, leaving a 1-inch overhang. Chill the pie shell while you prepare the top crust.
- Fill the Pie: Pour the apple filling into the chilled bottom crust, mounding the apples slightly in the center.
- Assemble the Top Crust: Roll out the second disk of dough. You can cut vents, create a lattice design, or place the full circle over the filling. Trim the top crust overhang to match the bottom. Crimp the edges to seal the two crusts together.
- Egg Wash and Bake: Brush the top crust lightly with the beaten egg and sprinkle with coarse sugar for a beautiful finish. Place the pie on a baking sheet to catch drips.
- Bake the Pie: Preheat your oven to 425 degrees F (220 degrees C). Place the pie on the middle rack. Bake for 15 minutes at 425 degrees F. Then, reduce the oven temperature to 375 degrees F (190 degrees C) and continue baking for another 40 to 50 minutes, or until the crust is golden brown and the filling is bubbling thickly. If the edges brown too quickly, cover them loosely with foil.
- Cool Completely: Let the **classic apple pie recipe** cool on a wire rack for at least 3 to 4 hours before slicing. This allows the **apple pie filling secrets** to set properly for perfect slices.
Notes
- For an extra **flaky pie crust tutorial** tip, keep all your ingredients, especially the butter and water, as cold as possible during mixing.
- If you prefer a **Dutch apple pie** style, skip the top crust and use a streusel topping instead.
- This recipe works well with a **deep dish apple pie** by increasing the filling slightly and using a deeper pie dish.
- The small amount of pepper in the filling brightens the flavor of the **cinnamon spiced apples** without making it taste savory.
Nutrition
- Serving Size: 1 slice
- Calories: 450
- Sugar: 35g
- Sodium: 250mg
- Fat: 25g
- Saturated Fat: 15g
- Unsaturated Fat: 10g
- Trans Fat: 0g
- Carbohydrates: 58g
- Fiber: 3g
- Protein: 5g
- Cholesterol: 55mg