

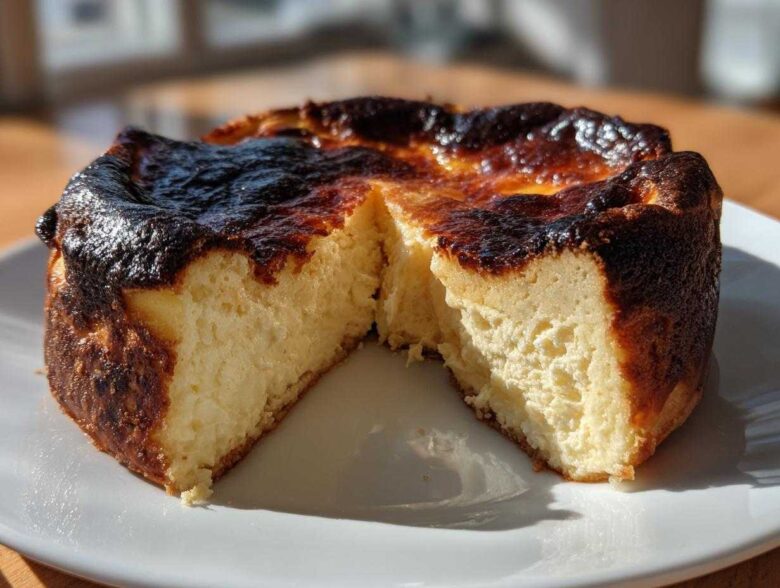
Julian and I used to photograph desserts that looked absolutely perfect—shiny glazes, crisp edges, towering layers. They looked incredible, but honestly? They looked intimidating. That’s why when we discovered the magic of the Basque Cheesecake, it felt like finding a secret shortcut to gourmet baking.
This cake is the ultimate contrast: it has this gorgeous, deeply caramelized, even intentionally *burnt* top, but inside? It’s pure, velvety luxury. It’s the rustic appearance meeting the most luxurious, custardy center you can imagine. And the best part, truly, is how wonderfully easy this recipe is. We developed this tutorial because we needed something that delivered maximum “wow” factor with zero fuss—yes, that means absolutely no fiddly water bath required!
Here at Magazine Meal, we believe your kitchen shouldn’t be about chasing photo perfection; it’s about making the meal the main feature of your entire day. I’m Iris, and with my Art Director/Husband Julian, we’re showing you how to create this showstopper dessert that tastes sophisticated but bakes with surprising simplicity. Get ready to make the ultimate Basque Cheesecake.
If you want to know more about how we approach baking as the headline of our evening, you can always check out our philosophy over on the About Us page!
Why This Basque Cheesecake Recipe is Your New Showstopper (Easy Cheesecake Baking)
I know what you’re thinking. Cheesecake equals stress, right? Cracks, water baths, perfectly smooth sides… I used to feel that way too, especially when I was trying to capture a picture-perfect slice for a client shoot. That’s why when we discovered the magic of the Basque Cheesecake, it felt like finding a secret shortcut to gourmet baking.
This cake is the ultimate contrast: it has this gorgeous, deeply caramelized, even intentionally *burnt* top, but inside? It’s pure, velvety luxury. It’s the rustic appearance meeting the most luxurious, custardy center you can imagine. And the best part, truly, is how wonderfully easy this recipe is. We developed this tutorial because we needed something that delivered maximum “wow” factor with zero fuss—yes, that means absolutely no fiddly water bath required! It’s the definition of Easy Cheesecake Baking.
Every time I pull this Basque Cheesecake out of the oven, I feel vindicated because it looks so incredibly rustic and impressive, yet I barely had to try. If you’ve ever wanted Crustless Cheesecake Secrets handed to you on a platter, this is it. I keep saying it, but this is miles easier than those traditional European bakes, which is why I love sharing it alongside simpler treats, like my Chocolate Chip Cheesecake Cookies.
The Magic of the Caramelized Top on Your Basque Cheesecake
The high temperature is absolutely essential here; don’t shy away from it! We crank the oven up because the intense heat does two amazing things simultaneously. First, it sets the edges beautifully while leaving the center completely soft and custardy. Second, it chars the top to that signature dark, almost black, caramelized finish.
That contrast between the deeply flavored, slightly bitter exterior and the sweet, silky interior is exactly what makes the Basque Cheesecake so famous. It’s that moment of beautiful tension in every bite we talk about!
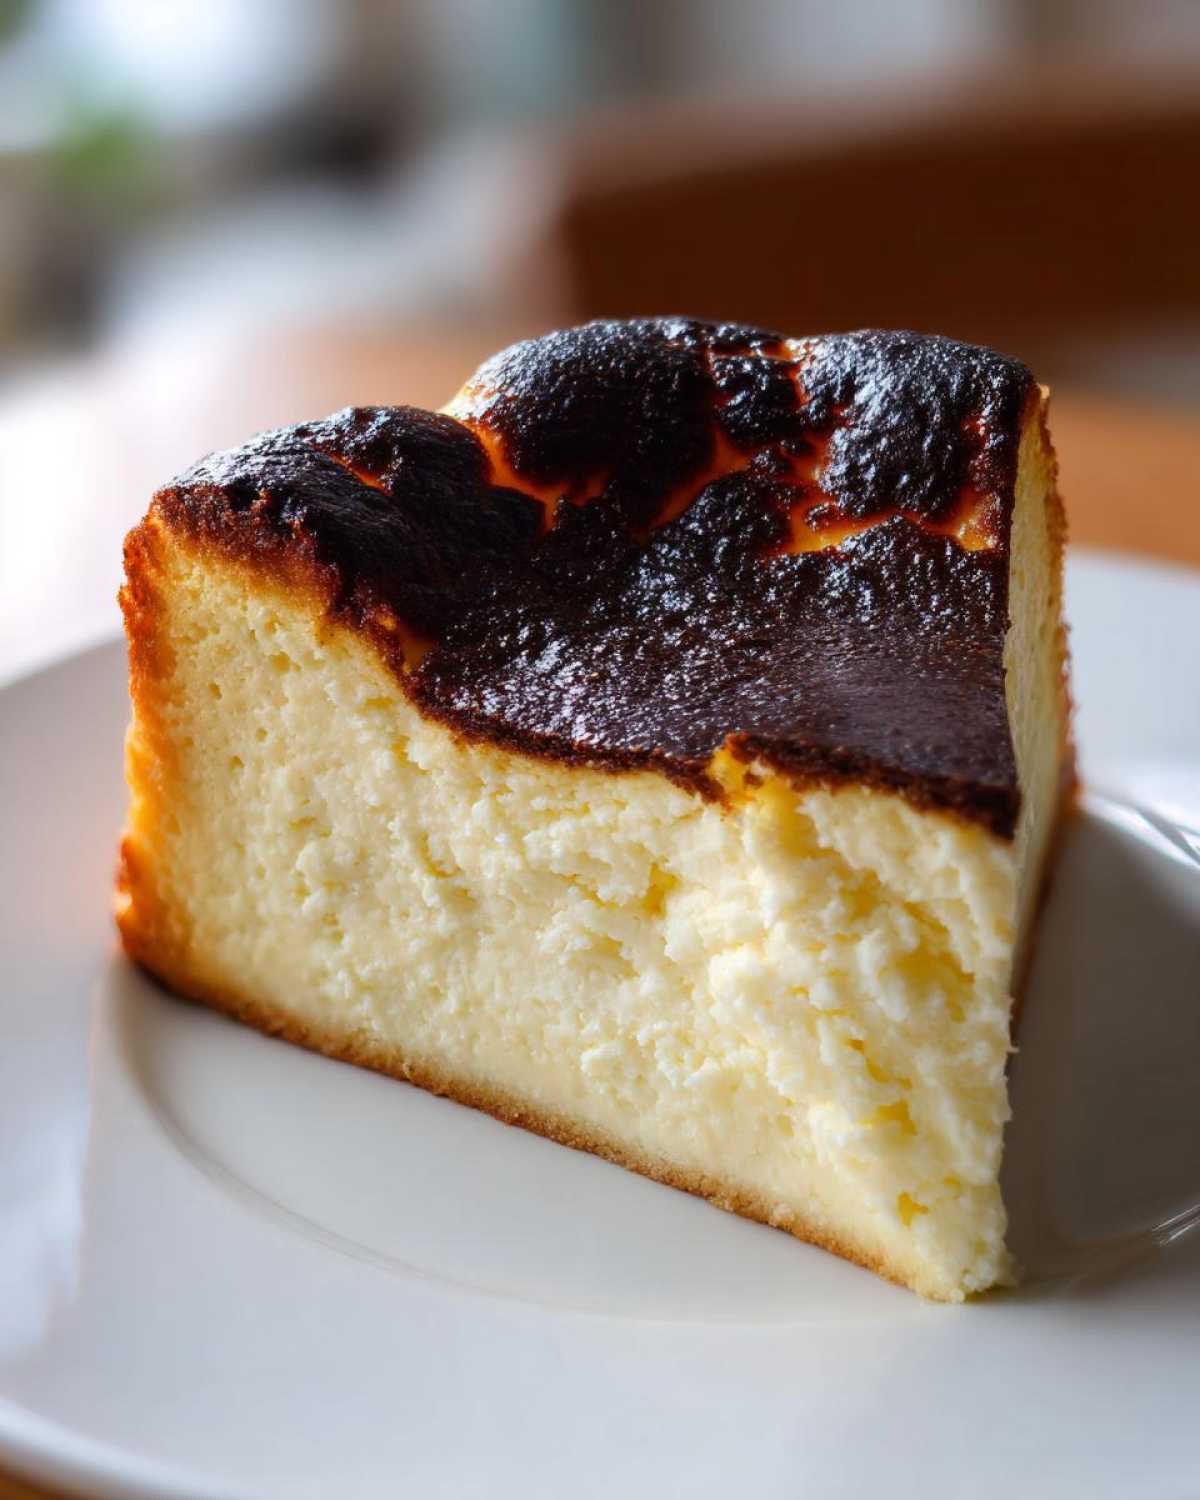
Gathering Your Ingredients for the Perfect Basque Cheesecake
Okay, here is where we keep things simple and focused. Unlike some recipes that need a dozen exotic things, the beauty of this Basque Cheesecake is that it relies only on a handful of high-impact ingredients. We need quality here, not quantity. Julian calls this our ‘minimal ingredient dessert’ phase!
You’ll notice we’re using a lot of cream cheese—900 grams! That’s almost two pounds, and that’s intentional. That high volume of full-fat cream cheese is the non-negotiable secret weapon for generating that unbelievably rich, spoonable filling. Don’t try to substitute this for low-fat stuff; you won’t get the creamy result we’re aiming for.
- 900g full-fat cream cheese, softened
- 1 1/4 cups granulated sugar
- 5 large eggs, room temperature
- 2 cups heavy cream
- 1 teaspoon vanilla extract
- 1/4 teaspoon salt
- 3 tablespoons all-purpose flour
Ingredient Notes and Substitutions for Your Basque Cheesecake
I can’t stress this enough: your cream cheese and your eggs absolutely must be at room temperature. If they aren’t, you end up with little lumps of cold cheese refusing to blend smoothly into the sugar. I usually pull mine out about an hour before I plan to start mixing. Trust me, taking those extra minutes ensures you get that smooth, silky batter that defines a great Basque Cheesecake.
We only use heavy cream here—no substitutions if you want that custardy middle. The high fat content helps stabilize the filling as it bakes high and fast. Remember, this recipe is all about relying on the fat and the heat to do the heavy lifting!
The Burnt Cheesecake Tutorial: Step-by-Step Instructions
Okay, writers, get your pencils ready because this is where the magic happens, and timing is everything! We’re moving fast, but we’re not rushing the steps, which is the whole trick to this Basque Cheesecake method. First things first: preheat that oven to 400°F (200°C). Get it hot! Make sure your oven has plenty of time to stabilize. While it’s heating up, let’s talk parchment paper. This is my favorite part because it creates that signature rustic look we love. If you need a quick confidence boost before diving in, check out how I approach texture in my Chocolate Chip Cookies, though this cheesecake is way more forgiving!
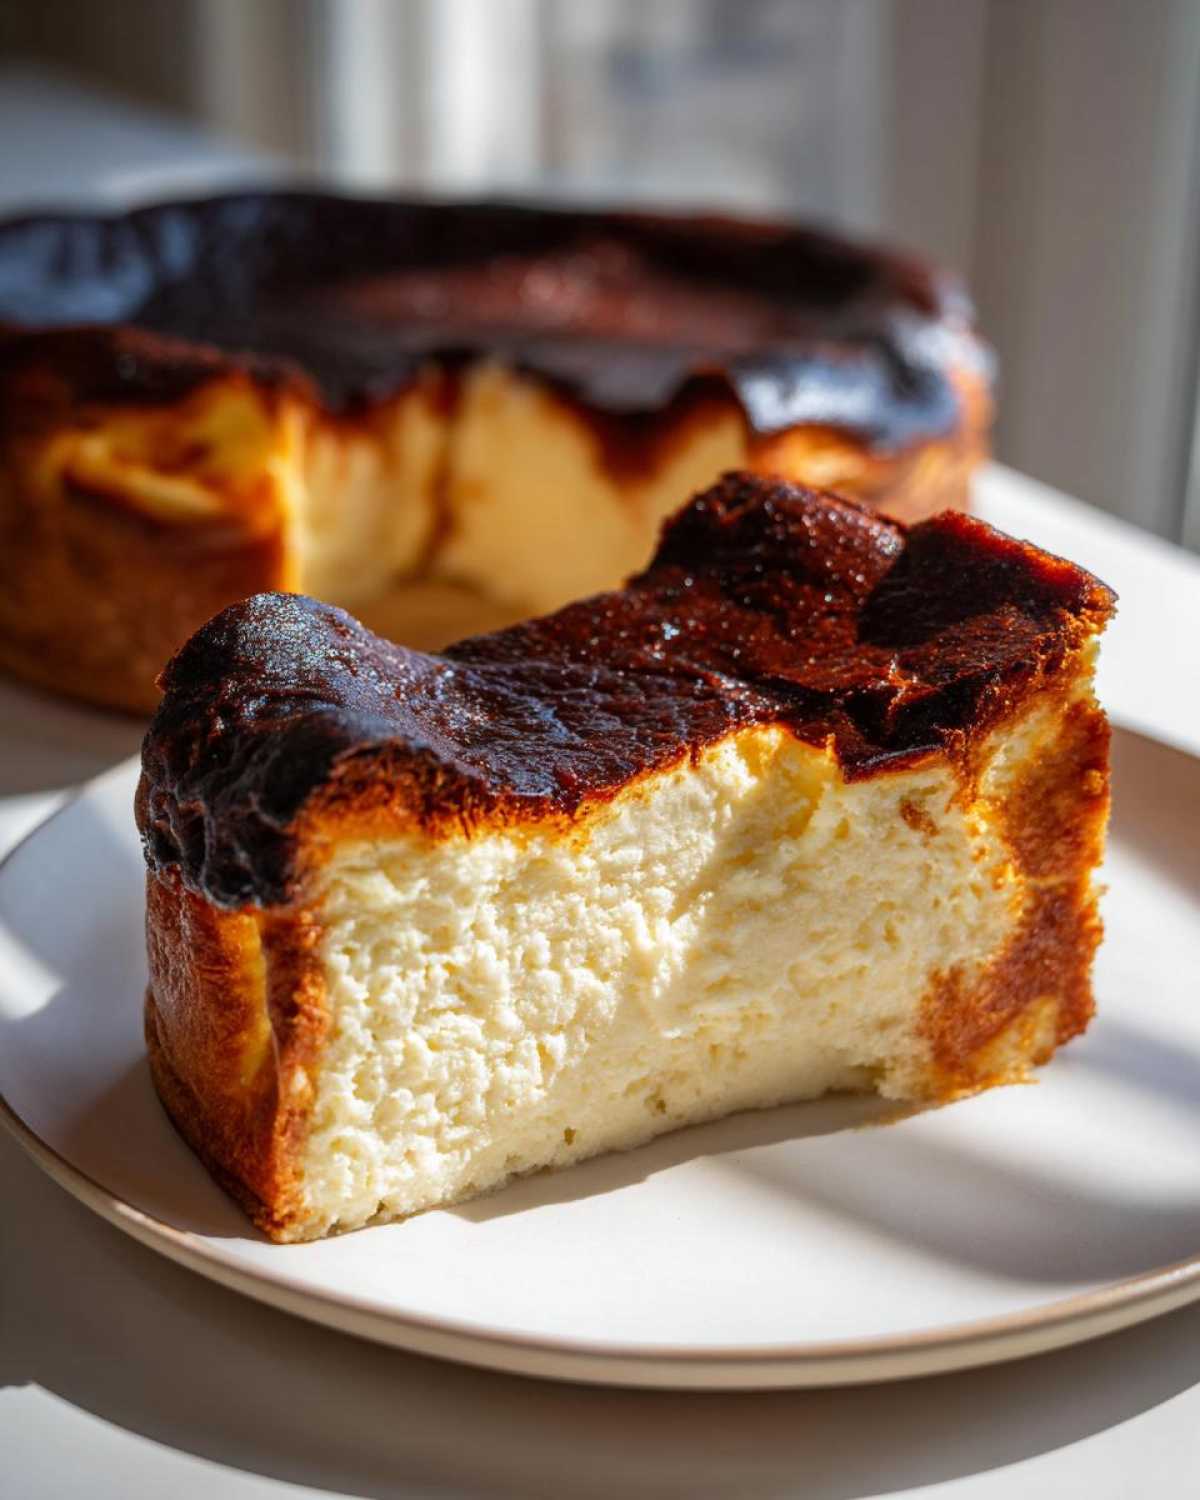
I use two big squares of parchment paper, crisscrossing them in the 9-inch springform pan. You want the paper to extend way up the sides—like 2 or 3 inches above the rim. This lets the cake puff up and get rustic and weird, which we want! Smooth it down firmly so it holds that shape.
Now for the gentle mixing. Start with your softened cream cheese and beat it until it’s totally smooth—no lumps, please! Then, slowly add the sugar and mix until *just* creamy. Once the eggs go in, keep the mixer on low and add them one by one. Low speed is key here; we’re not trying to whip air into this like a sponge cake; we’re just combining things so the final Burnt Cheesecake Tutorial comes out custardy.
Finally, sift in that tiny bit of flour, add the cream and vanilla, and mix until it just comes together. The batter is supposed to be thin, like heavy cream! Don’t panic; that thinness is exactly what guarantees that creamy center we are after.
Achieving the Signature Caramelized Top on Your Basque Cheesecake
Into the hot oven it goes for 50 to 60 minutes. This is where you have to trust the process. I watch mine closely, especially around the 50-minute mark. You are waiting for the edges to look set, but the center needs to have a real, pronounced wobble. If your center looks like set gelatin that jiggles when you gently shake the pan, you’re there! That intense heat creates that beautiful, bittersweet, caramelized top that makes this whole Basque Cheesecake famous. We’re aiming for that deep, dark char! If you want to see how others have navigated that high heat, check out some tips on achieving that perfect look online.
Chilling Time: The Secret to Perfect Cheesecake Texture
Remove that beauty from the oven—and yes, it will immediately start deflating like a sad balloon! That is completely normal for this style and how you know it’s going to be moist. Let it sit on the counter until it’s fully cool. Then, cover it loosely and get it into the fridge. I know waiting is torture, but you must chill it for a bare minimum of six hours. Honestly, overnight is so much better!
This long chill is the real secret to Perfect Cheesecake Texture. It’s during this time that the thin, wobbly center firms up into that rich, decadent, spoonable filling. If you cut it too soon, you’ll just have sweet soup!
Tips for Success: Mastering Your Rustic Cheesecake Baking
Now that we’ve gone through the process, I want to give you a few final nudges so your Basque Cheesecake turns out exactly as it should—stunningly burnt on top and impossibly creamy inside. The key, as we discussed, is high heat. Seriously, do not turn your oven down hoping to avoid the char. That burnt color is the flavor profile!
Julian actually worries about his oven temperature being a little inconsistent, so he always uses an oven thermometer to make sure we are hitting that 400°F mark dead on. If you don’t trust your oven, calibrate it first! That high, steady heat ensures we get that perfect textural contrast.
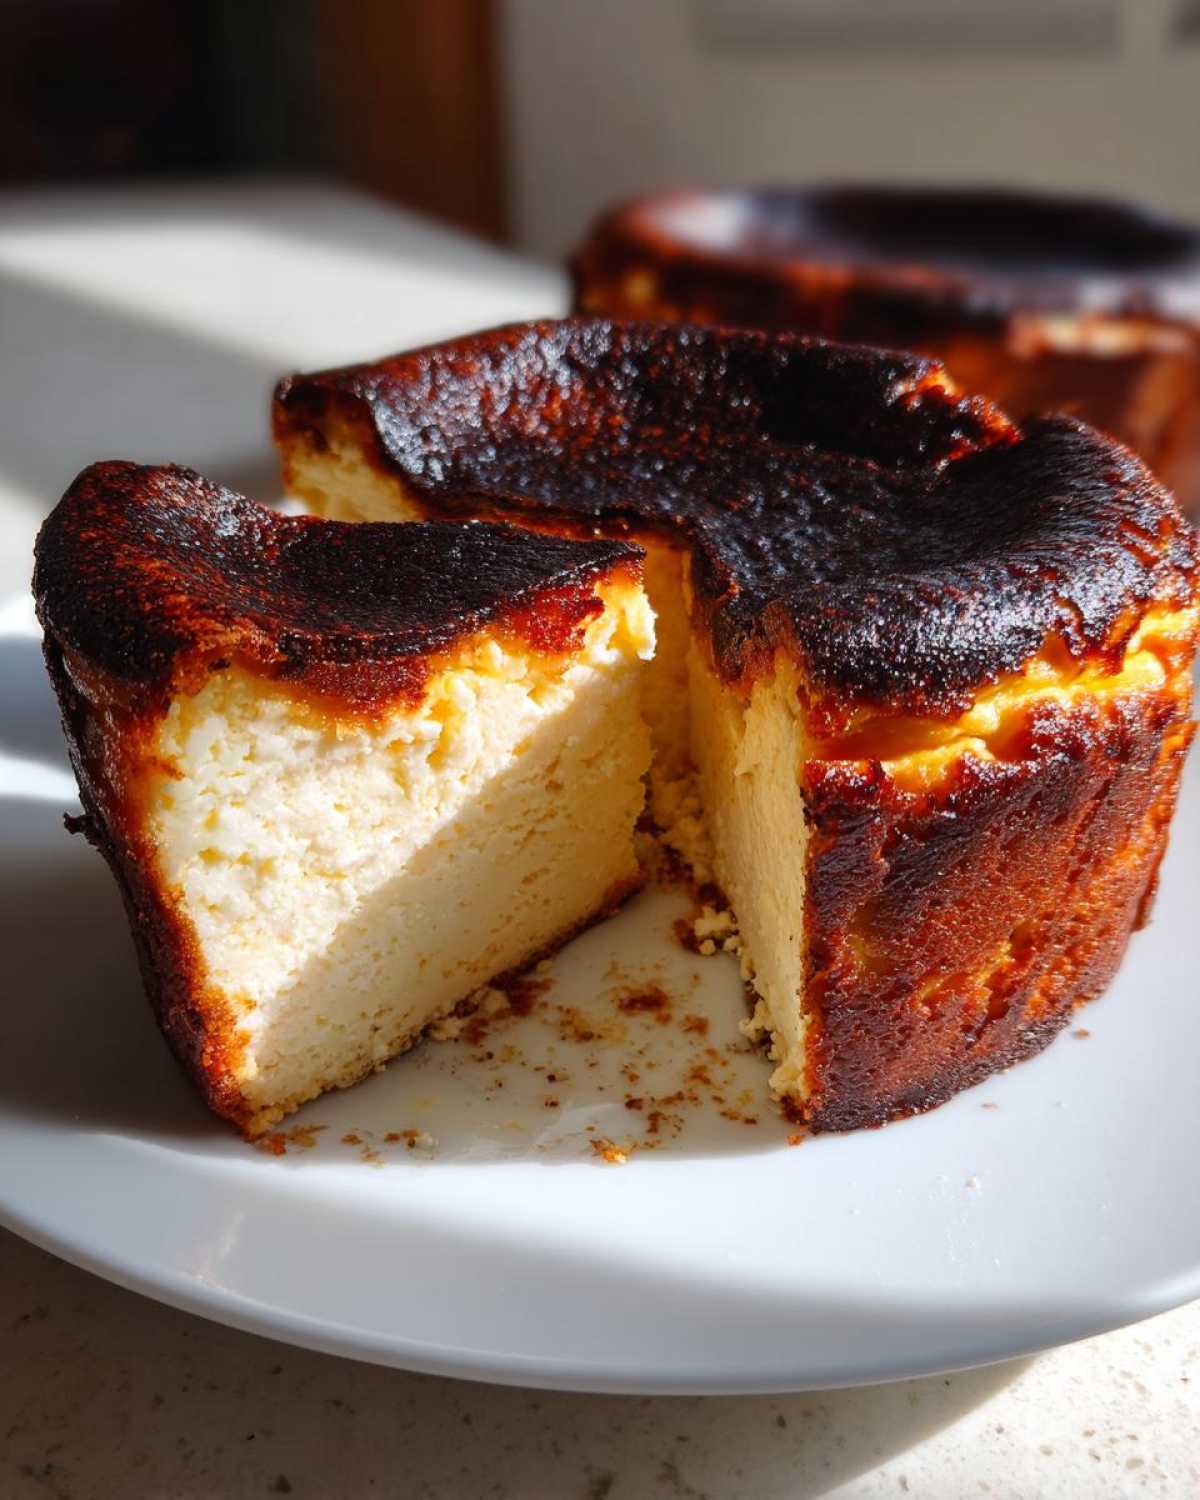
My biggest piece of advice, though, revolves around serving temperature. This is crucial for that custardy feel. If you slice into this cheesecake straight from the fridge, it will be dense and fudgy. Delicious, sure, but not authentic! For the real, melt-in-your-mouth, almost soufflé-like experience of this Rustic Cheesecake Baking masterpiece, you absolutely must let it come to room temperature for at least an hour before serving.
It’s an impressive dessert even with just the natural look—we don’t need fancy garnishes! If you’re looking for other simple, yet show-stopping recipes that don’t require a ton of effort, you have to try my recipe for Old-Fashioned Bread Pudding next.
Storage and Serving Suggestions for Your Creamy Dessert Recipes
Okay, perhaps you’ve made this stunning Basque Cheesecake and now you have leftovers—which, honestly, is a good problem to have! Since this is such a rich, Creamy Dessert Recipe, it holds up beautifully. You need to store it covered well in the refrigerator. Make sure whatever you use to cover it—cling wrap or a container lid—doesn’t stick directly to the top, or you might smear that gorgeous burnt color we worked so hard for.
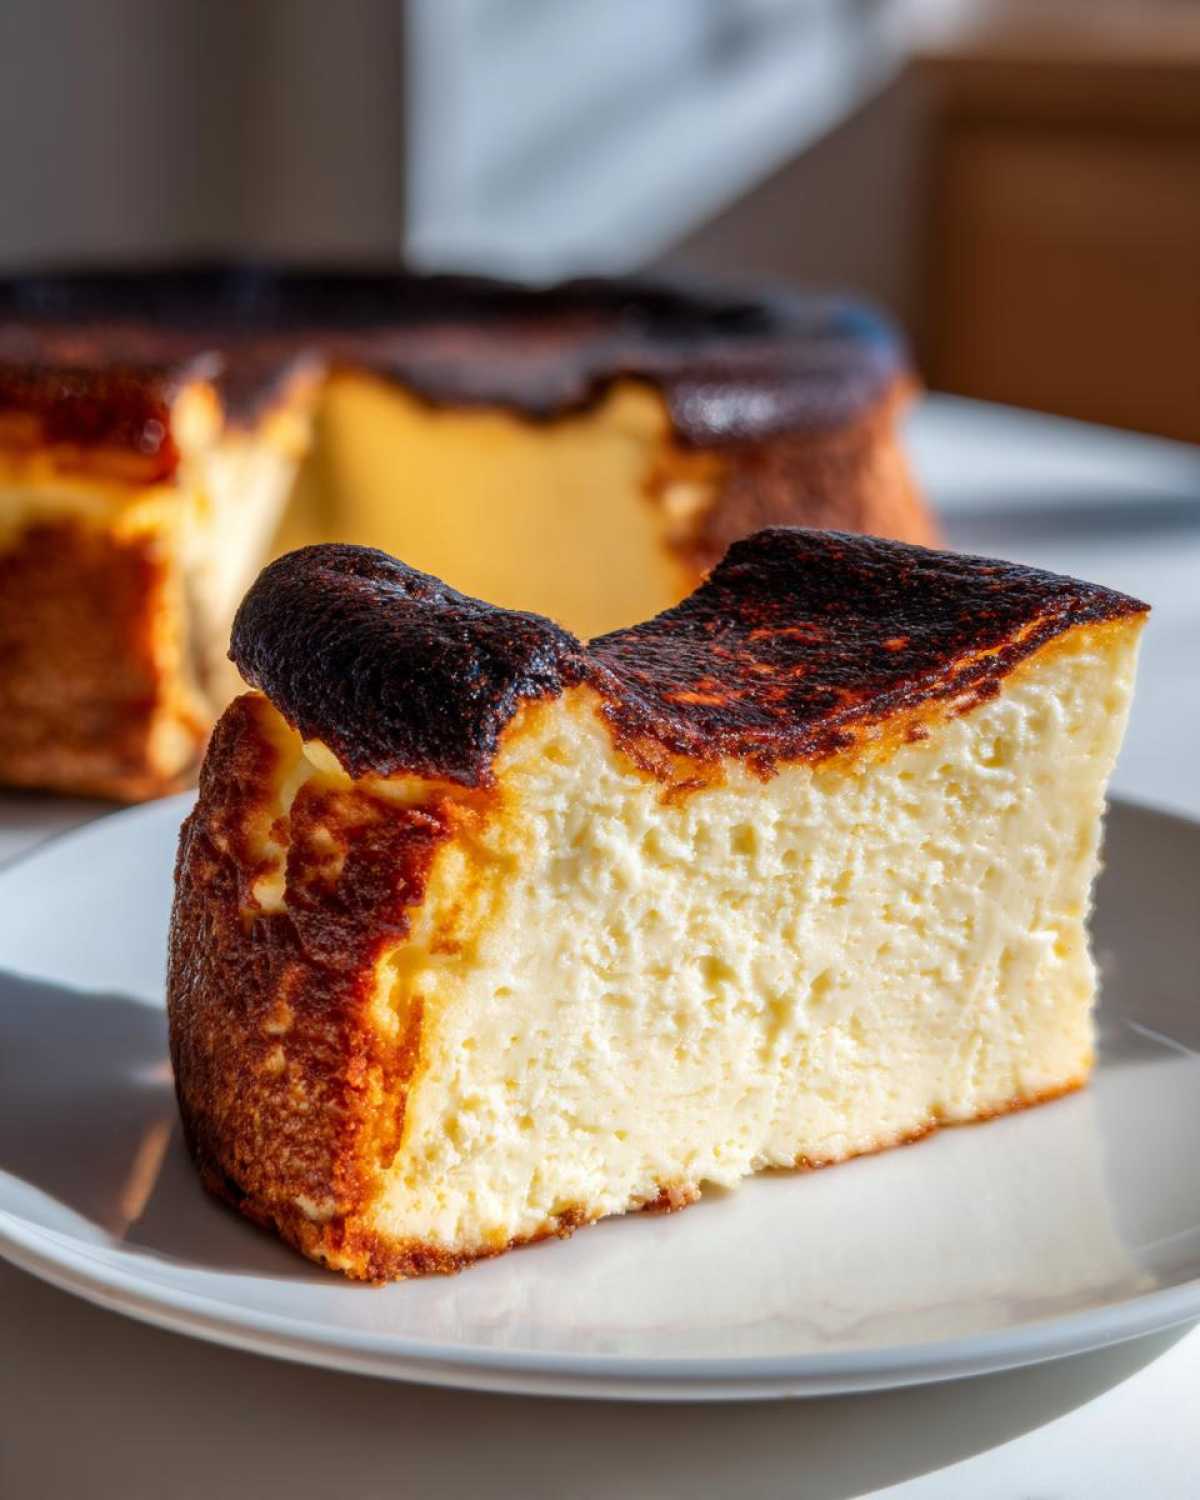
Now, let’s talk about texture one last time because this is important. If you eat it chilled, it will be firm, dense, almost like fudge. That’s delicious, but if you want that luxurious, almost pudding-like center, you have to let it sit out. I usually pull mine from the fridge an hour before we plan to slice it. It transforms back into that perfect texture.
Because this Basque Cheesecake is already so decadent and requires such Minimal Ingredient Desserts reliance for its flavor, I never feel the need to dress it up. A simple slice is truly elegant enough for any dinner party. If you’re looking for another simple, beautiful bake to round out your menu, you should check out my recipe for the Easy Moist Lemon Loaf!
If you want to see how others are enjoying similar desserts, there are some great inspiration photos on this site.
Frequently Asked Questions About the Basque Cheesecake Recipe
When we first started baking this, Julian and I had so many questions bounce back and forth. It’s a bit unconventional because it looks so dramatic, but it’s fundamentally simple! I put together the most common things people ask about to make sure your Basque Cheesecake turns out a total success.
Is the ‘burnt’ top supposed to crack?
Oh, absolutely! Cracking is totally part of the rustic charm. Remember, we are aiming for that highly caramelized, almost charred look by blasting it with heat. The top will puff up dramatically and then collapse as it cools, and that collapse often results in cracks.
This is normal behavior for this specific cake; it’s what separates this from a New York style cheesecake. If you get cracks, just smile because it means you nailed the high-heat baking required for that incredible, complex flavor profile. It always looks beautiful once it settles!
What if my center doesn’t wobble when I pull it out?
If your center looks completely set, you probably baked it too long. The wobble is your absolute best indicator that you’ll achieve the incredible, Custardy Cheesecake Filling everyone loves. If it doesn’t wobble, it will likely set up to be very dense when chilled, which isn’t bad, but it’s not the intended texture for this Gourmet Homemade Cake.
I recommend pulling it a little early next time. It continues to cook on the counter and further sets in the fridge. Think soft gelatin wobble, not firm jiggle!
Can I bake this Basque Cheesecake in a loaf pan?
Yes, you totally can, and it’s a fantastic idea if you’re making this dessert for just one or two people! We touched on this in the tips section, but it’s worth repeating. The standard recipe is designed for a 9-inch springform. For a standard loaf pan, you need to scale the entire recipe down by about one-third. Don’t just pour the full batch in, or it will take forever to bake and might not set right.
When scaling down, remember to decrease the baking time by about 10 to 15 minutes, but always rely on that center wobble test rather than the clock. Trying out Loaf Pan Cheesecake Variations is a great way to practice your technique without committing a huge batch!
Do I really need to use parchment paper that extends above the rim?
Yes, you do! This isn’t a decorative step; it’s functional. The high heat causes the Basque Cheesecake batter to rise fast and dramatically. If the parchment paper doesn’t extend high above the sides, the expanding batter will spill over the sides of the pan and likely burn onto your oven rack. That messy paper just folds over to create the rustic, intentionally crinkled edge that is the hallmark feature of this style of cake.
If you’re ready to get baking, head back up to the recipe steps. If you want more inspiration and want to see what else we’re featuring this month, you can always check out the main Magazine Meal Blog Index!
Estimated Nutritional Data for One Slice
I always remind people that numbers are just guidelines, especially when we’re talking about something as wonderfully rich as this creamy Basque Cheesecake. Julian stresses that since we’re making a truly gourmet dessert at home, the exact nutritional breakdown can change based on the brand of heavy cream or the exact sugar absorbed during that intense bake. So, consider this a general snapshot of what you can expect for one generous slice.
We are definitely leaning into the richness here—that’s the point of a dessert this decadent! It’s not exactly diet food, but honestly, it’s so satisfying you don’t need a huge portion. When I serve this, I cut decent wedges, and everyone is perfectly happy enjoying this beautiful centerpiece, which is why I see it as such a great feature for any dinner party.
Here is the estimated breakdown based on the recipe above, assuming 10 equal servings:
- Serving Size: 1 slice
- Calories: 450
- Fat: 32g (with 19g saturated fat)
- Carbohydrates: 30g
- Sugar: 35g
- Protein: 8g
- Cholesterol: 160mg
It’s high in flavor and fat, which is what gives this cake its signature creamy texture. Worth every single glorious calorie, I promise you!
Share Your Magazine Meal Creation
That’s it! You’ve officially mastered the incredibly easy, yet stunningly rustic, Basque Cheesecake. Now comes my favorite part of the whole process—seeing the amazing dishes you’ve featured on your own tables! Julian and I aren’t just here to give you instructions; we want you to treat your kitchen like your own personal studio, making your nightly meal the headline story.
When this Gourmet Homemade Cake comes out of your oven—burnt top and all—I want to see it! Please snap a photo of your beautiful rustic creation and tag us on social media. When you do, make sure you let me know how that creamy center turned out for you. Did you serve it room temperature for that amazing soufflé feel, or did you chill it firm?
Every time you try one of these recipes, you are choosing intention, and you’re making your life the main feature. If you have any questions after baking, ingredient swaps that you loved, or just want to say hi, feel free to reach out through the Contact Page. Happy baking, friends!
PrintThe Ultimate Easy Basque Cheesecake Recipe: Creamy Center and Burnt Top
Learn how to make the famous Burnt Basque Cheesecake, a rustic, crustless dessert known for its beautifully caramelized exterior and irresistibly creamy, custardy interior. This recipe requires no water bath and is surprisingly simple.
- Prep Time: 15 min
- Cook Time: 60 min
- Total Time: 75 min
- Yield: 10 servings
- Category: Dessert
- Method: Baking
- Cuisine: Spanish
- Diet: Vegetarian
Ingredients
- 900g full-fat cream cheese, softened
- 1 1/4 cups granulated sugar
- 5 large eggs, room temperature
- 2 cups heavy cream
- 1 teaspoon vanilla extract
- 1/4 teaspoon salt
- 3 tablespoons all-purpose flour
Instructions
- Preheat your oven to 400°F (200°C). Line a 9-inch springform pan with two large sheets of parchment paper, pressing them firmly into the bottom and sides so the paper extends several inches above the rim. This creates the rustic look.
- In a large bowl, beat the softened cream cheese with an electric mixer on medium speed until completely smooth, about 2 minutes. Scrape down the sides.
- Gradually add the sugar and beat until just combined and creamy. Do not overmix.
- Add the eggs one at a time, mixing on low speed after each addition until just incorporated.
- Slowly mix in the heavy cream, vanilla extract, and salt until the batter is uniform.
- Sift the flour over the batter and mix on low speed until just combined. The batter will be thin; this is correct for a creamy texture.
- Pour the batter into the prepared pan.
- Bake for 50 to 60 minutes. The edges should be set, and the center should still have a significant wobble (like soft gelatin). The top will be deeply caramelized or ‘burnt.’
- Remove the cheesecake from the oven. It will deflate significantly as it cools, which is normal for this rustic cheesecake.
- Let the cheesecake cool completely on a wire rack at room temperature for at least 2 hours.
- Once cool, cover the pan loosely and chill in the refrigerator for a minimum of 6 hours, or preferably overnight, for the best texture.
- To serve, carefully remove the parchment paper sides and slice. Serve at room temperature for the creamiest result.
Notes
- For the best ‘burnt’ color, do not be afraid of high heat. The high temperature creates the signature caramelized top.
- Serving temperature matters: Room temperature yields a soft, almost soufflé-like texture, while chilled results in a denser, richer slice.
- If you want a loaf pan cheesecake variation, use an 8.5 x 4.5 inch loaf pan, reduce the recipe by about one-third, and adjust baking time down by 10-15 minutes.
Nutrition
- Serving Size: 1 slice
- Calories: 450
- Sugar: 35
- Sodium: 250
- Fat: 32
- Saturated Fat: 19
- Unsaturated Fat: 13
- Trans Fat: 0.5
- Carbohydrates: 30
- Fiber: 0
- Protein: 8
- Cholesterol: 160