

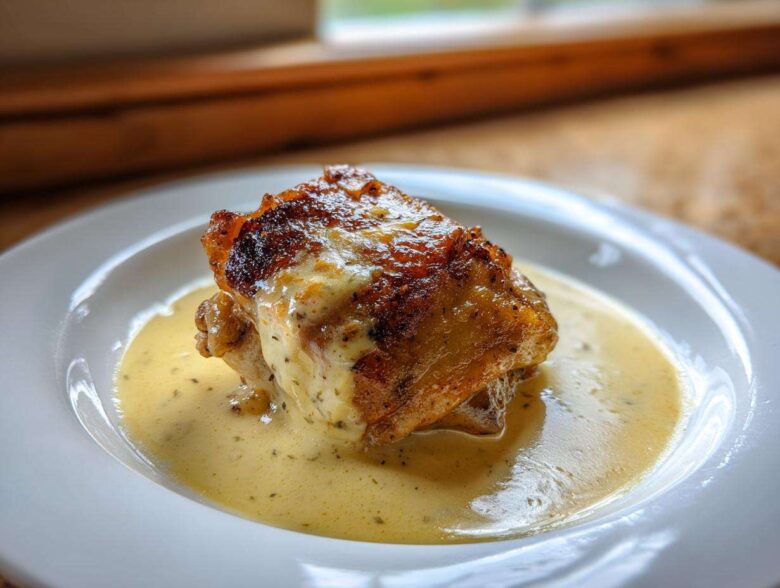
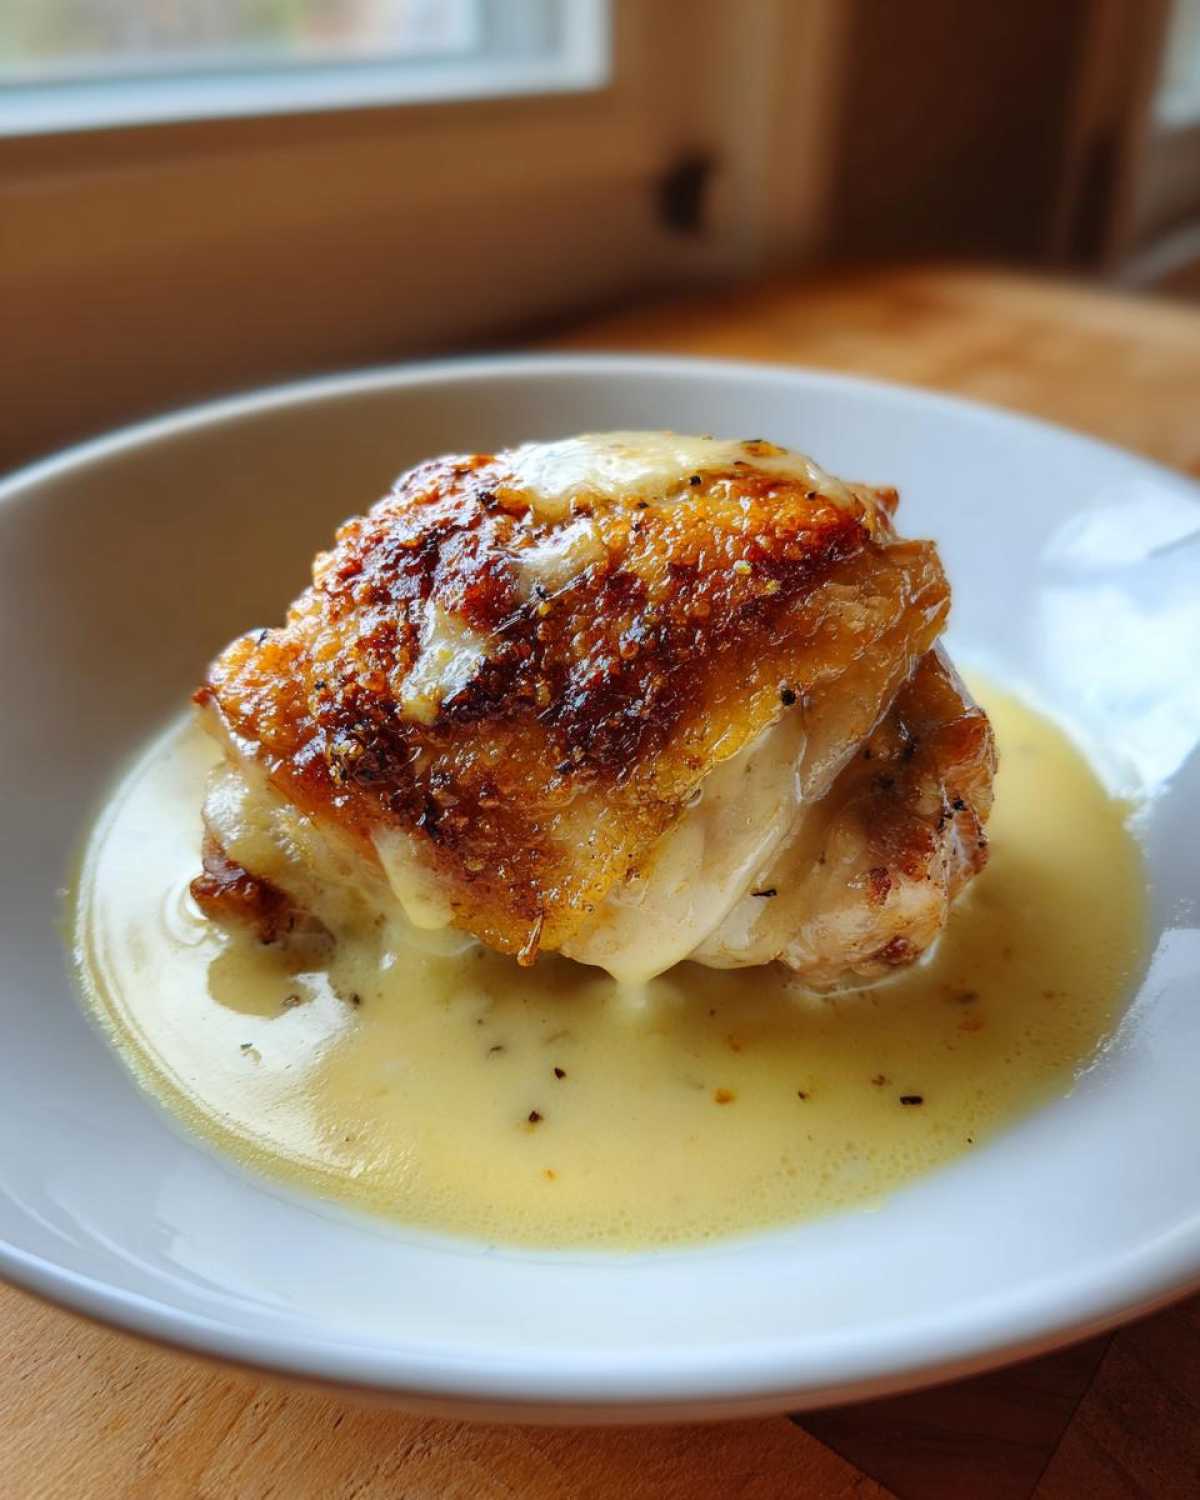
Listen, I’m going to let you in on a secret: getting that restaurant-quality, shatteringly crisp skin on chicken thighs at home can feel like a total guessing game. And making a creamy sauce while juggling that perfect sear? Forget about it! But after so many ruined dinners and soggy-skinned attempts, I finally cracked the code. This recipe guarantees you get both: the juiciest insides, that unbelievably crispy skin, and a dreamy, pungent creamy garlic pan sauce binding the whole thing together. Seriously, these rich garlic flavors transform a simple weeknight meal. I’ve spent ages perfecting this pan-searing technique for my Creamy Garlic Chicken Thighs with Crispy Skin, and trust me, once you try this, you won’t look back!
Why This Creamy Garlic Chicken Thighs with Crispy Skin Recipe Works
You might be wondering what makes THIS specific recipe stand out when there are a million chicken thigh recipes floating around. Honestly? It boils down to texture and unparalleled flavor payoff with almost no extra work. It’s the best weeknight chicken dinner solution, hands down.
- You get that magnificent, deep golden-brown, shatteringly crisp skin every single time.
- The garlic flavor is robust but never burnt, perfectly balanced by the richness of the heavy cream.
- It’s a true one-pan effort, minimizing cleanup for you!
Achieving Restaurant Quality Chicken at Home
We skip that frantic medium-high heat everyone recommends! The secret to perfect skin is starting the chicken skin-side down in a cold skillet with just a little oil. This allows the fat to render out slowly over 12 to 15 minutes. That low-and-slow process dries the skin out just enough to make it super crunchy later on.
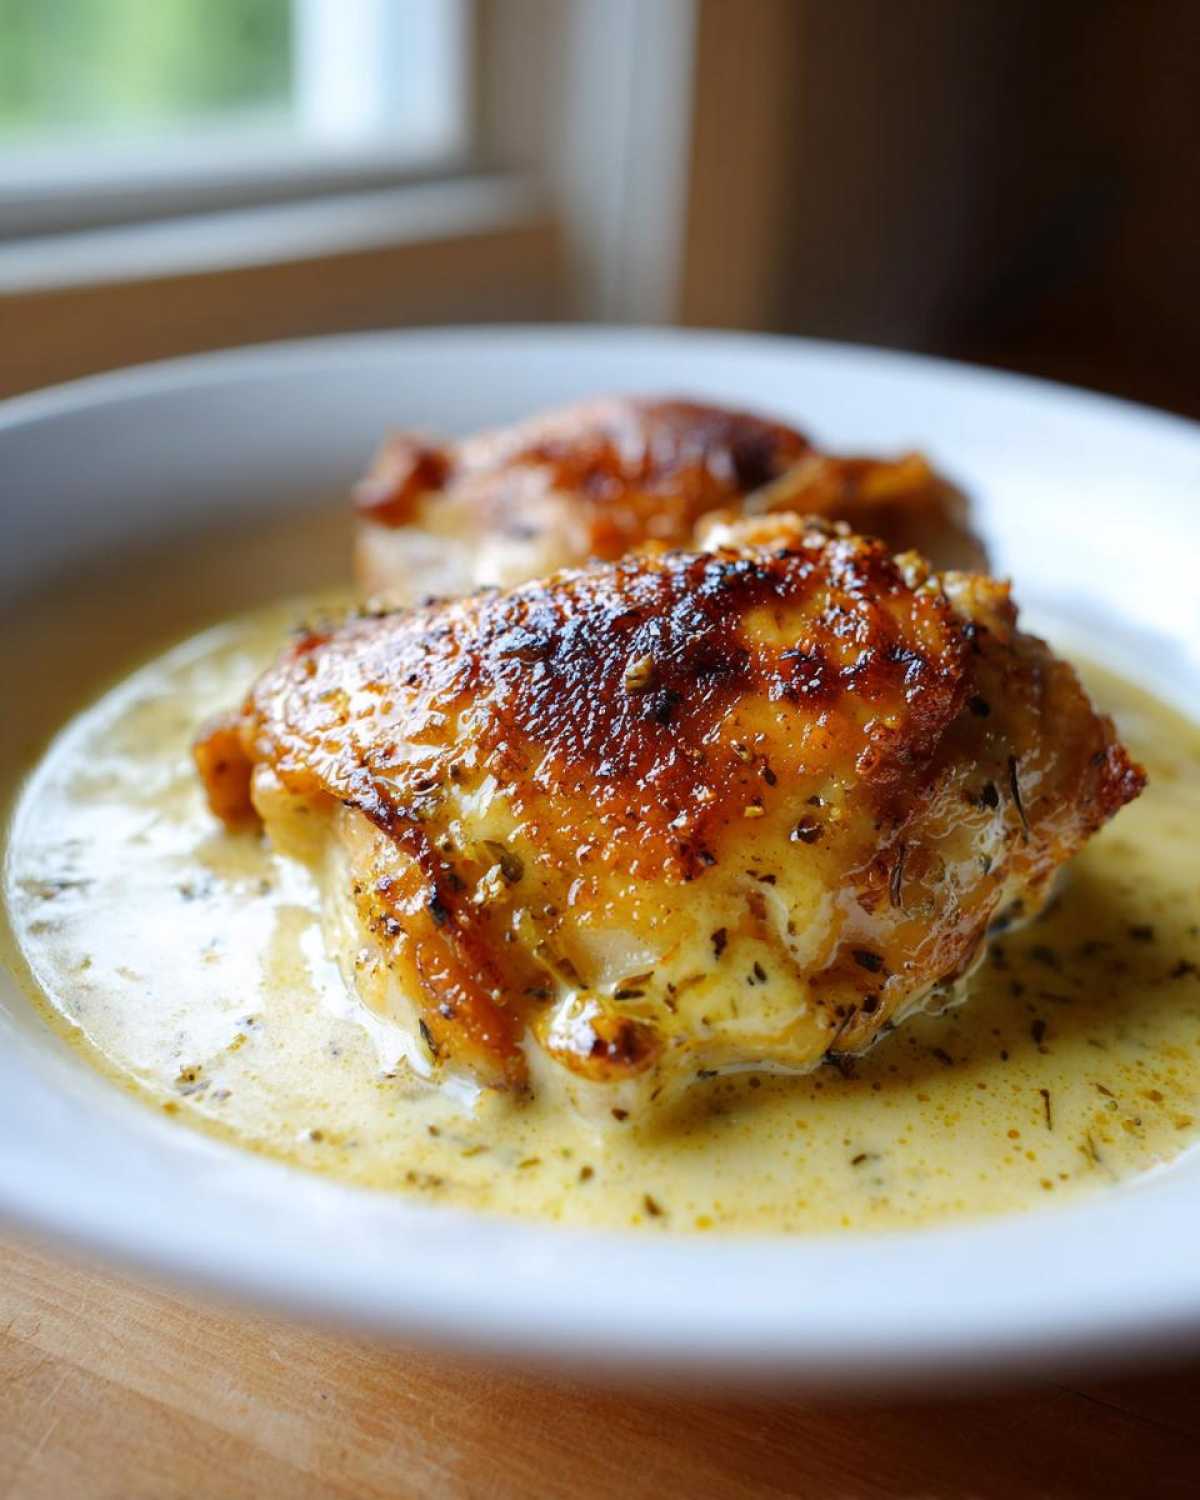
The Secret to the Creamy Garlic Sauce Method
Once that skin is gorgeous, we use all those savory, caramelized drippings left in the pan—that’s called the *fond*, darling! We use that rich base to build our simple but incredible sauce. It’s why this Creamy Garlic Chicken Thighs with Crispy Skin tastes like it took hours when it really only takes about 45 minutes total. You can see how I handle sauce building in my other one-pan meals, too, but the garlic here really sings!
Ingredients for Creamy Garlic Chicken Thighs with Crispy Skin
You don’t need a giant shopping list for this one, which I love for a quick weeknight meal. Seriously, keep these staples stocked and you’re ready to go! Don’t forget that paper towel trick; it’s more important than anything else here.
- 4 bone-in, skin-on chicken thighs (The bone keeps things juicy!)
- 1 tablespoon olive oil
- 1 teaspoon salt
- 1/2 teaspoon black pepper
- 1/2 teaspoon paprika, for color
- 4 cloves garlic, minced—yes, four, we love garlic!
- 1/2 cup good quality chicken broth (Low sodium is best)
- 1/2 cup heavy cream (Don’t skimp here!)
- 1/4 cup grated Parmesan cheese (Freshly grated is a non-negotiable!)
- 1 tablespoon fresh parsley, chopped, for garnish
If you want to dive deeper into making amazing garlic flavors shine, check out my favorite garlic noodle base sometime. It uses similar principles for max flavor!
Essential Equipment for Your Creamy Garlic Chicken Thighs with Crispy Skin
You need the right tools for this job, especially if you want that skin *perfectly* crispy while dealing with a liquid sauce later. This isn’t the time to use your non-stick pan that’s seen better days because we need serious heat retention and the ability to switch from stovetop to oven if needed.
Here are the things you absolutely need pulling out of your cupboards:
- A Large Oven-Safe Skillet: This is vital! Cast iron is my absolute favorite because it holds heat so beautifully and gives an even sear. If it doesn’t have a handle that can go into the oven, you might need a backup plan, but for the initial sear, this is key.
- Paper Towels: I can’t stress this enough! You need an entire roll. We are drying the skin like we mean it. Wet chicken skin steams, and steamed chicken skin equals rubbery disappointment.
- Tongs: Essential for flipping those hot thighs and maneuvering them into the sauce later without ripping up that beautiful crust you just worked so hard to create.
- A Meat Thermometer: If you want truly juicy chicken thighs every time, you should use one. We are aiming for 165°F internal temperature, and eyeballing it just leads to sadness.
- Small whisk or spoon: Necessary for stirring up your sauce base and making sure that Parmesan melts smoothly.
If you’re curious about other ways to cook chicken quickly, check out my thoughts on my favorite air fryer chicken techniques. It’s a great fast dinner solution, though we are sticking to the skillet today for that delicious pan sauce!
Step-by-Step Instructions for Creamy Garlic Chicken Thighs with Crispy Skin
Okay, this is where the magic happens! We have two main acts here: getting that perfect, deeply crisp skin—which requires patience—and then whipping up that luxurious sauce right in the same pan. Follow these steps closely, and you’ll have the most amazing Creamy Garlic Chicken Thighs with Crispy Skin!
Preparing and Searing the Chicken for Crispy Skin
First things first: moisture is the enemy of crispiness. Pat your bone-in, skin-on thighs absolutely bone-dry with paper towels. I mean it—really blot them until you feel like you’re going to tear the skin. Then, season them generously on both sides with salt, pepper, and that little bit of paprika for pretty color. Don’t skip the drying step; it’s how we guarantee that crispy skin you’re dreaming about!
Next, grab that oven-safe skillet and add just one tablespoon of olive oil. Now, here’s the move that separates champions from amateurs for the Best Crispy Skin Chicken Dinner: place the seasoned chicken thighs SKIN-SIDE DOWN into the *cold* skillet. Turn the heat to medium-low. We cook this slow! Let them sit undisturbed for about 12 to 15 minutes. You are rendering the fat, not burning the skin. Once it’s deep golden brown and feels tight and crisp when you gently nudge it with your tongs, flip them over and cook for about 5 minutes on the other side just to brown up.
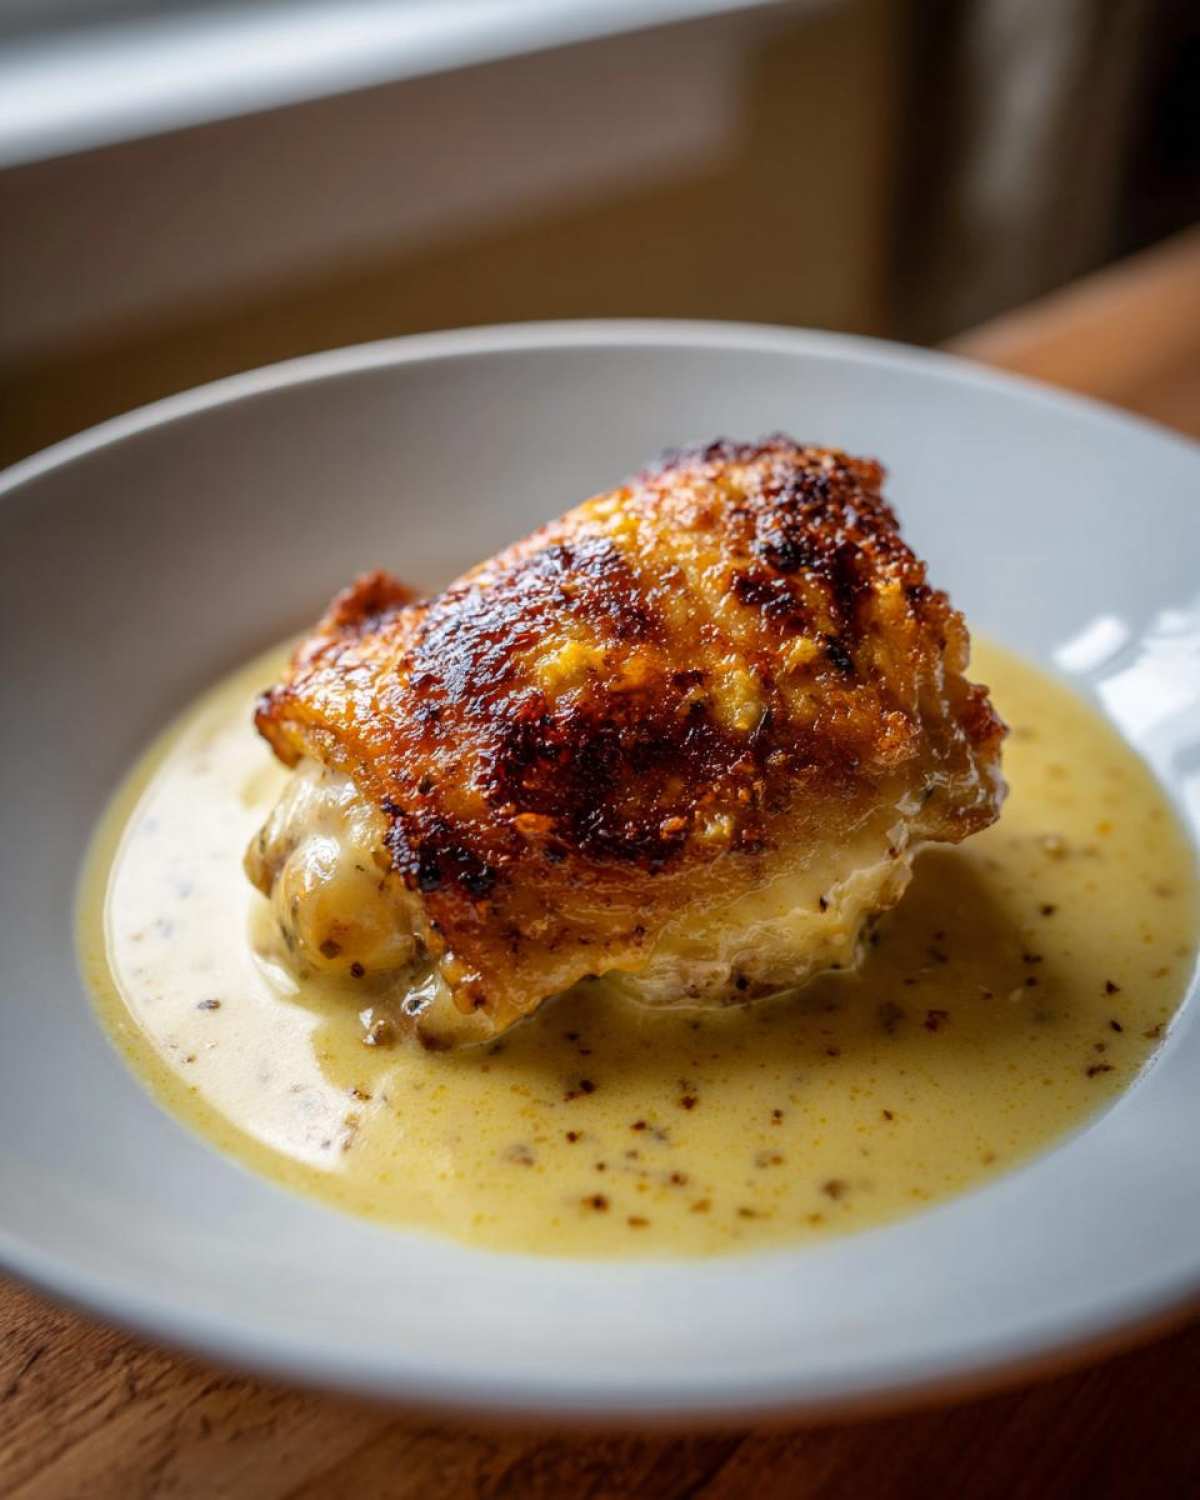
Take the chicken out carefully and set it aside on a clean plate. Don’t worry if they don’t look fully cooked internally yet; they’ll finish up later! Pour off almost all that rendered fat, but leave about one tablespoon behind for flavor.
Building the One Pan Creamy Garlic Chicken Sauce
The pan should still be over medium heat. Toss in your minced garlic—four cloves, remember!—and cook for just 30 seconds until you can really smell it. Watch that closely; garlic burns fast and bitterness ruins everything. Immediately pour in the chicken broth, and this is important: use your wooden spoon or spatula to scrape up all those beautiful brown bits stuck to the bottom. That’s pure flavor gold for your sauce!
Let that broth bubble away until it reduces by about half—that takes maybe two minutes. Now, turn the heat WAY down to low. We are adding dairy, so we want gentle warmth, not a boil! Stir in your heavy cream, let that warm up for a minute, and then whisk in the Parmesan cheese until everything is smooth. If you boil the cream right now, it’ll break, and that’s the saddest thing!
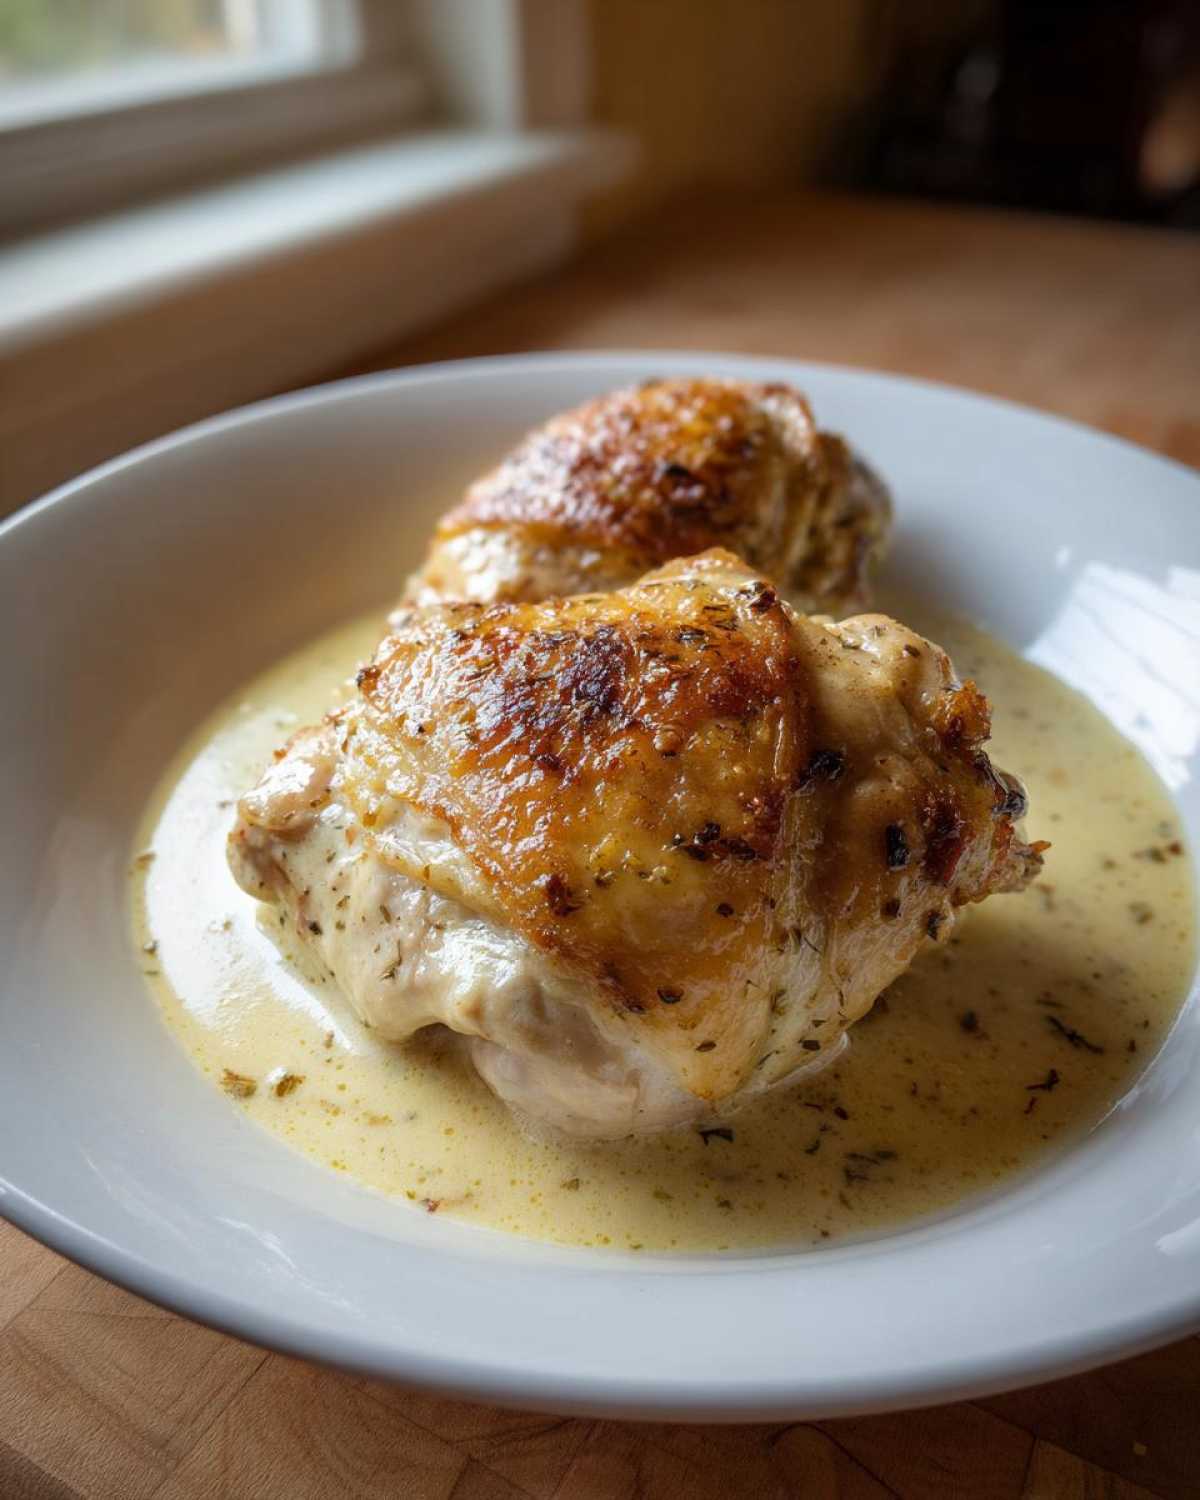
Finally, nestle those chicken thighs right back into the skillet, skin-side UP! We don’t want that beautiful crispy skin sitting in liquid! Cover the skillet and let them simmer on low heat for another 5 to 8 minutes. Pull out that meat thermometer and check the thickest part—we need 165°F internally. If you want to save that amazing leftover chicken, I’ve got some thoughts on reheating here on keeping it juicy!
Tips for Success with Your Creamy Garlic Chicken Thighs with Crispy Skin
I’ve cooked this dish way too many times not to share the few tiny hiccups that can derail your meal. If you follow these three rules religiously, you’ll nail this every time and feel like you’re eating restaurant-quality food. Seriously, please listen to me on the drying skin part!
First, let’s talk about dryness. Drying the skin thoroughly before cooking is the most important step for achieving maximum crispness. I mean it—use half a roll of paper towels if you have to! Wet skin steams, and steamed skin is like sad, rubbery leather. We are aiming for crunch, remember?
Second, when we make the sauce, keep the heat low when adding the cream and Parmesan cheese. This is key to keeping the sauce from breaking. If you boil that heavy cream mixture, it separates, and suddenly your beautiful sauce looks grainy and thin. A gentle simmer is all you need to let that cheese melt smoothly in. Trust me on keeping the heat low; that’s how you get that perfect consistency for the Creamy Garlic Chicken Thighs with Crispy Skin.
Finally, don’t mess with the cooking order. You need that rendered fat from the skin to flavor your broth and your sauce base. If you use boneless or skinless thighs, you lose that flavor foundation, and the sauce will taste flat. If you’re looking for a great dipping sauce vibe later, check out how I make my garlic aioli; it pairs nicely if you want extra garlic flavor on the side, but the sauce in this main recipe is perfect as is!
Ingredient Notes and Substitutions for This Easy Chicken Thigh Recipe
I always encourage people to cook what they have, but with a recipe this specific about texture, there are just a few spots where I really push for the ingredient I listed. But hey, life happens, so let’s talk about swaps for when you’re in a pinch!
The bone-in, skin-on thighs are where we cannot make compromises if you want that crispy skin and juicy finish. The bone insulates the meat, so it stays moist while the skin finally crisps up, and we need that skin fat to build the sauce flavor. Using boneless means everything cooks too fast, and you miss out on that beautiful, fatty fond.
What to Use If You Don’t Have Heavy Cream
If you run out of heavy cream, don’t panic! You can substitute it with half-and-half, but you’ll need a bit more Parmesan cheese and maybe a tiny pat of butter at the end to get that real richness back. It won’t be *quite* as luxurious, but it’s definitely still creamy!
Another trick—and this only works if you’re not worried about keeping it low-fat—is using full-fat Greek yogurt. You must warm the yogurt first in a separate little bowl with a splash of the hot broth to temper it. Then, slowly whisk it into the pan *off* the heat right at the end. If you dump cold yogurt into a hot pan, you’ll get curds instead of smooth sauce, even faster than regular cream. I learned that the hard way when making my famous Alfredo stand-in years ago!
Parmesan Cheese: Freshly Grated is Non-Negotiable Here
Listen, I use the pre-grated stuff sometimes for quick pasta toppings, but not in this sauce. Please, use the block and grate it yourself! That pre-grated Parmesan has anti-caking agents in it, and those agents are the absolute nemesis of a smooth, velvety sauce. They never melt correctly and they will absolutely make your sauce grainy or clumpy when you try to thicken it with the cheese. Keep it fresh, keep it smooth!
Adjusting Seasoning
Remember, the salt content of your chicken broth matters a lot. If you use regular, high-sodium broth, hold back on the salt you put on the chicken initially. Taste the sauce right before you return the chicken to the pan. That’s your last chance to adjust the overall balance before the flavors meld while simmering.
Storage and Reheating Instructions for Leftover Creamy Garlic Chicken Thighs with Crispy Skin
We all know that leftovers are half the fun of making a restaurant-quality meal at home, right? Especially when it’s something this rich! The tricky part with this dish, though, is dealing with two separate textures: the sauce and that beautiful crispy skin. You will need to treat them differently when saving them.
For the best results when you’re ready to eat them the next day—maybe for an easy weeknight dinner solution tomorrow—I highly recommend separating the parts if you can! If you store the chicken and the sauce together, that amazing skin is going to soak up moisture and get soft overnight. That’s okay, it’ll still taste fantastic, but if you’re aiming for that snap, separate them.
Storing the Chicken and the Sauce
When storing your chicken, just place the thighs in an airtight container. If you want to save the sauce, scoop it into a separate, smaller container. The sauce itself holds up really well in the fridge for about three to four days. It will look a little firmer and maybe slightly broken when you pull it out cold—that’s totally normal when dairy and cheese are involved!
The Best Way to Reheat for Maximum Crispness
If you want to bring back that incredible texture of the Creamy Garlic Chicken Thighs with Crispy Skin, you absolutely, positively, cannot use the microwave. Microwaving turns crispy skin into slightly moist, sad skin almost instantly! It’s just not worth it.
Instead, use your oven or, even better, your air fryer! Preheat your oven to 375 degrees Fahrenheit. Place the chicken thighs directly on a small baking sheet. If you baked them last time, you can try to crisp them back up by putting them skin-side up for about 8 to 10 minutes. If you have an air fryer, pop them in at 350 degrees for about 5 minutes. That hot, dry air really blasts the skin back to life!
Now, for the sauce, you need to gently reheat it on the stovetop over low heat. Think slow and steady. Once it’s warm, whisk it vigorously until it loosens up and becomes smooth again. You might need to add just a tiny splash of milk or broth to thin it back to its original consistency if it thickened up too much while chilling. Remember what I said earlier about not boiling the sauce? Apply that rule here too—keep it low so the sauce doesn’t break!
If you’re trying to get creative with leftovers, I love using that leftover sauce to toss with some roasted veggies or serve it over a quick baked potato, like my recipe for an air fryer baked potato. It’s a great way to use up every last bit of that delicious garlic flavor!
Frequently Asked Questions About Skillet Chicken Thighs with Sauce
I get asked the same things over and over again about this pan-seared dish, and I’m happy to clear things up! Getting the texture right on these juicy chicken thigh recipes can trip people up, especially when it’s a quick weeknight chicken dinner solution like this one. Here are the biggies!
Can I use boneless, skinless thighs for this recipe?
Oh, you *can*, but you shouldn’t if you’re looking for the *best* result. The whole magic trick for this dish relies on two things that boneless, skinless thighs just don’t give you. First, you miss out on that entire rendering process that dries out the skin to make it unbelievably crispy. Second, and this is crucial, you won’t have that tablespoon of flavorful, rendered chicken fat left in the pan to sauté your garlic. That fat is what deglazes and forms the base of our rich sauce. You’ll end up with a much flatter-tasting sauce, guaranteed!
How do I ensure the sauce stays thick and doesn’t water down?
This is the panic point for so many people when cream gets involved. The key here is a two-part defense plan. Part one happens *before* the cream: you must let that chicken broth reduce by half. When you reduce the broth with all those browned bits underneath, you concentrate the flavor and thicken the liquid slightly before you even introduce dairy. Part two happens right after: once the heavy cream is in, turn your heat down to low. If you let it boil aggressively after the cream is added, the fat separates from the liquid, and you get that watery mess. Keep it barely simmering until the Parmesan melts in, and you’ll be golden!
If you’re ever looking for other solutions for quick dinners, check out my go-to chicken zucchini stir fry—it’s fast, fresh, and requires zero dairy!
Serving Suggestions for Your Dinner Recipes with Chicken Thighs
Okay, the main star of the show—that gorgeous, crispy-skinned chicken smothered in garlic cream sauce—is ready. But what are we serving it with? You can’t just eat meat and sauce alone, that’s just sad! We need something to either soak up every last drop of that delicious sauce or something light to cut through the richness. This sauce is so good, it deserves a fantastic supporting cast.
Soaking Up the Sauce
When you’ve got this much creamy garlic goodness, you need something absorbent on the plate. My absolute first thought is always pasta. Not fancy shells or anything complicated; just some simple fettuccine or linguine tossed right into the pan for a minute before serving works wonders. You’d be amazed how quickly the pasta absorbs that leftover sauce and turns into an instant, rich side dish!
On that note, if you’re looking for a rice option that’s more exciting than plain white rice, you HAVE to try my French Onion Butter Rice. It’s savory, a little bit sweet, and honestly decadent enough to stand up to this chicken. It makes the whole meal feel like it came from a date-night restaurant!
Balance is Key: Veggie Pairings
Because the chicken thighs are rich and the sauce is heavy cream, we need something green, bright, and maybe a little bitter to keep everything balanced. Don’t overthink this—we want easy sides!
- Roasted Asparagus: Toss asparagus spears with olive oil, salt, and a tiny squeeze of lemon juice when they come out of the oven. The brightness cuts right through the heavy cream.
- Steamed Green Beans with Almonds: A classic side that brings a nice little crunch, contrasting the soft sauce and the crispy skin.
- Garlic Sautéed Spinach: If you cook the spinach quickly with just a little olive oil and maybe one extra clove of garlic, it wilts down perfectly and brings a nice earthy tone to the plate.
Don’t Forget a Crusty Bread!
Honestly, forget the side dish entirely if you only have time for one thing: grab a really crusty loaf of French bread or sourdough. You need something sturdy to basically wipe the plate clean once the chicken is gone. Dipping that warm crusty bread into the leftover Delicious Pan Sauce Recipes in the bottom of your dish is the true sign of a successful dinner!
PrintCreamy Garlic Chicken Thighs with Crispy Skin

Make tender, juicy chicken thighs with perfectly crisp skin, finished in a rich, homemade creamy garlic pan sauce.
- Prep Time: 10 min
- Cook Time: 35 min
- Total Time: 45 min
- Yield: 4 servings
- Category: Dinner
- Method: Pan Searing and Simmering
- Cuisine: American
- Diet: Low Fat
Ingredients
- 4 bone-in, skin-on chicken thighs
- 1 tablespoon olive oil
- 1 teaspoon salt
- 1/2 teaspoon black pepper
- 1/2 teaspoon paprika
- 4 cloves garlic, minced
- 1/2 cup chicken broth
- 1/2 cup heavy cream
- 1/4 cup grated Parmesan cheese
- 1 tablespoon fresh parsley, chopped
Instructions
- Pat the chicken thighs completely dry with paper towels. Season both sides with salt, pepper, and paprika.
- Place a large, oven-safe skillet over medium heat. Add the olive oil.
- Place the chicken thighs skin-side down in the cold skillet. Turn the heat to medium-low. Cook slowly for 12 to 15 minutes without moving them to render the fat and crisp the skin.
- Once the skin is deep golden brown and crisp, flip the thighs. Cook for 5 minutes on the second side until browned.
- Remove the chicken from the skillet and set aside on a plate. Pour off all but 1 tablespoon of rendered fat from the skillet.
- Return the skillet to medium heat. Add the minced garlic and cook for 30 seconds until fragrant. Do not let the garlic burn.
- Pour in the chicken broth, scraping up any browned bits from the bottom of the pan. Let the broth reduce by half, about 2 minutes.
- Reduce the heat to low. Stir in the heavy cream and let it warm through.
- Stir in the Parmesan cheese until the sauce is smooth and slightly thickened. Taste and adjust seasoning if needed.
- Return the chicken thighs to the skillet, nestling them into the sauce, skin-side up. Do not submerge the crispy skin.
- Cover the skillet and simmer on low for 5 to 8 minutes, or until the internal temperature of the chicken reaches 165 degrees Fahrenheit.
- Remove from heat. Garnish with fresh parsley before serving the chicken thighs with the creamy garlic sauce spooned over them.
Notes
- Drying the skin thoroughly before cooking is the most important step for achieving maximum crispness.
- To keep the sauce from breaking, keep the heat low when adding the cream and Parmesan cheese. Do not boil the sauce once the cream is added.
- If your skillet is not oven-safe, transfer the chicken and sauce to a baking dish after searing and bake at 375 degrees Fahrenheit for 10 minutes to finish cooking.
Nutrition
- Serving Size: 1 thigh with sauce
- Calories: 450
- Sugar: 2
- Sodium: 450
- Fat: 32
- Saturated Fat: 14
- Unsaturated Fat: 18
- Trans Fat: 0
- Carbohydrates: 3
- Fiber: 0
- Protein: 35
- Cholesterol: 130