

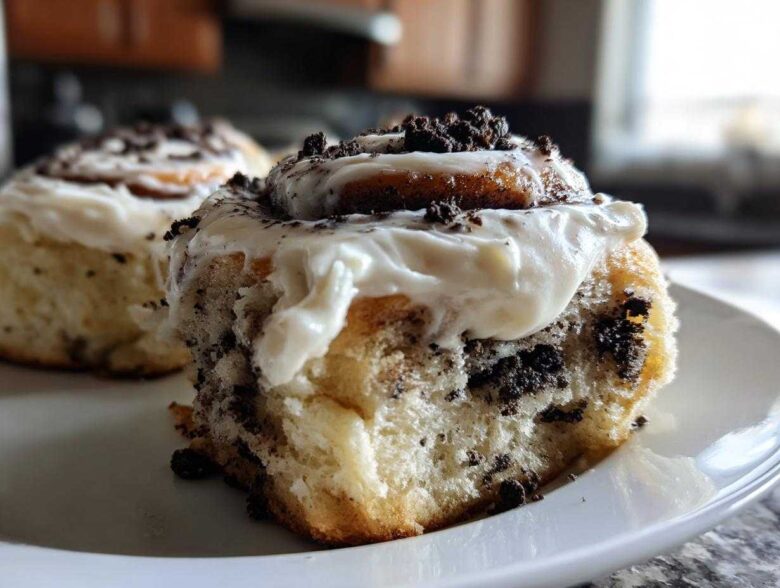
Oh my goodness, are you ready for a game changer? I love taking two of the absolute best comfort foods—creamy, crunchy Oreos and warm, swirls of cinnamon roll—and smashing them together. Seriously, it’s pure magic! I’ve perfected this recipe because I needed something decadent for weekend baking that didn’t take all day. Trust me when I say these are the ultimate gooey Oreo cinnamon rolls you’ll ever make, and the secret weapon is using that refrigerated dough to keep things super fast.
I know what you’re thinking: why mess with perfection? But putting that little bit of chocolatey, creamy goodness inside makes all the difference. They come out fluffy, rich, and that cream cheese frosting just melts into all those little Oreo crumbs. It’s my favorite kind of chaos, and you’re going to want to try this blend immediately for your next big brunch spread. If you love giant sweets, you should check out my recipe for the massive skillet cinnamon roll too!
Why You Will Love These Oreo Cinnamon Rolls (Cookies and Cream Rolls)
You absolutely need these on your table because life is too short for boring breakfast pastries, right? I’ve tested a ton of sweet treats, and these Cookies and Cream Rolls hit every single comfort button. Here’s the lowdown on why they always disappear first:
- They are ridiculously fast! We’re using store-bought dough, so you get that amazing homemade flavor in under 40 minutes total. No overthinking required!
- The texture is unmatched. When they bake up, you get those truly gooey cinnamon rolls, but mixed with pockets of sweet, dark chocolate from the Oreos. Pure bliss.
- It’s the perfect weekend baking project. They feel impressive, making them great for brunch, but they’re simple enough that you can whip them up on a lazy Sunday afternoon.
- That chocolate and spice combo just sings! It’s a twist on tradition that everyone goes wild for. Make sure you check out my idea for cinnamon roll pancakes if you love this flavor profile!
Essential Ingredients for Your Oreo Cinnamon Rolls
Okay, for these Oreo Cinnamon Rolls, we are cheating just a little bit, and that’s okay! Using pre-made dough saves your sanity, but we are upgrading everything else. Quality matters here, especially with the Oreos and the dairy for that amazing frosting, because that’s what separates a good roll from a life-changing one.
I always lay out my ingredients first—it keeps me calm! Here is exactly what you need for about 8 perfect rolls:
- One package (about 13.2 oz) of refrigerated cinnamon roll dough. Make sure it’s the kind that comes with icing, because we’re tossing that store icing aside!
- One cup of Oreo cookies, and I mean *finely ground*. You want crumbs, not giant chunks, so they spread evenly in the spiral.
- 1/4 cup of unsalted butter, melted. This is what helps those little chocolate pieces stick when we roll things up.
- For the glaze, we need that cream cheese to be perfectly softened—I mean, if you poke it, it should leave an easy fingerprint. We use 1/2 cup of it.
- Another 1/4 cup of unsalted butter, also softened for the frosting.
- 1 1/2 cups of powdered sugar (sift it if you have time, it makes the frosting so much smoother!).
- One teaspoon of vanilla extract. Don’t skimp on the vanilla, it brightens up the chocolate flavor beautifully.
- Just one tablespoon of milk to get the consistency exactly right.
See? So simple! We aren’t complicating things, we’re just making sure every component is ready to go before we start assembling. If you’re looking for other warm, spicy bakes, you have to try my apple cinnamon pull-apart bread recipe next!
Step-by-Step Guide to Making Stuffed Cinnamon Rolls
This whole process is surprisingly fast because we’re relying on the magic of pre-made dough, but assembly is where we make our magic happen. Don’t rush the rolling part; that’s what ensures we get those beautiful, defined spirals when they bake up. Preheat your oven to whatever temperature the can tells you—honestly, follow their guide for the dough, as it sets the foundation for everything.
Preparing the Dough and Oreo Filling for Oreo Cinnamon Rolls
First things first, gently unroll your refrigerated dough pieces onto a clean surface. You want them connected but ready to be buttered up. Take that 1/4 cup of melted butter and brush every single bit evenly across the surfaces. Now for the fun part: grab those finely crushed Oreos and sprinkle them all over the buttered dough. You want good coverage, but don’t pile them so high they won’t seal! This is the step that transforms these into epic oreo cinnamon rolls.
Then, starting from a short end, roll that dough up as tightly as you possibly can. Seriously, roll it tight! When you slice them into 8 individual servings—I highly recommend using unflavored dental floss for the cleanest cut, it sounds weird but it works wonders!—that tight roll prevents the filling from squeezing out immediately.
Tuck those beautiful, stuffed rolls cut-side up into your lightly greased baking dish. Give them a little space; they need room to grow!
Baking Time and Temperature for Fluffy Baked Goods
Pop the dish into that preheated oven. Since you’re using pre-made dough, just stick to the baking time on the package directions, usually around 18 to 22 minutes. If you want them to be perfectly, ultra-gooey, take them out about one minute early. Seriously, that tiny bit of underbaking makes for the softest, most decadent center. You are aiming for that beautiful golden brown color, which lets you know you’ve got truly fluffy baked goods on your hands. While the rolls are doing their thing, we can focus on that incredible frosting so we’re ready the second they come out of the heat. If you want to see another cozy baked recipe, peek at my thoughts on pumpkin spice waffles!
Remember, if you’re making a giant batch, maybe check out how I handle my giant skillet cinnamon roll to manage the heat distribution better than a standard pan.
Crafting the Perfect Cream Cheese Frosting for Oreo Cinnamon Rolls
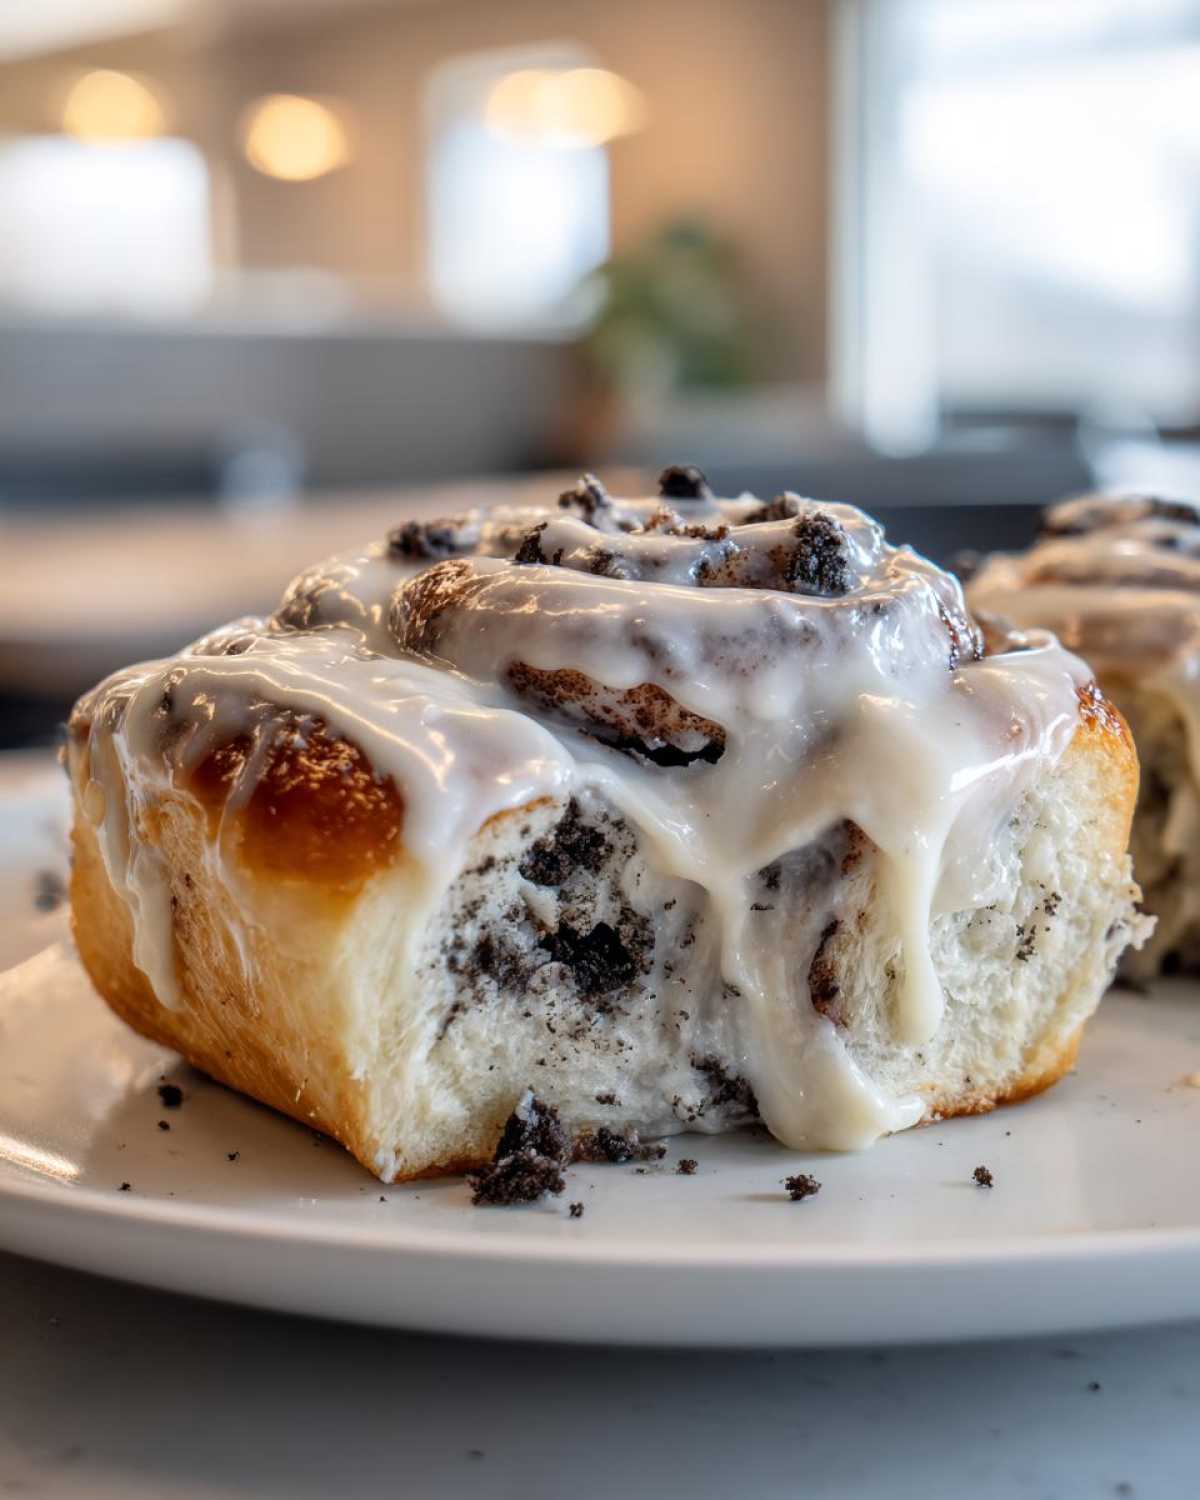
Okay, now that those sweet spirals are baking, we need to talk about the crowning glory, the part that truly makes these Oreo Cinnamon Rolls irresistible: the glaze! If you remember anything about this recipe, remember this: the temperature of your dairy absolutely matters here. If your cream cheese or butter are even a little too cold, you end up with lumps, and nobody wants a lumpy glaze, right?
We are skipping that overly sweet canned stuff and making a rich, tangy Cream Cheese Frosting from scratch. It only takes about three minutes, I promise!
First, make sure that 1/2 cup of cream cheese and your 1/4 cup of butter are sitting out long enough to be truly softened. I usually leave mine out for at least an hour before I even think about baking. Beat those two together first until they look like pale, creamy clouds in your stand mixer or a sturdy bowl. This initial creaming step is vital for smoothness!
Once that base is perfect, start adding your 1 1/2 cups of powdered sugar, but add it slowly, maybe a half cup at a time, mixing on low speed so you don’t end up wearing it! Finally, stir in that teaspoon of vanilla and just one tablespoon of milk. If it looks stiff, add another tiny splash of milk, but seriously, just drops at a time!
You want this frosting to be nice and thick—thick enough to sit on top of a warm roll without immediately sliding off the sides and pooling on the plate. It should be shiny and utterly swoon-worthy. If you decide to look at some other great glaze recipes after you finish these, check out the amazing topping I use on my brown butter pumpkin cookies—it’s a different flavor, but the technique for smoothness is the same!
Tips for Success with Homemade Cinnamon Rolls
Even though we are taking a shortcut with the dough, there are a few little tricks I’ve learned over the years that really elevate these Homemade Cinnamon Rolls from good to spectacular. These small details are what make the difference between a tasty treat and the best thing you’ve eaten all week!
Here are my must-follow rules when making these Oreo Cinnamon Rolls:
Use Dental Floss to Cut, Seriously!
I mentioned this before, but I have to stress it again: throw away the urge to just use a huge chef’s knife. When you try to saw through the dough with a knife, you end up squishing the beautiful spiral you just worked hard to build. You want those clean layers because those layers are what become that melt-in-your-mouth texture! Take a piece of unflavored, good quality dental floss, slide it under the log, cross the ends over the top, and pull straight down. It slices through the dough like butter and keeps all the filling tucked perfectly inside. It’s game-changing for achieving those perfect, round Stuffed Cinnamon Rolls.
Don’t Skip the Resting Time
Even though the recipe is quick, letting the rolls sit in the pan for about 15 minutes *before* they go into the oven is a crucial step for achieving truly Gooey Cinnamon Rolls. This brief rest allows the dough to relax and puff up just a little bit. When the dough starts slightly touching in the pan, that’s your visual cue. When they bake, they’ll bake more evenly and steam slightly against each other, leading to that interior softness you just can’t get if you rush them straight into the hot oven.
Frost While Warm, Not Hot
Timing the frosting is almost as important as the baking itself! You want to take the pan out when they are done, let them sit for a solid five minutes—no more!—and then immediately start slathering on that homemade Cream Cheese Frosting. If the rolls are piping hot, the frosting will melt completely and run right off into a puddle at the bottom of the pan. If you wait too long (like 20 minutes), the tops will form a slight crust, and the frosting won’t absorb in that delicious way it should. Five minutes is that sweet spot where the roll is structurally stable but still tender enough to slightly melt the glaze, making everything one cohesive, glorious bite.
If you want more ideas for combining spicy and sweet flavors, you have got to try my recipe for apple cinnamon pull-apart bread—it uses similar warm flavors but in a totally different format!
Serving Suggestions for Your Oreo Dessert
Now that you have these magnificent, sticky Oreo Cinnamon Rolls cooling (but not too much!), the final step is figuring out what to serve them with. These are definitely rich, which means they don’t need much company, but the right pairing can turn them from a simple snack into a full-on event. They are clearly an indulgence, so feel free to label them as your new favorite Oreo Dessert!
When I serve these, which is usually on a Saturday morning when my whole family is home, I stick to simple drinks that cut through the sweetness a little bit. You don’t want anything else too heavy, or you’ll need a nap immediately!
Here are my favorite ways to present these beauties to my family during a great weekend gathering. These make fantastic Brunch Ideas Dessert options!
- Simple Coffee or Espresso: Nothing beats the bitterness of a really good, strong black coffee against that sweet cream and chocolate. If you’re feeling fancy, an iced latte works wonders too.
- Milk (of course!): Sometimes the throwback option is the best. A tall, cold glass of milk is just the perfect companion for anything involving Oreos. It’s classic comfort food pairing.
- Fresh Fruit Platter: To trick yourselves into thinking you’re eating healthy, balance the richness with something tart and light. A simple mix of sliced strawberries, raspberries, and orange segments really cleanses the palate between bites.
- Something Bubbly: If you are serving these later in the day or for a special occasion brunch, I always like to have something fizzy ready. You must try serving them alongside my amazing Maple Apple Cider Fizz—the warm spices in the drink just echo the cinnamon perfectly!
Just remember, once these rolls hit the table, they disappear fast. Don’t worry about fancy plates; honestly, just slide one onto a napkin and enjoy the warm, melty frosting. That’s the true experience!
Storage and Reheating Instructions for Leftover Oreo Cinnamon Rolls
These oreo cinnamon rolls are honestly better the next day, provided you store them correctly. I know they smell tempting sitting on the counter, but because we used that delicious, dairy-heavy Cream Cheese Frosting, we can’t just leave them exposed for days. They deserve better than that!
Generally, if I know we’re going to eat them all within 24 hours, I just cover the baking dish tightly with plastic wrap or foil and leave them right on the counter. They stay pretty soft that way. If you’re planning on saving them for longer, or if your kitchen is super warm, you must refrigerate them. Just make sure they are sealed up tight because nobody likes dry cinnamon rolls!
How to Bring Back That Gooey Warmth
The biggest challenge with leftover rolls is getting back that perfect, pull-apart soft texture we worked so hard for. Cold, refrigerated rolls are firm, and we just can’t stand that!
My absolute favorite way to reheat them is the microwave, but you have to be careful with timing. If you microwave a whole roll for too long, the edges get tough, and the inside turns rubbery. Trust me, I learned that the hard way!
- For a Single Roll: Place one of those leftover Cookies and Cream Rolls on a microwave-safe plate. Nuke it for just 10 to 15 seconds. Check it after 10 seconds; if it’s warm and soft, you’re done! This brings the butter and sugar back to that melty, gooey state without overheating the dough structure.
- For a Pan of Rolls: If you saved a few rolls together in the dish (covered tightly with foil!), you can pop the whole thing into a 300°F oven for about 10 minutes. This heats them more evenly than the microwave.
If you reheated them in the oven, you might want to whip up a tiny extra spoonful of frosting to put on top right before serving again. If you’re looking for another easy, cozy baking recipe for leftovers, my pumpkin spice pancakes are a great way to use up extra warm flavors!
Frequently Asked Questions About Cookies and Cream Rolls
I get so many questions after people try making these, and honestly, that’s how you know they’re a keeper! It’s great that you all are getting brave in the kitchen. Sometimes, life throws a wrench into the best-laid plans, so let’s cover those little hiccups. We want every batch of these Cookies and Cream Rolls to be perfect!
Can I use a different type of cookie in these Oreo Cinnamon Rolls?
That is a super fair question! While the name specifies Oreos, you certainly *can* mess around with other cookies if you have a craving or happen to be missing the classic black-and-white sandwich cookie. You could use chocolate wafer cookies, or even some good quality chocolate chips if you’re in a real pinch. However, I have to be honest: you won’t get the classic flavor we are aiming for.
The thing that makes these Oreo Cinnamon Rolls so good is the combination of the sweet, slightly vanilla cream filling *mixed* with the dark, almost bitter chocolate cookie crumbs. Oreos offer that perfect contrast to the cinnamon and the tang of the cream cheese frosting. If you use plain chocolate chips, it just tastes like chocolate rolls. If you want that true “Cookies and Cream” vibe, stick with the original, but I’m not going to judge if you substitute a Milano for a midnight snack emergency!
Here are a few other things folks always ask me about these amazing Breakfast Treats:
Can I make the dough entirely from scratch?
Yes, absolutely you can! If you are a true baking purist, go for it. You’d just use your favorite scratch recipe for standard cinnamon rolls, roll it out, brush it with the butter, and then add the Oreos. Just remember that the scratch dough will take a solid hour or more to rise, which is why I love the store-bought dough for keeping things quick like I mentioned earlier. If you venture into scratch baking, make sure you check out my tips for those veggie packed breakfast muffins—they require a similar level of patience!
How early can I assemble these before baking?
I always recommend baking these the same day you assemble them, especially since we are using refrigerated dough, which isn’t meant for long storage once cut. Assembling them the night before tends to dry out the outside edges. If you absolutely must prep ahead, assemble them in the pan, cover them tightly, and let them sit in the fridge for maybe 4 to 6 hours max. When you take them out to bake, let them sit on the counter until they come somewhere close to room temperature before putting them in the oven. They won’t be quite as fluffy, but they’ll still be delicious!
What’s the best way to crush the Oreos finely?
If you just toss whole Oreos into a zip-top bag and hit them with a rolling pin, you’ll end up with huge, uneven chunks, and those large pieces can cause the roll to tear when you slice it. For the best distribution across your dough, I load them into my food processor and pulse until they look almost like coarse sand. If you don’t have a machine, put them in a heavy-duty bag, seal it well, and then use the flat side of a meat tenderizer or a sturdy saucepan bottom to gently crush them until they are uniformly fine. Fine crumbs mean even flavor!
Nutritional Estimates for This Comfort Food Baking Recipe
Now, I’m going to be totally upfront—these Oreo Cinnamon Rolls are pure indulgence! They are decadent, loaded with chocolate, sugar, and that rich cream cheese frosting. We aren’t making a diet food here, we are baking up some serious joy! So, when you are looking at the numbers, think of these as a special occasion, Comfort Food Baking treat, not your everyday breakfast.
I ran the numbers based on the ingredients we used (especially the refrigerated dough and those decadent Oreos), and here is what you can generally expect per serving—remember, this recipe makes 8 rolls.
Please keep in mind that these are just estimates! The final count swirls around a lot depending on which brand of dough you buy or how generous you are with that amazing frosting. If you’re looking for something a little less heavy but equally delicious, you should take a look at my recipe for savory oatmeal with egg and cheese.
Here is the breakdown for one glorious roll:
- Serving Size: 1 roll
- Calories: Right around 450
- Sugar: About 45 grams (It’s the frosting and the dough working together!)
- Total Fat: 25 grams
- Saturated Fat: 14 grams
- Trans Fat: 0.5 grams (We try to keep that low in our kitchen!)
- Carbohydrates: 55 grams
- Protein: 5 grams
- Cholesterol: 50 milligrams
See? It’s rich, but hey, that’s why we love them, right? You work hard, you bake these amazing Chocolate Cinnamon Rolls, and today you enjoy every single bite! Don’t stress the nutrition labels when the payoff is this delicious!
PrintUltimate Gooey Oreo Cinnamon Rolls with Cream Cheese Frosting

Make rich, soft cinnamon rolls stuffed with crushed Oreo cookies and topped with a simple cream cheese frosting.
- Prep Time: 15 min
- Cook Time: 20 min
- Total Time: 35 min
- Yield: 8 servings
- Category: Dessert
- Method: Baking
- Cuisine: American
- Diet: Vegetarian
Ingredients
- 1 package (13.2 oz) refrigerated cinnamon roll dough
- 1 cup Oreo cookies, crushed
- 1/4 cup unsalted butter, melted
- 1/2 cup cream cheese, softened
- 1/4 cup unsalted butter, softened
- 1 1/2 cups powdered sugar
- 1 teaspoon vanilla extract
- 1 tablespoon milk
Instructions
- Preheat your oven to the temperature specified on the cinnamon roll dough package. Lightly grease a baking dish.
- Unroll the cinnamon roll dough pieces onto a clean surface.
- Brush the melted butter over the surface of each dough piece.
- Sprinkle the crushed Oreo cookies evenly over the buttered dough.
- Roll the dough up tightly, starting from the short end. Slice the roll into individual servings using unflavored dental floss or a sharp knife.
- Place the rolls cut-side up in the prepared baking dish.
- Bake according to the package directions until golden brown and cooked through.
- While the rolls bake, prepare the frosting: Beat the softened cream cheese and softened butter together until smooth.
- Gradually add the powdered sugar, vanilla extract, and milk. Mix until the frosting is creamy and spreadable.
- Remove the baked rolls from the oven and let them cool for 5 minutes.
- Spread the cream cheese frosting generously over the warm rolls before serving.
Notes
- For extra gooeyness, slightly underbake the rolls by one minute.
- You can use store-bought cream cheese frosting if you prefer a quicker option.
- Crush the Oreos finely for better distribution throughout the dough.
Nutrition
- Serving Size: 1 roll
- Calories: 450
- Sugar: 45
- Sodium: 350
- Fat: 25
- Saturated Fat: 14
- Unsaturated Fat: 11
- Trans Fat: 0.5
- Carbohydrates: 55
- Fiber: 1
- Protein: 5
- Cholesterol: 50