

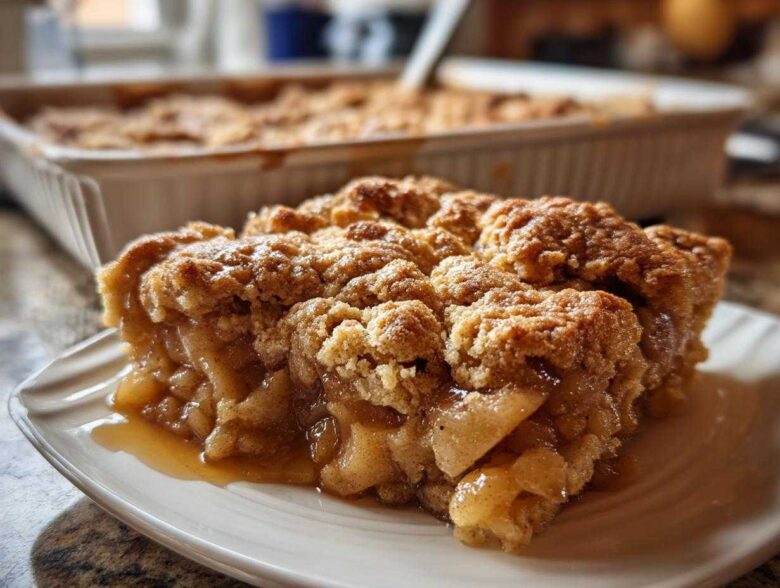
You know those nights where you just need something warm, sweet, and deeply comforting? For me, that moment always calls for a bubbling, spiced fruit bake, and honestly, nothing beats the classic apple cobbler. Forget those fussy layered pies! This recipe is my absolute lifeline when company drops by unexpectedly or when the first real chill hits in the fall. It’s the easiest, most reliable recipe I have for achieving those tender, cinnamon-drenched apples swimming under the best, richest, buttery biscuit topping you’ve ever had.
I’ve tinkered with every dessert under the sun, but this arrangement—soft apples meeting that sturdy, savory topping—is pure gold. If you’re looking for the Best Apple Cobbler, you’ve found it. Trust me, once you smell those spices drift through your house, you’ll understand why I turn to this little passion project whenever I need guaranteed comfort.
Why This Easy Apple Cobbler Recipe is a Must-Try
I’m telling you, this recipe ticks every single box you need for a truly satisfying dessert. It’s fast, folks, truly fast, and it delivers that nostalgic flavor we all crave. It’s the ultimate Comfort Food Dessert for any slow evening.
- It achieves that beautiful contrast between super tender, spiced apples and a topping that holds just enough structure.
- You get a genuinely Quick Apple Cobbler experience—we’re talking 20 minutes of actual hands-on work before it goes into the oven!
Perfect Buttery Biscuit Topping Cobbler Texture
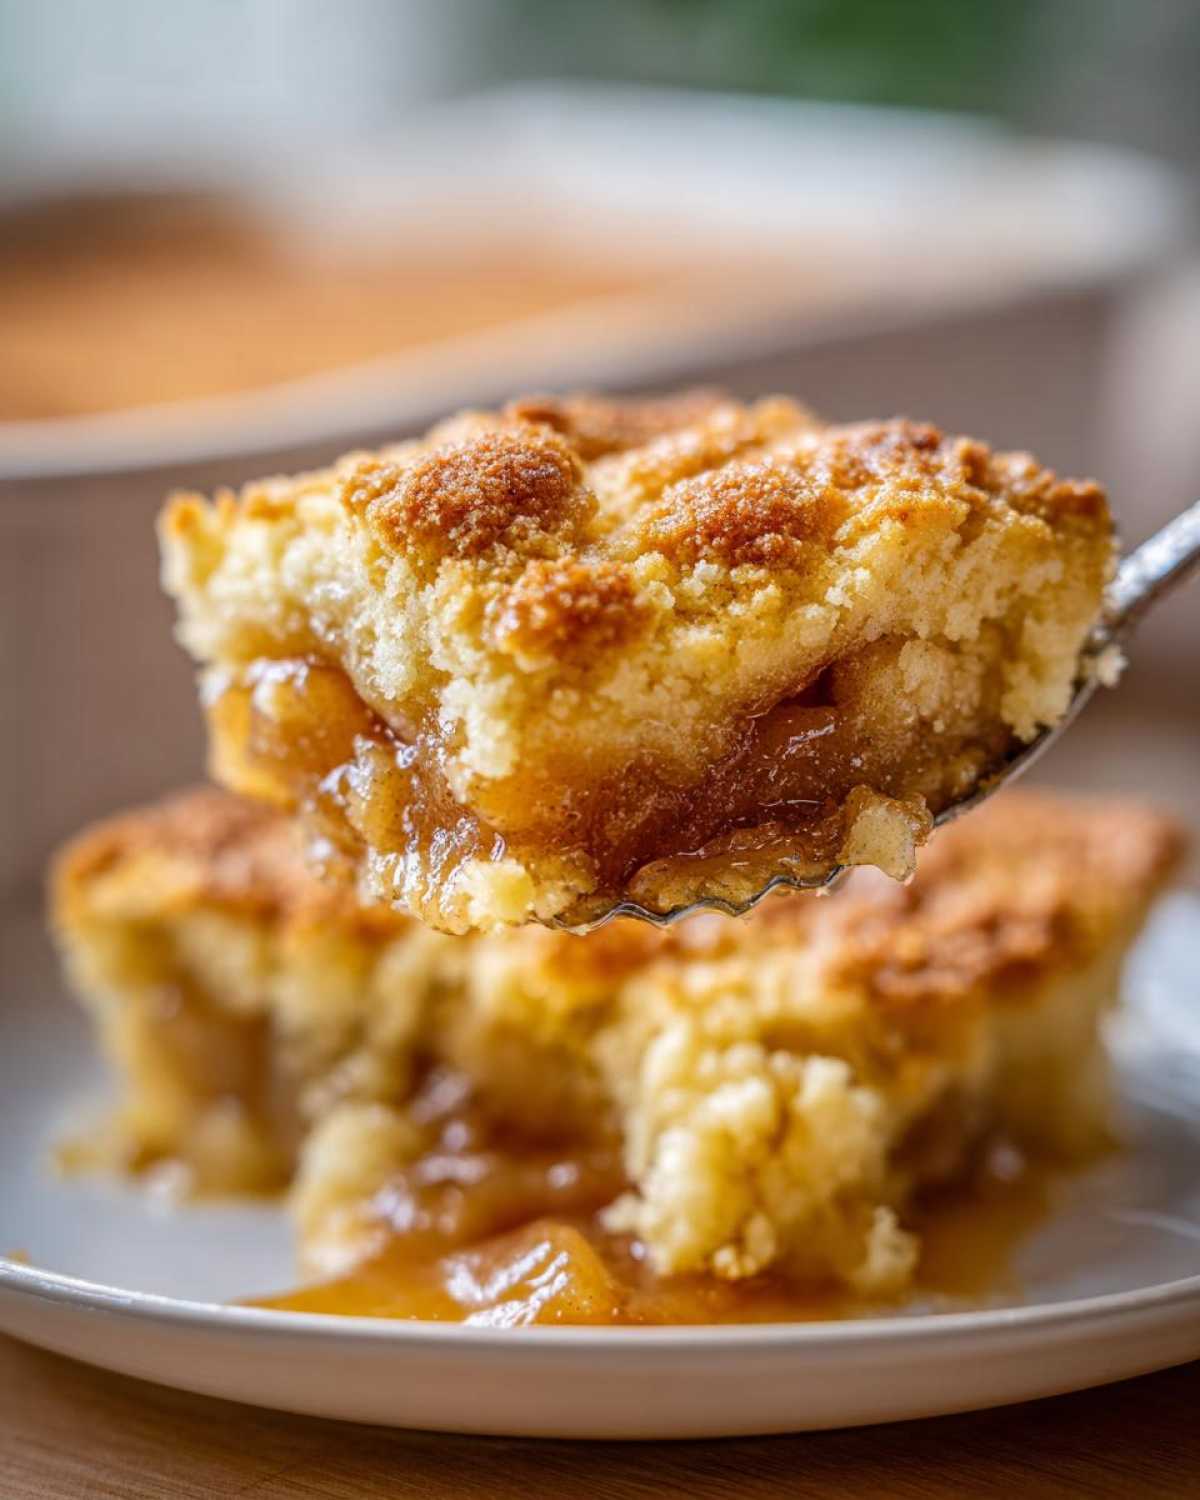
When I say biscuit, I mean it! This isn’t one of those cake-like toppings that gets soggy right away. Because we cut in the cold butter just enough, you get those fluffy, slightly crisp peaks that soak up the juices from underneath but still have a nice buttery chew. It’s the crust that really sets this apart.
Quick Apple Cobbler Prep Time
For a dessert this cozy and impressive, you wouldn’t believe the prep time is only 20 minutes! That speed is why I pull this out for last-minute gatherings or weeknight treats. You don’t need a whole afternoon set aside for this specific homemade apple cobbler glory.
Ingredients for Your Classic Apple Cobbler
Getting the flavor right starts here, way before the mixing even happens! When I’m setting out my counter for a Classic Apple Cobbler, I line everything up so that the process flows smoothly. You’ll notice we separate this into two main groups because the filling and topping have very different needs—especially when it comes to the fat content. I even keep the topping ingredients chilling until the last possible second. If you want that signature flaky feel, remember that cold ingredients are your friends!
Before you dive in, you should check out my favorite apple cinnamon pull-apart bread recipe if you’re just swimming in apples! But for this cobbler, let’s get organized.
For the Cinnamon Apple Filling
- 6 medium apples (I swear by Granny Smith or Honeycrisp—they hold their shape!), peeled, cored, and sliced
- 1/2 cup granulated sugar
- 1/4 cup packed light brown sugar
- 1 tablespoon all-purpose flour (this keeps the juices from getting too watery)
- 1 teaspoon ground cinnamon
- 1/4 teaspoon ground nutmeg
- 1 tablespoon lemon juice (just a splash to keep them bright)
- 2 tablespoons unsalted butter, cut into small pieces (for dotting on top of the apples)
For the Buttery Biscuit Topping Cobbler Dough
The key here is patience and coldness! Don’t let this butter get soft, or you’ll end up with a flat cookie instead of a fluffy topping.
- 1 1/2 cups all-purpose flour
- 2 teaspoons baking powder
- 1/2 teaspoon salt
- 1/2 cup granulated sugar
- 1/2 cup (1 stick) cold unsalted butter, cut into small cubes
- 1/2 cup milk (whole milk works best here, if you have it!)
- 1 large egg, lightly beaten (just for brushing the tops later)
Step-by-Step Instructions for Homemade Apple Cobbler
It’s go time! Once you have your ingredients lined up, making this homemade apple cobbler comes together surprisingly fast. I always put the oven on first, because rushing the preheat is a rookie mistake! If that heat isn’t steady, your topping won’t brown right. This recipe is so straightforward, but paying attention in these first few stages is what separates a good dessert from the one people rave about for weeks. You can see a beautiful, slightly different take on fruit topping here, my peach cobbler recipe, which uses a similar topping logic!
Preparing the Apple Base and Dish
First things first: set your oven to 375°F (190°C) and lightly grease your 8×8 inch baking dish—don’t skip the grease, we want easy clean up later! Now, grab that big bowl and toss your sliced apples with both sugars, the flour, that lovely cinnamon and nutmeg, and the lemon juice. Mix it all up until every slice is coated in spice heaven. Then, spread that mixture right into your greased dish. Before moving on, take those 2 tablespoons of butter reserved for the filling and just dot them randomly over the top of your apples. That bit of extra fat melts right in and deepens the flavor!
Making the Buttery Biscuit Topping Cobbler Dough
In a separate bowl, you’ll whisk your topping dry ingredients: the flour, baking powder, salt, and sugar. Now, take that cold, cubed butter and use a pastry blender—or honestly, just your fingertips if your hands aren’t too warm—and cut that butter into the flour mix. Stop when it looks like coarse crumbs, maybe like damp sand. Pour in the milk and stir it *just* until it comes together into a rough, shaggy dough. I mean it—stop stirring when you can barely keep the flour off your spoon. Overmixing makes this tough, not tender!
Baking and Resting the Apple Cobbler
Take spoonfuls of that shaggy dough and drop them evenly over the apples, leaving nice little gaps between them so you can see that bubbly fruit underneath. Give the peaks a quick brush with that beaten egg—this is what gives you that gorgeous golden-brown color. Pop it in the oven for about 40 to 45 minutes. You’re looking for a deep golden top and apples bubbling up fiercely around the edges. Once it’s out, let it sit on the counter for at least 15 minutes. I know it’s hard waiting, but this resting time is crucial so the filling can settle and you don’t burn your mouth on lava-hot fruit!
Tips for the Best Apple Cobbler Success
Listen, I’ve made this apple cobbler so many times, especially when I’m trying to rush before a big holiday dinner, so I’ve picked up a few tricks that guarantee success every time. It’s not just about the recipe; it’s about the tiny choices you make between mixing and baking that elevate it to that perfect level of cozy goodness.
You might want to check out how I use apples in my overnight oats—it shows you how to keep them fresh, which is key here too!
Choosing Apples for Your Apple Cobbler
Don’t just grab any apple off the counter! For this dessert, tartness is your friend. Granny Smith is the workhorse here because it holds its shape beautifully; it bakes down to tender but doesn’t turn into mush. If you want a little sweetness mixed in, use half Granny Smith and half Honeycrisp. Avoid super-soft apples like McIntosh, or you’ll end up with apple sauce instead of filling!
Achieving a Crisper Buttery Biscuit Topping Cobbler
Remember how I said we dropped spoonfuls of that shaggy dough? That gives you those fluffy, uneven bumps, which I love because they catch the cinnamon sauce. If you really, really need a crispier, more uniform crust, treat the topping dough like biscuit dough. You can gently press it out onto a lightly floured surface and use a water glass or a cookie cutter to create squares or circles. Lay those cut pieces right on top of the apples instead of dropping raw spoonfuls. You’ll get more surface area for browning, resulting in a crisper Buttery Biscuit Topping Cobbler.
Variations on This Apple Cobbler Recipe
While this recipe stands strong as the Old Fashioned Apple Cobbler classic, sometimes you just need to go a little extra, right? Life is too short for boring desserts! The simplest way to jazz this up for a special weekend treat is by turning it into a Caramel Apple Cobbler.
It’s so easy! Just before you drop those biscuit mounds on top of the apples, take about a quarter cup of your favorite thick caramel sauce and drizzle it right over the spiced fruit. It melts down, mixes with the cinnamon and brown sugar, and creates this unbelievable river of gooey goodness baked right into the base. It’s perfect for those autumn nights when you want something truly decadent. If caramel isn’t your thing, check out these salted caramel bars for a different kind of sweet fix!
Serving Suggestions for Warm Spiced Apple Dessert
Don’t you dare try to eat this straight from the dish when it’s piping hot! Truly, the experience of this Warm Spiced Apple Dessert is elevated so much by what you serve alongside it. If you are serving this to a crowd, make sure you have a big tub of vanilla ice cream ready to go. Seriously, vanilla ice cream melting slowly into those hot, spiced juices is non-negotiable for me—that slow cold-meets-hot combination is absolute heaven and why this is one of the best Apple Desserts with Ice Cream around.
If you’re feeling fancy, a little dollop of freshly whipped cream mixed with a touch of bourbon or maple extract is incredible on top of the buttery biscuit peaks. Or, if you prefer something light to cut through the richness, try serving it alongside a crisp, bubbly drink. I often whip up a Maple Apple Cider Fizz when I serve this; the ginger and bubbles are the perfect palate cleanser between bites of rich cobbler.
Storage and Reheating Instructions for Apple Cobbler
Okay, let’s talk about leftovers, because between you and me, this apple cobbler tastes even better the next day once those spices have really settled in! Luckily, this is a sturdy dessert, so it keeps well, but you have to store it right to keep that amazing topping from turning soggy on you.
If you have any left, just cover the dish tightly with plastic wrap or transfer the remaining portions into an airtight container. It will be perfectly fine sitting on the counter for a good six hours, but after that, you should pop it into the fridge. It stays good in the refrigerator for about three to four days, easy peasy.
The big question is reheating! You absolutely shouldn’t microwave this unless you enjoy a mushy topping, which, trust me, you don’t. To bring back that crispy, buttery crunch, the oven is your best friend. Set your oven to about 350°F (175°C). If you’re reheating a whole slice or two, wrap them loosely in foil first—this prevents the edges from burning while the center warms up. Heat them for about 10 to 15 minutes. If you are reheating a larger section, just leave the foil off for the last five minutes to crisp up the top crust again. It comes out tasting almost freshly baked, I promise!
Frequently Asked Questions About This Apple Cobbler
I get so many questions about my favorite Comfort Food Dessert! It just shows how much everyone loves a good baked fruit dish. Here are a few things folks always ask when they are getting ready to bake this version of the Old Fashioned Apple Cobbler.
Can I make this apple cobbler ahead of time?
You absolutely can assemble this ahead of time, which is a lifesaver! You can mix the apples and put them in the dish, and even make the topping dough. Just keep the topping wrapped tightly in the fridge. When you’re ready to bake, put the room-temperature apples in the oven for about 15 minutes first to warm up, then top with the cold dough and bake as directed. If you bake it straight from the fridge, you’ll be waiting forever for that filling to bubble!
What is the difference between cobbler and crisp?
Oh, that’s a fun one! The difference is all in the hat they wear. A cobbler, like this one, gets a topping made from biscuits or cake batter dropped right on top, giving you those rough mounds of tender baked dough. A crisp, on the other hand, usually has a thinner, streusel-like topping made with oats and brown sugar that gets wonderfully crispy and crunchy. I prefer the heartiness of the biscuit topping for my Easy Apple Cobbler Recipe!
Can I use pre-sliced apples in this Easy Apple Cobbler Recipe?
You can in a pinch, since this is an Easy Apple Cobbler Recipe, but I strongly advise against it if you can manage slicing them yourself. The moment apples are sliced commercially, they start losing moisture! If you buy them already cut, give them an extra splash of lemon juice and maybe toss them with just a tiny bit more flour to help thicken the juices while they bake. But really, fresh-sliced is always, always better for texture in this bake. Don’t forget to check out my cinnamon maple whiskey sour—it pairs surprisingly well with cinnamon baked goods!
Nutritional Estimates for Your Apple Cobbler Serving
Now, I know we usually aren’t counting calories when we pull out a big, bubbling dish of spiced fruit, but sometimes it’s good to have a rough idea of what we’re diving into! This apple cobbler is rich because we use real butter in that beautiful topping, but that’s what makes it taste so amazing, right?
Before you start comparing these numbers to a store-bought treat, remember that these figures are just estimates based on standard grocery store ingredients. If you use ultra-low-fat milk in the topping or skip a bit of the sugar, your numbers will shift! I always say, baking is science, but eating it is pure joy, so try not to fret too much over the details! You can find some lighter breakfast options over at my breakfast category if you need something lighter later in the day.
Here is what a standard serving size looks like, roughly calculated:
- Serving Size: 1 serving
- Calories: 380
- Sugar: 35g
- Fat: 16g
- Saturated Fat: 10g
- Carbohydrates: 60g
- Protein: 5g
- Sodium: 210mg
- Cholesterol: 55mg
See? Totally worth it for that buttery biscuit topping and those tender, warm cinnamon apples. Enjoy every bite!
PrintEasy Classic Apple Cobbler with Buttery Topping
Make this simple apple cobbler featuring tender, cinnamon-spiced apples covered with a rich, buttery biscuit topping. This is a comforting dessert perfect for any occasion.
- Prep Time: 20 min
- Cook Time: 45 min
- Total Time: 65 min
- Yield: 6 servings
- Category: Dessert
- Method: Baking
- Cuisine: American
- Diet: Vegetarian
Ingredients
- 6 medium apples (like Granny Smith or Honeycrisp), peeled, cored, and sliced
- 1/2 cup granulated sugar
- 1/4 cup packed light brown sugar
- 1 tablespoon all-purpose flour
- 1 teaspoon ground cinnamon
- 1/4 teaspoon ground nutmeg
- 1 tablespoon lemon juice
- 2 tablespoons unsalted butter, cut into small pieces (for the filling)
- 1 1/2 cups all-purpose flour
- 2 teaspoons baking powder
- 1/2 teaspoon salt
- 1/2 cup granulated sugar
- 1/2 cup (1 stick) cold unsalted butter, cut into small cubes (for the topping)
- 1/2 cup milk
- 1 large egg, lightly beaten (for brushing)
Instructions
- Preheat your oven to 375°F (190°C). Lightly grease an 8×8 inch baking dish.
- In a large bowl, combine the sliced apples, granulated sugar, brown sugar, flour, cinnamon, nutmeg, and lemon juice. Toss gently until the apples are evenly coated.
- Pour the apple mixture into the prepared baking dish. Dot the top of the apples evenly with the 2 tablespoons of small butter pieces reserved for the filling.
- Prepare the topping: In a separate medium bowl, whisk together the 1 1/2 cups flour, baking powder, salt, and 1/2 cup sugar.
- Cut in the cold, cubed butter using a pastry blender or your fingers until the mixture resembles coarse crumbs.
- Pour in the milk and stir just until a shaggy dough forms. Do not overmix.
- Drop spoonfuls of the dough evenly over the apple filling, leaving small gaps between the mounds.
- Brush the tops of the dough mounds lightly with the beaten egg.
- Bake for 40 to 45 minutes, or until the topping is golden brown and the apple filling is bubbly.
- Let the cobbler cool for at least 15 minutes before serving warm.
Notes
- For a caramel apple cobbler variation, drizzle 1/4 cup of caramel sauce over the apples before adding the topping.
- Serve this warm dessert with vanilla ice cream or whipped cream.
- If you prefer a crisper topping, you can roll the dough out and cut it into squares instead of dropping spoonfuls.
Nutrition
- Serving Size: 1 serving
- Calories: 380
- Sugar: 35
- Sodium: 210
- Fat: 16
- Saturated Fat: 10
- Unsaturated Fat: 6
- Trans Fat: 0
- Carbohydrates: 60
- Fiber: 3
- Protein: 5
- Cholesterol: 55