

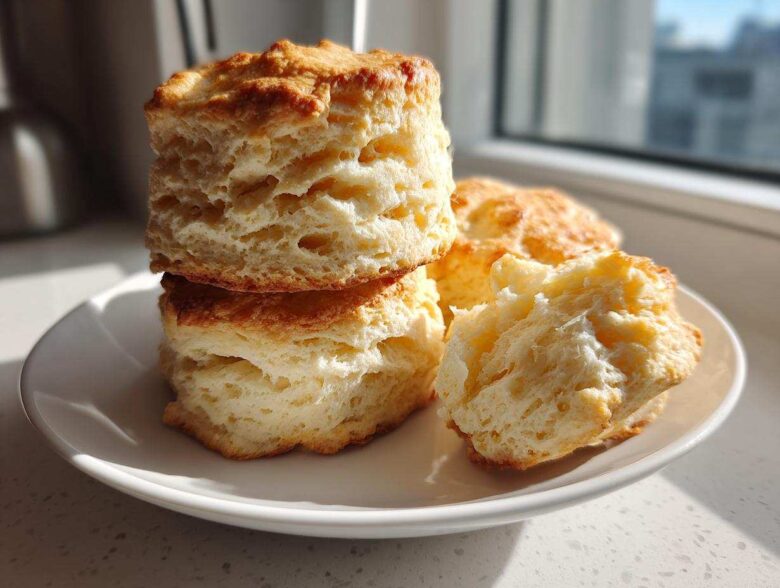
I can’t even tell you how many sad, flat, hockey-puck-like discs I used to pull out of my oven. I truly thought I wasn’t cut out for making real, authentic buttermilk biscuits. They looked like they belonged in a cartoon, not on my breakfast plate! But wow, things changed when I finally stopped guessing and started focusing on technique. This recipe isn’t just another quick drop biscuit approach; this is the game-changer that delivers ultra flaky and wonderfully tall buttermilk biscuits every single time. Trust me, once you master the chill and the fold, you’ll never look back. We’re making melt in your mouth biscuits today!
Why This is the Best Buttermilk Biscuit Recipe for Fluffy Buttermilk Biscuits
What sets this recipe apart from all those flat ones? It all comes down to temperature and touch! We aren’t looking for pretty, smooth dough here; we are looking for texture, and texture comes from keeping things icy cold and handling the dough like it’s a newborn baby. If your butter melts even a little bit before it hits that hot oven, poof—bye-bye flakiness. That’s why our buttermilk biscuits are so much better.
This method ensures you get those distinct, easily separated layers we all dream about when making fluffy buttermilk biscuits. I’ve seen recipes that skip the chilling or tell you to knead it like bread, and those just result in tough biscuits. We want tender buttery biscuits that fall apart when you look at them the right way! It’s the science of catching steam pockets in those cold fat pieces.
Key Secrets for Tall Buttermilk Biscuits
If you want seriously tall buttermilk biscuits, you have to commit to three things. First, your butter absolutely must be frozen or at least straight from the freezer. Don’t let it soften up while you measure the flour—that’s a rookie mistake! Second, mix the liquid in just until it barely comes together. Shaggy dough is happy dough. Seriously, stop stirring when you think you should keep stirring.
The third secret, and this is huge for getting those distinct layers, is the fold. We treat this dough almost like puff pastry. After the first gentle press and mix, we fold it over on itself a couple of times. This simple step builds those internal structure lines needed for maximum rise. When you cut your rounds, press straight down—no twisting! That seal keeps the air trapped inside, giving you the height you crave for these perfect buttermilk biscuits.
Gathering Ingredients for Classic Buttermilk Biscuits
Okay, let’s get our ingredients ready! Honestly, the ingredient list for these buttermilk biscuits is wonderfully short, which I love. We are talking flour, baking powder, baking soda, salt, butter, and the star: cold buttermilk. The quality and temperature of these few items are everything here. I can’t stress this enough—that butter needs to be rock hard, cubed, and if you can manage it, even slightly chilled from the freezer right before you cut it into the flour.
We want the buttermilk to be straight out of the fridge too. Cold fat plus cold liquid hitting a hot oven equals the ultimate lift. If you look at my classic buttermilk biscuits ingredients, you’ll see it’s really just about preparing them correctly before they even meet the bowl!
Ingredient Notes and Substitutions for Buttermilk Biscuits
If you open your fridge and realize you’re out of that crucial buttermilk—don’t panic! This happens to the best of us, even when making buttermilk biscuits. You can easily make a substitute that works just as well. Just take your regular milk—whole milk is best here—and stir in about one tablespoon of white vinegar or fresh lemon juice for every cup of milk you need.
Let that sit on the counter for about five to ten minutes. It will look slightly curdled, and that’s exactly what you want. That slight sourness and acidity are what react with the baking soda to give you the gorgeous rise you see in these fluffy versions. If you use the substitute, just make sure it’s still nice and cold before adding it to your dry mix!
Step-by-Step Instructions for Flaky Homemade Biscuits Recipe
Alright, this is where the real magic happens, and honestly, this is where most people accidentally turn their potential buttermilk biscuits into flat crackers. We need to follow these steps precisely, especially when it comes to mixing. Remember, we are baking, not mixing concrete! I always make sure my workspace is clear and my oven is preheating while I start this process, because speed helps keep things cold.
For more general tips on getting the hang of doughs, check out my general guide on baking techniques—it helps build the intuition you need here!
Mixing the Dough: Avoiding Overworking for Tender Buttery Biscuits
First up, grab a nice big bowl for your dry ingredients: flour, baking powder, baking soda, and salt. Whisk them together REALLY well. You want that leavening super evenly distributed, because we’re not mixing this dough for long later on. Then, toss in the cubes of that ice-cold butter. Now, you need to work that butter into the flour. I prefer using my fingertips—it’s quick and they don’t transfer as much heat as a pastry blender, though either works! You’re looking for a texture that looks like coarse cornmeal, but with some visible, slightly larger pieces of butter, about the size of small peas. If you can’t see distinct butter chunks, your biscuits will be tough, not flaky!
The Lamination Technique for Tall Buttermilk Biscuits
Once the butter is cut in, pour in all your cold buttermilk at once. Grab a fork and mix just until everything is *just* moistened. Don’t smooth it out; it should look shaggy and unappealing—that’s perfect! Turn the mess out onto a lightly floured surface. Now, gently pat this shaggy pile into a rough rectangle, about an inch thick. This is where we build height! Fold that dough in thirds, like you’re folding a business letter. Turn the dough 90 degrees, and then pat it back down slowly to about 3/4 inch thick.
That folding action is the key to making those gorgeous layers we associate with the best buttermilk biscuit recipe. Each fold creates a new plane for steam to lift, guaranteeing you those tall buttermilk biscuits you’re dreaming of. This lamination process is non-negotiable if you want true flaky homemade biscuits recipe results.
Cutting and Chilling Before Baking
Once you have your final thickness (aim for 3/4 inch—thicker biscuits rise taller!), take your biscuit cutter and press straight down. Please, please, PLEASE do not twist the cutter! Twisting seals the edges shut, and if that edge is sealed, the steam can’t escape upward to give you that fluffy rise. You want those pretty, rough edges to be open so the biscuit can climb toward the ceiling!
Once cut, arrange your rounds close together on a baking sheet if you like soft sides, or slightly apart if you want crispier edges. Now for another crucial step before the oven: chill them! Pop that whole tray into the refrigerator for a quick 15 minutes. This final chill firms up the butter one last time, ensuring that the biscuits don’t slump the moment they hit that 425-degree heat. This cooling period makes all the difference between a flat biscuit and one of those signature southern style biscuits.
Baking Tips for Perfect Southern Style Biscuits
Okay, the hard work is done, and those gorgeous, layered rounds are chilled. Now we send them into the oven! You absolutely need that high heat to shock the butter and create instant steam—that’s what gives these southern style biscuits their incredible lift. Make sure your oven is fully preheated to 425 degrees Fahrenheit. Don’t cheat this step; the oven might say it’s ready, but wait five extra minutes!
Place the pan in the middle rack. We are looking for golden brown tops—a deep, satisfying color that screams comfort food. They usually take between 12 to 15 minutes. If you brushed them with a little melted butter right when they come out, that extra richness melts right into every crack, making them feel even more tender. These buttermilk biscuits are best eaten the second they come out of the oven. Seriously, don’t delay!
Serving Suggestions for Your Buttermilk Biscuits
Now that you have achieved biscuit perfection—tall, flaky, and practically begging to be eaten—the fun part begins: deciding what to smother them with! Believe me, these amazing buttermilk biscuits deserve the best pairings, whether you’re whipping up a feast for biscuits for dinner or treating yourself to a lazy weekend biscuits for breakfast.
For a dinner showstopper, you already know the classic combination: rich, sausage gravy poured right over them. Watch how the biscuit soaks up that savory goodness; it’s heaven. But if your family isn’t into gravy, don’t fret! These are equally incredible served alongside anything from fried chicken to a nice stew. They are sturdy enough to hold up to juicy main courses but tender enough to be a side.
For breakfast or brunch, the toppings become a little sweeter. My absolute favorite way to elevate these is with a homemade spread. If you want something next-level amazing, you have to try making a homemade fruit butter. I have this incredible recipe for sweet peach butter that pairs shockingly well with these savory biscuits. Just slice the warm biscuit open, slather on that butter, maybe a drizzle of honey, and prepare for happiness.
Don’t forget the simple beauties, either! A slab of good salted butter melting into the warm layers, or a scoop of homemade jam or apple butter—these are simple comfort food baking at its absolute finest. Honestly, with biscuits this good, you could eat them plain, but where’s the fun in that?
Storage and Reheating for Melt in Your Mouth Biscuits
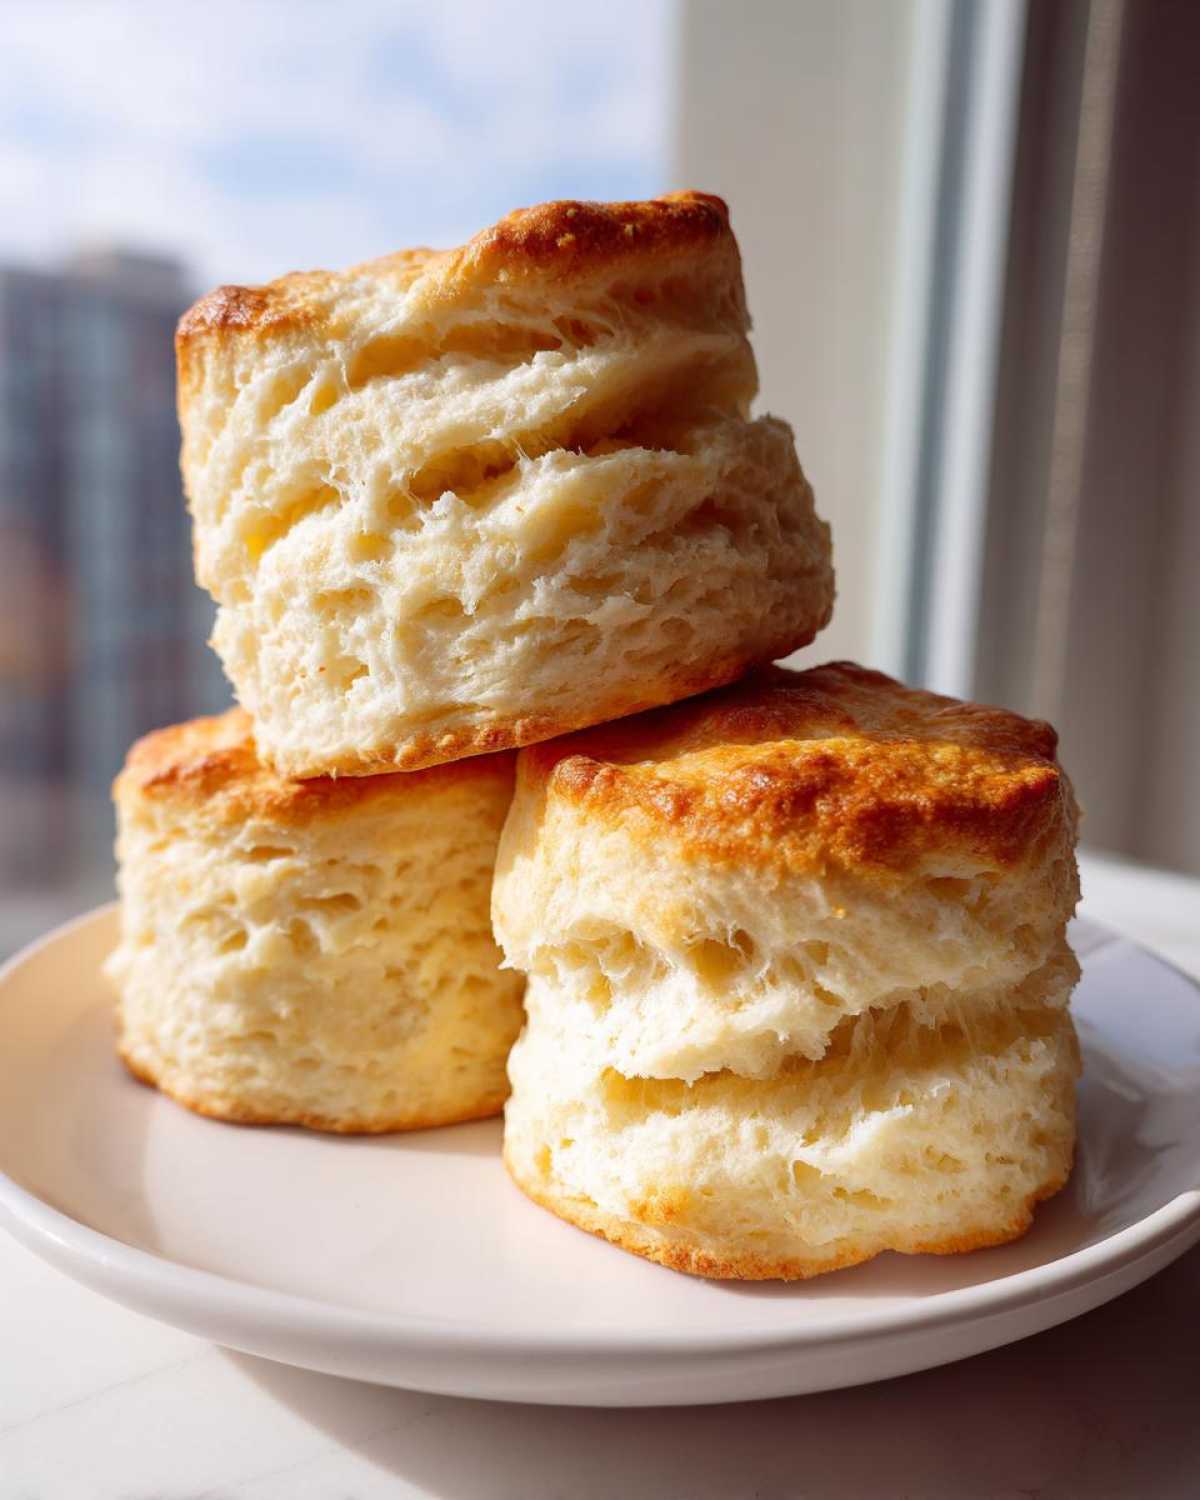
Listen, I know you want to eat all eight of these magic buttermilk biscuits the second they come out of the oven. Who wouldn’t? But if—and I mean *if*—you happen to have leftovers, we need a game plan to keep that flaky texture alive. If you just wrap them up tight on the counter, they will go from glorious to slightly sad pretty fast. They are best eaten the day you make them, no question, but they’ll keep okay for a day or two.
For short-term storage, keep them in an airtight container at room temperature. Don’t put them in the fridge right away if you can help it! The cold air speeds up staling and ruins that soft interior, turning them into dense little doorstops instead of melt in your mouth biscuits.
If you need them to last longer, say up to five days, pop them in an airtight container in the refrigerator. I know I said avoid the fridge, but we just need them colder for longer preservation. The real trick comes when you want to bring them back to life. Nobody wants a cold, slightly stiff biscuit!
Forget the microwave if you want flakiness! The microwave heats from the inside out and makes the steam turn the texture gummy. To revive these beauties and get that fresh-baked texture back, you need a little oven time. Wrap the biscuits loosely in foil—this traps just enough moisture to soften them without letting them get soggy.
Pop that foil packet into a 350-degree oven for about 8 to 10 minutes. That gentle warmth steams the biscuit from the inside while the exterior crisps up just a touch. When you pull them out, they’ll be piping hot, tender, and you’ll forget they were ever leftovers. That’s how you preserve the integrity of these flaky homemade biscuits!
Troubleshooting Common Buttermilk Biscuits Issues
Even when you follow the steps exactly, sometimes things go a little sideways in the oven. Don’t sweat it! Every great baker (and I mean *every* great baker) has had a batch of biscuits that just didn’t cooperate. Understanding why your buttermilk biscuits failed is the fastest way to guarantee success next time. It usually comes down to temperature or handling, just like we talked about.
If you end up with flat biscuits, there are usually three reasons why they refuse to get tall. The most common reason is warm butter. If your butter was soft when you cut it into the flour, it mixed in completely instead of creating those protective pockets that turn to steam. Next time, freeze that butter for 15 minutes before you even start mixing!
Another reason for flatness is twisting the cutter. I know I nagged about it, but seriously, twisting seals the edges shut. The biscuit can’t push up if it’s glued to itself! The steam needs that clean edge to climb straight up to tall buttermilk biscuits status. If the tops look flat and the sides are sort of smooth and rounded, you twisted!
If your buttermilk biscuits came out tough, that means we developed too much gluten, which happens when you overwork the dough. Once you add the buttermilk, your job is mostly done. You poke it together with a fork until it barely holds, and that’s it. You don’t want smooth, elastic dough; you want shaggy and messy. Tough biscuits are just unhappy biscuits whose gluten strands bound together too tightly!
Finally, if your dough was crumbly and hard to bring together, you might have been too heavy-handed with the flour when you turned it out for folding. Or, it could mean the buttermilk wasn’t quite cold enough and *some* of the butter melted before you could get the dough folded through. For a tender, perfect batch of tender buttery biscuits next time, remember: less flour on your counter, colder ingredients, and gentle hands!
Frequently Asked Questions About Easy Buttermilk Biscuits from Scratch
I knew you’d have questions! Making truly amazing buttermilk biscuits brings up some deep technical queries, but don’t worry, I can clear those up real fast. I’ve answered the biggest things people ask me when they are trying to move from okay biscuits to the best batch they’ve ever made. If you want my full philosophy on baking, you can always check out my baking philosophy page!
Can I use a food processor for this recipe?
In my honest opinion? Please don’t! The whole point of achieving those flaky homemade biscuits recipe layers is getting those distinct pea-sized chunks of cold butter into the flour. A food processor is too efficient, and it churns everything into a fine, sandy meal too fast. That fine meal means your butter melts immediately from the friction, and you end up with something closer to a pastry crust than a fluffy biscuit.
While it is an easy buttermilk biscuits from scratch recipe, using your hands for the first two steps—cutting in the butter and mixing the liquid in—gives you the control needed for those tender buttery biscuits. It might feel slower, but it guarantees superior texture. Stick to your fingers for this one, friend!
How thick should I roll the dough for the tallest buttermilk biscuits?
This is a great question, and it directly influences how tall your biscuits get! For the absolute best results, you want to aim for a consistent thickness of 3/4 inch after you’ve done all your folding and patting. If you roll it thinner than that, say half an inch, the layers don’t have enough vertical space to push upward, and they might start spreading out sideways instead of going high.
When I’m making my special Southern style biscuits, I often go closer to a full inch before the final cut, especially if I want really dramatic, tall buttermilk biscuits that are perfect for splitting and loading with gravy. Just make sure the thickness is uniform across the whole piece of dough so they all bake evenly!
Can I freeze the raw dough for quick biscuit recipe moments?
Yes, you absolutely can, and this is a lifesaver for those morning rushes! Freezing the cut biscuits works wonderfully, as long as you remember our main rule: keep everything cold! After you cut out your rounds (remember, no twisting!), lay them on a parchment-lined tray, and place that tray directly in the freezer until the biscuits are rock solid—usually about an hour.
Once frozen, transfer those hard biscuit rounds into a heavy-duty freezer bag. They will hold their perfect buttermilk biscuits shape for up to three months. When you’re ready to bake them, pull them straight from the freezer onto the baking sheet and add about 5 minutes to the baking time, or until they are golden brown. No need to thaw them out first—that would melt the butter! This keeps your promise of having the best buttermilk biscuit recipe available anytime you need some simple comfort food baking!
Nutritional Snapshot of Classic Buttermilk Biscuits
Now, I know when we are talking about incredibly tender, buttery biscuits, we aren’t exactly reaching for a salad! These are pure, simple Southern comfort food, and we cherish them for what they are. That said, I always like to share a general idea of what’s in these wonderful buttermilk biscuits, just so you know what you’re diving into!
Please remember, these numbers are just estimates based on using the standard recipe amounts (like the 6 tablespoons of butter listed). If you go heavy on the butter brush-off at the end or use different flour weights, those numbers will change. If you’re tracking macros for specific dietary goals, you might want to plug the quantities into your favorite app, but for a general idea of our delicious classic buttermilk biscuits, here’s the rundown for one biscuit serving:
- Serving Size: 1 biscuit
- Calories: Around 250 (Perfect for fueling up before a big day!)
- Fat: 14g (This is where the flakiness comes from, remember? Don’t skimp on the cold!)
- Saturated Fat: 9g
- Carbohydrates: 28g
- Protein: 5g
- Sugar: Just 1g (Mostly naturally occurring from the buttermilk itself)
- Sodium: 450mg
See? Not too bad for a truly spectacular, scratch-made treat! These are meant to be enjoyed hot and fresh, probably slathered in jam or diving into some gravy. Don’t worry too much about the numbers when you are eating something this good; just appreciate the simple, buttery goodness of a perfectly made flaky homemade biscuits recipe!
PrintUltra Flaky and Tender Southern Buttermilk Biscuits
A step-by-step recipe for making tall, flaky, and buttery buttermilk biscuits using simple techniques for a tender result every time.
- Prep Time: 20 min
- Cook Time: 15 min
- Total Time: 35 min
- Yield: 8 biscuits
- Category: Baking
- Method: Baking
- Cuisine: American
- Diet: Vegetarian
Ingredients
- 2 cups all-purpose flour
- 1 tablespoon baking powder
- 1 teaspoon baking soda
- 1 teaspoon salt
- 6 tablespoons cold unsalted butter, cut into small cubes
- 3/4 cup cold buttermilk
Instructions
- Combine the flour, baking powder, baking soda, and salt in a large bowl. Whisk them together well.
- Add the cold butter cubes to the flour mixture. Use a pastry blender or your fingertips to cut the butter into the flour until the mixture resembles coarse crumbs with some pea-sized pieces of butter remaining.
- Pour in the cold buttermilk all at once. Use a fork to mix until just combined. Do not overmix; the dough will look shaggy.
- Turn the dough out onto a lightly floured surface. Gently pat the dough into a rough rectangle about 1 inch thick.
- Fold the dough into thirds, like a letter. Turn the dough 90 degrees and gently pat it down again to about 3/4 inch thickness. This folding creates the layers.
- Pat or roll the dough to a uniform thickness of about 3/4 inch. Use a biscuit cutter (do not twist the cutter) to cut out rounds. Place the cut biscuits close together on an ungreased baking sheet for softer sides, or slightly apart for crispier sides.
- Place the baking sheet in the refrigerator for 15 minutes before baking.
- Preheat your oven to 425 degrees Fahrenheit (220 degrees Celsius).
- Bake for 12 to 15 minutes, or until the biscuits are tall and golden brown on top.
- Remove from the oven and brush the tops immediately with melted butter, if desired. Serve warm.
Notes
- Keep all ingredients, especially the butter and buttermilk, very cold. Cold fat creates steam pockets, resulting in flaky layers.
- Handle the dough as little as possible. Overworking develops gluten, leading to tough biscuits.
- Do not twist the biscuit cutter when cutting; press straight down to keep the edges sealed, which helps the biscuits rise tall.
Nutrition
- Serving Size: 1 biscuit
- Calories: 250
- Sugar: 1
- Sodium: 450
- Fat: 14
- Saturated Fat: 9
- Unsaturated Fat: 5
- Trans Fat: 0
- Carbohydrates: 28
- Fiber: 1
- Protein: 5
- Cholesterol: 35