

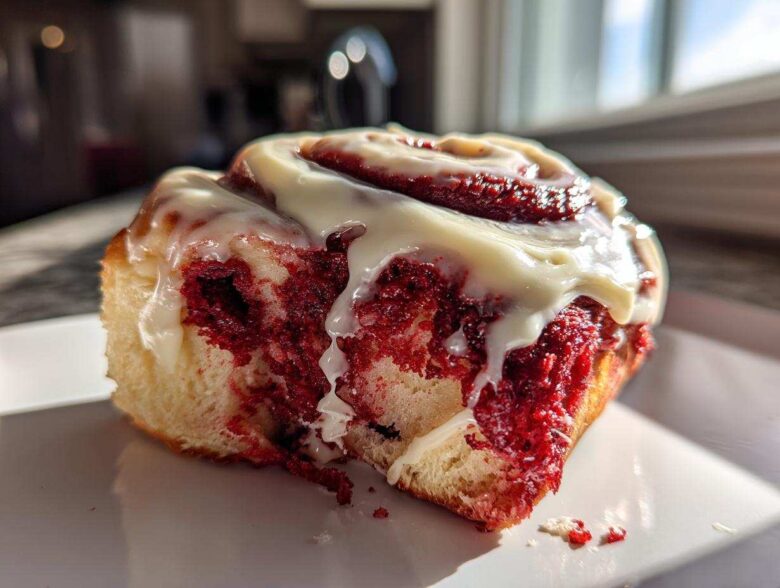
Forget those boxed cake mix shortcuts, seriously. When I’m committing to a weekend baking project, I want that rich, decadent experience only a from-scratch dough can give you. And let me tell you, mastering these red velvet cinnamon rolls—picture that vibrant, deep red, swirled with spice, and drowning in tangy cream cheese—is absolutely my current obsession! I spent ages tweaking the yeast activation process; you have to get that milk temperature just right or the whole thing falls flat. I’ve finally perfected the technique for that deep, moody red hue too, and I promise the result is heavenly, soft, and fluffy rolls that taste like they came straight from a gourmet bakery. If you love diving into amazing weekend projects, you’ll find this recipe is a winner for your next sweet breakfast adventure.
Why You Will Love This Red Velvet Cinnamon Rolls Recipe
I know what you’re thinking: yeast dough from scratch? That sounds like work! But trust me, these rolls are worth every second of kneading and waiting. They deliver on every promise, especially when it comes to texture. Here’s why I think these are the very best red velvet cinnamon rolls you’ll ever make.
- The Fluff Factor: Seriously, these are the definition of soft and fluffy rolls. We use a gentle dough process that keeps everything light—no dense, chewy bricks here, I promise!
- That Tangy Perfection: The flavor contrast is huge! The rich, slightly chocolatey red velvet dough is perfectly cut by that bright, slightly tart cream cheese glaze recipe. It balances the sweetness beautifully.
- They Look Stunning: These are instant showstoppers, perfect for any special gathering. Think gorgeous reds swirling together, ready for Christmas morning or any of your favorite Holiday Breakfast Ideas.
- Better Than a Box: While using cake mix is faster, these from scratch cinnamon rolls have a beautiful, slightly yeasty, brioche-like texture that you simply cannot replicate from a box. It’s that deep, rich flavor that sets them apart.
Gathering Ingredients for Soft and Fluffy Red Velvet Cinnamon Rolls
Okay, deep breath! Baking cinnamon rolls from scratch is a little more involved than cookies, but that’s part of the fun, right? We break this down into three manageable teams: the Dough, the Filling, and that glorious Glaze. Paying attention to how your butter is softened or your eggs are tempered is what separates just good rolls from truly melt-in-your-mouth amazing ones.
When you pull these ingredients out, make sure your butter for the dough and glaze is perfectly softened—push your finger in a stick; if it leaves a clean dent without sinking through, you’re good. And please, if you can swing it, use gel food coloring! Liquid coloring just waters down the batter, and we need maximum pigment for that deep, gorgeous red velvet color. Getting the sourcing right matters, and honestly, knowing where your ingredients come from is just part of knowing how to cook well. If you’re curious about us and our dedication to quality recipes, you can always read more about our story right here!
Ingredients for the Red Velvet Cinnamon Rolls Dough
This is the foundation of our Homemade Cinnamon Rolls. Pay close attention to the milk temperature here; too hot and you kill the yeast, too cold and it won’t wake up!
- 1 cup whole milk, warmed (make sure it’s only warm to the touch, not hot!)
- 2 1/4 teaspoons active dry yeast
- 1/2 cup granulated sugar, plus 1 teaspoon for yeast
- 2 large eggs, room temperature (this helps the dough come together better)
- 1/4 cup unsalted butter, melted
- 1 teaspoon vanilla extract
- 1 teaspoon white vinegar (this helps bring out that traditional red velvet tang!)
- 1/2 teaspoon salt
- 3 1/2 to 4 cups all-purpose flour (start with 3 1/2 and only add more as needed while kneading)
- 2 tablespoons red food coloring (gel preferred for that luxurious color)
Ingredients for the Rich Cinnamon Filling
The filling is what gives us that beautiful spiral! Make sure your butter is soft enough to smear easily, but not greasy or melted, so it spreads nicely without tearing the dough.
- 1/2 cup unsalted butter, softened (again, that perfect soft stage!)
- 1 cup packed light brown sugar
- 2 tablespoons cocoa powder (just a touch for depth)
- 1 tablespoon ground cinnamon
Ingredients for the Tangy Cream Cheese Glaze Recipe
This thick, luscious glaze is non-negotiable. Ensure your cream cheese and butter are completely softened—nobody wants to be whipping chunks of cold cheese into their frosting!
- 8 ounces cream cheese, softened
- 1/2 cup unsalted butter, softened
- 3 cups powdered sugar, sifted (sifting keeps it smooth!)
- 1 teaspoon vanilla extract
- 1 tablespoon milk or heavy cream (use this sparingly, only if needed to thin it out)
Step-by-Step Guide to Homemade Cinnamon Rolls
This is where the magic happens, and honestly, it’s all about following the rhythm of the dough. Don’t rush the rising times—that’s where all the fluff gets created! We’re going for incredible, next-level Homemade Cinnamon Rolls here, so patience is your best friend. Once you see that dough double in size, you’ll know you’re on the right track for truly Gourmet Cinnamon Rolls.
My expert tip for amazing dough texture is this: when you think you’ve kneaded enough, knead for two more minutes. You want that dough to feel supple, elastic, and like smooth velvet under your hands. If it’s still tearing easily, it needs more work!
Activating Yeast and Mixing the Red Velvet Dough
The first step is crucial because we need happy, bubbly yeast! It’s the engine for these beautiful rolls.
- First things first: Get your milk warmed up—think barely warm bathwater, not hot tub temperature. Combine that warm milk, the tiny bit of sugar (1 teaspoon!), and your yeast in a big bowl. Set it aside for about ten minutes. If it gets foamy on top, cheers! Your yeast is alive and ready to go. If it does nothing, you gotta start over with new yeast; that’s just the reality of baking!
- Once the yeast is foamy, toss in the remaining sugar, your room-temperature eggs, melted butter, vanilla, vinegar, and salt. And now for the fun part—pour in that red food coloring! Mix it gently until everything is an even, beautiful shade of red.
- Now we slowly introduce the flour. Add it in about a cup at a time, mixing on low speed or by hand. You’re aiming for a soft, slightly sticky ball. Stop adding flour when it just starts to pull away from the sides of your mixing bowl consistently.
The First Rise and Preparing the Filling
Once the dough is mixed, we let it rest and develop flavor and structure. This time is perfect for whipping up the filling.
- Lightly grease a big bowl with a little oil and plop your red dough ball right in there. Give it a quick turn so it’s coated. Cover that bowl tightly with plastic wrap or a clean kitchen towel and find a warm spot for the dough to chill out for about an hour to an hour and a half. You’ll know it’s done when it’s doubled in bulk—it should look puffy and airy.
- While that’s happening, make the filling paste. Take your perfectly softened butter, the packed light brown sugar, cocoa powder, and cinnamon. Mix it all together until it’s completely uniform. It should look like a stiff, sweet, deep-brown paste. This intense flavor is what seeps out during baking!
Shaping, Rolling, and Cutting Your Red Velvet Cinnamon Rolls
This is the part where you create those gorgeous swirls that make these Red Velvet Twist Baking treats so famous!
- Gently punch down the risen dough to release all that captured air. Turn it out onto a lightly floured surface or a piece of parchment paper. Roll it gently into a large rectangle. We need about a 12×18 inch size, keeping it about a quarter-inch thick all over. Try to keep the edges neat if you can!
- Take that gorgeous red velvet filling paste and spread it evenly over the dough. Use an offset spatula if you have one! Be sure to leave a small border—maybe half an inch—bare along one of the long edges. That bare strip is your seal!
- Starting on the long edge *opposite* that bare border, roll that dough up as tightly as you physically can without squishing out the filling. Once you have a tight log, pinch that bare edge onto the rest of the roll really well to seal the seam shut. Use a sharp, non-serrated knife or even unflavored dental floss to cut the log into 12 equal pieces. They should be about 1.5 inches thick.
Baking and Creating the Perfect Cream Cheese Glaze Recipe
Slowly heating the oven means they are ready when you are!
- Time to turn on the heat! Preheat your oven to 375°F (190°C). While the oven warms up, place your cut rolls into a greased 9×13 inch baking pan. Give them one last short rest—cover them lightly and let them get puffy again for about 30 to 45 minutes. They should look swollen and cozy next to each other.
- Bake them for 20 to 25 minutes. You’re looking for the edges to look set and maybe just *barely* turning a light golden color. If they are too dark, they will dry out, so keep an eye on those centers!
- While those beauties are cooling slightly (give them about 10 minutes—this helps the glaze stay thick!), get started on the glaze. Beat the softened cream cheese and butter together until they are totally smooth, like silk. Slowly mix in the powdered sugar and vanilla. If it looks like it could stand up on its own, add a tiny drizzle of milk or cream, just until it drops off your spoon in thick ribbons. Spread this generously over the warm rolls and devour! I highly recommend checking out some easy weekend baking tips if you start getting addicted to making these!
Tips for Achieving Bakery Style Rolls Texture
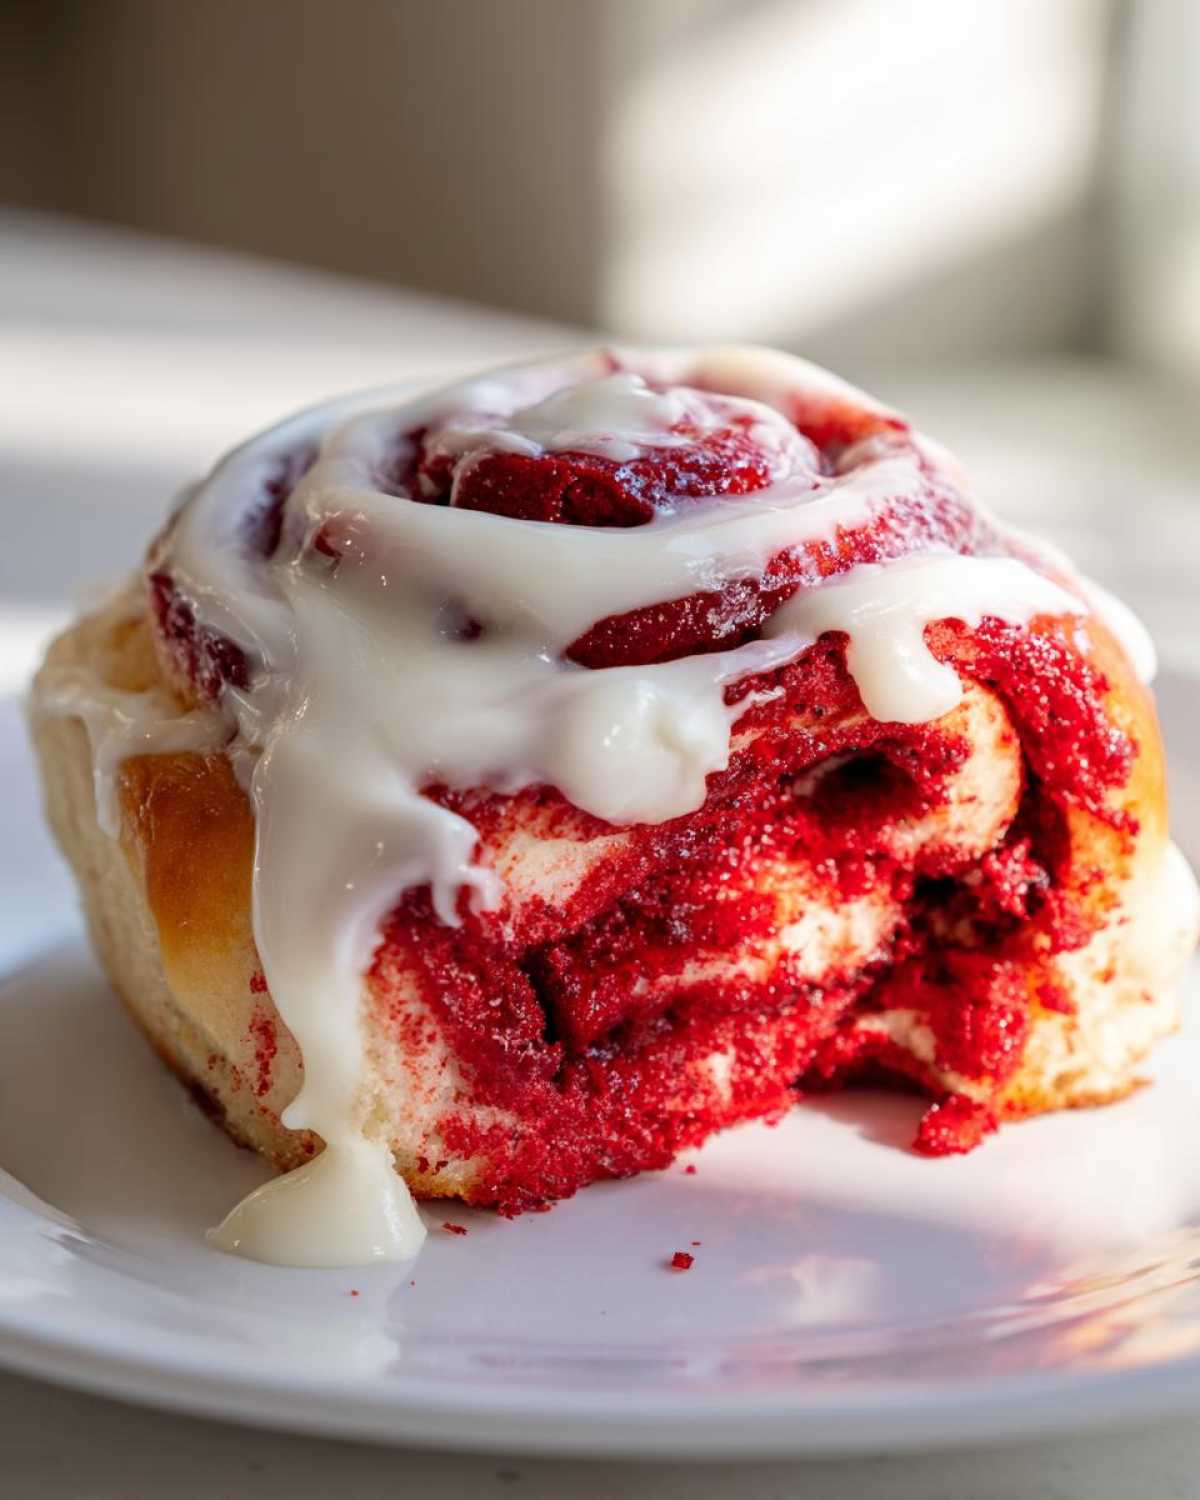
If you want those glorious, tall, pillowy Bakery Style Rolls—the kind where you can literally pull the layers apart with your fingers—you have to respect the dough. It’s not impossible; it just requires a little bit of kitchen discipline! My goal with these red velvet cinnamon rolls is that perfect melt-in-your-mouth feeling, and that comes down entirely to how we treat the ingredients and manage that rising time.
The single biggest difference between homemade and that sad, spongy roll you get sometimes? Temperature and gentle handling. Think of the dough like a very sensitive sponge that needs space to breathe and grow. If you treat it gently, it rewards you tenfold!
We talked about the food coloring briefly, but I want to stress it here again because it impacts the texture! Using liquid coloring adds extra water to the system, which can slightly hinder the gluten structure we worked so hard to build during the kneading phase. If you want that deep, dark red that signifies true Red Velvet Baking, you absolutely must splurge on the gel coloring. It concentrates the pigment without disrupting the moisture balance needed for those Fluffy Dessert Recipes.
The Importance of Room Temperature Ingredients
If you skip this, you’re fighting an uphill battle! Room temperature ingredients—especially the eggs—incorporate so much more smoothly into the yeast mixture and the melted butter. Cold eggs shock the activated yeast and can slow down the whole proofing process. Trust me, setting your eggs and milk out while you measure your flour makes the mixing phase quicker and smoother.
Also, when you’re taking that butter out for the filling, that softness is key. If the butter is too hard, you end up dragging holes in your beautiful red dough sheet when you try to spread it. If it’s too melty, it soaks right into the dough, and you end up with oily patches instead of a distinct spice layer running through your baked roll.
Kneading Time: Not Too Much, Not Too Little
This is where intuition bumps up against the recipe card! You need enough kneading to develop gluten—that’s the network that traps the gas from the yeast and gives the roll its spring. As I mentioned before, go a little longer than you think you need to. You want the dough to pass the ‘windowpane test’ if you’re feeling scientific, but for us home bakers, it should feel smooth, elastic, and bounce back slowly when you poke it.
Once it passes that feel test, you stop! Over-kneading is the main culprit for tough rolls. If you keep working that dough past its peak, you tighten up the gluten too much, and those beautiful gas bubbles can’t expand properly during the second rise or in the oven. We want soft and yielding, not tough leather!
Rest Matters: Why Two Rises Are Essential
The first rise builds strength and flavor in that yeast base. The second rise, after you’ve rolled and cut the rolls, is what creates that final, airy, fluffy structure that makes these Decadent Breakfast Ideas so memorable. Do not skip that second rest!
When the cutout rolls are nestled in the pan, the change in volume should be obvious—they should be puffy but not quite touching the pan edges yet. If you rush this, the rolls will bake up dense because the yeast hasn’t had time to populate the entire structure yet. Give them that 30 to 45 minutes of peace. For those times when you need ideas for beverages to go with these rich treats, check out my thoughts on making homemade chai concentrate!
Ingredient Notes and Substitutions for Red Velvet Baking
When you’re diving into a recipe like these red velvet cinnamon rolls, sometimes you run into a tricky ingredient or realize you’re out of something crucial. Don’t panic! Part of being a good home cook is knowing how to improvise without ruining the end result. I’ve found that even small tweaks can sometimes result in delightful variations for these Gourmet Cinnamon Rolls.
The original recipe card didn’t call it out specifically, but the secret weapon that makes red velvet *pop* is the acid. That little teaspoon of white vinegar you see in the wet ingredients isn’t for flavor, necessarily—or at least, not *all* for flavor! It reacts with the cocoa powder and the red food coloring together. This interaction is what deepens the color and gives true red velvet that signature subtle tang that balances the sugar overload. It’s a little science trick I learned to trust!
Switching Flours for a Brioche Texture
If you’re aiming for something even richer than normal—maybe you want that luxurious, extra-pull-apart, melt-in-your-mouth quality that feels like real French brioche—I have a little secret for you! You can absolutely swap out some of the all-purpose flour for bread flour.
Bread flour has a higher protein content than the AP stuff. When you knead it, that protein develops stronger gluten strands. This allows the yeast to inflate that dough structure even higher during the second rise. If you’re feeling ambitious for your next Holiday Breakfast, try swapping one cup of the all-purpose flour for bread flour. Remember, this will make the dough a bit stiffer, so you might need an extra tiny splash of milk when mixing!
The Cocoa Conundrum: Why We Need It
You might think, “Wait, these are red, why are we adding brown cocoa powder?” That’s an excellent question that shows you’re paying attention to detail! The cocoa powder is what moves this dessert from just being sweet red bread into the legitimate category of Red Velvet Baking.
Traditional red velvet relied on a reaction between buttermilk and non-Dutched cocoa powder that created a reddish tint. Even though we are using modern gel coloring to get our true color now, that small amount of cocoa powder (two tablespoons in the filling!) adds a necessary earthy background flavor. It keeps the sweetness grounded. If you skip it, you end up with rolls that taste overwhelmingly sweet, rather than richly decadent.
Glaze Consistency: Milk vs. Cream
The glaze ingredients call for milk or heavy cream, but only if needed. This is one of those steps where you truly have to listen to what the frosting is telling you. I always start by leaving that tablespoon of liquid out entirely.
If you beat the cream cheese and butter, and then mix in all that powdered sugar, you often end up with a very thick mixture—perfect for piping decorations, but maybe too stiff for a nice, thick ribbon pour over your red velvet cinnamon rolls. If it’s struggling to move after adding the vanilla, add the liquid **one teaspoon at a time**. Heavy cream will give you a slightly richer, silkier taste than regular milk, but either works just fine to get that beautiful consistency for your Sweet Breakfast Treats.
It’s always good to know you have options, but honestly, these foundational ingredients are what make these rolls perfect every time. For more inspiration on baking philosophy and how we approach ingredients in our kitchen, I always point people back to our About Us page!
Storage and Reheating Instructions for Leftover red velvet cinnamon rolls
Oh, honey, if you even *have* leftovers of these glorious red velvet cinnamon rolls, you’re doing better than me! But for the sake of completeness, because we want every last bite to be as soft and amazing as the first, storage is mighty important. We worked so hard to get that melt-in-your-mouth texture, and we don’t want to lose it to dry refrigerator air.
The glaze contains dairy, so refrigeration is necessary eventually, but we need to handle that carefully so they don’t end up stiff. Because these are yeast rolls, they definitely start to harden overnight, even if they are covered.
Storing Your Soft and Fluffy Rolls
If you anticipate having extra rolls that need to last more than 24 hours, or if your kitchen is super warm, you’ll need to put them away.
- Room Temperature (Best for 1 day): If you know you’ll eat them the next morning, store them covered tightly with plastic wrap directly in the pan or transfer them gently to an airtight container. Keep them on the counter, away from direct sunlight or heat. This generally preserves the best texture for about 24 hours.
- Refrigeration (For up to 4 days): Once they’ve cooled completely (do not refrigerate warm rolls with glaze!), wrap the pan tightly in plastic wrap, then maybe even throw a layer of foil over that. The goal is to block all air. When refrigerated, the rolls will naturally firm up significantly because of the butter and the chilling process.
The Best Way to Reheat Leftover Rolls
This is the most critical step if you refrigerated them! You have to resurrect that soft, pillowy texture. Forget eating them cold—it’s just not the same experience.
Oven Revival (Recommended for a whole pan or several rolls): This method is the best for restoring moisture and getting a slightly crispy edge if you happen to like that! Wrap the rolls (still in the pan, or just a few placed on foil) in aluminum foil. Heat in an oven preheated to 350°F (175°C) for about 10 to 15 minutes until they feel soft all the way through. If the glaze is already on, you might want to give them a quick 5-minute reheat, then add a fresh smear of glaze right before serving.
Microwave Quick Fix (For one or two rolls): If you just need one roll *right now*, wrap it loosely in a slightly damp paper towel. Microwave on medium power for about 15 to 20 seconds. The damp paper towel steams the roll slightly, helping it soften back up without turning it rubbery. Check it often; 30 seconds and you might be pushing it!
We take great care to ensure our readers have access to secure information, which is why you can review our full privacy policy if you ever have questions about how we handle data here on the blog.
Serving Suggestions for Decadent Breakfast Ideas
Once you’ve pulled these stunning red velvet cinnamon rolls out of the oven and drowned them in that tangy glaze, you need the perfect supporting acts! These aren’t your everyday Tuesday morning rolls; they scream special occasion, whether that’s a lazy Sunday brunch, a big family gathering, or making February 14th extra sweet—they are perfect as an easy alternative to heavy Valentine’s Day Desserts.
You need a beverage that can stand up to that rich spice and tart cream cheese without being completely overwhelmed. I always look for something that cuts through the fat a little bit, keeping the whole experience balanced.
The Perfect Coffee Pairings
Honestly, a plain strong cup of coffee is often the best cleanse for your palate when eating something this rich. But if you’re looking to lean *into* the gourmet vibe, think about complementary flavors.
- Classic Black Coffee: The strong bitterness is the perfect contrast to the sweet dough and sugar rush.
- Iced Vanilla Latte: If you want something creamy, go vanilla. It harmonizes with the vanilla in the glaze without fighting the red velvet flavor profile.
- Chai Tea: A little unexpected, but the warm spices in chai—cardamom, clove—actually echo the cinnamon we use in the filling beautifully. If you’re looking to make something amazing to go alongside these rolls, you should definitely check out my recipe for homemade chai concentrate; it works wonders as a latte base!
Best Sides for a Brunch Spread
When you’re serving these, you need a couple of lighter, fresher options nearby because these are definitely the star of the show! Don’t serve another heavy starch!
- Fresh Berries: A big bowl of fresh strawberries, raspberries, or even tart pomegranate seeds (especially during winter holidays) adds acidity and vibrancy that cuts right through the richness of the rolls.
- Crispy Turkey Bacon or Sausage: A little bit of salty, crispy protein helps anchor the entire meal. It’s the ultimate sweet-and-savory payoff for these Best Brunch Recipes.
- Light Fruit Salad: Focus on citrus! Slices of grapefruit or small bowls of mandarin oranges offer that zing you need to refresh your mouth between bites of that thick cream cheese glaze.
These rolls are definitely indulgent, which is why pairing them with something simple and bright makes the whole experience feel complete and truly special. You’ve done the hard work making the Soft and Fluffy Rolls; now enjoy the celebration!
Frequently Asked Questions About red velvet cinnamon rolls
I always get so many questions after people try making these, which just tells me you guys are paying attention to the details! That’s good, because details are what take these red velvet cinnamon rolls from good to spectacular. Here are some of the things I hear most often after people dive into this recipe for their next Festive Sweet Bake.
Can I make the dough for these Homemade Cinnamon Rolls ahead of time?
Yes, you absolutely can! This is one of my favorite tricks, especially when I’m making these for a big holiday morning and want to save time. You can let the first rise happen overnight in the fridge instead of at room temperature. Once the dough has doubled after that initial kneading and mixing (Step 4), pop it into a lightly oiled, tightly sealed bowl in the refrigerator. It can chill there for up to 24 hours. Just remember that yeast works slower when it’s cold, so when you take it out, let it sit at room temperature for about an hour to warm up before you punch it down and move onto rolling out the filling. Overnight dough makes these Easy Weekend Baking sessions way less stressful!
What is the secret to the Melt in Your Mouth Rolls texture?
If you are aiming for the softest, most unbelievably tender Melt in Your Mouth Rolls possible, there are two non-negotiable factors. First, the fat content! We use plenty of butter in both the dough and the filling, and that fat coats the flour particles, which prevents them from forming overly tough gluten networks during kneading. Second, and this is huge: the second rise. You absolutely must give that cut dough 30 to 45 minutes to become puffy before they hit the heat. That time allows the yeast to fill the entire structure with air bubbles one last time before baking, ensuring that fluffy, airy interior.
How do I get the bright red color in my red velvet cinnamon rolls?
This is the key to making them visually stunning enough for Valentine’s Day Desserts! If you use standard liquid food coloring, you end up using so much liquid that it messes with the dough’s hydration, and you still might end up with a slightly pinkish dough instead of a deep, vibrant red. The secret is always gel food coloring. Gel is concentrated pigment; you need far less of it to achieve an intensely darker, true red hue. When mixing the wet ingredients (Step 2), start with a dense teaspoon of gel coloring, mix it in, and then add just a touch more until you hit that perfect, sultry red color you see in the photos!
If there’s anything else you’re wondering about while working through these steps, please feel free to reach out on my contact page! Happy baking!
Estimated Nutritional Data for red velvet cinnamon rolls
Now, I’m not a nutritionist, so please take this part with a grain of salt—or maybe a grain of salt *and* a teaspoon of that amazing cream cheese glaze! These red velvet cinnamon rolls are absolutely a treat, not an everyday food, so the numbers reflect that decadent nature. We aim for happiness here, not calorie counting, but it’s good practice to know what you’re working with!
These estimates are based on dividing the entire recipe (12 rolls) by the ingredients listed in the recipe card. Keep in mind that how much glaze you drizzle on top, or which brand of butter you choose, can shift these figures slightly. Always refer to the site’s full disclaimer for legal specifics on nutritional estimates.
- Calories: Approximately 480 per roll
- Sugar: Around 55g (Yup, that’s a sweet treat!)
- Total Fat: About 25g, with 15g being saturated fat from all that wonderful butter and cream cheese.
- Carbohydrates: Roughly 60g
- Protein: About 6g
- Sodium: Close to 350mg
Bottom line: These are rich, satisfying Decadent Breakfast Ideas meant for sharing on special days! Don’t let the numbers stop you from enjoying one when the craving hits—just plan for a nice walk later!
PrintThe Ultimate Soft and Fluffy Red Velvet Cinnamon Rolls with Tangy Cream Cheese Glaze

Make soft, fluffy red velvet cinnamon rolls from scratch. This recipe yields bakery-style rolls with a rich red color and a bright, tangy cream cheese glaze, perfect for holidays or weekend treats.
- Prep Time: 45 min
- Cook Time: 25 min
- Total Time: 2 hr 50 min
- Yield: 12 servings
- Category: Breakfast
- Method: Baking
- Cuisine: American
- Diet: Vegetarian
Ingredients
- 1 cup whole milk, warmed
- 2 1/4 teaspoons active dry yeast
- 1/2 cup granulated sugar, plus 1 teaspoon for yeast
- 2 large eggs, room temperature
- 1/4 cup unsalted butter, melted
- 1 teaspoon vanilla extract
- 1 teaspoon white vinegar
- 1/2 teaspoon salt
- 3 1/2 to 4 cups all-purpose flour
- 2 tablespoons red food coloring (gel preferred)
- 1/2 cup unsalted butter, softened (for filling)
- 1 cup packed light brown sugar (for filling)
- 2 tablespoons cocoa powder (for filling)
- 1 tablespoon ground cinnamon (for filling)
- 8 ounces cream cheese, softened (for glaze)
- 1/2 cup unsalted butter, softened (for glaze)
- 3 cups powdered sugar, sifted (for glaze)
- 1 teaspoon vanilla extract (for glaze)
- 1 tablespoon milk or heavy cream (for glaze, if needed)
Instructions
- Activate the yeast: Combine warm milk, 1 teaspoon sugar, and yeast in a large bowl. Let stand 5 to 10 minutes until foamy.
- Mix wet ingredients: Add the remaining sugar, eggs, melted butter, vanilla, vinegar, salt, and red food coloring to the yeast mixture. Mix well.
- Form the dough: Gradually add flour, one cup at a time, mixing until a soft, slightly sticky dough forms. Knead on a lightly floured surface for 5 to 7 minutes until smooth.
- First rise: Place the dough in a lightly oiled bowl, turning to coat. Cover and let rise in a warm place for 1 to 1.5 hours, or until doubled in size.
- Prepare filling: While the dough rises, mix the softened butter, brown sugar, cocoa powder, and cinnamon in a small bowl until combined into a paste.
- Shape the rolls: Punch down the risen dough. Roll it out on a lightly floured surface into a large rectangle, about 12×18 inches and 1/4 inch thick.
- Spread filling: Evenly spread the red velvet filling over the dough, leaving a small border on one long edge.
- Roll and cut: Starting from the long edge opposite the border, tightly roll the dough into a log. Pinch the seam closed. Cut the log into 12 equal slices.
- Second rise: Place the rolls in a greased 9×13 inch baking pan. Cover and let rise for 30 to 45 minutes until puffy.
- Bake: Preheat oven to 375°F (190°C). Bake for 20 to 25 minutes, or until the centers are set and the edges are lightly golden.
- Make the glaze: While rolls cool slightly, beat the softened cream cheese and butter until smooth. Gradually add powdered sugar and vanilla. Add milk if the glaze is too thick.
- Glaze and serve: Spread the cream cheese glaze generously over the warm rolls. Serve immediately.
Notes
- For a deeper red color, use gel food coloring instead of liquid.
- If you prefer a brioche texture, use bread flour instead of all-purpose flour.
- Cool the rolls for 10 minutes before glazing for a thicker icing layer.
Nutrition
- Serving Size: 1 roll
- Calories: 480
- Sugar: 55g
- Sodium: 350mg
- Fat: 25g
- Saturated Fat: 15g
- Unsaturated Fat: 10g
- Trans Fat: 0.5g
- Carbohydrates: 60g
- Fiber: 2g
- Protein: 6g
- Cholesterol: 85mg