

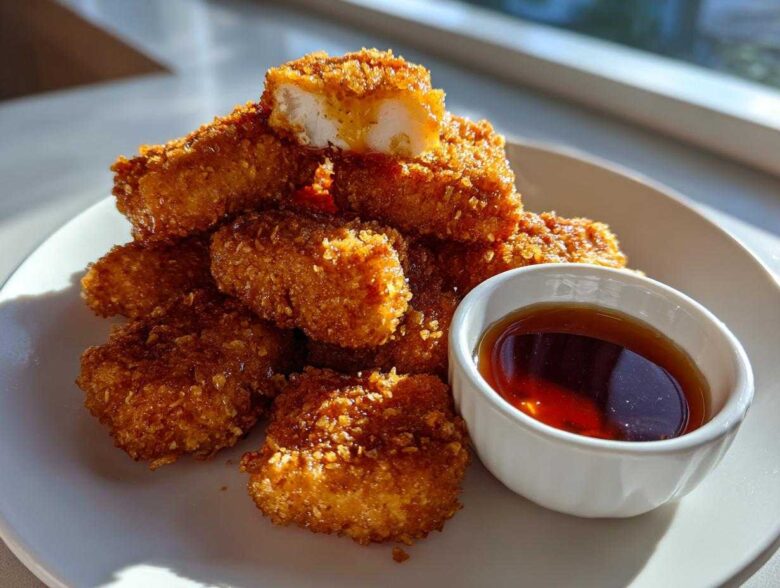
Oh my gosh, tell me if this sounds familiar: You get that intense craving for chicken nuggets, but not the pale, slightly sad kind from a drive-thru. No! You want those perfect, golden-brown beauties that crunch so loud your neighbor hears you eating. That’s exactly what sent me into a frenzy in my kitchen until I cracked the code for truly Crispy Chicken Nuggets with Honey Garlic Dip.
Forget deep frying! I’m serious. We’re making these incredible from-scratch chicken bites in the oven or the air fryer, and they come out unbelievably crisp. The real secret, honestly, is the double-dip breading technique—it builds mountains of crunch! And what’s a great nugget without a killer dip? We’re whipping up an easy honey garlic sauce that is perfectly sweet, savory, and clingy. Seriously, this recipe is totally foolproof once you see how I coat these things. You’re going to want to hide these gems from the kids, trust me!
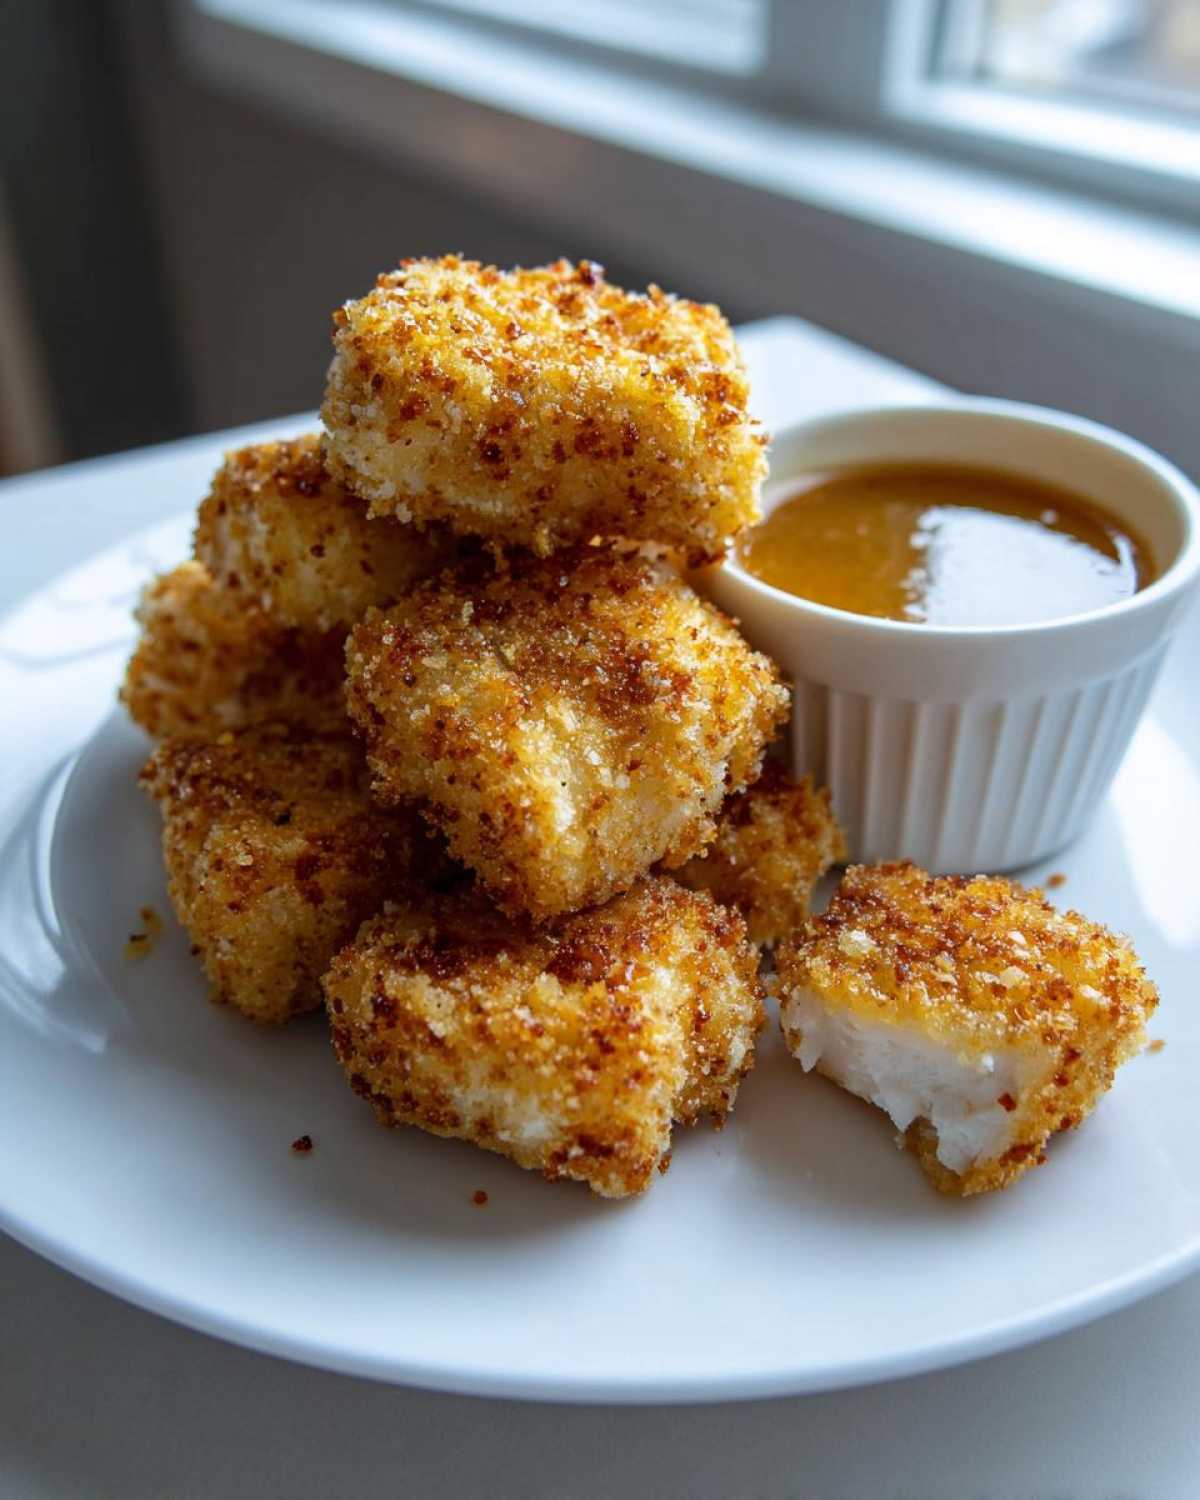
I spent way too many afternoons testing flour-to-egg ratios, so you don’t have to. I learned that using Panko is non-negotiable for that restaurant-level sound when you bite in. Plus, knowing exactly how to prep the dip while the chicken rests makes this whole process so smooth. If you want a family-pleasing meal that feels like a treat but is actually made with real stuff, you’ve come to the right place. If you want to learn more about our kitchen philosophy, check out the About Us page!
Why You Will Make the Best Crispy Chicken Nuggets with Honey Garlic Dip
I know you’ve tried other recipes that *claim* to be crispy, but they turn out floppy halfway through the meal. Not these! This batch of Crispy Chicken Nuggets with Honey Garlic Dip is different. Here’s why you’ll ditch takeout forever once you try this method:
- You get maximum crunch without deep frying! We’re using Panko and a clever coating trick that locks in the crispiness whether you bake them or air fry them.
- Everything is totally from scratch: the chicken is perfectly tender inside because we use buttermilk, and the dip uses real garlic and honey. No weird stabilizers here!
- The Honey Garlic Dip is pure magic. It’s that perfect sticky balance between sweet and savory that makes you want to dunk every single nugget until it’s all gone.
- This is totally customizable for the family. If you have picky eaters, you can skip dipping them in the sauce! They’re delicious on their own, too.
- Honestly, the smell while these are baking? Incredible. Your kitchen will smell like a gourmet fast-food spot converted into a cozy home kitchen.
Essential Ingredients for Crispy Chicken Nuggets with Honey Garlic Dip
Okay, let’s talk about what goes into these amazing, crunch-packed bites. Getting the right components here is crucial for nailing that perfect texture and that incredible sweet-and-savory flavor profile of the Crispy Chicken Nuggets with Honey Garlic Dip. We need three main stations for dredging, plus the simple stuff for our dip. It sounds like a lot, but it comes together super fast!
Don’t skip the Panko breadcrumbs; they are the key player in achieving that superior crunch we talked about. Also, notice the buttermilk—that’s part of what keeps the inside of the chicken extra juicy. If you’re interested in seeing other ways to pack flavor into your chicken, you should check out my tips on the best chicken marinade recipe for juicy flavor!
Ingredients for the Homemade Chicken Nuggets Recipe
For the nuggets themselves, grab these items. Make sure your chicken breast pieces are nice and uniform, about one inch each, so they cook evenly:
- 1.5 lbs boneless, skinless chicken breast, cut into 1-inch pieces
- 1 cup all-purpose flour
- 1 teaspoon salt
- 1/2 teaspoon black pepper
- 1/2 teaspoon paprika
- 2 large eggs, lightly beaten
- 1 cup buttermilk
- 2 cups Panko breadcrumbs (seriously, don’t use regular ones!)
- 1/2 cup vegetable oil (just for brushing or spraying the pan later, not for deep frying!)
Ingredients for the Easy Honey Garlic Sauce
This is the sauce that ties the whole thing together. It’s so simple, you’ll never buy a bottle again. We’re keeping it nice and fresh here:
- 1/2 cup honey
- 1/4 cup soy sauce
- 2 cloves garlic, minced (use fresh, trust me!)
- 1 tablespoon rice vinegar
- 1 teaspoon grated fresh ginger
Coating for Crispy Chicken: Achieving Maximum Crunch
This is where the real magic happens! If you want the Best Crispy Chicken Nuggets, you cannot rush this breading process. Think of it as giving your chicken three little chances to get perfectly crunchy. It’s a classic three-station dredge, but we’re layering it on thick!
First, you get your setup ready. You’ll need three shallow dishes lined up like little assembly stations. I always put a little cooling rack over the counter next to the final station so the coated nuggets are ready to go without sitting in any puddle.
Here is the order: First, we toss the chicken into the dry flour mixture—that’s your salt, pepper, and paprika blended with the flour. This first coat is super important because it helps the wet stuff stick!
Next up is the bath. Dip that floured chicken piece entirely into the egg and buttermilk mixture. Let the excess drip off for just a second. This is what bonds the crumb layer to the meat.
Finally, the grand finale: the Panko. Drop that wet chicken into the Panko breadcrumbs. Listen, this is the step where you have to put some muscle into it. You need to really press that breadcrumb coating onto the chicken piece. Don’t just roll it around; press it into the crumbs! We want full, thick coverage to make sure it crisps up beautifully.
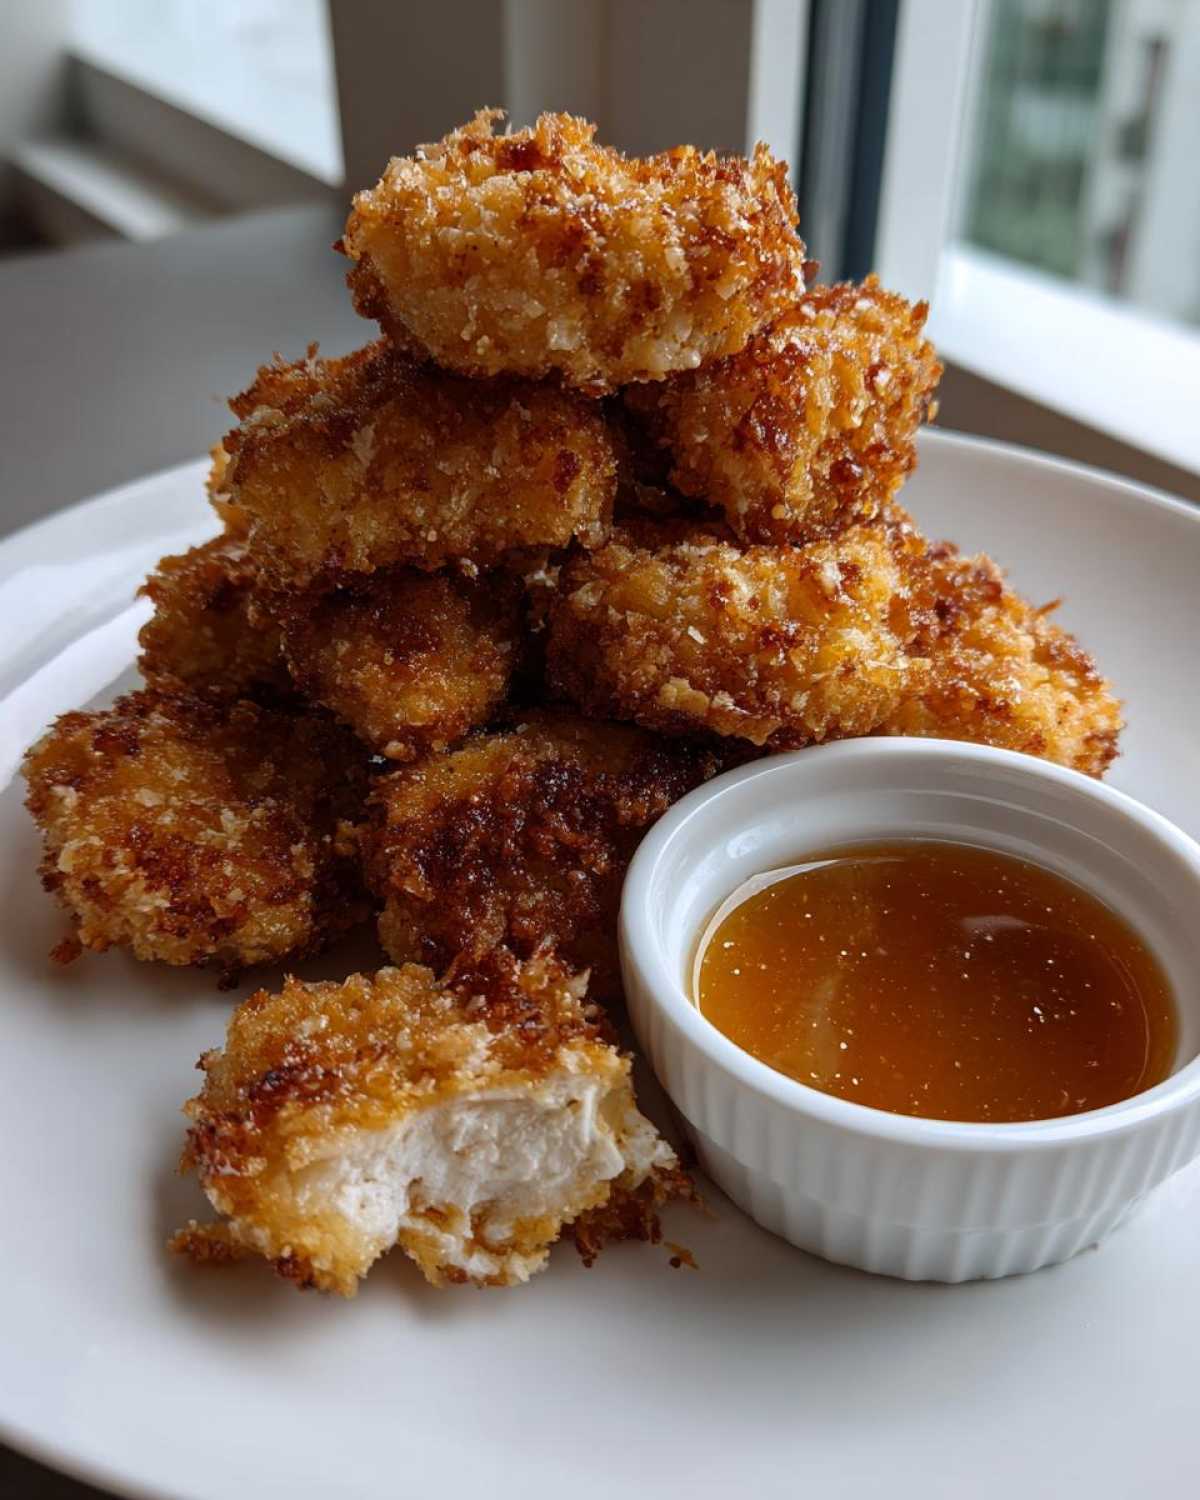
Now, here is the tip that elevates these to restaurant status—the one that guarantees you get those amazing Crispy Chicken Nuggets with Honey Garlic Dip you’re dreaming of. If you have the time, try the double-dredge. After you press the nugget into the Panko the first time, dip it right back into the egg/buttermilk mixture, and then give it one more, final, firm press into the Panko. That extra layer locks everything in tight, and when it cooks, you get a coating that truly cracks when you bite it. It’s next level!
How to Prepare Crispy Chicken Nuggets with Honey Garlic Dip (Baking or Air Frying)
Alright, this is the moment of truth! We’ve got perfectly crusted chicken pieces waiting patiently. You don’t need to fire up the deep fryer—we are using clean heat here to get those gorgeous Crispy Chicken Nuggets with Honey Garlic Dip. I’m going to walk you through both the oven and the air fryer method because honestly, both crush it when you prep those nuggets right.
It’s vital that you make sure your internal temperature hits 165°F. That’s non-negotiable for safety! But the great thing is, since these are smaller pieces, they cook pretty fast. Get your chosen heat source ready while you prep the dipping gold standard.
Baking Instructions for Oven Baked Crispy Chicken
If you’re going the oven route for your Oven Baked Crispy Chicken, you need a hot start! Preheat your oven to 400°F (200°C) before you even get the chicken coated. Seriously, don’t put them in a cold oven, that’s how they steam instead of crisp!
Prepare your baking sheet by spraying it really well with cooking spray or brushing it lightly with that vegetable oil. We really do not want sticking! Line up your coated nuggets in a single layer—don’t let them touch each other, or they’ll share moisture and get soggy spots.
Pop those trays in and bake them for about 18 to 20 minutes total. Here’s the key part: halfway through cooking (around the 9-minute mark), pull them out and flip every single nugget. That ensures both sides get that beautiful golden-brown finish. They are done when they’re deeply colored and reach 165°F inside.
Air Fryer Chicken Nuggets Recipe Method
If you’re using the air fryer—which is probably my favorite way to get that next-level crunch—preheat that bad boy to 380°F (195°C). These smaller appliances create such amazing circulation for crisping!
Lightly spray the air fryer basket. You don’t want to overload it, so if you have a smaller basket, you absolutely must work in batches. Shove too many in and you’re back to steaming. Arrange the nuggets in one layer!
They only need about 10 to 12 minutes total. Around the 6-minute mark, yank that basket out and give it a really good shake. That’s how you get even cooking without having to manually flip every single piece! Pull them out once they look perfectly golden and puffy.
Making the Sweet and Savory Dip
While the nuggets are doing their thing in the heat, turn your attention to the sauce. This is what takes everything from good to legendary, creating that perfect Sweet and Savory Dip experience! Grab a tiny saucepan; we are keeping this easy.
Toss in the honey, the soy sauce, your minced garlic, that splash of rice vinegar, and the fresh ginger. Put it over medium-low heat. You just want to stir it gently until the honey dissolves completely into the soy sauce. Don’t boil it furiously! Let it just simmer lightly for about 2 minutes total. That quick simmer helps the flavors blend, and the sauce thickens up just the tiniest bit so it clings nicely to the chicken.
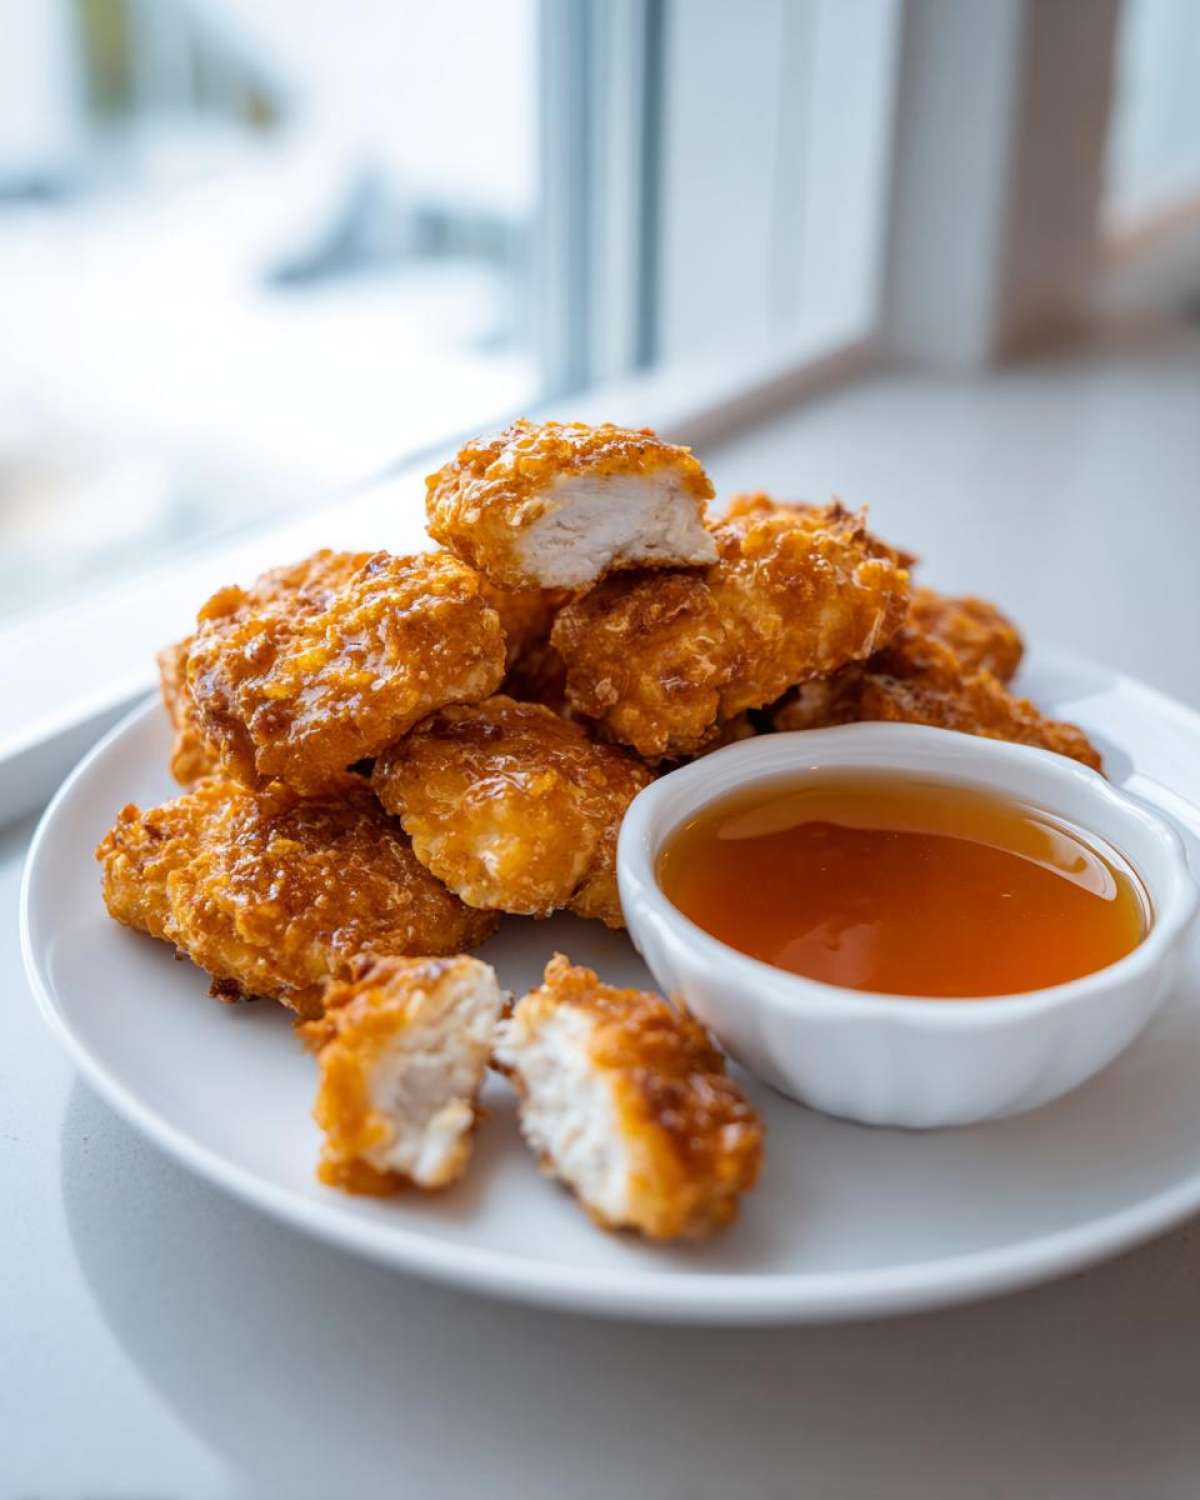
Once that’s done, take it off the heat immediately. It’ll thicken a little more as it cools. Serve it warm right alongside your piping hot, crunchy chicken. This entire process means you can have these incredible air fryer chicken treats ready in under 40 minutes total!
Tips for Success with Your Crispy Chicken Nuggets
I love sharing the little secrets I figured out the hard way, because getting these Crispy Chicken Nuggets right isn’t just about the steps—it’s about understanding *why* those steps matter! We’re going for maximum crunch and minimum fuss here, building on that double-dredge method we already nailed.
If you want to stick to the recipe structure but maybe use slightly different cuts of chicken or adjust the liquids, I’ve got you covered here. Following these notes will ensure you get that perfect texture every single time you make those nuggets to dunk in that amazing sauce. For side dish inspiration that really complements this meal, check out my recipe for chicken zucchini stir fry!
Ingredient Notes and Substitutions for From Scratch Chicken Bites
Let’s quickly talk about swapping things out. Remember, we’re aiming for that great structure, so some ingredients hold the line better than others. When it comes to the coating, Panko breadcrumbs are my absolute favorite because they are light and large enough to create those crunchy peaks. If you only have regular breadcrumbs, they will still work, but I promise they won’t achieve that same airy crispness. You might need to press them slightly harder into the wet coat just to make them adhere better.
What about the protein? While I wrote this for chicken breast because it’s lean and easy to cut neatly into one-inch cubes, you can totally use boneless, skinless chicken thighs if you prefer something richer and slightly more forgiving! Just keep the pieces about the same size so they cook through at the same time. Thighs might cook a minute faster, so keep an eye on them.
And the buttermilk? That’s our secret weapon for texture! It has a little acidity that helps tenderize the meat just a touch, and it gives the flour something great to grab onto. If you don’t have any, don’t stress! Just take one cup of regular milk and stir in one tablespoon of white vinegar or lemon juice. Let it sit on the counter for five minutes until it looks slightly curdled—voilà, homemade buttermilk for your From Scratch Chicken Bites!
Serving Suggestions for Family Favorite Chicken Meal
Okay, now that you have this huge batch of perfect, crunchy chicken waiting, you need some things to eat alongside them, right? These aren’t just for snacking straight out of the air fryer basket—they deserve a solid meal setup! Since you’ve put in all that work to get the Best Crispy Chicken Nuggets, let’s make sure the sides match that effort!
My go-to idea for a Family Favorite Chicken Meal is keeping it simple so the honey garlic flavor really shines. If you want something comforting that is just a step up from plain fries, try roasting some sweet potato wedges alongside the nuggets. They cook at a similar temperature, and the sweetness plays wonderfully with the savory dip.
For something green—because we all need a little color on our plates—I often toss some broccoli florets with a tiny bit of olive oil and salt and roast them during the last ten minutes of the nugget baking time. They get slightly charred and tender-crisp, which is exactly what you want next to a crunchy nugget!
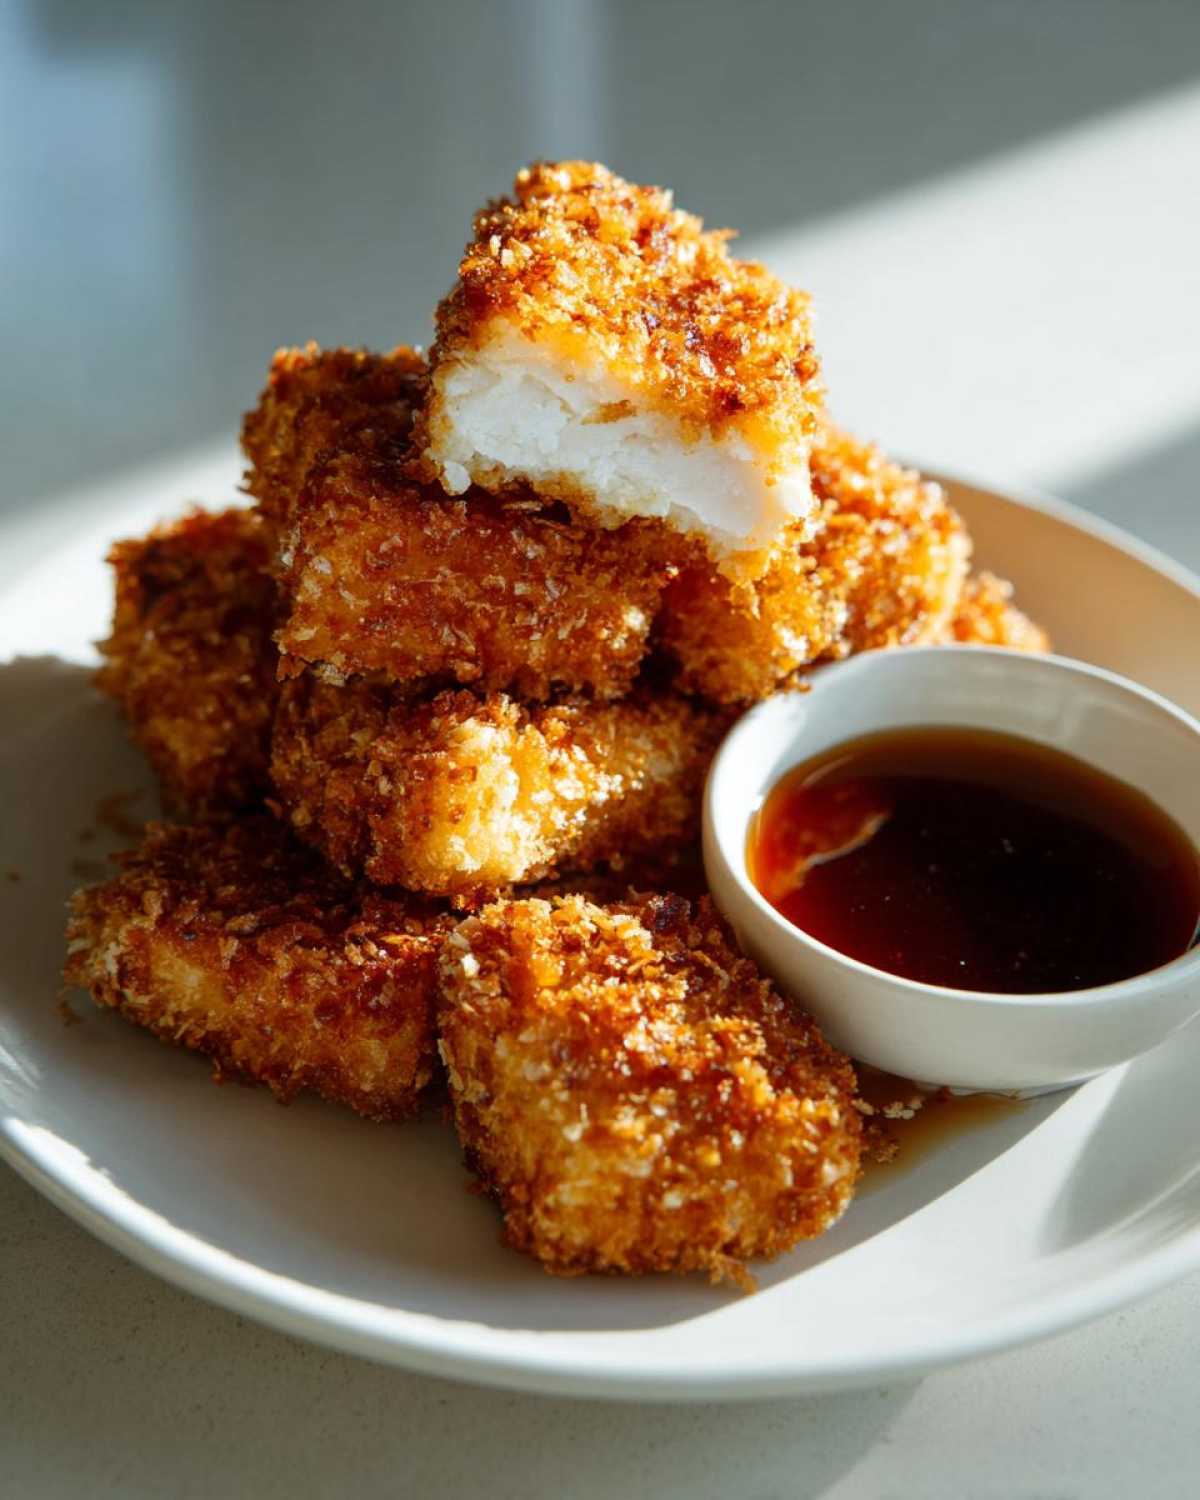
If you’re feeling like leaning into the comfort food aspect but want something heartier than potatoes, you could set these nuggets on top of a small bed of creamy mashed potatoes and drizzle a little extra sauce over the top. It turns it into a fantastic, kid-approved dinner plate. Thinking about other comforting main dishes? You might want to look up my easy chicken cobbler recipe for next week!
Honestly, though, sometimes the best pairing is just a big bowl of crunchy carrot and celery sticks for dipping on the side. It keeps things super fresh and gives you something crunchy to munch between the double-dredged bites!
Storage and Reheating Instructions for Crispy Chicken Nuggets
You definitely won’t have leftovers because everyone devours these things, but just in case you manage to save a few of those perfect Crispy Chicken Nuggets—or maybe you made a double batch because you’re smart like that—proper storage is everything. You want to make sure that amazing Panko crust stays as crunchy as possible when you eat them tomorrow!
First things first: make sure the nuggets and the honey garlic dip are completely cooled down before you even think about putting them away. Storing warm food traps steam, and steam is the absolute enemy of crispiness. Store the nuggets in a container, and then store the dip in a separate small, sealed container. They’ll be good in the fridge for about three to four days max.
Now, everyone asks me how to reheat them. Please, please, please, don’t ever microwave these! They will turn soft and sad instantly. The best, number one way to bring back that perfect crunch is to use the air fryer again. Preheat it to 375°F (190°C). Pop the nuggets in, making sure they aren’t touching, and cook for just 4 to 6 minutes. They heat through fast, and that intense dry heat totally re-crisps that beautiful coating.
If you don’t have an air fryer, the conventional oven works too! Preheat it to 375°F (190°C) and place them on a dry baking sheet. Bake for about 8 to 10 minutes, maybe flipping once halfway through. They won’t be *quite* as perfect as the air-fried ones, but they’ll be way better than microwaved mush. Enjoy those leftovers!
By the way, if you’re looking for another seriously easy dip idea that’s perfect for parties or just snacking, you should check out my recipe for a quick and easy million dollar dip recipe. It’s totally different from the honey garlic, but everyone loves it!
Frequently Asked Questions About Crispy Chicken Nuggets with Honey Garlic Dip
Can I use chicken thighs instead of breasts for these nuggets?
Absolutely, you totally can! While I used chicken breast because it’s so easy to cut into perfect little cubes, using boneless, skinless thighs will give you a richer, slightly fattier, and maybe even juicier nugget. Just keep your pieces the same size so they cook evenly. If you go with thighs, you might want to check the internal temperature right around the 16-minute mark when baking, just to make sure they aren’t overcooked!
What is the best way to ensure my nuggets stay crispy after cooling?
Crispiness is my obsession, so listen closely! The absolutely number one way to keep them crisp is to never store them warm, obviously. But when you reheat them, stick to dry heat—the air fryer on high (375°F) for 4-6 minutes is your best friend. This dries out the exterior crust again perfectly. If you’re planning ahead, I highly recommend using that double-dredge method we discussed earlier when you first coat them!
My honey garlic sauce turned out too thick! How do I thin it out?
Oh, that happens sometimes because honey varies in thickness depending on the type you use! If your sauce is more like thick glue than a nice dipping consistency, don’t panic. Just take it off the heat and whisk in one tablespoon of hot water at a time until it reaches the perfect drizzly texture you want. It will loosen up without losing any flavor!
Is there a way to make these Crispy Chicken Nuggets with Honey Garlic Dip healthier?
Yes, for sure! We already skip the deep fryer, which is huge. To make them even lighter, you could try using whole wheat flour or even gluten-free flour in the first dredge, though you might need a slightly longer baking time. For a lower-sugar dip, you could use honey substitute, but frankly, the flavor won’t be the same. For more ideas on healthier ways to enjoy chicken, you should check out my post on healthy chicken nugget alternatives!
Can I make the honey garlic sauce ahead of time?
You absolutely can! I often make a double batch of the dip because my family uses it on everything—stir-fries, rice bowls, you name it. You can mix up all the sauce ingredients and keep it sealed tight in the fridge for up to a week. When you’re ready to eat, just warm it gently on the stovetop for a minute or two to get it silky smooth again. It tastes even better the next day!
Recipe Snapshot and Details
I always like to give you a quick rundown here so you can see exactly how much time you need to block out for this amazing meal. Honestly, getting these Crispy Chicken Nuggets with Honey Garlic Dip on the table in under an hour is a huge win for a homemade dinner!
This table should give you all the vital stats you need to plan your afternoon. It’s categorized as a dinner recipe, but you know these are perfect for lunch or a serious game-day snack too. It’s amazing how putting a little effort into the coating yields such huge results!
We’ve kept the prep time down since we aren’t doing any long marinades, and the cooking time is fast because we are sticking to smaller chicken pieces and using high, dry heat.
| Detail | Time/Amount |
|---|---|
| Prep Time | 20 min |
| Cook Time | 20 min |
| Total Time | 40 min |
| Yield | 4 servings |
| Category | Dinner |
| Method | Baking or Air Frying |
| Cuisine | American |
| Diet | Low Fat |
Nutritional Disclaimer
Just a quick word, because I know some of you track macros closely! The nutritional information I shared previously is based on standard calculations for the ingredients listed, assuming you use the low-fat baking/air frying method. However, since we all use slightly different brands—maybe one uses thicker cut chicken, or your honey is super thick—these numbers are always estimates. For the most accurate details for your specific diet, you might want to check the labels on the products you use! You can always read more about why these numbers can vary on my full disclaimer page.
PrintCrispy Chicken Nuggets with Honey Garlic Dip

Make homemade chicken nuggets with a double-dredged coating for maximum crispiness, served with a simple, sweet, and savory honey garlic dipping sauce.
- Prep Time: 20 min
- Cook Time: 20 min
- Total Time: 40 min
- Yield: 4 servings
- Category: Dinner
- Method: Baking or Air Frying
- Cuisine: American
- Diet: Low Fat
Ingredients
- 1.5 lbs boneless, skinless chicken breast, cut into 1-inch pieces
- 1 cup all-purpose flour
- 1 teaspoon salt
- 1/2 teaspoon black pepper
- 1/2 teaspoon paprika
- 2 large eggs, lightly beaten
- 1 cup buttermilk
- 2 cups Panko breadcrumbs
- 1/2 cup vegetable oil (for baking/air frying surface)
- For the Dip: 1/2 cup honey
- For the Dip: 1/4 cup soy sauce
- For the Dip: 2 cloves garlic, minced
- For the Dip: 1 tablespoon rice vinegar
- For the Dip: 1 teaspoon grated fresh ginger
Instructions
- Prepare the chicken: Place the flour, salt, pepper, and paprika in a shallow dish. In a second dish, whisk the eggs and buttermilk together. In a third dish, place the Panko breadcrumbs.
- Dredge the chicken: Take each piece of chicken and coat it first in the flour mixture, shaking off excess. Dip it completely into the egg/buttermilk mixture. Finally, press the chicken firmly into the Panko breadcrumbs, ensuring full coverage.
- For baking: Preheat your oven to 400°F (200°C). Lightly spray a baking sheet with cooking spray or brush with vegetable oil. Arrange the nuggets in a single layer and lightly spray the tops with oil. Bake for 18-20 minutes, flipping halfway through, until golden brown and cooked through (internal temperature 165°F).
- For air frying: Preheat the air fryer to 380°F (195°C). Lightly spray the basket. Place the nuggets in a single layer, working in batches if necessary. Air fry for 10-12 minutes, shaking the basket halfway through, until crispy.
- Make the dip: While the nuggets cook, combine the honey, soy sauce, minced garlic, rice vinegar, and ginger in a small saucepan. Heat over medium-low heat, stirring until the honey is fully dissolved and the sauce simmers lightly for 2 minutes. Remove from heat.
- Serve the crispy chicken nuggets immediately with the warm honey garlic dip.
Notes
- For extra crispiness when baking, use the double-dredge method: after the first Panko coating, dip the nugget back into the egg wash and then into the Panko again before baking.
- If you prefer a thinner sauce, add 1 tablespoon of water to the saucepan mixture before heating.
- You can substitute chicken tenderloins for breast pieces if you prefer a different shape.
Nutrition
- Serving Size: 6 nuggets + 2 tbsp dip
- Calories: 350
- Sugar: 22
- Sodium: 550
- Fat: 10
- Saturated Fat: 2
- Unsaturated Fat: 8
- Trans Fat: 0
- Carbohydrates: 38
- Fiber: 2
- Protein: 28
- Cholesterol: 95