

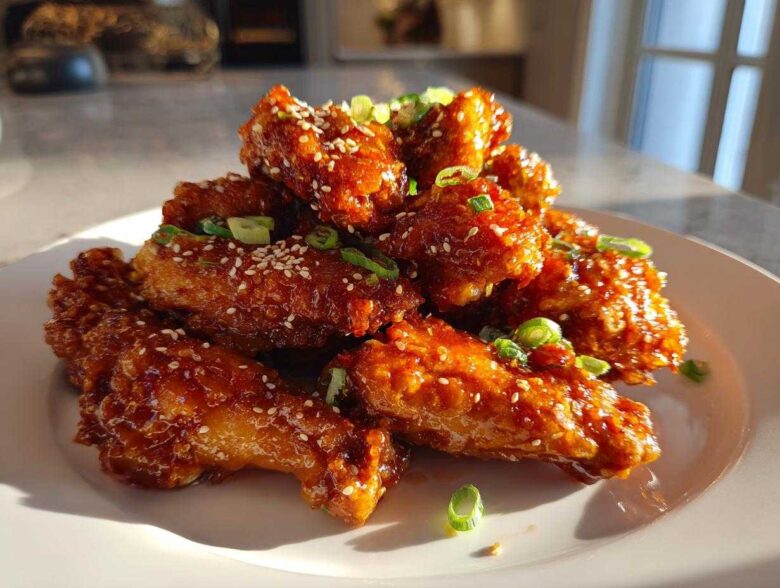
Oh my gosh, you know that moment? That moment you’re sitting on the couch, suddenly hit with the craving for those sticky, glistening takeout wings, but you just don’t want to wait for delivery or gamble on soggy breading? I’ve been there a million times! That’s why I spent what felt like an entire winter perfecting this recipe for Sticky Orange Chicken Wings with Honey Glaze. Forget everything you thought you knew about baking wings; this method delivers that true restaurant crunch beneath a thick, sweet, and tangy coat that clings beautifully. Trust me, after trying this, you’ll never need to call the local place again. I’ve tweaked the glaze ratio so many times, but I finally nailed the *perfect* balance of bright orange zest and deep honey sweetness for that incredible, satisfying bite. You can see my full thoughts on why this beats takeout in one of my first attempts here: Orange Chicken Better Than Takeout.
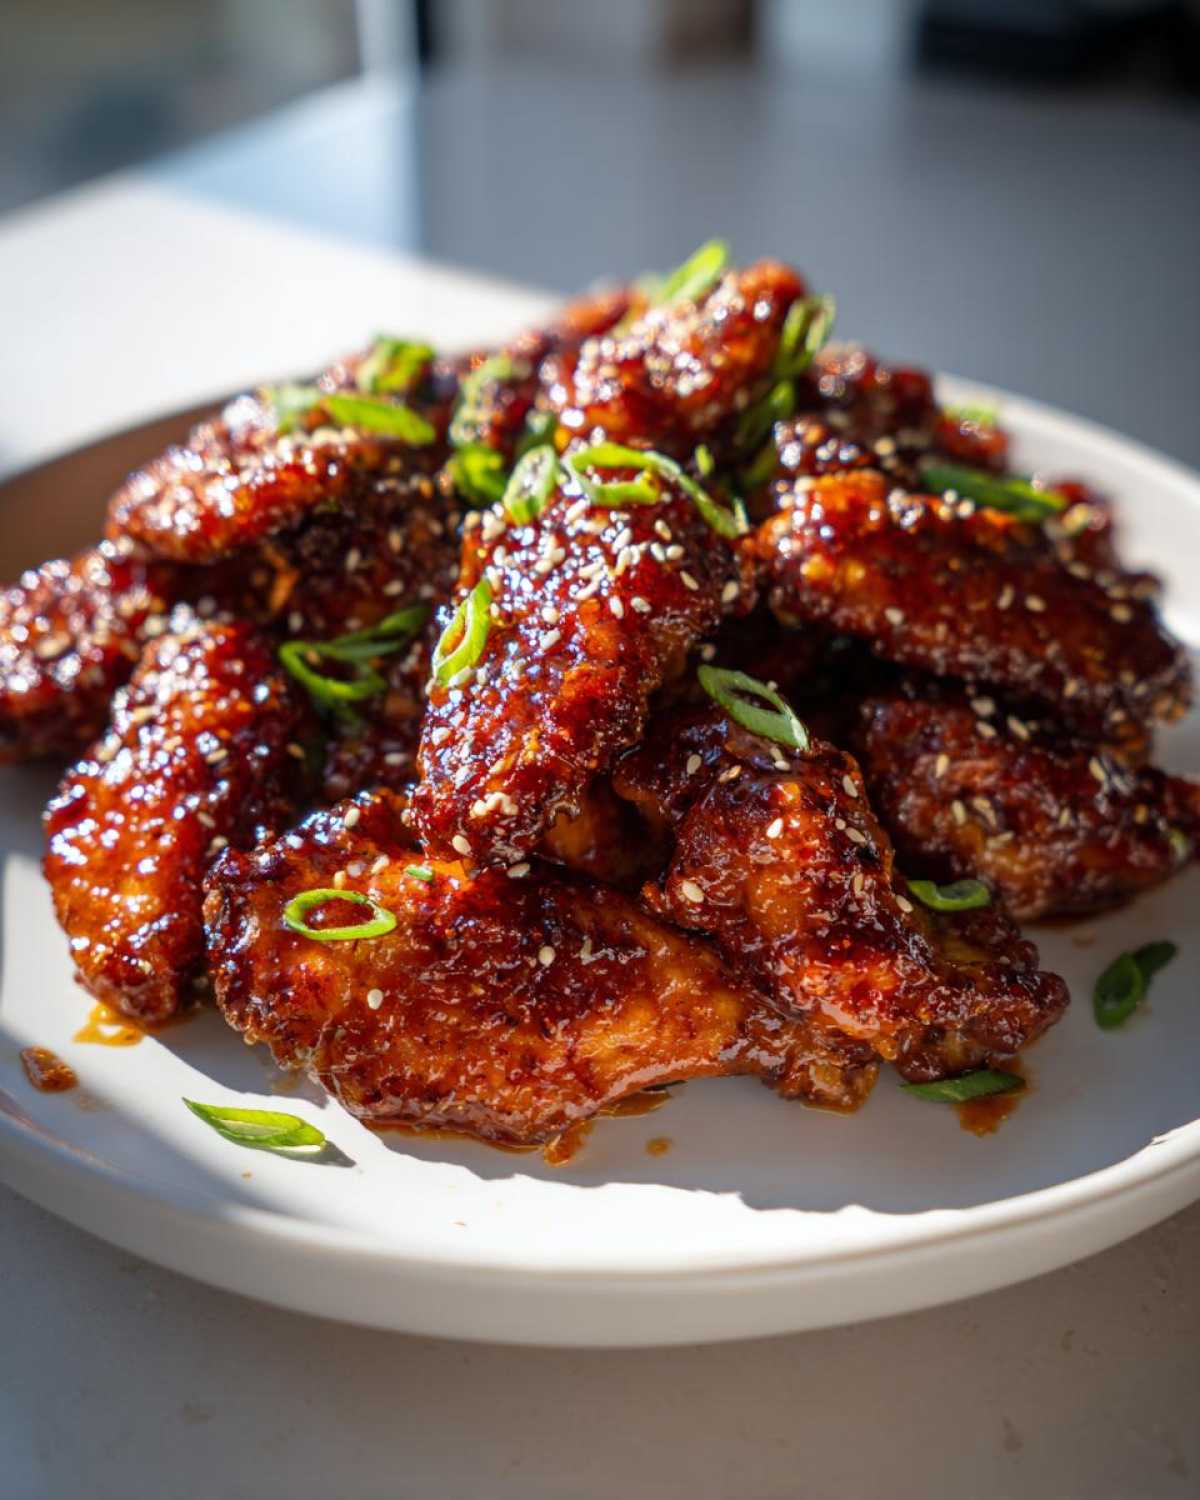
Why You Will Make This Sticky Orange Chicken Wings with Honey Glaze Recipe Often
I know there are a million chicken wing recipes out there screaming for your attention, but this one honestly stands apart. It solves all the usual problems—soggy skin, weak sauce, or too much fuss in the kitchen. Here’s why this Sticky Orange Chicken Wings with Honey Glaze recipe is going straight into your weekly rotation:
- The Crisp Factor is Real: We use baking powder—don’t skip it! It pulls moisture from the skin during that initial bake, which gives you shockingly crispy wings even before they hit the sticky sauce later on.
- Perfect Flavor Balance: It hits all the right notes; the honey provides a lush sweetness, while the fresh orange juice and zest give you that perfect, bright tang. It’s sweet *and* tangy, never cloying.
- Glaze That Actually Clings: This isn’t a thin, watery sauce that slides right off. We thicken it up just right so that it sets beautifully onto the wings when you give them that final quick roast in the oven.
- All About the Honey: Using honey in the glaze instead of just plain sugar gives the sauce a richer depth of flavor and a gorgeous, amber shine. Wow!
- Oven-Baked Simplicity: We skip the deep-fryer mess. You get incredible texture with hardly any hands-on time, making this an ideal appetizer for Game Day or just a Tuesday night craving.
- Make-Ahead Sauce Power: The sauce component is so bright and flavorful; you can easily whip up a double batch of the honey glaze and store it, ready to go for your next batch of wings or even grilled items.
Essential Ingredients for Sticky Orange Chicken Wings with Honey Glaze
Okay, let’s talk ingredients. You can’t fake flavor, especially when you’re aiming for that amazing takeout quality at home. I broke down everything you’ll need below. Make sure you’ve got everything measured out because when we get to the sauce step, things happen fast!
For the wings themselves, you need:
- 2 lbs chicken wings—make sure they are separated into those little flats (where the two tiny bones are) and drumettes (the mini drumstick shapes).
- 1 tablespoon baking powder. Seriously, this is the secret weapon for crispiness. It’s essential!
- 1 teaspoon salt, just for seasoning the skin.
- 1/2 teaspoon black pepper.
Now, for the star of the show—the thick, tangy glaze. This is where the magic happens, especially because we are using real fruit!
- 1/2 cup fresh orange juice. Listen to me: do not reach for that bottled stuff! Freshly squeezed juice has the brightness and acidity that works perfectly with the honey, and it makes all the difference in the final flavor profile.
- 1/4 cup honey. This gives you that lovely amber color and rich sweetness.
- 1/4 cup soy sauce. For that salty depth and umami backbone.
- 2 tablespoons rice vinegar. Just a splash to keep everything sharp and tangy, preventing it from getting too heavy.
- 1 tablespoon grated fresh ginger. Hello, aroma!
- 2 cloves garlic, minced fine.
- 1 teaspoon cornstarch and 2 tablespoons cold water. We’ll turn this into a slurry later to thicken everything up beautifully.
- Optional garnish: 1 tablespoon sesame seeds and 2 scallions, sliced thin, for that classic finish.
If you’re ever looking to see how other delicious sauces are built, check out my guide to making killer BBQ sauce—it uses similar layering techniques for flavor intensity. You can find that breakdown here: Best Easy Homemade BBQ Sauce Recipe. But don’t wait too long, these wings need your attention!
Equipment Needed for Perfect Sticky Orange Chicken Wings with Honey Glaze
Before we jump into the cooking process, let’s make sure your kitchen is ready! I find that having all your tools lined up first makes the whole experience way less stressful, especially when you’re juggling hot wings and simmering sauce. You don’t need any fancy gadgets for this recipe, thankfully, but a few things are must-haves for that intended crispiness and that gooey glaze.
Here’s the basic lineup I use every time I make these appetizer favorites:
- A large mixing bowl for tossing the wings with the baking powder mixture. You need room to toss them without flinging seasoning everywhere—trust me on that one!
- A standard baking sheet. Line it with foil first, though; cleanup is so much easier when you’ve got sticky sauce fallout!
- A sturdy wire rack that fits inside your baking sheet. This is non-negotiable. It elevates the wings so air circulates all around them, which is precisely how we get that crispy skin all over, not just on the top!
- A small saucepan. This is strictly for simmering down that beautiful orange-honey mixture into a real glaze.
- A whisk and a small bowl. You need these two to quickly make that cornstarch slurry before the sauce boils over. Whisking constantly is key!
- Tongs. You’ll need these for flipping the wings mid-bake and for tossing them in the sauce later.
If you’re thinking about leaning into the air fryer trend instead of the oven—which I totally support, especially for smaller batches—you’ll want to make sure your basket can handle the wings in a single layer. For great air frying tips, I always refer back to my notes here: Air Fryer Chicken. Having the right tools just makes everything easier!
Step-by-Step Baking Instructions for Crispy Orange Chicken Wings
I always say that the secret to any great wing—baked, fried, or air-fried—is taking your time with the initial cook before you even think about the sauce. If the wings aren’t perfectly cooked and crispy first, that beautiful glaze you worked so hard on is going to just steam them into sadness. No thanks! Following these initial steps exactly is how we turn simple wings into crispy perfection.
Preparing and Baking the Wings
First things first, let’s get the oven roaring. Preheat your oven to 400 degrees Fahrenheit (that’s 200 degrees Celsius). I find this higher heat is crucial for rendering out the fat and getting that nice crunch. While it’s heating up, line a baking sheet with some foil—again, thank me later for the easy cleanup. Then, place a wire rack right on top of that foil.
Now for the magic coating! Grab your large mixing bowl and toss those 2 lbs of wings (flats and drumettes separated, remember?) with the baking powder, salt, and pepper. Get in there and make sure every single piece is lightly and evenly coated with that white powder. That baking powder is your best friend for creating microscopic bubbles on the skin, which leads to maximum crispiness. It feels weird, but trust me on this culinary trick!
Once they are perfectly seasoned, arrange the wings on your wire rack in a single layer. Do not let them touch—crowding brings steam, and steam brings sogginess! Stick them into that hot oven. They need about 40 to 45 minutes total. You must flip them halfway through so both sides get that gorgeous golden brown color and cook evenly.
While those wings are busy getting crispy, you can start thinking about making that unbelievable sauce! For some great tips on technique when baking proteins, I love referencing how I prep my sheet pan chicken dinners. You can check out that approach here: Greek Chicken Juicy Baked Sheet Pan Recipe. Prep work while the main event cooks is the best use of oven time!
Creating the Thick Honey Glaze for Sticky Orange Chicken Wings
Okay, now that your wings are getting beautifully crisp in the oven—like 15 minutes left to go—it’s time to nail the sauce. This is what transforms good wings into truly memorable Sticky Orange Chicken Wings with Honey Glaze. We need a sauce that’s flavorful but, most importantly, thick enough to actually stick and set onto that crispy skin during the final bake. I’ve got the exact process laid out for you here, and I promise it’s so easy!
First, you need to combine all your core flavor builders in a small saucepan. That means pouring in your fresh orange juice, the gorgeous honey, the soy sauce, the rice vinegar, the grated fresh ginger, and all that minced garlic. Set this over medium heat and bring it up to a gentle simmer. You want to let it bubble quietly for a few minutes so that the ginger and garlic can really infuse the liquid. You can smell it getting good already, right?
While that’s heating up, quickly do your slurry in a separate little bowl. Just take your cornstarch and whisk it into the 2 tablespoons of cold water until it’s completely smooth. This is a vital step; if you don’t make the slurry first, you’ll end up with clumps of cornstarch floating in your beautiful sauce, and nobody wants that mess!
Pour that slurry right into your simmering sauce mixture while you are whisking constantly—and I mean *constantly*! Keep whisking and let it boil gently for about 1 to 2 minutes. That’s usually all it takes for the sauce to magically transform and thicken enough to coat the back of a spoon. Once it looks glossy and thick, yank it off the heat immediately so it doesn’t get too hard.
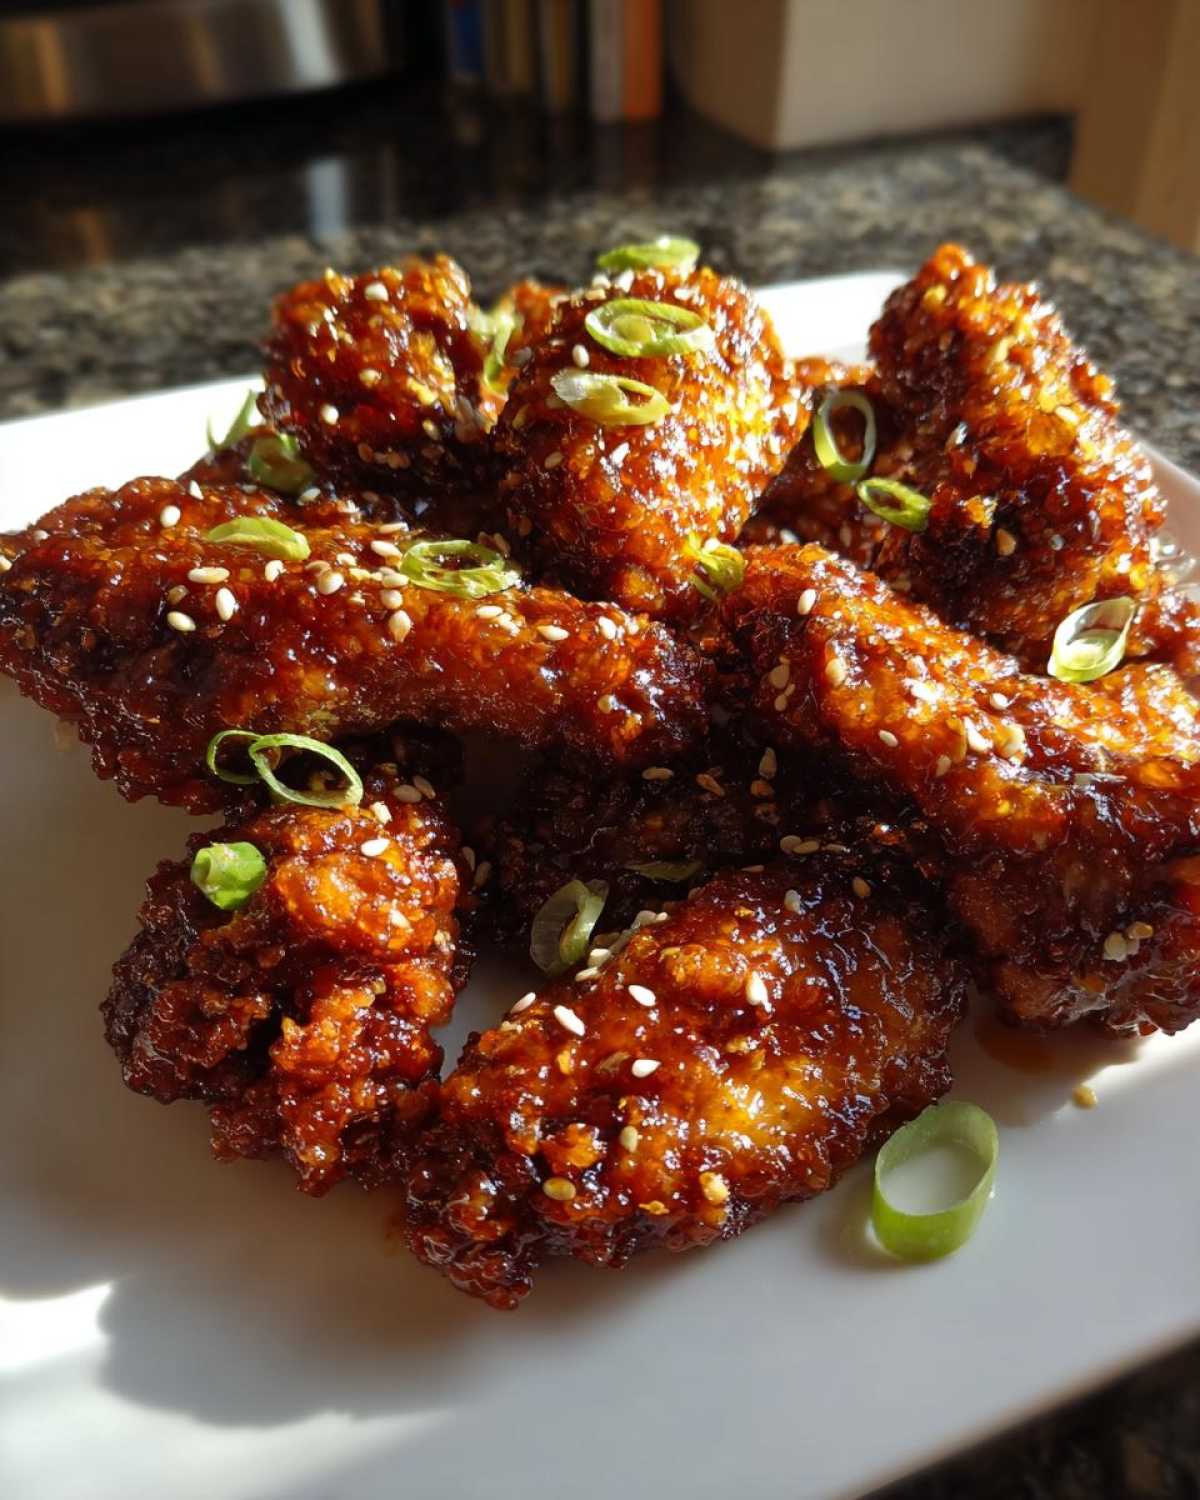
Achieving Maximum Stickiness in the Honey Glaze
The moment you pull that glaze off the heat is when you check for that perfect “sticky” texture. This is my little trick: dip a clean spoon into the sauce and pull it out. If the sauce runs off the back of the spoon slowly, leaving a faint trail when you run your finger across it, you’re golden! If it still looks watery, throw it back on the heat for 30 more seconds and whisk again. It has to be glossy and adhere without dripping off immediately, or it won’t set right on the wings.
For more sauce techniques that help prevent thin sauces, check out my guide on quick wing glazes—it talks a lot about how to manage the thickening process perfectly: Quick and Easy Chicken Wing Glaze. Seriously, that glossy, thick texture is what sets these wings apart from anything else!
Final Steps: Glazing and Setting the Sticky Orange Chicken Wings
Okay, deep breath! The wings are baked, the sauce is glossy and thick, and now it’s time for the grand finale where everything comes together. This is probably the single most important stage for delivering on the promise of truly luscious, messy, delicious Sticky Orange Chicken Wings with Honey Glaze! You cannot just pour the sauce on and serve them immediately, or you’ll end up with sticky sauce on your plate instead of sticky sauce clinging to the crispy skin.
First, pull those perfectly golden wings out of the oven. They should be super hot and nice and brown. Immediately transfer them from the rack into a big, clean bowl—the one you used before for tossing them with the baking powder works just fine. Now, grab at least two-thirds of that gorgeous, thick honey glaze you just made. You want to pour it right over those hot wings.
Get in there with your tongs and toss! You need to work fast but gently to make sure every single wing gets coated completely. You want that thick glaze to adhere right away while the wings are still radiating heat. It should look messy and absolutely delicious right now. That’s a good sign!
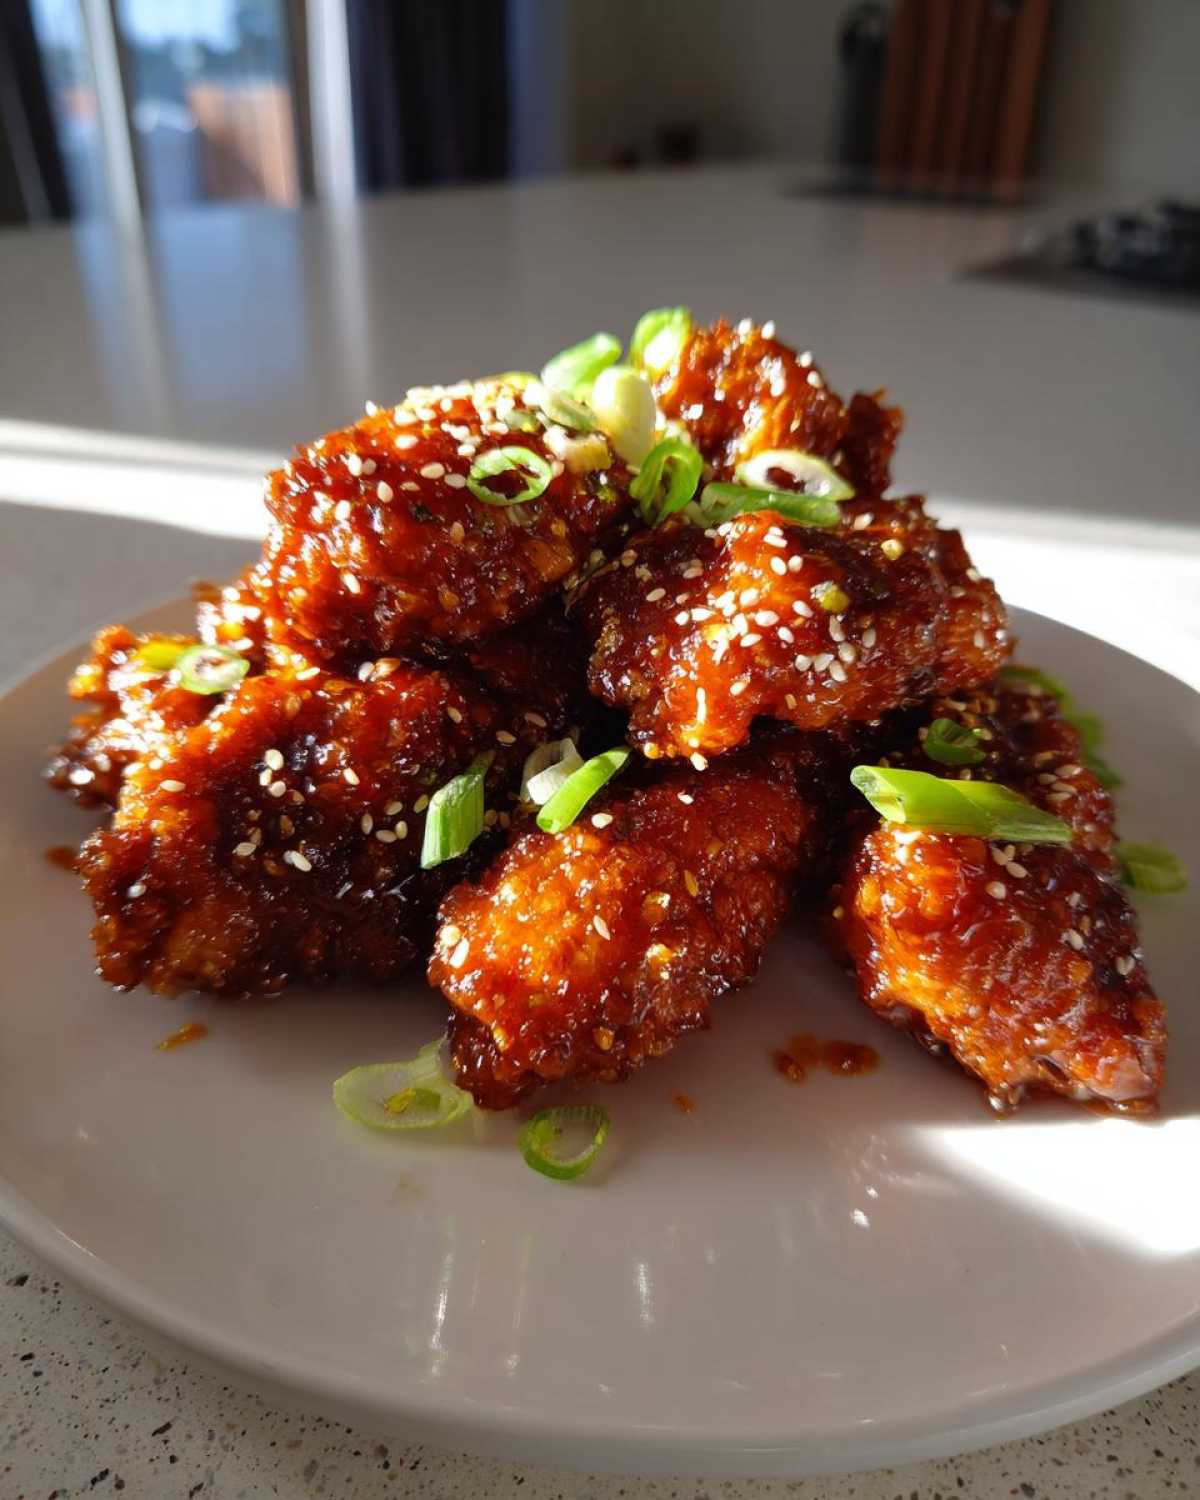
Here’s the part people often skip, and it’s critical for that signature stickiness: you have to put them back on the rack! Gently place them back onto your wire rack on the foil-lined baking sheet. They need one final trip into the oven, but only for about 5 minutes. This short, hot blast does two things: it caramelizes the honey just a touch more, and it sets the glaze so it doesn’t just run off when you try to pick the wing up. It locks that stickiness right in place.
Pull them out after those 5 minutes are up. They should look lacquered, shiny, and totally irresistible. Serve these babies immediately, maybe drizzling any remaining gooey sauce over the top for extra drama! Enjoy all that sticky bliss!
Tips for the Best Sticky Orange Chicken Wings Recipe
Honestly, cooking wings can feel fussy, but once you learn a few basic tricks, you’ll be whipping up winners every time. Even though this baking method is my absolute favorite for getting that crispy skin without using gallons of oil, I’ve picked up a few pointers over the years that can really elevate your game. Think of these as the insider secrets that separate an okay batch of wings from a total showstopper!
The biggest thing I learned early on? Moisture is the enemy of crispiness. It doesn’t matter if you are baking or frying; if the skin is wet, it steams instead of crisps. So, before you even season your wings, grab a big stack of paper towels and just pat, pat, pat every single wing dry. I mean, really dry them out. This simple step makes a shocking difference once they hit the oven!
Another key thing is managing your sauce. I mentioned it before, but I think it bears repeating: always add the sauce *after* the wings are fully cooked and crispy. If you attempt to sauce them halfway through baking, the sugars in the honey will just burn before the chicken cooks through, and you’ll get a bitter mess instead of that lovely, gorgeous glaze.
Alternative Cooking Method: Air Fryer Sticky Orange Wings
If you’re short on time, or maybe you just really love your air fryer—and who doesn’t?—this recipe adapts beautifully! Using the air fryer is actually one of the fastest ways to get that crispy exterior we are aiming for. It’s just slightly different timing than the oven method.
If you opt for the air fryer, set it to 380 degrees Fahrenheit (which is about 195 degrees Celsius). You’ll need to cook your wings in batches, making sure they aren’t stacked on top of each other. Cook them for about 20 to 25 minutes total. Remember to flip them halfway through, just like in the oven, so they crisp up evenly on both sides. Once they are looking golden and done, then you pull them out and toss them in that amazing honey glaze we made!
For anyone who loves using the air fryer for sides, too, like crispy potatoes, I always check out guides on proper basket loading to make sure everything cooks even. For example, here is a great tip sheet I often reference when maximizing my air fryer space: Air Fryer Baked Potato. It’s all about getting that hot air moving!
Serving Suggestions and Garnishing Your Sticky Orange Chicken Wings with Honey Glaze
Alright, we have reached the final, most beautiful stage: serving these perfect, crispy, sticky masterpieces! These Sticky Orange Chicken Wings with Honey Glaze are honestly incredible just on their own, but I always think presentation makes the whole meal feel more special. Plus, you want to show off that beautiful, glossy coating!
First, the garnish. This is so simple but adds necessary texture and a pop of color that makes them look exactly like the appetizer you’d pay extra for at a fancy spot. Grab those thinly sliced scallions and sprinkle them liberally all over the top. The mild oniony bite cuts through the richness of the honey glaze perfectly. Then, take your sesame seeds—toasting them very lightly in a dry pan beforehand always makes them smell nuttier and taste better—and sprinkle those on top too. They give just a little crunch when you bite into the sticky exterior.
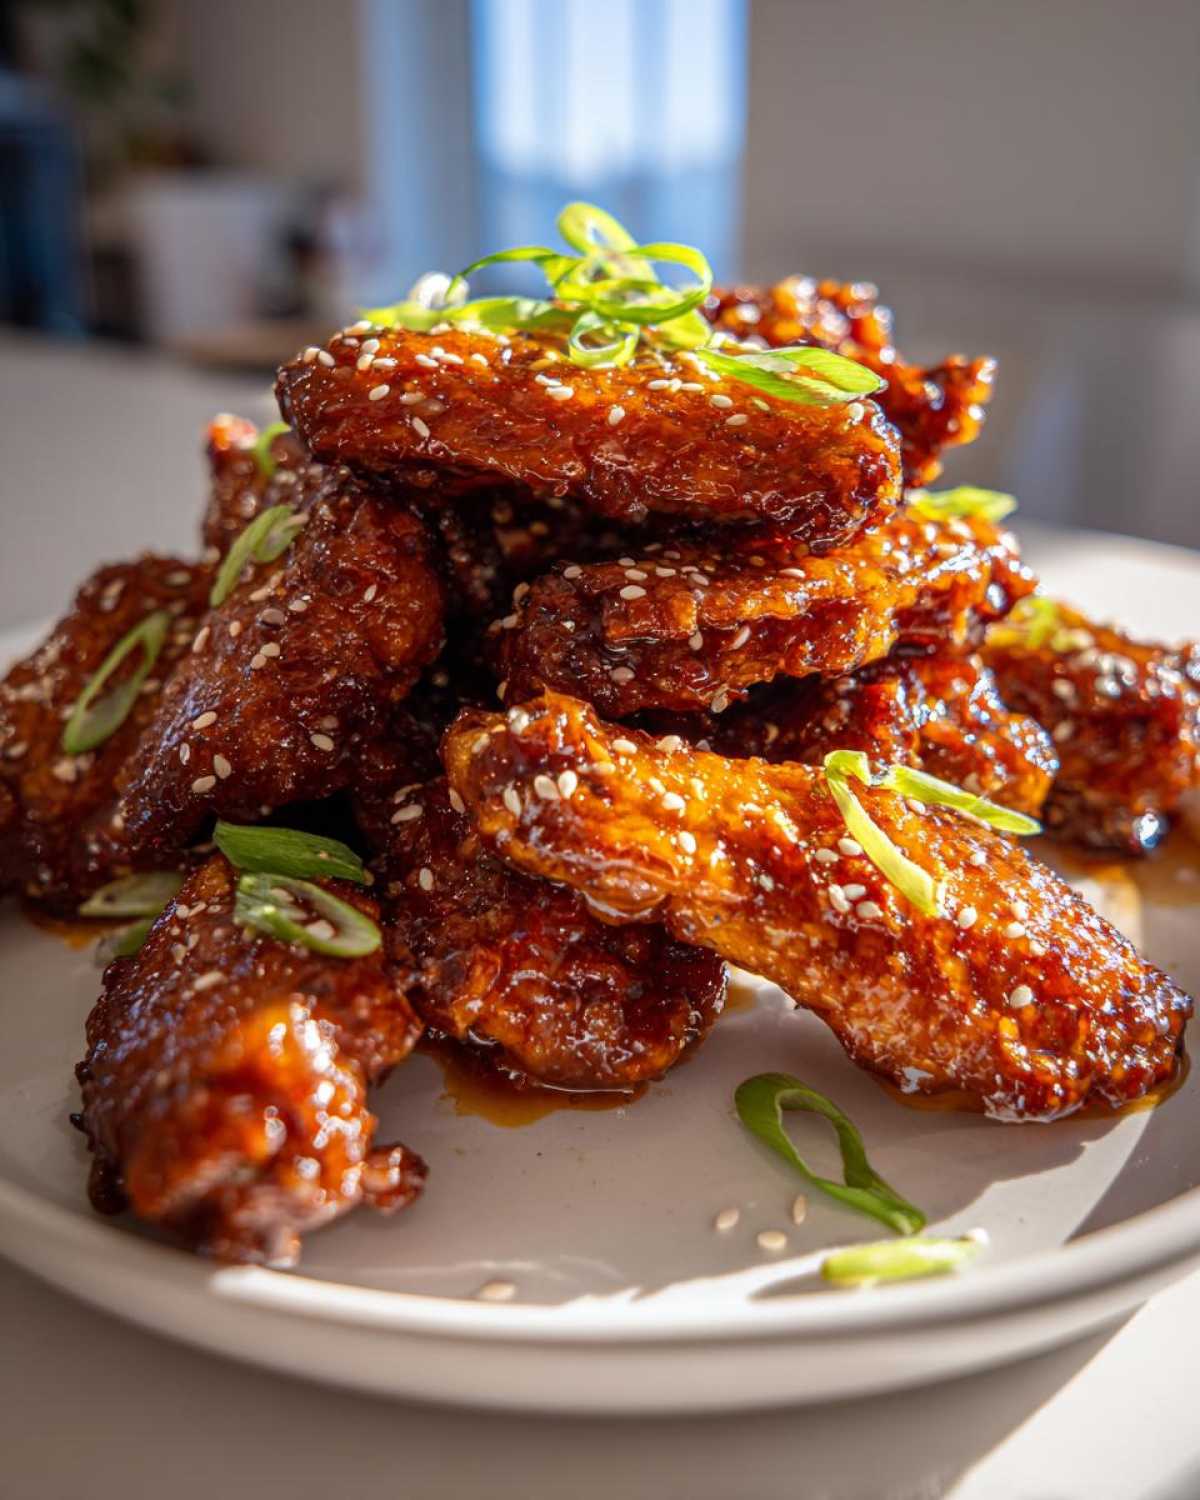
How should you serve them? Well, they are definitely the ultimate party food or a fantastic appetizer before a big Asian-inspired meal. Seriously, put out a big platter of these wings next time you have people over; they disappear frighteningly fast! If you’re serving them as the main event, which sometimes I definitely do, you’ll want something fresh and light to balance out that sweetness.
I highly recommend serving them alongside a crisp, slightly acidic side dish. Think crisp Napa cabbage slaw or maybe a simple cucumber salad. If you are looking for a quick, light vegetable to throw together that balances out spicy or sweet profiles perfectly, I love making a quick stir-fry. Check out my recipe for a Chicken Zucchini Stir Fry—it’s fast, light, and pairs wonderfully without competing with the deliciousness of the orange honey glaze. Serve them hot, maybe with a side of extra sauce for dipping if your family is anything like mine—we always need extra sauce!
Frequently Asked Questions About This Wing Recipe
Can I use bottled orange juice instead of fresh for the glaze?
Oh, I wish I could say yes, but honestly, bottled juice just won’t give you that vibrant, sunny flavor we are trying to achieve here! Pre-bottled orange juice is often pasteurized and lacks the essential bright acidity and fresh aroma you get from juice squeezed right off the counter. If you want that true sweet and tangy flavor that balances the honey so perfectly, you really need the fresh stuff. It’s the difference between a good sauce and a great, authentic one. If you ever need a recipe that is super forgiving with ingredients, my lemon loaf is fantastic when made with bottled lemon juice, but for this honey glaze? Stick to fresh!
How can I make these orange chicken wings spicier?
That’s an easy fix, and I totally get it—sometimes you want a little kick with your sweetness! Since we already have ginger in the sauce, you’re halfway there. I always recommend adding a dash of heat when you’re simmering the sauce base. You have a couple of options here. You can drop in a teaspoon of crushed red pepper flakes, or if you want a really smooth heat, whisk in about a teaspoon of sriracha or chili garlic sauce. If you want something fiery and quick, a few drops of your favorite hot sauce blended in at the end works too. Just taste as you go, because you don’t want the spice to completely overpower that lovely orange note.
What if I don’t have honey? Can I substitute it with another sweetener?
Honey is key here because it adds viscosity and that specific caramel note, but if you are out, you can certainly swap it! I’d suggest maple syrup as the next best thing for a savory-sweet glaze; it works really well with the ginger and soy sauce. You might need to reduce the maple syrup just a tiny bit longer than the honey because it can be slightly thinner, but it’s a solid backup for making these Satisfying Sticky Wing Recipes. You could also use agave nectar in a pinch, but I find maple lends a deeper background flavor.
Can I make these Honey Glazed Chicken Wings Tutorial friendly for a HUGE party?
Absolutely! These are great for your Chicken Wing Recipes for Parties! The best way to scale this is to double or triple the ingredients, but you have to be smart about the cooking. You can easily make a massive batch of the glaze ahead of time. For the wings, however, do not try to cram them all onto one rack! That ruins the crispiness. Cook them in staggered batches, making sure they are always in a single layer on the rack. You can keep finished, un-sauced wings warm in a very low oven (around 200°F) while you finish the rest and make the sauce.
Why is the final 5-minute bake after glazing so important?
That final little pop in the oven is what makes these wings superior to almost any other baked variation! If you just toss the raw sauce on and serve, the sauce stays wet and steamy, which will soften that crispy skin you worked so hard to achieve in the first 45 minutes! That final 5 minutes at 400°F cooks the sauce just enough to set it beautifully onto the wing. It creates that hard, sticky lacquer coat that holds onto the wing instead of sliding off onto your fingers. It’s the secret method for all my best coatings, similar to how I finish my quick freezer-friendly lemon desserts, like this Easy Moist Lemon Loaf Recipe, where a quick higher heat helps stabilize the glaze!
Storage and Reheating Instructions for Leftover Sticky Orange Chicken Wings
I never expect to have leftovers, because these wings are usually devoured in minutes, but when I do—and let’s be honest, sometimes you just can’t eat 2 pounds of wings in one sitting—storage is crucial if you want to keep that crispy exterior intact!
First off, you have to let the wings cool down completely, which sounds counterintuitive, I know! If you put hot, sticky wings into a container, the steam gets trapped underneath the lid, and you’ll end up with a soggy, sweaty mess when you check them later. So, let them sit on the counter until they are room temperature.
Once cooled, tuck them away in an airtight container. I try to place a paper towel on the bottom of the container first, just to absorb any residual moisture that might try to creep up. They’ll do great in the fridge for about three days, but honestly, they taste best within the first 48 hours.
Now for reheating—this is where most people go wrong with glazed wings! Throwing them in the microwave turns them into rubbery sadness almost instantly because that intense heat just steams the skin and melts the glaze weirdly. We want crispy, not chewy! My preference, without question, is to bring back that crunch using the oven or even the air fryer again.
If you’re using the oven for reheating, set it to about 350°F (175°C). Arrange the wings in a single layer on a wire rack set on a baking sheet, just like we did when we first cooked them. Pop them in for about 8 to 10 minutes. This allows the heat to dry out the skin slightly and re-crisp it while warming the interior meat perfectly. If they look a little dry, you can brush them with just a tiny bit of extra warm glaze from the fridge before the final warming blast!
If you’re low on time, the air fryer is excellent for a quick revival, too. Use a slightly lower temp, maybe 350°F (175°C), for just 4 to 6 minutes. They come out almost as good as new. Seriously, don’t skip the oven or air fryer for leftovers—it’s worth the extra 10 minutes to save that incredible texture!
PrintSticky Orange Chicken Wings with Honey Glaze
A recipe for making crispy chicken wings coated in a thick, sweet, and tangy orange and honey glaze.
- Prep Time: 15 min
- Cook Time: 50 min
- Total Time: 65 min
- Yield: 4 servings
- Category: Appetizer
- Method: Baking
- Cuisine: Asian Fusion
- Diet: Low Fat
Ingredients
- 2 lbs chicken wings, separated into flats and drumettes
- 1 tablespoon baking powder
- 1 teaspoon salt
- 1/2 teaspoon black pepper
- 1/2 cup fresh orange juice
- 1/4 cup honey
- 1/4 cup soy sauce
- 2 tablespoons rice vinegar
- 1 tablespoon grated fresh ginger
- 2 cloves garlic, minced
- 1 teaspoon cornstarch
- 2 tablespoons cold water
- Optional garnish: 1 tablespoon sesame seeds, 2 scallions, sliced
Instructions
- Preheat your oven to 400°F (200°C). Line a baking sheet with foil and place a wire rack on top.
- In a large bowl, toss the chicken wings with baking powder, salt, and pepper until evenly coated. This helps them crisp up.
- Arrange the wings in a single layer on the wire rack. Bake for 40 to 45 minutes, flipping halfway through, until the wings are golden brown and cooked through.
- While the wings bake, prepare the glaze. In a small saucepan, combine the orange juice, honey, soy sauce, rice vinegar, ginger, and garlic. Bring the mixture to a simmer over medium heat.
- In a separate small bowl, whisk together the cornstarch and cold water to create a slurry.
- Pour the slurry into the simmering sauce while whisking constantly. Continue to cook for 1 to 2 minutes until the sauce thickens enough to coat the back of a spoon. Remove from heat.
- Once the wings are cooked, transfer them to a large, clean bowl. Pour about two-thirds of the glaze over the hot wings. Toss well until every wing is fully coated and sticky.
- Return the glazed wings to the baking sheet. Bake for an additional 5 minutes to set the glaze.
- Serve immediately, drizzled with any remaining warm glaze. Garnish with sesame seeds and sliced scallions if desired.
Notes
- For extra crispiness, pat the wings very dry with paper towels before seasoning with baking powder.
- To achieve a very thick glaze, reduce the sauce slightly longer before adding the cornstarch slurry.
- If you prefer an air fryer method, cook wings at 380°F (195°C) for 20-25 minutes, flipping halfway, before tossing in the sauce.
Nutrition
- Serving Size: 4 wings
- Calories: 350
- Sugar: 18
- Sodium: 550
- Fat: 18
- Saturated Fat: 5
- Unsaturated Fat: 13
- Trans Fat: 0
- Carbohydrates: 25
- Fiber: 1
- Protein: 22
- Cholesterol: 85