

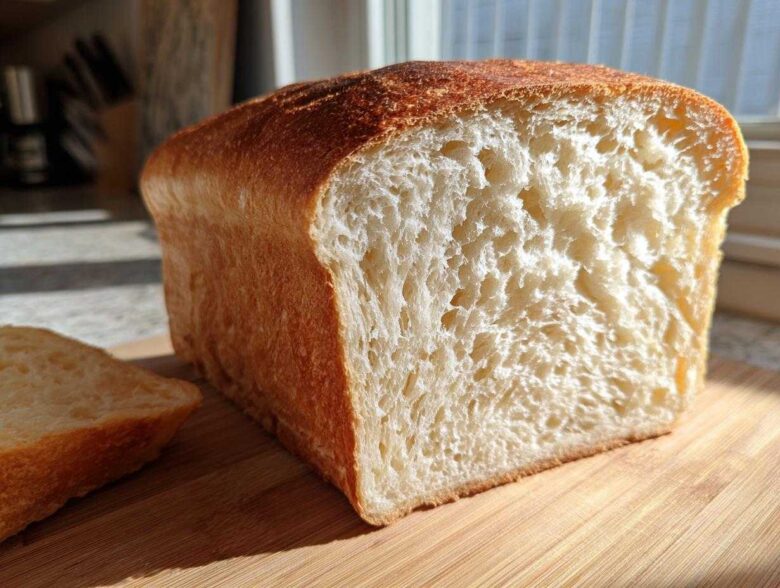
Oh, you know the struggle! We all crave that perfect slice—soft enough for little hands (or picky adult lunches!) yet sturdy enough for a real sandwich, all made with that wonderful, slow, natural yeast flavor. For ages, I felt like I was choosing between rustic, holey bread you can’t properly spread butter on, or sacrificing the sourdough tang for a store-bought softness. After countless sticky countertops and loaves that crumbed apart the second I touched them, I finally cracked the code. This recipe for proper sourdough sandwich bread is my absolute winner. Trust me, the texture of this loaf rivals anything you buy, but better because you made it! I spent years tinkering just for that pillowy crumb that pleases everyone. You can read a bit more about my baking philosophy over at our story page.
Why This is the Best Sourdough Sandwich Bread Recipe for Beginners
Listen, if you’ve been scared off by sourdough because the recipes look like they require a degree in molecular biology, this is the one for you. This is truly an easy sourdough loaf that focuses specifically on texture. We are ditching that overly chewy, rustic crumb associated with hearth loaves. Instead, we are aiming for something wonderfully soft and completely sliceable sourdough bread.
What I love most is that this delivers a mild sourdough recipe profile. It has that slight tang that makes sourdough great, but it won’t overpower peanut butter or grilled cheese fillings. It’s my go-to, no-fuss sourdough sandwich solution, and I documented the easy steps over on the main sandwich bread tutorial page.
Ingredients for Your Soft Sourdough Sandwich Bread
Okay, let’s talk about what goes *into* this loaf because ingredient quality really matters when you’re aiming for that perfect softness. You only need five simple things, but pay close attention to the flour. This isn’t the time for all-purpose if you want a truly sturdy, yet soft, result.
- 100g active sourdough starter (it needs to be bubbly and ready to rock!)
- 350g warm water (aim for about 85°F—think bathwater, not hot tap water)
- 500g strong white bread flour
- 10g fine sea salt
- 20g unsalted butter, softened (or olive oil if you prefer)
I want to stress the flour here. Using strong white bread flour is non-negotiable for this texture. That higher protein content is what gives you the great structure and prevents the loaf from collapsing into itself once it’s baked. It’s the key to that wonderful, sliceable sourdough bread you’re looking for, keeping those slices intact for lunch boxes and toast!
Ingredient Notes and Substitutions
Since this recipe is designed to be tender, those last few ingredients play a huge role in the final feel. We want that lovely, tender, buttery sourdough crumb, and the fat is what gets us there.
You have a choice between softened butter or olive oil. Butter gives you a richer flavor, exactly what I use when I want that true homemade taste. Oil keeps the loaf just as soft, sometimes even slightly softer, and can make the crumb feel a little lighter. Pick whichever you love! Just ensure whatever you use is incorporated gently, like we discuss in the shaping steps later.
Now, about the sourness! If you’re trying to hit that mild sourdough recipe target—especially if you have kids who are sensitive to strong flavors—control your bulk fermentation temperature. Baking this when your kitchen is on the cooler side, or even letting the bulk fermentation go a little longer (but watching for only 40-50% rise, remember!), results in a less acidic, sweeter final flavor. Save the long, cold overnight bakes for the really tangy country loaves!
Step-by-Step Instructions for Perfect Sourdough Sandwich Bread
This is where the magic happens, and honestly, it’s a lot calmer than making those giant, free-form artisan boules. Because we are using a pan, we don’t need aggressive shaping or tons of oven spring; we need control. We’re guiding this dough gently toward becoming a beautifully structured, perfect sandwich loaf. Remember that autolyse step? That’s essential for gluten development without having to beat the dough into submission, which would ruin the softness we’re aiming for here.
Mixing and Initial Fermentation for Sourdough Sandwich Bread
First things first, get that active starter into your big bowl, followed by the warm water. Whisk it around so everything starts mingling. Now, dump in the flour and the salt. Don’t panic when it looks like dry, uncooperative mush—that’s what we want! Mix it just until there are no dry patches left. We call this a shaggy mass. Cover it up and leave it alone for 30 minutes. This rest time, the autolyse, lets the flour hydrate beautifully, which gives us that structure we need for a fluffy sourdough bake without tearing up the dough later.
Developing Strength and Shaping the Square Sourdough Loaf
After that 30-minute rest, it’s time to add your fat—that 20g of softened butter or oil. Squish it in with your fingers until it disappears. It feels greasy at first, but go ahead and knead it right there in the bowl for about three to five minutes until the dough starts coming back together. Resist the urge to add more flour!
Now we build strength. Over the next two hours, you’ll do four sets of stretch and folds, spaced 30 minutes apart. Don’t wring its neck, just gently pull up one side and fold it over. This builds strength without knocking out all the lovely air we’ve cultivated.
Once bulk fermentation is done (remember, just 40-50% volume increase, not doubling!), gently turn it onto a very lightly floured surface. Time to shape! Gently stretch it into a rough rectangle that’s about the width of your loaf pan. Then, roll that rectangle up tightly, like you’re making a jelly roll. Crimp the seam shut with your fingers and give it one final, gentle tug to tighten the surface tension. This tight outer skin is crucial for that beautiful square sourdough loaf shape once it comes out of the oven. I always make sure my 9×5 pan is greased generously with coconut oil—it releases so much better than cheap baking spray, trust me!
Place that little log, seam-side down, into the prepared pan. You can check out my favorite loaf pan prep secrets in this detailed sourdough loaf tutorial.
Final Proofing and Baking Your Sourdough Sandwich Bread
Cover the loaf pan loosely with plastic wrap or a damp tea towel. The final proof is sensitive. You’re looking for the dough to rise about an inch *over* the rim of the pan. This can take anywhere from one hour to three, depending on how warm your kitchen is. If you poke it gently, the indentation should slowly spring back, but not completely disappear.
Preheat that oven up to 375°F (190°C). Once hot, slide the loaf in. Bake it for about 35 to 45 minutes. The crucial clue is the temperature: stick a thermometer right into the center of the loaf—we are hunting for 205°F (96°C). If the top starts getting too dark before it hits that temperature, just loosely tent a piece of foil over it!
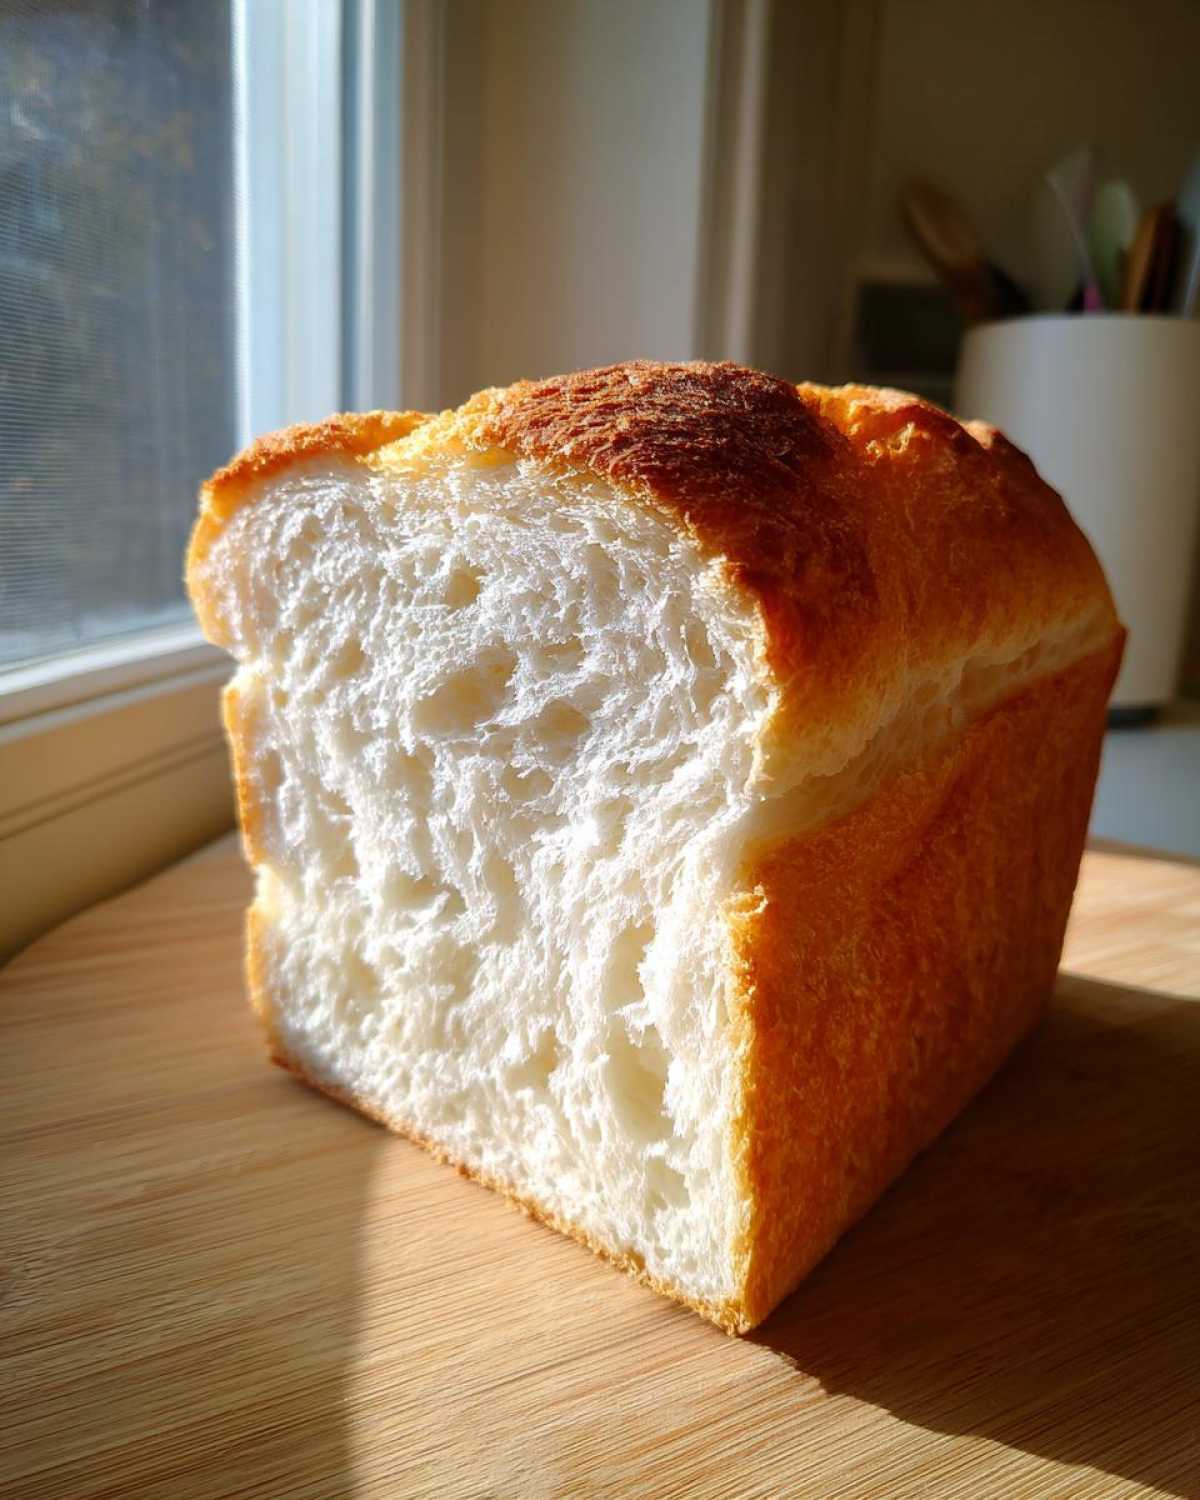
The last, and perhaps hardest, step as a baker is waiting! Get that loaf out immediately onto a wire rack. Do not, I repeat, DO NOT slice it while it’s hot. It might look done, but the internal structure is still setting up. If you slice too soon, you’ll get that gummy, sticky texture that ruins all your hard work. Let it cool completely—at least two hours—before you cut into that perfect sandwich loaf.
Tips for Achieving a Soft Sourdough Bread Crumb
Okay, so you’ve mastered the timing and you’ve got a beautiful loaf shape, but maybe the very middle crumb felt just a tiny bit denser than you hoped. Don’t worry, every baker has those loaves! Getting that truly cloud-like, soft sourdough bread texture is about managing a few key variables. These are the things I’ve learned through trial and error that finally made my loaf truly exceptional.
First thing’s first: the flour isn’t just about gluten; it’s about structure. Stick to strong white bread flour, as I mentioned. If you start using a whole wheat flour, even just 10% substitution for “health,” you’re adding bran and that bran cuts through the delicate gluten network, resulting in a less fluffy bake every single time. You’re sacrificing softness for grit, and for a sandwich loaf, we want fluff!
Hydration management is critical because too much water in a high-protein dough means it spreads instead of rising tall, leading to a dull result. We’re keeping our hydration level moderate right in this recipe for exactly that reason. If you find your dough feels sloppy during the stretch and folds, resist adding water—try adding five more minutes of gentle stretching instead.
Temperature control during that bulk fermentation is my dark horse tip. If you want maximum sourness, you ferment warm. If you want maximum tenderness and that mild flavor, you ferment cooler. A cooler bulk (say, 68°F instead of 78°F) slows everything down, allowing the dough structure to mature perfectly without over-proofing. This results in the softest crumb you can imagine. It takes longer, true, but good things are worth waiting for! I’ve put together some other little tricks and baking experiments over on my main baking blog.
Make-Ahead and Storage for Your Sourdough Sandwich Bread
One of the best things about baking a loaf specifically for sandwiches is that it begs to be made ahead! Unlike some fancy sourdoughs that need to be eaten within hours, this soft loaf holds up beautifully. But, you have to follow my golden rule about cooling it down first. I know, I know—a warm slice slathered with butter is the dream, but if you cut into this baby too early, all that moisture escapes, and you end up with a slightly gummy texture that settles weirdly.
Seriously, let it cool completely on the wire rack. I usually bake mine in the afternoon and don’t even think about slicing until the next morning. That resting time solidifies the structure, giving you those perfect, neat slices you need for making lunch.
Once it’s fully cool, storage is easy. Wrapping it tightly—and I mean *tightly*—in plastic wrap keeps the crust soft and the interior moist for about three or four days on the counter. This is fantastic news because you get that amazing flavor from your homemade sandwich bread natural yeast all week long!
If you’re like me and hate having bread hang around too long, go ahead and slice the entire loaf before freezing. Lay the slices flat on a cookie sheet and pop them in the freezer until they are solid little bricks. Then, transfer them to a large freezer bag. This way, you can pull out exactly two slices for toast or a quick sandwich whenever you need them. They thaw incredibly fast on the counter or can even go straight into the toaster.
Freezing is definitely the way to go if you’re not going to eat the whole thing in three days. Storing it properly keeps that soft texture locked in, so even frozen slices taste like they just came out of the oven. For more make-ahead kitchen tricks, check out my tips on prepping things like freezer breakfast burritos!
Troubleshooting Common Sourdough Sandwich Bread Issues
Even with the best recipe, baking sometimes throws us a curveball, right? Don’t sweat it at all! When you’re shifting from those rustic, open-crumb loaves to something meant for smooth slicing, the usual rules can shift a little. These are the three main issues I see people run into when baking this specific sourdough sandwich bread, and how we can fix them easily so you get that perfect, slightly fluffy bake every time.
The goal here is structure and mildness, so our fixes center around making sure the dough has enough strength to stand tall in that pan and that the fermentation isn’t pushing the sourness too far past what we want for lunch.
Dense Crumb or Too Much Gumminess
If you cut into your loaf and it feels heavy, almost like a brick, or if the inside is sticky and wet no matter how long you waited to slice it, the dough was likely under-proofed or poorly shaped. Under-proofing is the #1 killer of the soft crumb! If the yeast hasn’t done enough work, the structure can’t support itself, and the fats and water get trapped.
If this happens to you, look at your bulk fermentation. Did you wait for a true 40-50% rise? Sometimes, especially when it’s cold, it takes longer than the recipe suggests. Next time, rely on sight—does it look visibly puffier and jiggly?—rather than the clock.
The poor shaping tie-in is also major for this loaf. If you didn’t roll that log tightly enough in Step 6, the loaf spreads out instead of towering upward, leading to a dense bottom half. When shaping, really focus on creating that taught outer skin. You need surface tension to fight gravity in that loaf pan!
My Loaf Tastes Way Too Sour
This is a frustration for folks who love the sourdough process but need a mild bread for daily toast. If your loaf tastes more like vinegar than tangy bread, it means you had a very long, warm fermentation somewhere in the process. Remember, acidity builds over time.
To keep the flavor mild, focus on keeping your bulk fermentation temperature cooler, maybe aiming for the lower end of the 70s Fahrenheit, or even slightly below. If you’re rushing it, it often jumps to an aggressive sour profile before developing the full structural strength.
Also, use a younger starter! If your starter has been fed 12+ hours ago and is totally deflated when you use it, that over-fermented starter will immediately push your dough toward intense sourness. Make sure you’re only using your starter when it’s peaking—bubbly, active, and still holding its height.
It Stuck to the Pan!
Ugh, the worst feeling! You pull the pan out, flip it over, and a huge chunk of the beautifully brown crust stays glued to the bottom. This is almost always a greasing issue. The butter/oil we added to the dough helps soften the crumb texture, but it doesn’t magically grease the pan for us!
You must be incredibly thorough when preparing that 9×5 pan. I always use a combination of softened butter spread into every single corner, and then I dust it heavily with cornmeal or rice flour instead of regular wheat flour. The cornmeal/rice flour creates a barrier that the dough cannot easily bond with. If you use coconut oil, make sure it’s softened so you can rub it into every nook and cranny before you place your proofed dough inside. No skips allowed!
Serving Suggestions for Your Perfect Sandwich Loaf
Now that you have this incredible, soft loaf—the ultimate sourdough sandwich bread—it would be a crime to just slather it with plain mayonnaise and turkey! Because this sourdough has a milder flavor profile, it really opens up to incredible pairings. It’s sturdy enough for the heaviest fillings but tender enough that the crust isn’t fighting you, which is perfect for making sure the kids actually eat their lunch!
When I pull this bread out for my family, I try to elevate whatever fillings we have on hand. You know how sometimes you make a sandwich with artisanal bread, and the tangy crust just overpowers everything? Not here! This loaf acts as the perfect, slightly complex base that supports whatever you put on it.
For school lunches, I sometimes turn it into really simple versions of better sandwiches. Think cream cheese and thinly sliced cucumber or thin slices of sharp cheddar with apple! Because this bread tastes a bit richer thanks to that little bit of fat, it immediately elevates the snack factor, making it a great option for healthy sandwich bread seekers.
But if we’re talking special weekend treats, you have to try something with a bit more flair. Last weekend, I made a batch specifically for curry egg salad—the gentle tang of the sourdough plays so nicely with the warm spices, and the soft crumb soaks up the dressing perfectly without getting soggy right away. You can find my favorite recipe for that on the blog; it’s a total comfort food winner right here!
Honestly, what I love most is how versatile this loaf is. It makes phenomenal cinnamon toast because the crumb toasts evenly, and it’s sturdy enough that even when I pile on the fillings, the bread doesn’t collapse under the weight. If you’re trying to transition your sourdough bread for kids, just toast it slightly first—it gives that initial comforting, familiar feel they expect from regular bread, but you get all the natural yeast goodness!
Frequently Asked Questions About This Sourdough Sandwich Bread
I get so many messages asking the same little tweaks, which tells me you all are just as obsessed with making the *perfect* soft slice as I am! Here are the most common questions I hear about this whole process. Don’t worry if you’re new to this—we’ve all been there!
Can I skip the butter or oil and make this truly lean?
You technically *can*, but I strongly advise against it if you are chasing that beautiful, soft texture that makes this sourdough sandwich bread so desirable. Sourdough dough can be lean, but when you’re aiming for that fluffy, commercial bread feel, the fat is your friend. It coats the gluten strands just enough to keep the crumb tender instead of tough. If you skip it, you’ll end up with something closer to a slightly chewy, rustic loaf, which defeats the purpose of getting that easy sliceable sourdough bread.
How can I ensure I get the mildest sourdough flavor possible?
This is all about temperature management during bulk fermentation. If you want zero overpowering sourness, you need to embrace cooler temperatures. Instead of letting it rise in a warm spot (75°F+), try keeping that dough between 68°F and 70°F. Yes, it takes longer—maybe 8 or 9 hours instead of 5—but that slow, cool growth develops flavor complexity without spiking the acidity. This seriously helps when baking sourdough bread for kids who are just learning to love natural yeast!
Is it okay to use all-purpose flour instead of strong bread flour?
I’ve tried subbing in AP flour before, and honestly, it turns into a sad, flatter pancake! For this recipe, where we are adding fat and aiming for height in a loaf pan, you need that extra protein boost found in bread flour. All-purpose flour just doesn’t have the strength to hold up to the shaping and the final rise, which will result in a denser, less fluffy bake. Stick to the bread flour for your first few attempts to nail that classic easy sourdough loaf structure.
Can this recipe be rushed? Do you have a quicker sourdough bread recipe?
If you need bread *today*, natural yeast can be tricky! The beauty of this recipe is that the slow fermentation equals great flavor and texture. If you try to rush the bulk ferment by moving it to a boiling hot kitchen, you’ll get a quick rise, but you’ll also get a super sour flavor and a less stable structure, leading to cracking or poor slicing later. For truly quick sourdough, you might need to use a dedicated, high-activity starter or look into tangzhong/shokupan hybrid methods, which are a bit different than this technique. This recipe asks for patience for the sake of that perfect buttery sourdough crumb!
If you have any other burning questions after baking, feel free to shoot me a message on the contact page! Happy baking!
Nutritional Estimates for Sourdough Sandwich Bread
Now, I’m going to preface this by saying that baking is an art, not an exact science, especially once you start messing with your flour brands or swap the butter for olive oil! These numbers are based on the exact recipe details I listed above, using standard brand ingredients, but consider them a starting point. You can find more information about ingredient sourcing and how those choices affect the final macros over on my official disclaimer page.
The good news is that compared to a store-bought loaf that’s packed with preservatives and sugar, this healthy sandwich bread made with natural yeast is usually a winner! Plus, because it relies on slow fermentation, some of the nutrients are more bioavailable—though I won’t pretend I measure that part!
Here is the estimated breakdown per slice:
- Serving Size: 1 slice
- Calories: 220
- Sugar: 1.5g
- Sodium: 350mg
- Fat: 3.5g
- Saturated Fat: 2g
- Trans Fat: 0g
- Carbohydrates: 42g
- Fiber: 2g
- Protein: 8g
- Cholesterol: 8mg
See? Not bad at all! You’re getting a decent amount of protein from the bread flour, and the sugar content is incredibly low because we aren’t adding refined white sugar, just relying on the slight sweetness from the flour itself. Enjoy every slice of your wonderfully soft, homemade creation!
PrintSoft Sourdough Sandwich Bread
A straightforward recipe for a soft, sliceable sourdough loaf perfect for everyday sandwiches, suitable for beginners.
- Prep Time: 30 min
- Cook Time: 45 min
- Total Time: 7 hours 15 min
- Yield: 1 loaf
- Category: Baking
- Method: Baking
- Cuisine: American
- Diet: Vegetarian
Ingredients
- 100g active sourdough starter (100% hydration)
- 350g warm water (about 85°F)
- 500g strong white bread flour
- 10g fine sea salt
- 20g unsalted butter, softened (or olive oil)
Instructions
- Mix the active starter and warm water in a large bowl until combined.
- Add the flour and salt to the wet ingredients. Mix by hand until just combined into a shaggy mass.
- Cover the bowl and let it rest for 30 minutes (autolyse).
- Add the softened butter or oil to the dough. Knead gently in the bowl for 3 to 5 minutes until the fat is incorporated and the dough starts to smooth out slightly.
- Perform four sets of stretch and folds, spaced 30 minutes apart, over the next 2 hours.
- Cover the dough and allow it to bulk ferment at room temperature (around 72°F) until it has increased in volume by about 40-50% and feels airy. This may take 4 to 6 hours depending on your kitchen temperature.
- Gently turn the dough out onto a lightly floured surface. Shape the dough into a tight log or rectangle suitable for a standard 9×5 inch loaf pan.
- Place the shaped dough seam-side down into a lightly greased loaf pan.
- Cover the pan loosely and proof the dough in a warm spot until it has risen about 1 inch above the rim of the pan. This final proof can take 1 to 3 hours.
- Preheat your oven to 375°F (190°C).
- Bake the loaf for 35 to 45 minutes, or until the internal temperature reaches 205°F (96°C). If the top browns too quickly, loosely tent it with foil.
- Remove the bread from the pan immediately after baking and cool completely on a wire rack before slicing.
Notes
- Use bread flour for the best structure and soft crumb.
- For a milder flavor, use cooler temperatures during bulk fermentation.
- Wait until the loaf is completely cool before slicing to prevent a gummy texture.
Nutrition
- Serving Size: 1 slice
- Calories: 220
- Sugar: 1.5
- Sodium: 350
- Fat: 3.5
- Saturated Fat: 2
- Unsaturated Fat: 1.5
- Trans Fat: 0
- Carbohydrates: 42
- Fiber: 2
- Protein: 8
- Cholesterol: 8